
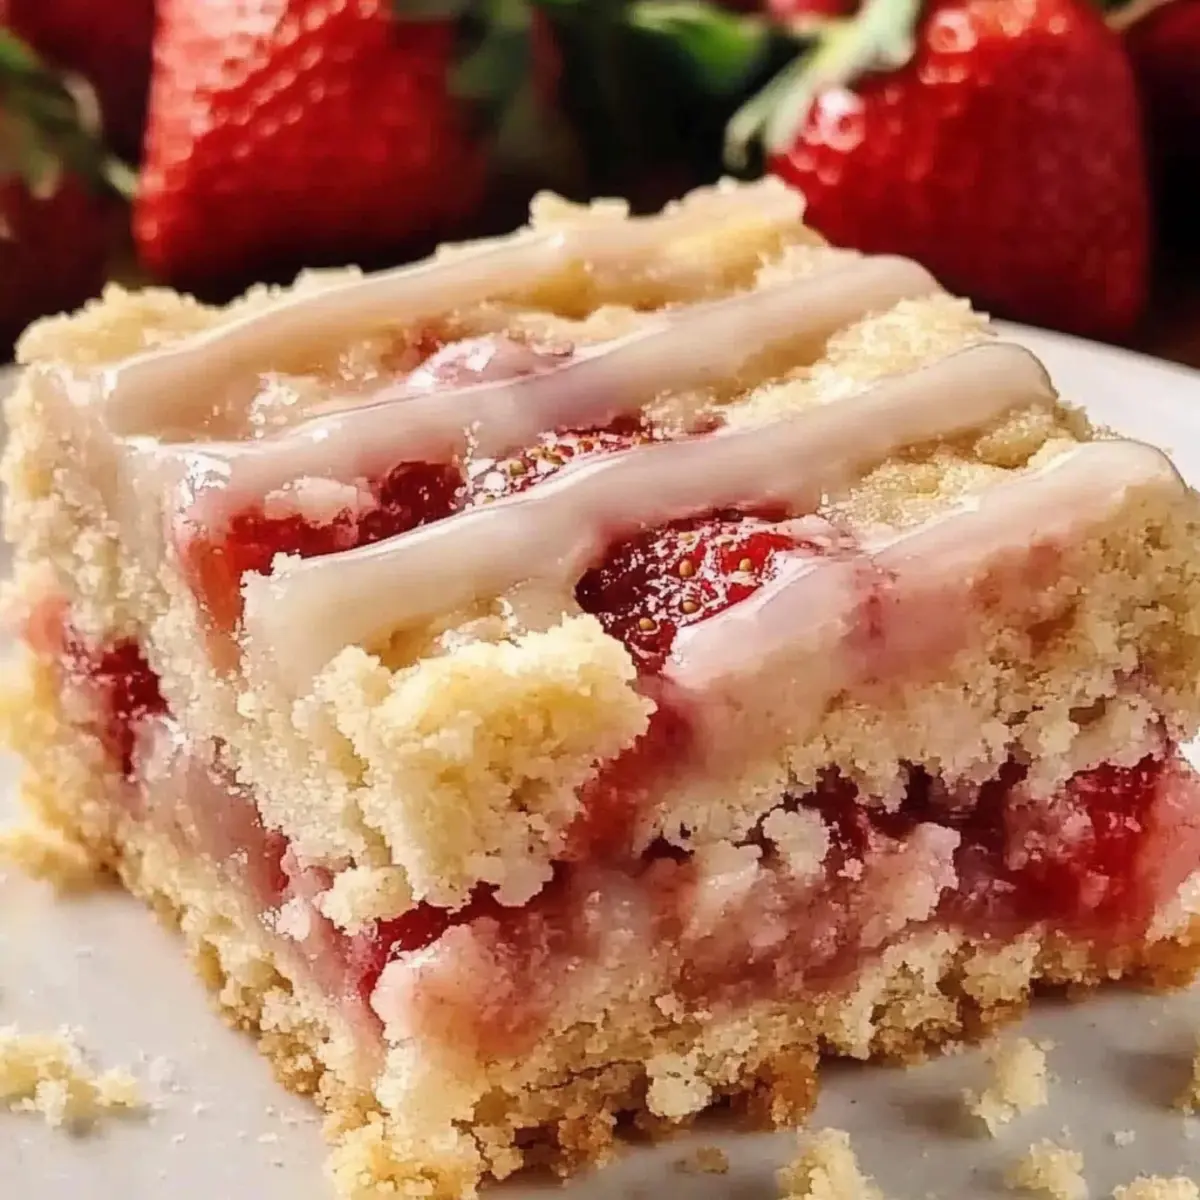
As I stood by the kitchen window, the soft summer breeze wafting through, I couldn’t help but think how perfect this weather was for whipping up some irresistible Strawberry Shortcake Bars. With a buttery crumb crust that melts in your mouth and lush, juicy strawberries woven into the filling, these dessert bars create a delightful escape into summer indulgence. Not only are they incredibly easy to prepare—making them a fantastic choice for busy days—but they also promise to be the star of your next gathering, from picnics to potlucks. Ready to enchant your taste buds with a touch of berry sweetness? Let’s dive into this vibrant recipe that will surely bring smiles on each bite!
Why Make Strawberry Shortcake Bars?
Simplicity in preparation sets these bars apart—whether you’re a seasoned chef or a home cook, you’ll find the steps easy to follow. Bursting with flavor, the fresh strawberries combined with a buttery crumb crust offer a delightful balance that is simply irresistible. Versatile enough to accommodate different fruit substitutions, you can tailor them to your taste or what’s in season. Perfect for gatherings, these bars are sure to impress friends and family, making them a must-have for your summer dessert list. Plus, with a make-ahead option, you can save valuable time while still serving a delicious treat!
Strawberry Shortcake Bars Ingredients
• Get ready to create a berry-tastic treat!
For the Crust
- All-purpose flour – Provides structure for the crust and filling; can substitute with gluten-free flour for a gluten-free version.
- Granulated sugar – Adds sweetness to the crust and strawberry filling.
- Light brown sugar – Enhances the flavor profile of the crust with a hint of molasses.
- Salted butter (melted) – Creates a rich, buttery taste for the crust; unsalted butter can be used instead; just add a pinch of salt.
- Pure vanilla extract – Adds aromatic flavor to the crust and glaze.
For the Strawberry Filling
- Fresh strawberries (chopped) – The star ingredient providing fresh flavor and moisture; frozen strawberries work too, just thaw and drain them thoroughly.
For the Glaze
- Powdered sugar – Sweetens and thickens the glaze.
- Whipping cream (light or heavy) – Incorporates a smooth texture into the glaze.
These Strawberry Shortcake Bars are not only simple to whip up, but they also celebrate the vibrant essence of summer in every bite!
Step‑by‑Step Instructions for Strawberry Shortcake Bars
Step 1: Preheat the Oven
Begin by preheating your oven to 350°F (175°C). This ensures the heat is evenly distributed throughout, allowing your Strawberry Shortcake Bars to bake perfectly. While the oven heats up, gather your baking ingredients and prepare your workspace for a smooth cooking experience.
Step 2: Prepare the Baking Pan
Line an 8×8-inch square baking pan with parchment paper, leaving a slight overhang on two sides. This will make it easier to lift the Strawberry Shortcake Bars out of the pan once they are baked and cooled. Ensure the parchment paper covers the bottom and sides well for easy removal.
Step 3: Make the Crust Mixture
In a large mixing bowl, whisk together all-purpose flour, granulated sugar, light brown sugar, and a pinch of salt until combined. Next, pour in the melted salted butter and vanilla extract, stirring with a spatula until you achieve a crumbly mixture resembling coarse crumbs. This buttery base will form the delicious foundation of your bars.
Step 4: Press the Crust into the Pan
Take about two-thirds of the crumb mixture and firmly press it into the bottom of your prepared pan. Ensure it forms an even layer for a sturdy crust. Once pressed, place the pan in the preheated oven and bake for 15–20 minutes or until the crust turns light golden brown, signaling it’s ready for the strawberry filling.
Step 5: Prepare the Strawberry Filling
While the crust is baking, chop fresh strawberries and toss them in a bowl with 2 tablespoons of granulated sugar and 1 tablespoon of flour. This combination will sweeten and thicken your filling. Once the crust is out of the oven, gently spoon the strawberry mixture evenly over the warm crust, allowing the flavors to meld beautifully.
Step 6: Add the Topping
Sprinkle the remaining crumb mixture over the strawberry filling, ensuring it covers the fruit evenly. This layer will form a delightful crunchy topping. Don’t worry if it’s not perfectly even; it will bake into a delicious layer. Now, return the pan to the oven to bake for another 30–35 minutes, or until bubbling occurs around the edges and the top is set.
Step 7: Cool the Bars
Once your Strawberry Shortcake Bars are baked to perfection, remove them from the oven and allow them to cool completely in the pan on a wire rack. This step is crucial so that the bars firm up and hold together when sliced. Patience here will reward you with beautiful, clean cuts later.
Step 8: Prepare the Glaze
In a small mixing bowl, whisk together powdered sugar, whipping cream, and pure vanilla extract until you achieve a smooth glaze. This irresistible vanilla topping will add an extra layer of sweetness to your bars. Once the bars are completely cool, drizzle this creamy glaze over the top evenly.
Step 9: Slice and Serve
Now that your Strawberry Shortcake Bars are fully prepared, carefully lift them out of the pan using the parchment overhang. Place them on a cutting board and slice into 12 equal squares. These delightful bars are now ready to be enjoyed, perfect for sharing at gatherings or savoring during a quiet afternoon!
Tips for the Best Strawberry Shortcake Bars
-
Choose Ripe Strawberries: Opt for ripe yet firm strawberries to enhance the flavor and texture of your bars, avoiding mushy fruits that could create a soggy filling.
-
Cool Before Glazing: Allow the bars to cool completely before adding the glaze to ensure clean, elegant slices and keep the topping from melting into the bars.
-
Check for Doneness: Bake until edges are bubbly and the top is set; if unsure, a toothpick inserted should come out clean to guarantee perfectly baked Strawberry Shortcake Bars.
-
Customize Flavors: Feel free to experiment with different fruit substitutions like raspberries or blueberries for a delightful twist on the classic recipe.
-
Chill for Neat Slices: For a firmer filling, refrigerate the bars for about 30 minutes before slicing; this helps maintain their shape and makes serving easier.
What to Serve with Bright & Summery Strawberry Shortcake Bars?
As the sweet aroma of strawberry fills your kitchen, it’s time to create a delightful meal that perfectly complements these dessert bars.
-
Fresh Mint Salad: A light salad with fresh mint and citrus dressing adds a refreshing touch that balances the sweetness of the bars.
-
Vanilla Ice Cream: A scoop of creamy vanilla ice cream alongside the bars makes for a classic pairing that enhances the dessert experience.
-
Iced Tea: Sweetened or unsweetened, iced tea is a wonderful beverage option that offers a refreshing contrast to the rich flavors of the strawberry shortcake bars.
-
Lemonade: The tangy flavors of lemonade cut through the sweetness beautifully, creating a delightful harmony with the dessert.
-
Fruit Skewers: Colorful fruit skewers featuring berries, melon, and pineapple provide a joyful, bite-sized treat that echoes the fresh strawberry flavors.
-
Pound Cake Slices: Serve a slice of buttery pound cake for added texture, perfect for layer pairing with the strawberry shortcake bars and a scoop of whipped cream.
-
Sparkling Water: A splash of lime or lemon juice in sparkling water will make a refreshing drink option and cleanse the palate between bites.
This blend of flavors and textures is sure to create a warm and inviting atmosphere, perfect for any summer gathering!
Make Ahead Options
These Strawberry Shortcake Bars are a fantastic option for meal prep! You can prepare the crust and the strawberry filling up to 24 hours in advance. Simply follow the recipe up until the assembly step, then cover and refrigerate the components separately. To maintain the quality, press the crust into the baking pan and store it wrapped in plastic, while the strawberry filling can be kept in an airtight container. When you’re ready to bake, just spoon the filling onto the crust, sprinkle on the topping, and bake as directed. Finish with the glaze just before serving for fresh, delicious results!
Strawberry Shortcake Bars Variations
Feel free to explore these delightful twists and substitutions to make your Strawberry Shortcake Bars uniquely yours!
-
Gluten-Free: Swap all-purpose flour for a gluten-free blend to cater to dietary needs without sacrificing flavor.
-
Mixed Berries: Alter the filling by mixing in raspberries or blackberries for a vibrant, berry medley experience. Each bite will surprise you with its fruity punch!
-
Lemon Zest: Add a teaspoon of lemon zest to the crust mixture for a refreshing zing that beautifully complements the sweetness of the strawberries.
-
Nuts Booster: Stir in chopped nuts like pecans or almonds into the crust for added crunch and a nutty depth that contrasts the soft fruit layer.
-
Coconut Flakes: Mix in shredded coconut into the crumb topping for a delightful tropical twist that enhances texture and flavor, bringing a taste of paradise to your dessert.
-
Chocolate Drizzle: After glazing, drizzle some melted chocolate over the top for a decadent finish that pairs wonderfully with the fruit. It’s an indulgent treat that chocolate lovers will adore!
-
Cinnamon Swirl: Sprinkle a dash of cinnamon in the crust mixture to add a warm spice that elevates the flavor profile, making each bite a hug from the inside.
-
Spicy Heat: Feel adventurous? Add a pinch of cayenne pepper to the glaze for a subtle heat that contrasts perfectly with the sweetness. A surprising kick that may just become your new favorite secret ingredient!
For more inspiration, don’t forget to check out my other recipes like classic Strawberry Shortcake or consider making a rich berry tart to celebrate the fruit-filled season!
How to Store and Freeze Strawberry Shortcake Bars
- Room Temperature: Allow bars to cool completely before covering and storing them at room temperature for up to 2 days. Use foil or plastic wrap for wrapping.
- Fridge: Store in an airtight container in the refrigerator for up to 3 days. Let the bars reach room temperature before serving for the best taste and texture.
- Freezer: For longer storage, freeze unglazed bars in an airtight container for up to 2 months. Thaw overnight in the fridge and glaze just before serving.
- Reheating: If desired, warm the bars slightly in the microwave for 10-15 seconds before serving, enhancing their buttery flavor while keeping the strawberries fresh.

Strawberry Shortcake Bars Recipe FAQs
How do I know when my strawberries are ripe?
Absolutely! Look for strawberries that are bright red all over, firm to the touch, and have a natural shine. Avoid those with dark spots or a dull, matte finish as they may not have the best flavor or texture. If they smell sweet, you’ve found some good ones!
What’s the best way to store Strawberry Shortcake Bars?
To keep your Strawberry Shortcake Bars fresh, store them in an airtight container in the refrigerator for up to 3 days. Before serving, allow them to reach room temperature to restore their delicious texture and flavor. I often use foil or plastic wrap if I’m storing them at room temperature for up to 2 days.
Can I freeze Strawberry Shortcake Bars?
Yes! For longer storage, you can freeze unglazed Strawberry Shortcake Bars in an airtight container for up to 2 months. To freeze, let them cool completely, then wrap them tightly. When you’re ready to enjoy them, just thaw overnight in the fridge and glaze them before serving.
What should I do if my bars are too soft when sliced?
If your bars turn out too soft, don’t worry! For neater slices, refrigerate them for about 30 minutes before cutting. This will firm up the strawberry filling and make it easier to cut clean slices. Additionally, ensure you allow the bars to cool completely after baking; this step can really help maintain their structure.
Are these Strawberry Shortcake Bars suitable for people with gluten intolerance?
Absolutely! You can substitute the all-purpose flour with a gluten-free flour blend to accommodate gluten sensitivities. Make sure to check the labels to ensure that all other ingredients used are gluten-free as well. Your gluten-free friends will love this dessert!
Can pets eat strawberries?
Yes, strawberries are safe for pets in moderation! However, ensure that the bars themselves are not given to pets due to ingredients like sugar and butter, which may not be good for them. If you do give your dog fresh strawberries, just make sure to wash them and remove any stems!
Delicious Strawberry Shortcake Bars for Summer Bliss
Ingredients
Equipment
Method
- Preheat your oven to 350°F (175°C).
- Line an 8×8-inch square baking pan with parchment paper.
- Whisk together flour, granulated sugar, brown sugar, and salt. Stir in melted butter and vanilla until crumbly.
- Press two-thirds of the mixture into the bottom of the pan. Bake for 15–20 minutes until light golden brown.
- Prepare the strawberry filling by tossing strawberries with sugar and flour. Spoon evenly over warm crust.
- Sprinkle remaining crumb mixture over strawberries. Bake for another 30–35 minutes until bubbly and set.
- Allow the bars to cool completely in the pan.
- Whisk together powdered sugar, whipping cream, and vanilla until smooth. Drizzle over cooled bars.
- Lift out of the pan using parchment and slice into 12 squares.
Leave a Reply