
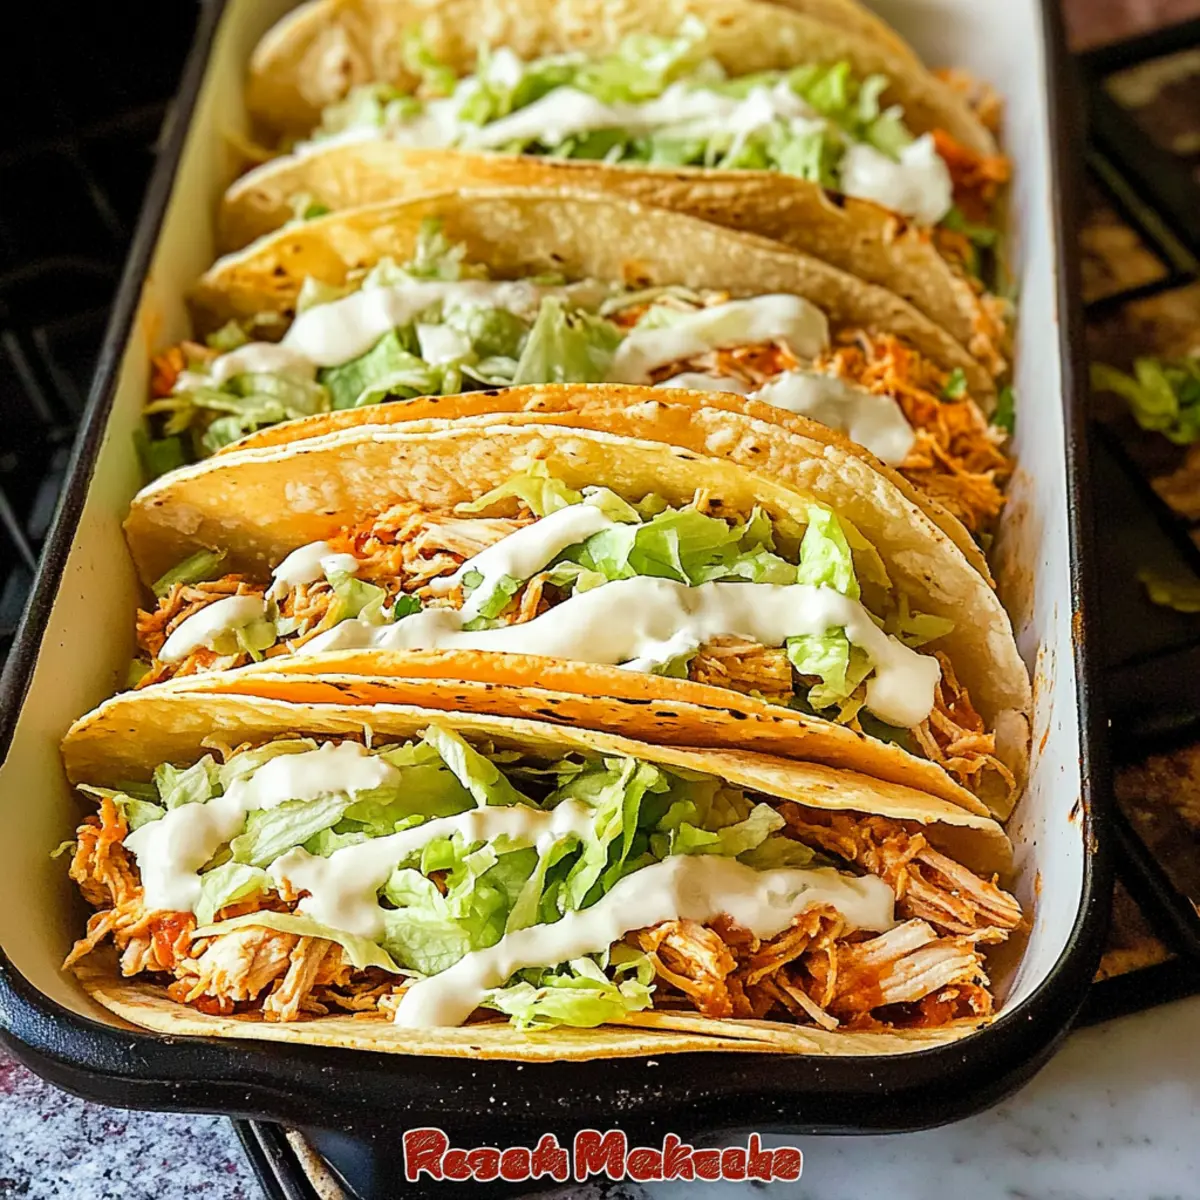
As I pulled the golden-brown tacos from the oven, a wave of delicious aroma filled the kitchen—crispy tortillas, melted cheese, and savory rotisserie chicken came together in perfect harmony. These Easy Rotisserie Chicken Tacos are my go-to for busy nights when a satisfying meal is non-negotiable. With just a few simple ingredients and minimal prep, they turn an ordinary weeknight into a flavorful fiesta. Not only are these tacos quick to whip up, but they’re also highly customizable, making them a family-friendly choice that pleases even the pickiest eaters. So, what creative toppings will you add to your delicious taco creation?
Why Are These Tacos So Irresistible?
Quick Prep Time: With pre-cooked rotisserie chicken, you can have these tacos ready in under 30 minutes, perfect for busy days.
Mouthwatering Flavors: The blend of spices, rich salsa, and creamy cheeses creates a delightful taste explosion that everyone’s palate will enjoy.
Customizable Toppings: Feel free to get creative! Pair your tacos with sliced avocado, zesty lime juice, or spicy jalapeños—your meal, your way!
Crowd-Pleaser: These tacos are a hit at gatherings, ensuring that even the fussiest of eaters will be reaching for seconds. Serve them alongside some homemade guacamole for an extra touch, and check out my Skillet Chicken Mushroom for more inspiring chicken dishes!
Satisfying Texture: The golden, crispy corn tortillas, combined with tender chicken and melted cheese, make every bite an adventure in texture and taste.
Rotisserie Chicken Tacos Ingredients
• Dive into the deliciousness with these must-have ingredients!
For the Chicken Filling
- Rotisserie Chicken – Your star ingredient, about 1½ pounds shredded; quickly brings flavor to the dish.
- Salsa – Adds essential moisture and flavor; feel free to swap in your favorite jarred salsa or homemade version.
- Water – A little helps blend the chicken and salsa for a smooth mixture.
- Tomato Paste – Intensifies the filling’s flavor and color for extra allure.
- Ground Cumin – Contributes a warm earthiness that enhances the chicken.
- Chili Powder – Add to taste for a bit of spice; tweak depending on preferred heat level.
- Coriander – Introduces a warm, citrusy note to tantalize the taste buds.
For Assembly
- Corn Tortillas – Using 6-inch corn tortillas provides that authentic taco experience; grab flour as an alternative if you prefer.
- Vegetable Oil – Brush onto tortillas for that extra crispy finish; elevates the texture beautifully.
- Pepper Jack Cheese – For a touch of spice and creaminess; swap for cheddar or colby if you prefer milder flavors.
- Monterey Jack Cheese – Melts beautifully on top, but feel free to replace it with another melting cheese.
For Toppings
- Shredded Iceberg Lettuce – Adds crunch and freshness; a taco essential!
- Customizable Extras – Consider sliced black olives, pickled jalapeños, avocado, sour cream, lime juice, and cilantro for a personal touch.
This Rotisserie Chicken Tacos fixture promises not just a meal but a joyful gathering around the table. What toppings will you choose?
Step‑by‑Step Instructions for Easy Rotisserie Chicken Tacos
Step 1: Preheat the Oven
Start by preheating your oven to 450°F (232°C). This high temperature is essential for achieving those perfectly crispy tortillas that define your Easy Rotisserie Chicken Tacos. Allow the oven to fully heat while you prepare the chicken filling, ensuring a deliciously golden result once baked.
Step 2: Prepare the Chicken Filling
While the oven is heating, shred your pre-cooked rotisserie chicken and place it in a mixing bowl. Add in your favorite salsa, a splash of water, a tablespoon of tomato paste, and the spices—ground cumin, chili powder, and coriander. Mix thoroughly until all the ingredients are nicely combined and the chicken gets coated in the flavorful sauce.
Step 3: Brush the Tortillas
Next, brush both sides of six 6-inch corn tortillas with vegetable oil. This step is key for achieving that delightful crispiness when baking. Lay the oiled tortillas flat on a baking sheet, ready to be topped with the savory chicken mixture. Make sure they’re well spaced out for even cooking.
Step 4: Assemble the Tacos
Once your tortillas are laid out, sprinkle a layer of shredded pepper jack cheese evenly on top of each one. Then, generously spoon the chicken filling over the cheese, ensuring each tortilla is loaded with flavorful rotisserie chicken. This combination will melt beautifully in the oven and create a satisfying bite.
Step 5: Bake Until Golden
Transfer the baking sheet to your preheated oven and bake for about 10-12 minutes. Keep an eye on them as they bake; you’re looking for a lovely golden-brown color on the tortillas and for the cheese to be bubbling. This visual cue means your Easy Rotisserie Chicken Tacos are well on their way to perfection.
Step 6: Top with Lettuce
After baking, carefully remove the tacos from the oven. Immediately sprinkle shredded iceberg lettuce over the hot chicken-topped tortillas for added crunch and freshness. The contrasting textures will elevate your taco experience and add a refreshing element to each bite.
Step 7: Fold and Melt More Cheese
Next, fold each tortilla in half and arrange them neatly in a baking pan. For an extra gooey touch, sprinkle Monterey Jack cheese on top. Return the pan to the oven for another 3-5 minutes or until the cheese is melted and bubbly, completing the delightful layers of flavor and richness in your Easy Rotisserie Chicken Tacos.
Step 8: Serve with Toppings
Once all the cheese is melted and the tacos look irresistible, remove them from the oven. Serve your Easy Rotisserie Chicken Tacos immediately and encourage everyone to add their chosen toppings, like avocado slices, lime juice, or pickled jalapeños. Enjoy the fun of personalizing each taco at the table!
Make Ahead Options
These Easy Rotisserie Chicken Tacos are perfect for busy weeknights and can be prepped in advance for ultimate convenience! You can prepare the chicken filling (made with shredded rotisserie chicken, salsa, and spices) and store it in the refrigerator for up to 3 days. To maintain quality, keep the filling in an airtight container to avoid moisture loss. When you’re ready to serve, simply brush and assemble the tacos with the oil-dipped tortillas and cheese, then bake them directly from the fridge. Finish by adding fresh toppings, and you’ll have delicious, homemade tacos that taste just as great as if they were made on the spot!
Rotisserie Chicken Tacos: Customizing Delights
Elevate your Easy Rotisserie Chicken Tacos by exploring these fun, mouthwatering variations tailored to different preferences!
- Heat Options: Adjust the amount of chili powder or add diced jalapeños for a spicy kick. Enjoy the heat levels tailored to your taste buds.
- Cheese Variations: Substitute pepper jack for mozzarella or goat cheese for a creamy twist. The choice of cheese can completely alter the taco experience!
- Tortilla Types: Swap corn tortillas for whole wheat or gluten-free options. Each type brings a new flavor and texture to delight your palate.
- Vegetable Boost: Add seasonal veggies like bell peppers, zucchini, or even roasted corn for added nutrition and a colorful presentation.
- Salsa Styles: Experiment with fruit salsas, like mango or pineapple, for a refreshing sweetness that pairs beautifully with the savory chicken.
- Herbal Infusion: Sprinkle fresh herbs like cilantro or parsley over your tacos just before serving for an aromatic touch. They add brightness and flavor.
- Protein Alternatives: Use ground turkey or even quinoa for a meatless option. This not only satisfies different diets but also adds variety to your meals!
- Creamy Enhancements: Drizzle with avocado sauce or add a dollop of sour cream for added richness and decadence. This can transform the flavor profile into something spectacular!
Pair these creative twists with delicious sides—like a fresh guacamole or a vibrant salad—and for more inspiration, check out my Garlic Parmesan Chicken recipe to find additional hearty chicken options!
Helpful Tricks for Rotisserie Chicken Tacos
-
Perfectly Crisp Tortillas: Preheat the oven before assembly; a hot oven is crucial for achieving those golden, crispy tortillas that define your Rotisserie Chicken Tacos.
-
Flavor Balance: Adjust your chili powder to complement the spiciness of your salsa. Tasting as you go will prevent overly spicy tacos, ensuring everyone enjoys them.
-
Use Leftovers: Save time and money by utilizing leftover chicken from previous meals instead of buying a rotisserie chicken; just ensure it’s well-flavored!
-
Assembly Timing: To avoid soggy tortillas, assemble your Rotisserie Chicken Tacos just before baking. This keeps the tortillas crispy and delicious right until serving!
-
Layer Smartly: Start with cheese, add the filling, then top with cheese again before the final bake. This technique creates a gooey texture that you won’t be able to resist!
How to Store and Freeze Rotisserie Chicken Tacos
-
Fridge: Store leftover Rotisserie Chicken Tacos in an airtight container for up to 3 days. To prevent sogginess, keep toppings separate until ready to enjoy.
-
Freezer: For longer storage, freeze assembled but unbaked tacos, wrapped tightly in plastic wrap and aluminum foil, for up to 2 months. Thaw in the fridge overnight before baking.
-
Reheating: To reheat, bake tacos in a preheated oven at 350°F (175°C) for about 10-15 minutes, until heated through and crispy. Add any fresh toppings after reheating for the best flavor!
-
Make-Ahead: Prepare the chicken mixture ahead of time and store it in the fridge for up to 2 days. Assemble with tortillas and cheese just before baking to ensure fresh, crispy tacos.
What to Serve with Easy Rotisserie Chicken Tacos?
Complete your flavorful fiesta with delightful sides and pairings.
- Guacamole: A creamy dip that adds a cool contrast to the spicy chicken, elevating every bite of your tacos.
- Mexican Rice: Fluffy rice flavored with herbs and spices complements the savory taco filling while keeping the meal balanced.
- Refried Beans: These provide a comforting richness and plant-based protein, creating a heartier meal that satisfies hunger.
- Fresh Salsa: A burst of bright, fresh tomatoes, onions, and cilantro brings zest and a touch of acidity to the plate.
- Elote (Mexican Street Corn): Grilled corn topped with cheese, lime, and spices offers vibrant flavors and a fun twist.
- Chips and Salsa: Crunchy tortilla chips paired with zesty salsa make a perfect starter or snack while waiting for the tacos.
- Margaritas: A refreshing citrus cocktail that beautifully balances the richness of the tacos and enhances the festive atmosphere.
- Fruit Salad: A light, refreshing mix of seasonal fruits cleanses the palate and adds a touch of sweetness to your meal.
- Cilantro Lime Rice: This fragrant rice steals the show, offering bright flavors that pair perfectly with the tacos’ savory filling.
- Churros: For dessert, these crispy, cinnamon-sugar-coated treats are a delightful end to your taco night, bringing a touch of sweetness.
Easy Rotisserie Chicken Tacos Recipe FAQs
What kind of rotisserie chicken should I use?
Absolutely! You want to choose a rotisserie chicken that looks fresh and has a nice golden-brown color. Check for any dark spots on the skin, which can indicate it’s past its prime. A chicken weighing around 1½ pounds is ideal, ensuring you have enough tender meat for all your tacos.
How should I store leftover Rotisserie Chicken Tacos?
Store any leftover tacos in an airtight container in the fridge for up to 3 days. To prevent the tacos from getting soggy, I recommend keeping the toppings separate until you’re ready to eat. This method helps retain the crunch and flavors!
Can I freeze Rotisserie Chicken Tacos?
Very! For easy meal prep, you can assemble the tacos but leave them unbaked; wrap them tightly in plastic wrap and aluminum foil, and freeze for up to 2 months. When you’re ready to enjoy, simply thaw in the fridge overnight, then bake them according to the recipe instructions for that crispy finish.
What if my tortillas get soggy?
Soggy tortillas can ruin your taco joy! To avoid this, assemble the tacos just before baking, or if you’re making them ahead, store ingredients separately, especially the toppings. Also, brushing the tortillas with oil helps them crisp up nicely when baked. If they become soggy when reheating, a quick bake in the oven can rejuvenate their texture.
Are these tacos pet-friendly?
No, they are not! Many ingredients like onions, certain spices, and cheese are not advisable for pets. If you want to share the taco experience with your furry friend, consider making a plain chicken mix without seasoning, and keeping the toppings pet-safe, like plain shredded chicken or cooked veggies.
How can I customize the heat level in my tacos?
The more the merrier! Adjusting the heat is simple. Start with the recommended amount of chili powder in the chicken mixture, then taste it. If you prefer more spice, add in a dash of cayenne pepper or use a spicier salsa. For a milder flavor, you could try using a sweet salsa or omit the chili powder entirely!
Savory Rotisserie Chicken Tacos for Quick Dinner Bliss
Ingredients
Equipment
Method
- Preheat your oven to 450°F (232°C).
- Shred the rotisserie chicken and mix with salsa, water, tomato paste, cumin, chili powder, and coriander.
- Brush both sides of corn tortillas with vegetable oil and lay them on a baking sheet.
- Sprinkle pepper jack cheese on tortillas, add chicken filling, then top with more cheese.
- Bake for 10-12 minutes until golden brown and cheese is bubbling.
- Sprinkle shredded iceberg lettuce over the hot tacos.
- Fold tortillas, top with Monterey Jack cheese, and return to the oven for 3-5 minutes.
- Serve immediately with customizable toppings.
Leave a Reply