
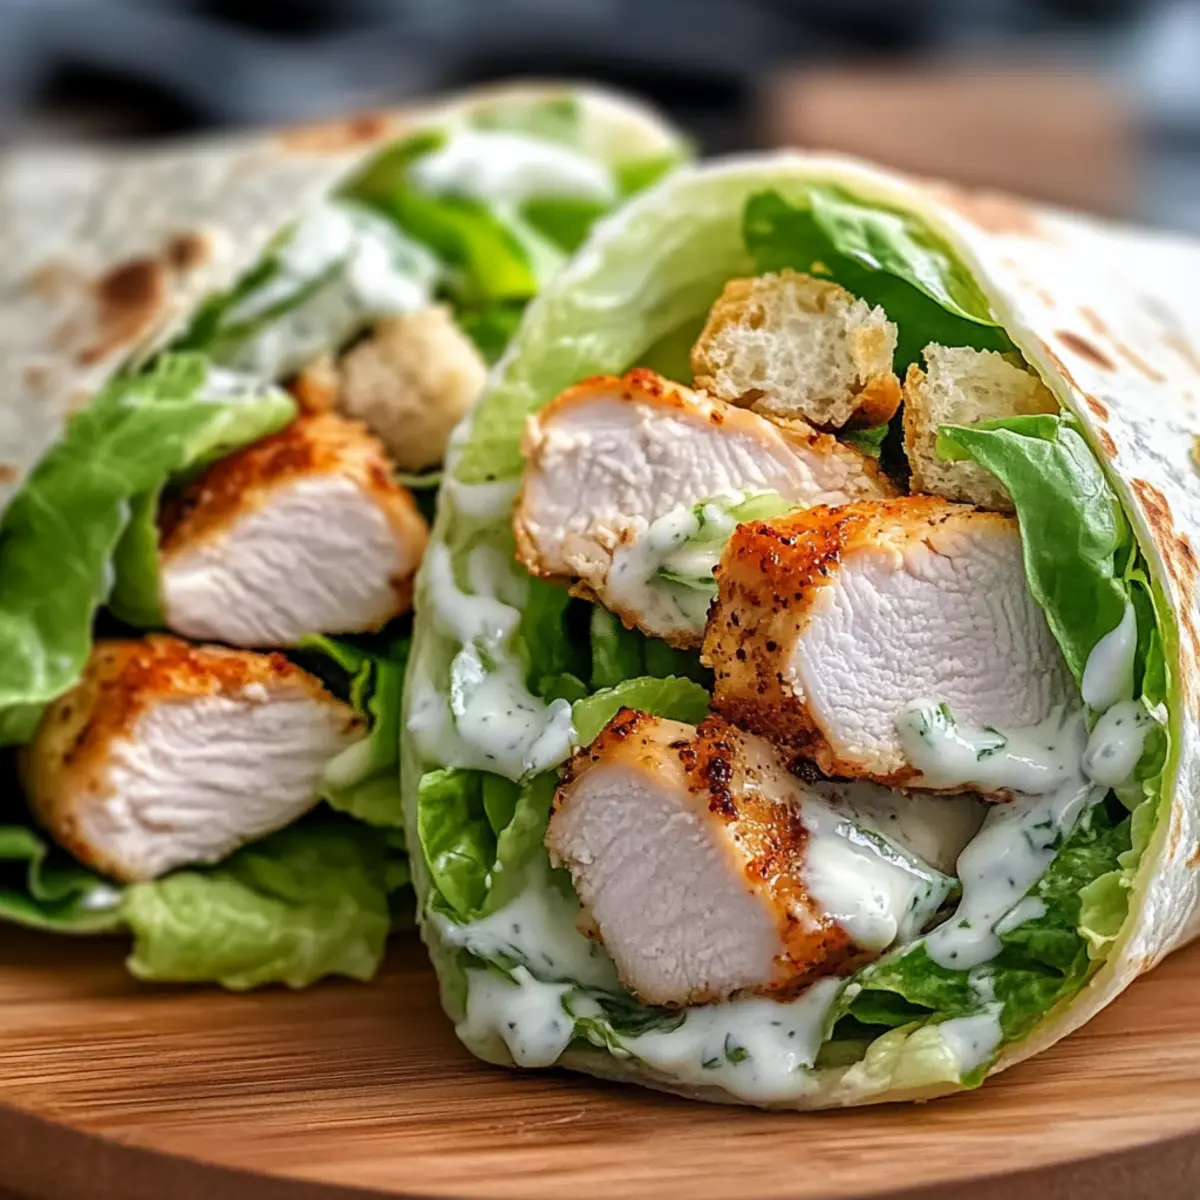
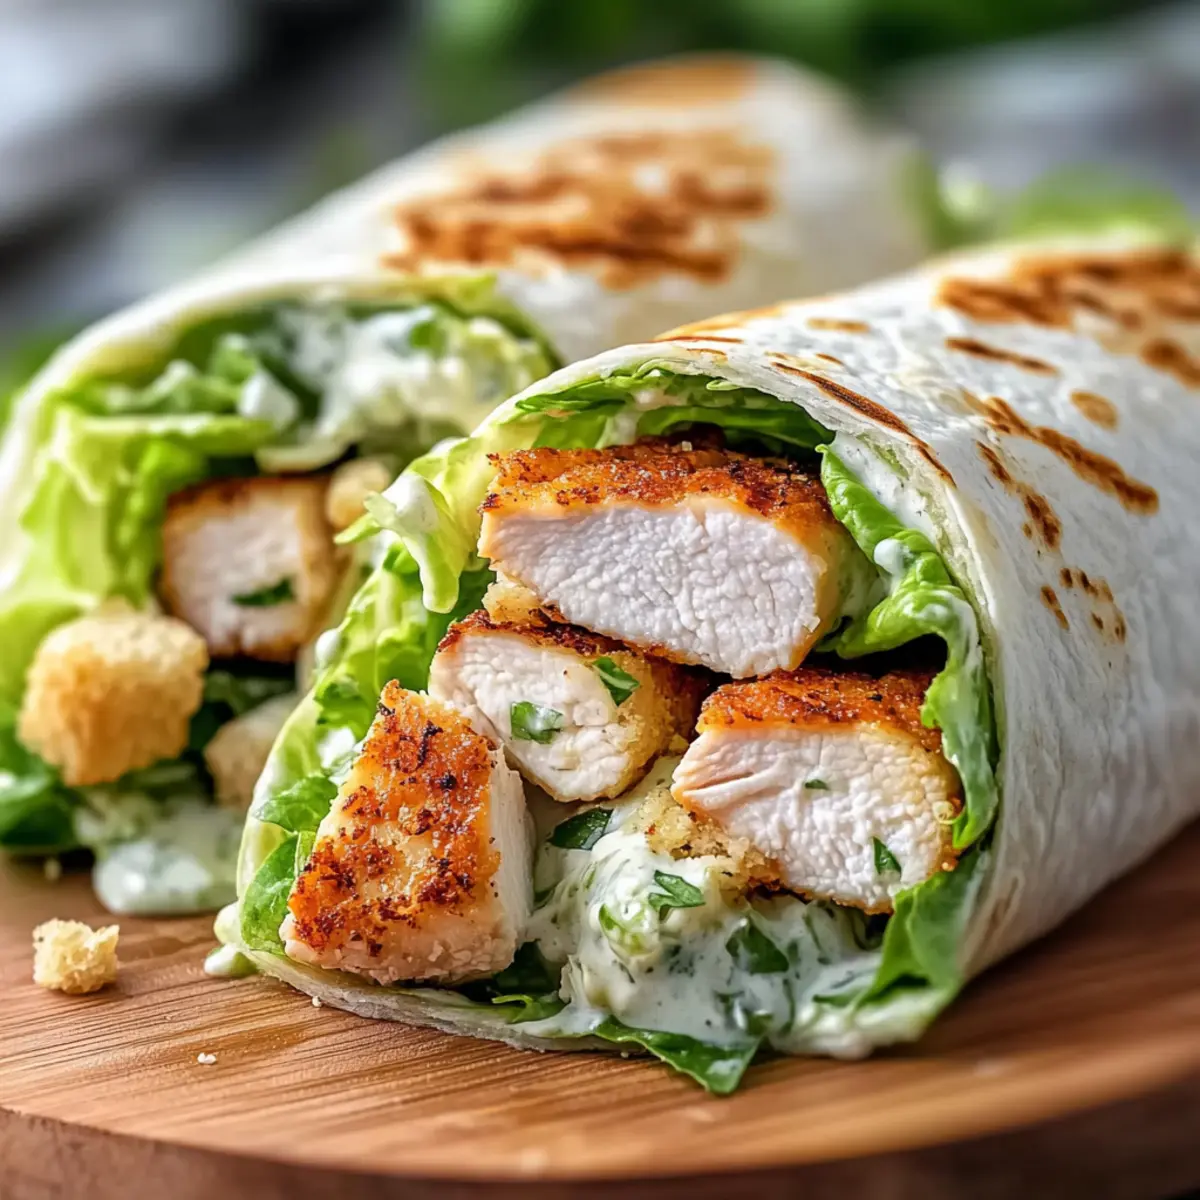
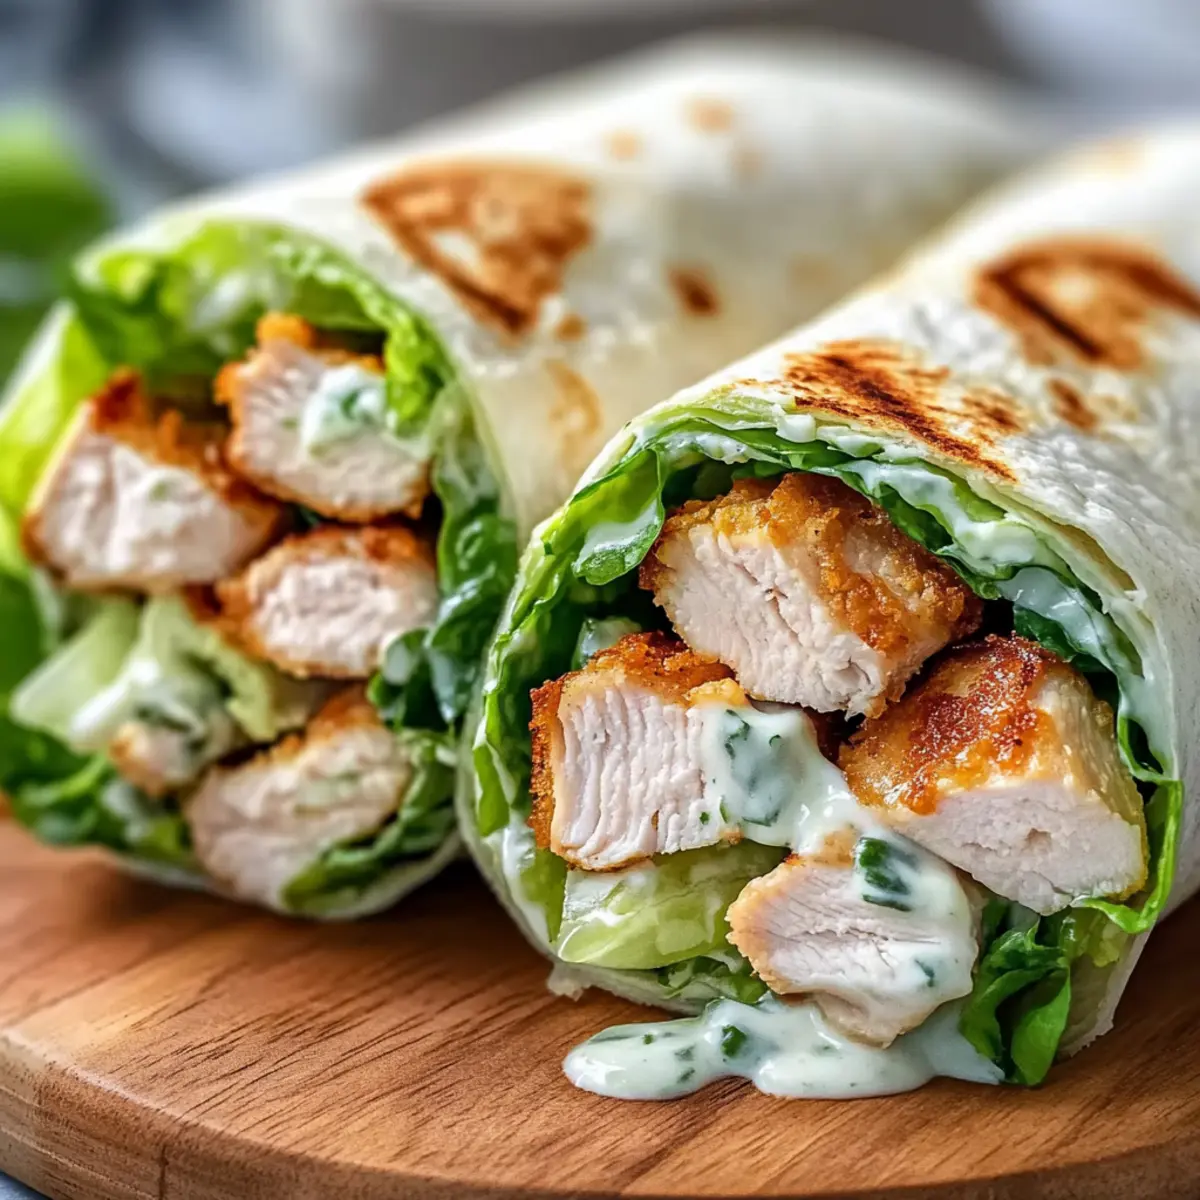
As I unwrap my lunch, the first thing that hits me is the inviting aroma of seared chicken mingling with the crispness of fresh romaine. These Ultimate Chicken Caesar Wraps are the perfect antidote to those fast food temptations that lurk around every corner. Crisp lettuce, tender chicken, and creamy dressing all wrapped in a lightly toasted tortilla create a harmonious bite that is satisfying and quick to prepare. Not only do they make for a delightful lunch or dinner option, but they’re also a crowd-pleaser that’ll impress your family and friends. Whether you’re a seasoned home chef or just looking to elevate your meal prep game, this Caesar wrap recipe is about to become your new go-to. Are you ready to discover just how simple and scrumptious it can be?
Why Are These Chicken Caesar Wraps a Must-Try?
Simplicity: These wraps require minimal effort, making meal prep a breeze even for busy home cooks.
Flavor Explosion: Enjoy a delightful blend of juicy chicken, crisp romaine, and creamy dressing, delivering a taste sensation in every bite.
Customizable: Tailor the recipe to fit your cravings; swap ingredients, add toppings like avocado, or try spinach instead of romaine for variety.
Crowd-Pleasing: Perfect for family dinners or gatherings, these wraps satisfy even the pickiest eaters with their familiar and beloved flavors.
Healthy Choice: Each wrap packs a balanced mix of protein and greens, providing a hearty yet nutritious meal without the guilt.
Take the plunge and make these Ultimate Chicken Caesar Wraps your new favorite meal—ideal for lunch or a quick weeknight dinner that everyone will rave about!
Chicken Caesar Wraps Ingredients
For the Chicken
• Boneless, Skinless Chicken Breasts – The primary protein source ensures a hearty filling; swap with chopped rotisserie chicken to save time.
• Olive Oil – Essential for searing the chicken, creating a golden crust; can substitute with other high-smoke point oils if preferred.
• Kosher Salt – Enhances flavor and moisture retention during cooking; be careful when substituting with other salts as their strengths may vary.
• Black Pepper – Adds a touch of heat; adjust to suit your spice preference.
For the Salad
• Romaine Lettuce – Provides freshness and a satisfying crunch; ensure it’s thoroughly dried to keep your wrap from getting soggy.
• Shaved Parmesan Cheese – Adds richness and umami to the wrap; large flakes fare better than pre-shredded for textural contrast.
• Rustic Croutons – Contributes crunch; lightly crushing them prevents tearing the tortilla, and homemade croutons can elevate the flavor.
• Creamy White Caesar Dressing – Binds the ingredients; a thick quality is crucial for maintaining the wrap’s integrity. Homemade versions can be a delightful twist.
For the Tortilla
• Flour Tortillas – These hold everything together; warming them makes rolling easier and keeps them pliable.
Now you’re ready to whip up the ultimate Chicken Caesar Wraps that will surely impress your family and friends!
Step‑by‑Step Instructions for Chicken Caesar Wraps
Step 1: Prepare the Chicken
Begin by patting your boneless, skinless chicken breasts dry with paper towels to remove excess moisture. Season both sides generously with kosher salt and freshly cracked black pepper to enhance flavor. This preparation step is crucial for ensuring your chicken develops a beautiful crust when cooked.
Step 2: Sear the Chicken
Heat a tablespoon of olive oil in a large, heavy-bottomed skillet over medium-high heat. When the oil shimmers, carefully place the seasoned chicken breasts in the skillet. Sear them for 5-6 minutes on one side until golden brown, then flip and continue cooking for an additional 5-6 minutes until they reach an internal temperature of 165°F (74°C).
Step 3: Rest and Slice the Chicken
Once cooked, transfer the chicken to a cutting board and let it rest for 5 minutes. This resting period allows the juices to redistribute, resulting in a juicier bite. Once rested, slice the chicken into thick, even pieces to ensure every Chicken Caesar Wrap is filled with tender chicken goodness.
Step 4: Prepare the Salad Mixture
In a mixing bowl, combine chopped romaine lettuce, shaved parmesan cheese, and crushed rustic croutons. Drizzle the creamy white Caesar dressing over the salad mix, taking care not to drown it. Toss everything gently until the greens are evenly coated in dressing, creating a delightful mixture for your wraps.
Step 5: Warm the Tortillas
To ensure your flour tortillas are pliable and easy to work with, warm them in the microwave for about 10 seconds. This brief heating makes rolling the wraps more manageable and helps to prevent tearing when you fill them with the hearty Chicken Caesar blend.
Step 6: Assemble the Wraps
On each warmed tortilla, spoon a generous portion of the salad mixture, then layer on the sliced chicken. Be sure to distribute the ingredients evenly, allowing every bite to deliver a burst of flavor.
Step 7: Roll and Toast the Wraps
Fold the edges of each tortilla inward, then roll tightly from the bottom up to secure your ingredients. In the same skillet used for the chicken, toast the wraps seam-side down for 1-2 minutes per side until golden brown and slightly crispy. This gives them a charming texture while sealing the contents inside.
Step 8: Serve and Enjoy
Once toasted, remove the Chicken Caesar Wraps from the skillet and let them cool slightly. Cut them in half diagonally for attractive presentation, then serve immediately. These wraps are perfect for a quick meal that combines convenience with delicious homemade flavors, satisfying even the most discerning taste buds!
What to Serve with Ultimate Chicken Caesar Wraps
Elevate your Chicken Caesar Wrap experience by pairing it with complementary sides and drinks that enhance the flavors of this delicious meal.
-
Crispy Sweet Potato Fries: Their natural sweetness and crispy texture provide a delightful contrast to the savory wraps.
-
Vibrant Asian Edamame Salad: This refreshing salad brings a protein punch with its crunchy vegetables and zesty dressing, balancing the creaminess of the wraps.
-
Garlic Herb Roasted Potatoes: These crispy potatoes add a hearty, savory element that pairs beautifully with the lightness of the wraps.
-
Chilled Mediterranean Quinoa Salad: A cool and flavorful option featuring wholesome grains, fresh veggies, and tangy feta that complements the Caesar flavors.
-
Creamy Coleslaw: The crunch and tang of coleslaw provide a refreshing counterpoint to the rich textures in your wraps.
-
Zesty Lemonade: This invigorating drink cuts through the creaminess of the wraps, enhancing the overall dining experience with its bright flavors.
-
Decadent Chocolate Chip Cookies: Finish your meal with a sweet treat that’s always a crowd-pleaser, offering a delightful contrast to the savory flavors of your wraps.
Chicken Caesar Wraps Variations
Feel free to get creative with your Chicken Caesar Wraps and make them uniquely yours!
-
Rotisserie Chicken: Use pre-cooked rotisserie chicken for a quick assembly, cutting down on cooking time without sacrificing flavor.
-
Leafy Greens: Swap romaine for kale or spinach for a nutritional boost and a different texture. These greens add unique flavors while keeping it fresh.
-
Add-ons: Elevate with toppings like creamy avocado, zesty sun-dried tomatoes, or crispy bacon bits for extra richness. Each addition brings a new flavor profile that can make your wraps standout!
-
Tortilla Choice: For a healthier option, exchange flour tortillas for whole wheat or spinach tortillas. This small swap can add a nutritional punch without compromising on taste.
-
Dressing Twist: Try a homemade yogurt-based Caesar dressing for a lighter version without sacrificing that classic creamy goodness. Experimenting with homemade dressings can lead to delightful surprises.
-
Spicy Kick: For a fiery touch, mix in some sliced jalapeños or a dash of hot sauce to your salad mixture. A little heat can take these wraps from ordinary to extraordinary!
-
Fresh Herbs: Incorporate fresh herbs like basil or cilantro to your salad mix for a fragrant twist. These herbs bring a burst of freshness that can uplift the entire wrap.
-
Grilled Veggies: Add grilled bell peppers or zucchini into your wrap for a delightful smokiness and additional texture. Veggies can transform your wraps into a garden fresh delight.
With so many options, each bite can be a little adventure! For a cozy meal, consider pairing these wraps with a side of Garlic Parmesan Chicken or a refreshing Chicken Caesar Sandwich for added variety. Enjoy your culinary exploration!
Storage Tips for Chicken Caesar Wraps
Fridge: Store assembled Chicken Caesar Wraps wrapped in foil or plastic wrap for up to 2 days. Keep them in an airtight container to avoid moisture intrusion.
Freezer: If you’ve made extra wraps, freeze them for up to 3 months. To prevent freezer burn, wrap each wrap tightly in plastic wrap and place them in a resealable freezer bag.
Reheating: To reheat, thaw in the fridge overnight if frozen, then toast in a skillet for 2-3 minutes per side until warmed through and the tortilla is crispy.
Keep Components Separate: For optimal freshness, store the chicken and salad ingredients separately if you’ve prepared them in advance. This will help avoid sogginess in your Chicken Caesar Wraps.
Make Ahead Options
These Ultimate Chicken Caesar Wraps are perfect for meal prep enthusiasts! You can prepare the chicken and the salad ingredients up to 3 days in advance. Cook and cool the chicken before slicing it; store it in an airtight container in the refrigerator. For the salad, wash and dry the romaine thoroughly, then combine it with the shaved parmesan and croutons in a separate container to keep them crisp. Just before serving, add the creamy Caesar dressing and toss everything together. This ensures the wraps remain fresh and delicious, allowing you to enjoy restaurant-quality meals with minimal effort throughout your busy week!
Expert Tips for Chicken Caesar Wraps
-
Crouton Care: Ensure croutons are slightly crushed to maintain structural integrity while rolling. Too large croutons can tear the tortilla!
-
Lettuce Maintenance: Thoroughly dry romaine lettuce to keep the dressing thick and creamy. Excess moisture will lead to soggy wraps.
-
Proper Cooling: Allow chicken to cool slightly before assembling to minimize moisture and sogginess in your Chicken Caesar Wraps.
-
Cooking Technique: Use a heavy-bottomed skillet for even cooking results, ensuring your chicken is beautifully seared on all sides.
-
Tortilla Tip: Warm tortillas in the microwave for a few seconds before filling; this makes them more pliable and easier to roll without tearing.

Chicken Caesar Wraps Recipe FAQs
How do I select the best chicken for my wraps?
Absolutely! When choosing chicken breasts, look for ones that are plump and free from dark spots. The skin should be smooth, and the meat should be a nice pale pink. If you’re tight on time, using pre-cooked rotisserie chicken can be a great shortcut while still delivering that delicious flavor.
How should I store leftover Chicken Caesar Wraps?
Store assembled Chicken Caesar Wraps wrapped in foil or plastic wrap for up to 2 days in the fridge. Keep them in an airtight container to maintain freshness and avoid moisture. If you prefer to keep the components separate, the chicken and salad ingredients can be stored individually to ensure your wraps don’t get soggy.
Can I freeze Chicken Caesar Wraps?
Yes! You can freeze these wraps for up to 3 months. Make sure to wrap each wrap tightly in plastic wrap, then place them in a resealable freezer bag to prevent freezer burn. When you’re ready to enjoy, thaw them in the fridge overnight and reheat in a skillet for 2–3 minutes per side until warmed through and crispy.
What if my Chicken Caesar Wraps end up soggy?
Very! If you find your wraps are soggy, it’s essential to thoroughly dry your romaine lettuce before assembly. Excess moisture may cause the dressing to become runny. Additionally, ensure you allow the cooked chicken to cool slightly before filling the wraps to prevent steam from making the tortilla damp.
Are these Chicken Caesar Wraps safe for my dog to try?
While your furry friend might love a little taste of chicken, it’s best to avoid giving them Caesar dressing, as it can contain ingredients like garlic and onion that are harmful to dogs. Instead, you could offer plain cooked chicken (without seasoning) as a treat! Always consult your vet regarding your pet’s diet.
Can I make Chicken Caesar Wraps ahead of time?
Absolutely! You can prepare components like the chicken and salad up to 4 days in advance. Store them separately to keep the salad crisp and allow the chicken to remain juicy. When ready, simply assemble the wraps, warm tortillas, and enjoy a quick meal!
Chicken Caesar Wraps that Wow: Crispy, Creamy Perfection
Ingredients
Equipment
Method
- Pat the chicken breasts dry with paper towels and season both sides with salt and pepper.
- Heat olive oil in a skillet. Sear the chicken for 5-6 minutes on each side until golden brown.
- Transfer the chicken to a cutting board, let it rest for 5 minutes, then slice it into thick pieces.
- In a mixing bowl, combine romaine, parmesan, and croutons. Drizzle with Caesar dressing and toss gently.
- Warm the tortillas in the microwave for about 10 seconds.
- On each tortilla, spoon a portion of the salad mixture, then layer with sliced chicken.
- Fold tortilla edges inward and roll tightly. Toast the wraps seam-side down in the skillet for 1-2 minutes per side.
- Remove from skillet, cool slightly, cut in half, and serve immediately.
Leave a Reply