
As I prepped for dinner on a hectic weeknight, I stumbled upon a delightful solution that transformed a simple salad into a flavor-packed feast: the Ultimate Crispy Chicken Caesar Salad. The combination of juicy, breaded chicken tenders resting on a bed of crisp romaine offers not just nourishment but satisfaction in every bite. With easy-to-make homemade dressing and the chance to customize, this salad crosses the line from side dish to meal star! Plus, it’s a breeze to prepare, meaning I can spend less time in the kitchen and more time savoring the evening with loved ones. Curious how this satisfying twist on a classic can elevate your weeknight dinners? Let’s dive in!
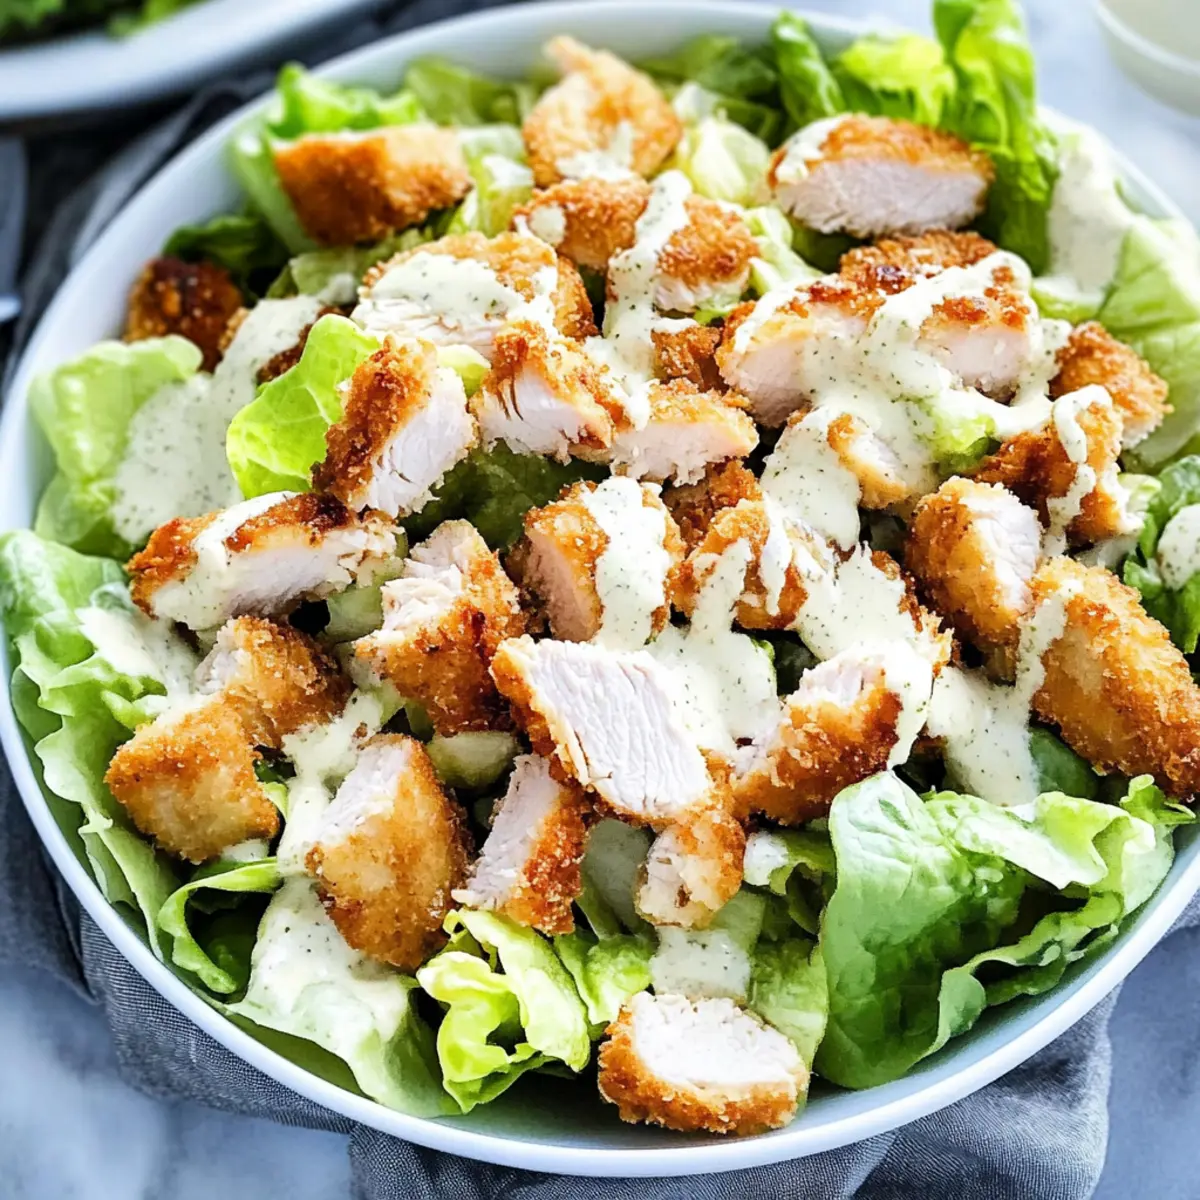
Why is this Chicken Caesar Salad special?
Simplicity at its finest: This recipe requires minimal prep time and ingredients, making it perfect for anyone, from busy parents to novice cooks.
Irresistible flavor: The crispy chicken, paired with the creamy homemade dressing, brings an explosion of taste that’s simply unforgettable.
Customizable options: You can easily adjust the ingredients, adding toppings like crispy bacon or fresh avocado to cater to your cravings. Check out this refreshing Chickpea Peach Salad for more customization ideas!
Healthy choice: Packed with protein and nutrients, this salad is not only filling but also a nourishing alternative to fast food.
Crowd-pleaser: Whether it’s a weeknight dinner or a gathering with friends, this salad is guaranteed to impress and satisfy everyone’s palate.
Chicken Caesar Salad Ingredients
• Discover the perfect blend of flavors!
For the Salad
- Romaine Lettuce – Freshly washed and dried for that satisfying crunch in every bite.
- Croutons – A delightful texture boost; feel free to use your favorite store-bought or homemade variety.
- Parmesan Cheese – Shaved for an extra layer of umami flavor; Pecorino Romano is a great substitute if you want a sharper taste.
- Chicken Tenders – The star of the salad, providing lean protein; opt for skinless tenders for a lighter option.
For the Dressing
- Mayo – Creamy base that adds richness to your homemade dressing; Greek yogurt can serve as a lighter alternative.
- Plain Yogurt – Balances the mayo with a tangy note, contributing to the overall creaminess.
- Garlic – Freshly grated to give the dressing a flavorful punch; adjust to your taste.
- Black Pepper – Freshly ground to elevate the flavor profile; personalize it to your liking.
- Lemon Juice – Freshly squeezed brightens and balances the creamy flavors, making it irresistible.
- Salt – Essential for enhancing all the flavors; adjust depending on your preference.
- Olive Oil – Adds richness; feel free to switch it with avocado oil for a unique twist.
- Dijon Mustard – Adds a hint of spice and depth to the dressing, rounding out the flavors.
- Worcestershire Sauce – A key ingredient that brings that essential umami flavor found in Caesar dressings.
For the Chicken Crust
- Egg – Acts as a binder for your breading, ensuring a crisp texture.
- Additional Seasonings – Flour, breadcrumbs, paprika, garlic powder, onion powder, and salt combine to create a crunchy coating for the chicken.
With this Chicken Caesar Salad, you’ll create a colorful, satisfying dish that’s sure to please!
Step‑by‑Step Instructions for Crispy Chicken Caesar Salad
Step 1: Prepare the Dressing
In a mixing bowl, whisk together mayo, plain yogurt, freshly grated garlic, lemon juice, Dijon mustard, Worcestershire sauce, grated Parmesan, olive oil, salt, and black pepper until smooth and creamy. Look for a thick yet pourable consistency. Once combined, cover the bowl and refrigerate the dressing for at least 30 minutes to allow the flavors to meld beautifully while you prepare the rest of the chicken Caesar salad.
Step 2: Prep Chicken
Start by cleaning 1 pound of chicken tenders under cold water, patting them dry with paper towels. In one bowl, whisk together 1 egg, minced garlic, lemon juice, and a sprinkle of salt and black pepper. In another bowl, mix together flour, breadcrumbs, and your choice of spices like paprika, garlic powder, and onion powder. This ensures a flavorful crust that will make your chicken tenders irresistible.
Step 3: Coat Chicken
Dip each chicken tender into the egg mixture, allowing any excess to drip off. Then, transfer it to the breadcrumb mixture, pressing firmly to ensure an even coating. As you coat each piece, arrange them in a single layer on a non-stick baking sheet. This step is crucial to achieve the perfectly crispy chicken for your Chicken Caesar Salad later on.
Step 4: Bake Chicken
Preheat your oven to 400°F (204°C). Generously spray the coated chicken tenders with avocado oil for an extra layer of crispiness. Bake them in the preheated oven for 10 minutes. Afterward, carefully flip the tenders, spray again, and continue baking for another 10 minutes, or until the chicken is golden brown and crispy. Use a meat thermometer to ensure chicken reaches an internal temperature of 165°F (74°C).
Step 5: Assemble Salad
In a large bowl, combine chopped romaine lettuce with half of the prepared dressing. Toss gently until the leaves are well coated—this adds delicious flavor throughout. Transfer the mixed greens to a serving platter, then arrange the baked chicken on top. Finish your crispy Chicken Caesar Salad by adding croutons, a drizzle of the remaining dressing, and a generous sprinkle of shaved Parmesan cheese for that touch of elegance.

How to Store and Freeze Chicken Caesar Salad
- Fridge: Store leftover Chicken Caesar Salad in an airtight container for up to 3 days. Keep the dressing separate until serving to maintain crispness.
- Freezer: While the salad is best fresh, you can freeze baked chicken tenders for up to 2 months. Reheat in the oven before assembling the salad again.
- Dressing: Homemade Caesar dressing can last in the fridge for 2-3 days in a sealed container. Ensure to stir well before using.
- Reheating Chicken: For the best texture, reheat the frozen chicken tenders in the oven at 375°F (190°C) until heated through, about 10-15 minutes.
Expert Tips for the Best Chicken Caesar Salad
-
Dry the Romaine: Ensure your romaine lettuce is completely dry using a salad spinner to prevent a soggy salad.
-
Add Flavor Depth: Use high-quality Parmigiano Reggiano for garnishing to enhance the flavor profile of your Chicken Caesar Salad.
-
Mind the Temperature: Always check the chicken’s internal temperature with a meat thermometer to ensure it’s cooked perfectly to 165°F (74°C).
-
Customize the Crust: Feel free to experiment with the additional seasonings for the chicken crust — it can really elevate the taste!
-
Let It Rest: Allow the chicken to rest for a few minutes after baking to retain its juiciness before slicing for the salad.
Chicken Caesar Salad Variations
Feel free to sprinkle your personal touch on this salad, making it uniquely yours with these delightful tweaks!
-
Bacon Bliss: Add crispy bacon bits for a savory crunch that enhances the flavor profile beautifully. The salty richness of bacon complements the creamy dressing perfectly.
-
Veggie Boost: Toss in some vibrant cherry tomatoes or creamy avocado for an extra burst of freshness. These additions brighten the dish and enhance its nutritional value.
-
Seafood Swap: Replace chicken with grilled shrimp for a fresh take on the classic. The subtle sweetness of shrimp pairs nicely with the Caesar dressing for a delightful twist.
-
Gluten-Free Option: Use gluten-free breadcrumbs in the chicken crust and adjust the dressing accordingly for a tasty gluten-free version. A small adjustment can make the whole dish accessible to everyone.
-
Cheesy Upgrade: Experiment with different cheeses, like feta or blue cheese, instead of Parmesan for a bold flavor twist. Each cheese brings its own character to the salad!
-
Herb Infusion: Mix in fresh herbs like basil or parsley into the dressing for an aromatic touch that elevates the entire dish. It’s a simple way to enhance flavor with fresh ingredients.
-
Spicy Kick: Add a pinch of crushed red pepper flakes to the dressing for a zesty heat that balances the creaminess. This will give your salad an exciting edge!
-
Nutty Crunch: Incorporate toasted pine nuts or walnuts for an earthy flavor and added crunch. Nuts also add healthy fats, making the salad even more nourishing.
For more customization ideas, don’t miss this flavorful Cucumber Caesar Salad, which explores fresh twist perfect for any table. Happy cooking!
What to Serve with Crispy Chicken Caesar Salad
A delightful meal awaits you when you pair this refreshing salad with complementary side dishes.
- Garlic Bread: The buttery, garlicky goodness of fresh garlic bread provides a satisfying crunch and is perfect for sopping up any leftover dressing.
- Roasted Vegetables: A medley of roasted seasonal vegetables adds vibrant color and earthy flavors, enhancing the nutritional value of your meal.
- Quinoa Pilaf: This nutty, slightly chewy side balances with the crispy texture of the salad, making your dinner not only hearty but wholesome.
- Chilled White Wine: A crisp Sauvignon Blanc elevates your dining experience, complementing the salad’s flavors without overwhelming the palate.
- Fruit Salad: A light, fruity side filled with seasonal berries or citrus segments can add a refreshing contrast that brightens each bite of your chicken Caesar salad.
- Chocolate Mousse: For dessert, a rich chocolate mousse provides an indulgent finale, creating a delightful end to a satisfying meal.
These pairings transform your chicken Caesar salad from a simple dish into a memorable culinary experience!
Make Ahead Options
Preparing your Ultimate Crispy Chicken Caesar Salad ahead of time is a game changer for busy weeknights! You can whip up the creamy homemade dressing and refrigerate it for up to 3 days. The chicken tenders can be breaded and kept in the fridge for up to 24 hours before baking, ensuring they retain their crispiness once cooked. When you’re ready to serve, simply bake the chicken for about 20 minutes, assemble your salad with freshly chopped romaine and croutons, and drizzle the remaining dressing on top. This way, you’ll enjoy a restaurant-quality meal with minimal effort and maximum flavor, perfect for family dinners or gatherings!

Crispy Chicken Caesar Salad Recipe FAQs
How do I select ripe lettuce for my Chicken Caesar Salad?
Absolutely! When choosing romaine lettuce, look for crisp, vibrant leaves with a fresh aroma. Avoid heads that have dark spots or wilting leaves, as these indicate spoilage. Opt for romaine that feels firm to the touch for the best crunch in your salad.
What’s the best way to store leftover Chicken Caesar Salad?
Very! Store your leftover Chicken Caesar Salad in an airtight container in the fridge for up to 3 days. However, remember to keep the dressing separate until you’re ready to enjoy, as this will help maintain the crispness of the romaine and croutons. If necessary, you can easily toss it with the dressing just before serving.
Can I freeze the chicken tenders used in this Caesar Salad?
Definitely! While the full salad doesn’t freeze well, you can freeze your baked chicken tenders. Once cooled, place them in a single layer on a baking sheet and freeze until solid. Afterward, transfer to a freezer-safe bag or container for up to 2 months. To reheat, pop them in the oven at 375°F (190°C) for 10-15 minutes, until heated through and crispy again.
Is it okay to adjust the dressing ingredients based on dietary needs?
Absolutely! If you or someone you’re serving has dietary restrictions or preferences, feel free to customize the dressing. For example, swap mayo for Greek yogurt to lighten it up, or omit Worcestershire sauce if your guests are avoiding anchovies. This way, you can easily accommodate different dietary needs while maintaining flavor.
What should I do if my chicken tenders are not crispy after baking?
Very! If your chicken tenders aren’t as crispy as you’d like, check if they were coated well in the breadcrumb mixture. For extra crispiness, make sure to generously spray the tenders with oil before baking. Also, don’t crowd the baking sheet; give each tender space for air circulation. If you find that they are still not crispy, try finishing them under the broiler for a minute or two—just keep an eye on them to prevent burning!
Can I make this Chicken Caesar Salad for a large group?
For sure! This salad is easy to scale up and perfect for gatherings. Simply multiply the quantities based on the number of servings you’ll need. For larger crowds, it’s best to prepare the chicken and dressing ahead of time, but combine the salad elements just before serving to keep everything fresh and crunchy. Embrace the joy of sharing this delightful dish with friends and family!

Crispy Chicken Caesar Salad with Creamy Homemade Dressing
Ingredients
Equipment
Method
- Whisk together mayo, plain yogurt, garlic, lemon juice, Dijon mustard, Worcestershire sauce, Parmesan, olive oil, salt, and black pepper in a bowl until smooth and creamy.
- Cover and refrigerate the dressing for at least 30 minutes.
- Clean chicken tenders under cold water and dry with paper towels.
- In one bowl, whisk together egg, minced garlic, lemon juice, salt, and black pepper.
- In another bowl, mix flour, breadcrumbs, paprika, garlic powder, and onion powder.
- Dip each chicken tender into egg mixture, then coat with breadcrumb mixture.
- Arrange on a non-stick baking sheet.
- Preheat oven to 400°F (204°C). Spray chicken with avocado oil.
- Bake for 10 minutes, flip, spray again, then bake for another 10 minutes.
- Combine romaine lettuce with half of the dressing in a large bowl.
- Transfer to a serving platter, lay baked chicken on top, and add croutons and remaining dressing.
- Sprinkle shaved Parmesan to finish.
Leave a Reply