
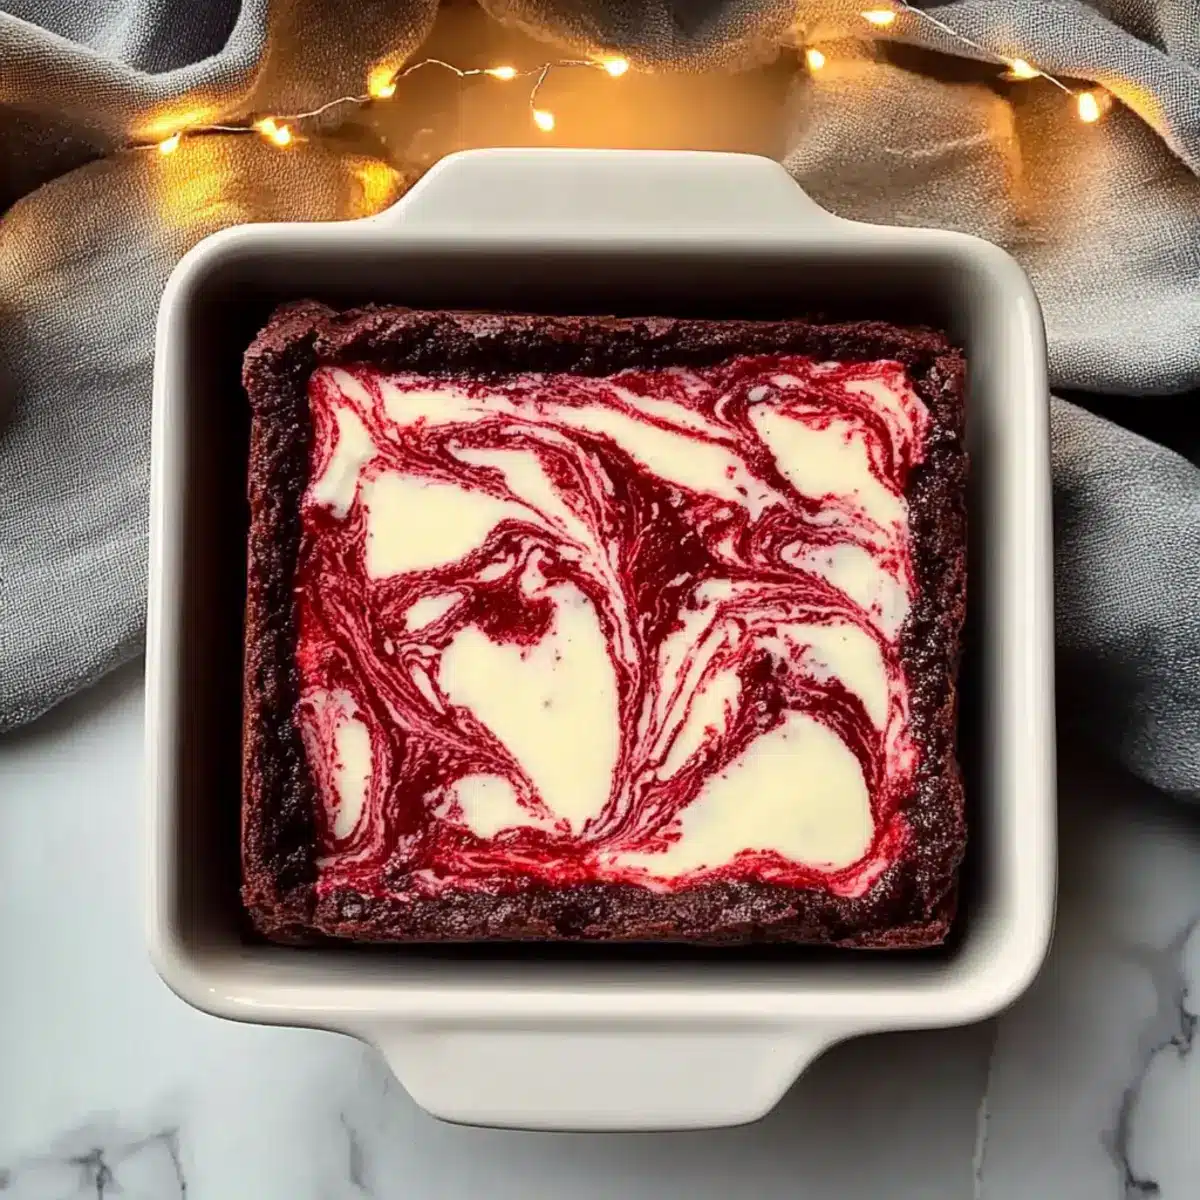
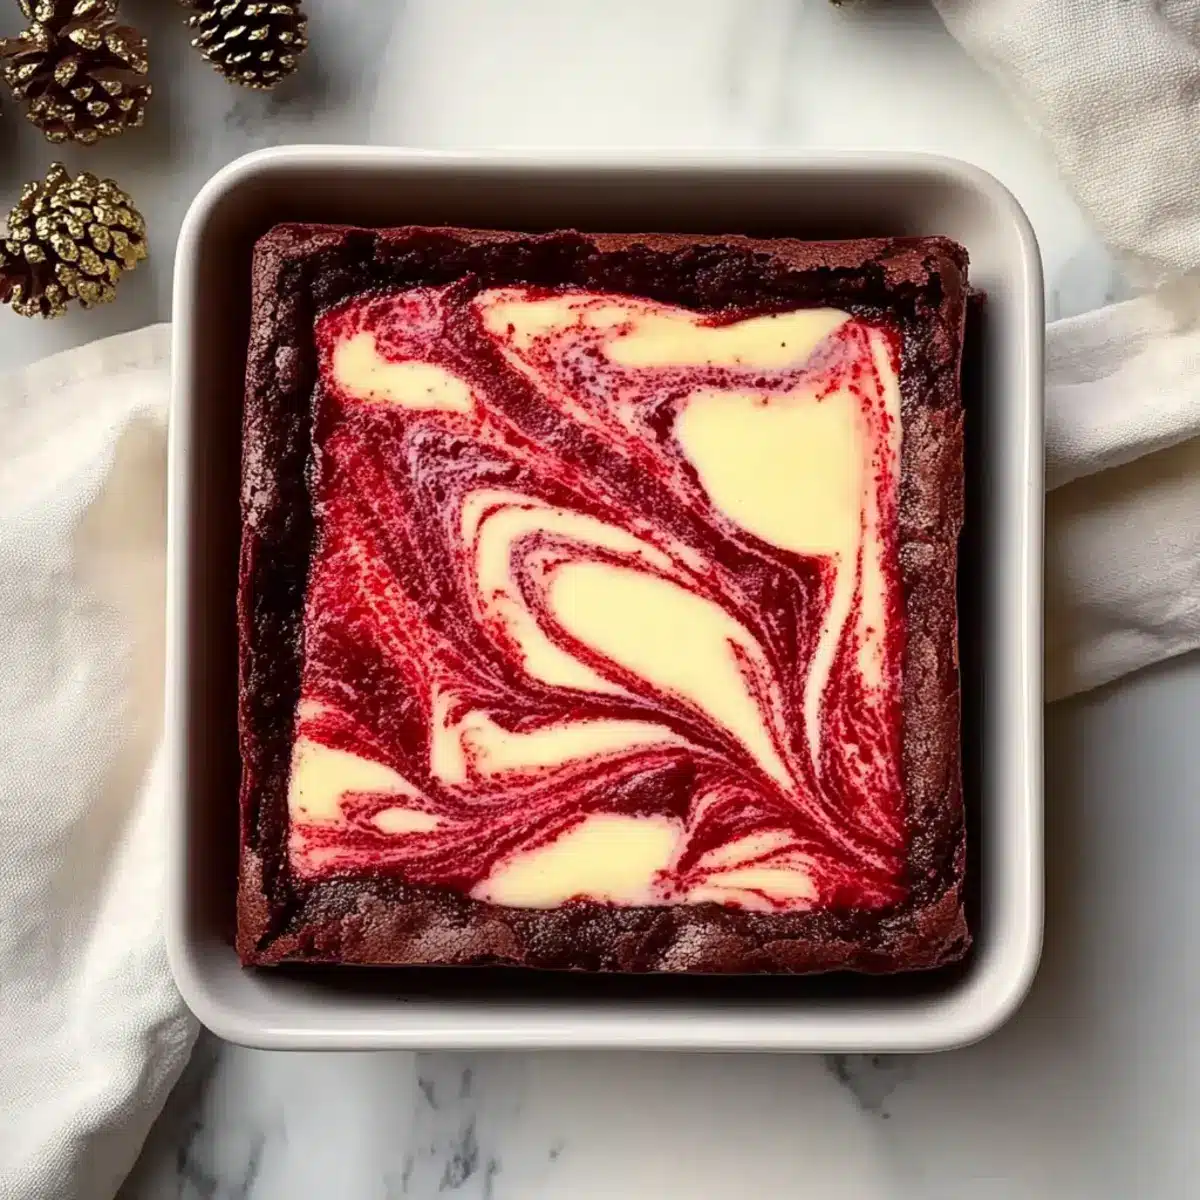
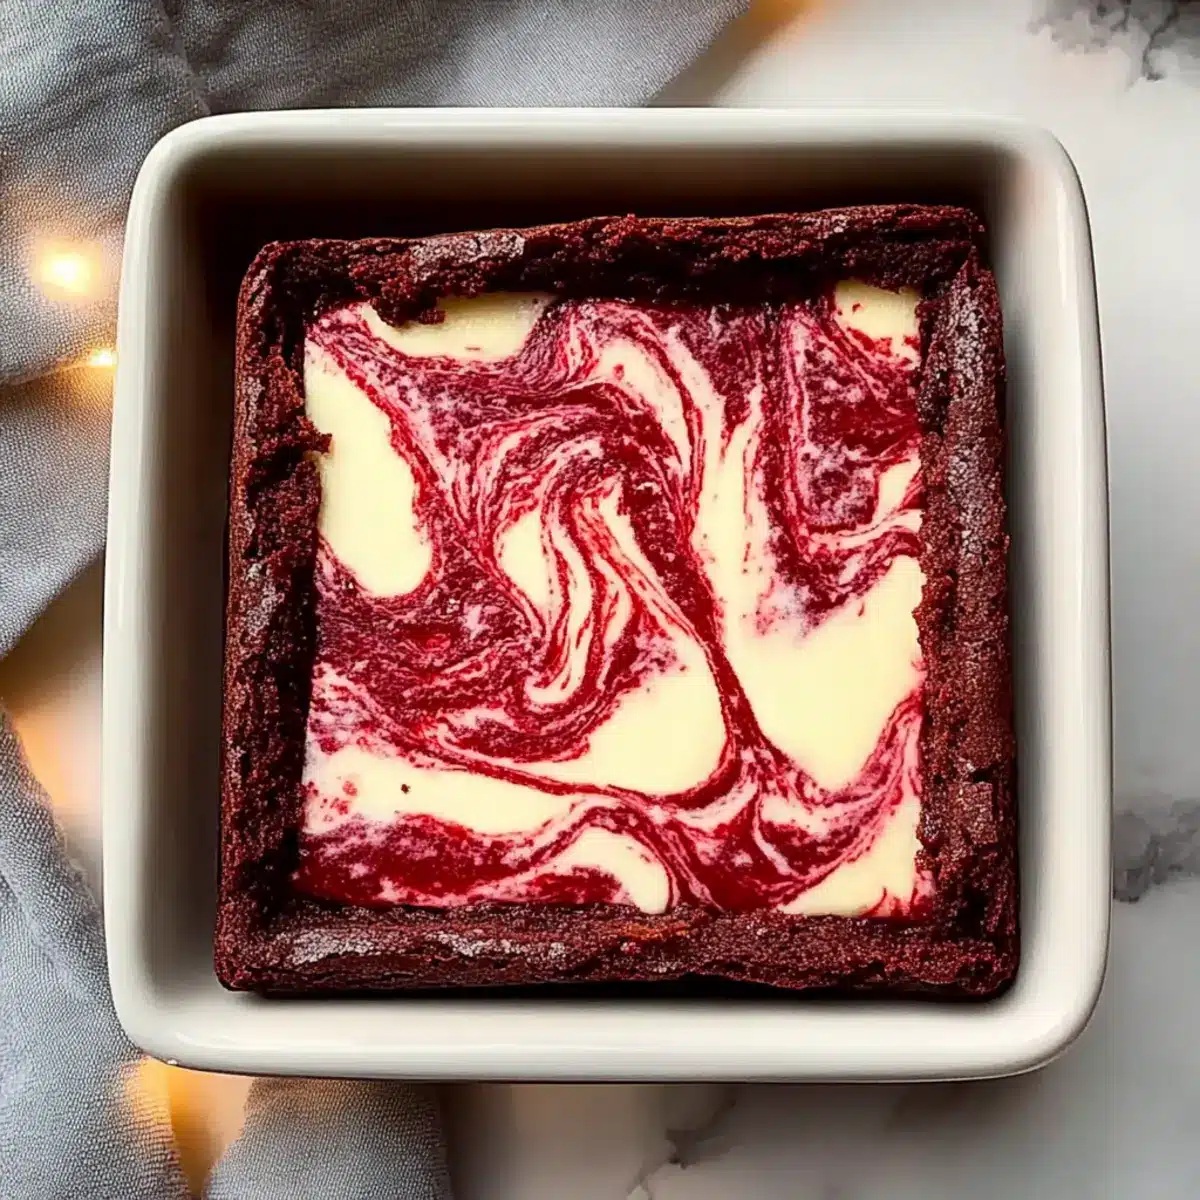
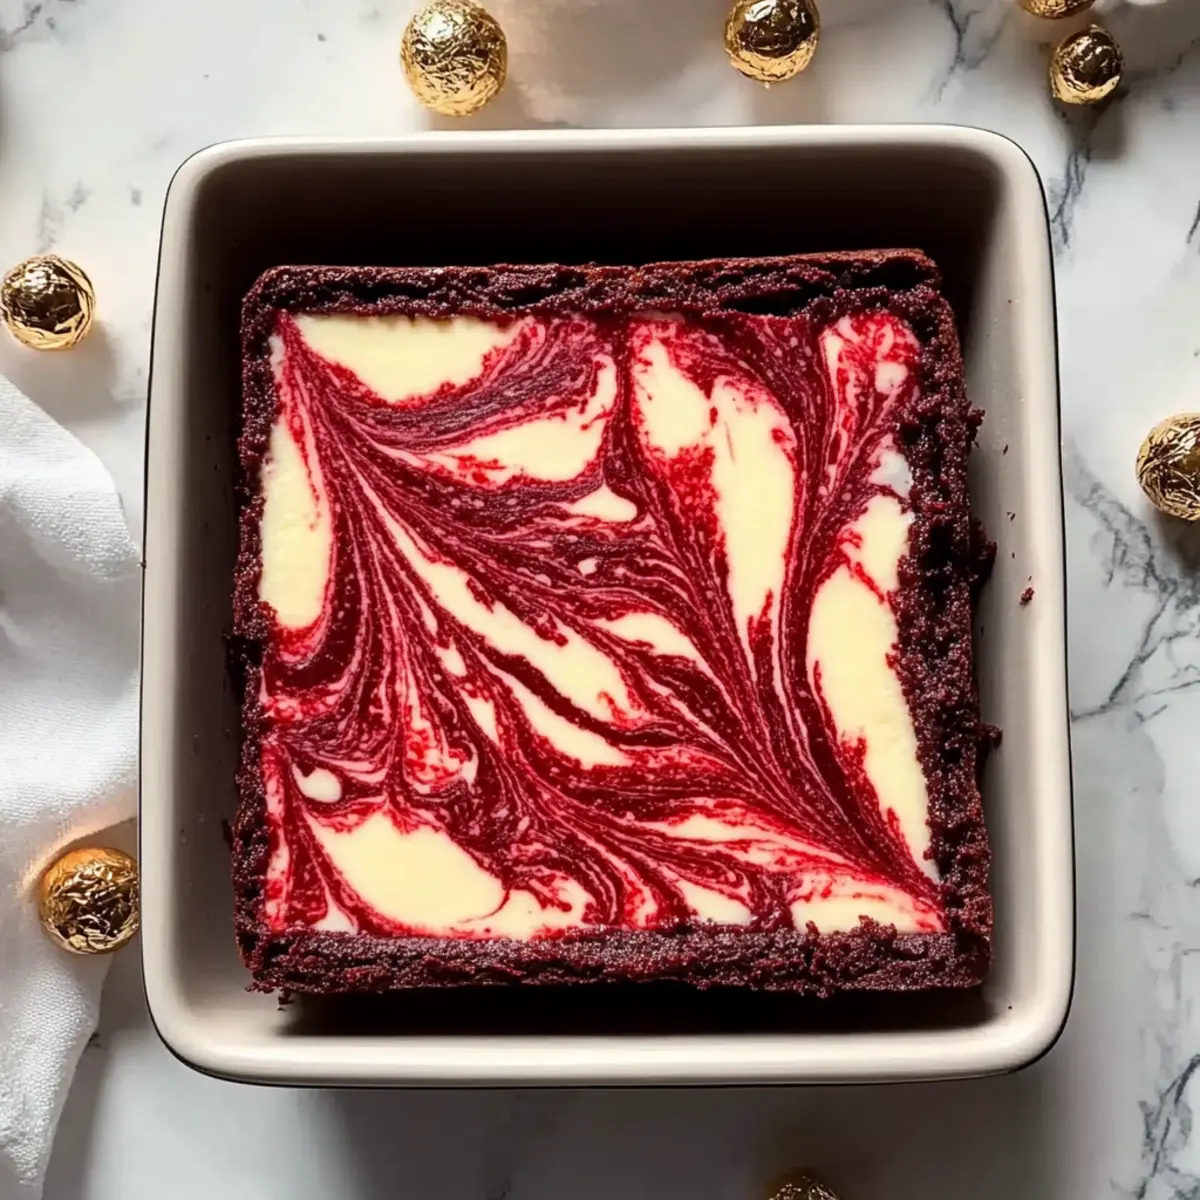
As I pulled the rich, fudgy red velvet brownies from the oven, the aroma was simply irresistible. Topped with a velvety cheesecake layer, these treats are the perfect marriage of decadence and comfort that will have you swooning with every bite. Not only do these Red Velvet Brownies with Cheesecake Layer look stunning with their beautiful marbled design, but they’re also surprisingly easy to whip up, making them a go-to dessert for any occasion. Whether you’re baking for a potluck, a festive celebration, or simply indulging your sweet cravings at home, these brownies offer the cozy satisfaction of a homemade treat without extensive fuss. So, why not elevate your dessert game and impress your friends with this show-stopping delight? What could be sweeter than that?
Why Are These Brownies So Special?
Irresistible flavors come together in these Red Velvet Brownies with Cheesecake Layer, delivering a rich chocolate experience topped with creamy goodness. Gorgeous presentation makes these brownies a perfect centerpiece for any dessert table, earning you compliments galore. Quick to prepare yet undeniably impressive, they’re ideal for busy home chefs craving gourmet desserts. Serve them warm with a scoop of ice cream or pair with a hot cup of coffee for an unforgettable treat. Plus, with simple ingredients, you’ll find it easy to whip up a batch whenever the sweet tooth strikes!
Red Velvet Brownies Ingredients
• Classic Red Velvet Brownies with Cheesecake Layer require simple yet impactful ingredients for the ultimate dessert experience.
For the Brownie Layer
- Butter (5 oz) – Provides richness and moisture; using unsalted butter gives you better control over saltiness.
- Sugar (3/4 cup) – Sweetens and contributes to the brownie layer’s texture; no direct substitutions recommended.
- Vanilla Extract (1 1/2 tsp) – Adds depth to the flavor profile; substitute with almond extract for a unique twist.
- Cocoa Powder (1/3 cup) – Infuses the brownies with rich chocolate flavor; a higher quality cocoa, like Hershey’s Special Dark, enhances color.
- Salt (1/8 tsp) – Enhances overall flavors; can be omitted if using salted butter.
- Red Food Coloring (1 1/2 tbsp) – Delivers the signature red hue of red velvet; a natural coloring can be a lovely alternative.
- Vinegar (1 tsp) – Balances sweetness and enhances the red color; no direct substitutes.
- Eggs (2 large, room temperature) – Bind ingredients and provide that fudgy texture; using room temperature eggs yields the best results.
- Flour (3/4 cup) – The core structure for the brownie layer; can be substituted with gluten-free flour mix if necessary.
For the Cheesecake Layer
- Cream Cheese (8 oz, softened) – Essential for creaminess and tang; stick to brick-style cream cheese, like Philadelphia, for best results.
- Sugar (1/4 cup) – Sweetens the cheesecake layer for perfect harmony; no direct substitutions recommended.
- Egg (1 large, room temperature) – Binds the cheesecake mixture; always ensure it is at room temperature for optimal mixing.
- Vanilla Extract (1/2 tsp) – Adds a flavor boost, creating harmony with the brownie layer.
These Red Velvet Brownies with Cheesecake Layer are not just delicious but also visually striking. Dive into baking this delightful treat, and let your family marvel at your creations!
Step‑by‑Step Instructions for Red Velvet Brownies with Cheesecake Layer
Step 1: Preheat and Prepare
Begin by preheating your oven to 375°F (190°C) and greasing an 8×8 inch baking dish with butter or baking spray. This ensures that your delicious Red Velvet Brownies with Cheesecake Layer come out effortlessly! Set the prepared dish aside as you move on to the brownie batter preparation.
Step 2: Mix Brownie Ingredients
In a medium saucepan, melt 5 ounces of butter over low heat, then stir in 3/4 cup sugar along with 1 1/2 teaspoons of vanilla extract and 1/3 cup cocoa powder. Blend these ingredients until they create a deep burgundy mixture. Add a pinch of salt, 1 1/2 tablespoons of red food coloring, and 1 teaspoon of vinegar, mixing until your batter is smooth and cohesive, showcasing vibrant color.
Step 3: Add the Eggs and Flour
Lightly beat 2 large eggs in a separate bowl until frothy, then incorporate them into the chocolate mixture, stirring just until combined. Gently fold in 3/4 cup of all-purpose flour until no dry streaks remain; be careful not to overmix. Reserve 1/4 cup of this luscious brownie batter to use for topping later, and pour the rest into the prepared baking dish.
Step 4: Prepare the Cheesecake Layer
In another bowl, beat 8 ounces of softened cream cheese with 1/4 cup sugar until the mixture is fluffy and smooth. Add in 1 large room-temperature egg and 1/2 teaspoon of vanilla extract, blending until fully incorporated and creamy. This luscious cheesecake mixture will elevate your Red Velvet Brownies to new heights, so be sure to mix well!
Step 5: Assemble the Layers
Carefully spread the cheesecake mixture over the brownie base in the baking dish, ensuring an even layer across the surface. Take your time to do this gently to maintain the integrity of the brownie layer below. The vibrant red brownie layer will peek through the cheesecake, creating a delightful visual effect.
Step 6: Swirl and Top
Spoon the reserved 1/4 cup of brownie batter in dollops across the cheesecake layer, and use a butter knife or skewer to swirl it gently. Aim for a beautiful marbled effect—be cautious not to over-swirl, as you want to keep the distinct layers visible. This step adds a touch of artistry to your Red Velvet Brownies with Cheesecake Layer!
Step 7: Bake
Place the assembled dish in the preheated oven and let it bake for 30 to 35 minutes. Keep an eye out for set edges and a slightly jiggly center; this indicates that your brownies are perfectly fudgy. Avoid overbaking to maintain that decadent texture right where you want it.
Step 8: Cool and Serve
Once baked, remove the dish from the oven and set it on a wire rack to cool for 1 to 2 hours. This cooling period allows the layers to firm up and makes it easier to slice. When ready, cut into squares and enjoy the delightful fusion of the rich brownie and creamy cheesecake layers that your guests will love!
Storage Tips for Red Velvet Brownies with Cheesecake Layer
Fridge: Store your Red Velvet Brownies with Cheesecake Layer covered in the refrigerator for up to 5 days to maintain freshness and flavor.
Freezer: Cut brownies into squares and wrap them individually in plastic wrap for freezing. They can be stored for up to 3 months.
Thawing: To enjoy later, thaw the wrapped brownies at room temperature or in the refrigerator overnight before serving for the best taste and texture.
Reheating: If you prefer them warm, microwave individual slices for about 15-20 seconds until just warmed through, but avoid overheating to keep the cheesecake creamy.
Expert Tips for Red Velvet Brownies
-
Quality Ingredients: Use high-quality cocoa powder and cream cheese for the best flavors and textures in your Red Velvet Brownies with Cheesecake Layer.
-
Don’t Overmix: When combining the brownie batter, mix until just combined to keep your brownies fudgy and moist. Overmixing can lead to a dense texture.
-
Room Temperature: Ensure eggs and cream cheese are at room temperature for seamless blending. This helps create a velvety cheesecake layer without lumps.
-
Watch the Bake Time: Keep an eye on your brownies as they bake; removing them while slightly jiggly in the center ensures that they’ll be perfectly fudgy once cooled.
-
Cool Completely: Allow the brownies to cool thoroughly before cutting; this ensures cleaner slices and prevents the layers from merging together.
-
Swirling Technique: When dolloping the reserved brownie batter on top of the cheesecake, be gentle to maintain the marbled effect without merging the layers too much.
What to Serve with Decadent Red Velvet Brownies with Creamy Cheesecake Layer
As you dive into a blissful bite of these rich brownies, consider adding delightful companions to make your dessert experience even more memorable.
-
Vanilla Ice Cream: The cool, creamy texture perfectly balances the warm, fudgy brownies, creating a satisfying contrast that’s hard to resist.
-
Fresh Berries: Strawberries or raspberries add a burst of tartness that cuts through the sweetness, enhancing each rich bite.
-
Coffee or Espresso: A strong, aromatic cup complements the chocolate flavors, making for an indulgent afternoon treat or after-dinner delight.
-
Chocolate Sauce: Drizzling warm chocolate sauce over your brownies takes indulgence to the next level, amplifying the dessert’s richness.
-
Whipped Cream: Light and airy, whipped cream adds a luscious texture that enhances the creamy cheesecake top without overpowering the flavors.
-
Nutty Crumble Topping: A sprinkle of chopped pecans or walnuts introduces a delightful crunch, making each bite a unique textural experience.
-
Mint Tea: A refreshing cup of mint tea serves as a palate cleanser and adds an aromatic element, complementing the rich flavors beautifully.
Pairing these elements with your decadent red velvet brownies will elevate your dessert game and ensure every bite is a heavenly experience!
Make Ahead Options
These luscious Red Velvet Brownies with Cheesecake Layer are perfect for busy weeknights or potlucks when you need to save time! You can prepare the brownie batter up to 24 hours in advance, just store it in an airtight container in the refrigerator to maintain freshness. The cheesecake mixture can also be made ahead and kept chilled for up to three days before you’re ready to bake. Simply layer the chilled cheesecake over the brownie batter and swirl the reserved brownie mix on top just before baking. This way, you’ll have rich, fudgy brownies with creamy cheesecake that’s just as delicious and ready to impress your guests with minimal effort!
Red Velvet Brownies with Cheesecake Layer Variations
Create a delightful twist on classic flavors and enjoy making these brownies even more personal!
- Nutty Delight: Stir in chopped walnuts or pecans into the brownie batter for added crunch and a nutty flavor that pairs beautifully with cheesecake.
- Chocolate Chip Boost: Add a half cup of mini chocolate chips to the brownie layer for an extra rich, chocolaty indulgence.
- Dairy-Free Option: Substitute cream cheese with a dairy-free alternative like cashew cream for a creamy layer that anyone can enjoy.
- Fruit Infusion: Swirl in some fruit puree, like raspberry or cherry, into the cheesecake layer for a fruity tang that complements the rich chocolate.
- Spiced Variation: Sprinkle in a teaspoon of cinnamon or nutmeg into the brownie batter for a warm touch of spice that brings new depth to each bite. Give it a try with some whipped ricotta, too, like in my delicious Peach Bruschetta with Whipped Ricotta.
- Vegan Twist: Use flax eggs and unsweetened applesauce as substitutes for eggs and cream cheese, allowing everyone to indulge guilt-free.
- Cafe Style: Drizzle with a rich mocha glaze before serving, adding a delightful flavor that would make any café proud. Pair it with a hot cup from your favorite blend for a perfect match!
- Zesty Lemon: Add a hint of lemon zest to the cheesecake mixture for a refreshing contrast that brightens the flavor.
Feel inspired to get creative, and let your taste buds lead the way with these fun variations!
Red Velvet Brownies with Cheesecake Layer Recipe FAQs
How do I select ripe ingredients for this recipe?
Absolutely! For the best results, ensure your eggs are at room temperature, which helps them blend smoothly into the batter. When selecting cream cheese, reach for brick-style cream cheese, like Philadelphia, as it has a better texture for cheesecake. When choosing butter, unsalted is recommended for better control of flavor. As for red food coloring, high-quality liquid or gel options will give you the vibrant hue that makes these Red Velvet Brownies stand out!
How should I store my brownies after baking?
Very simple! Store your Red Velvet Brownies with Cheesecake Layer covered in the refrigerator for up to 5 days. I often place them in an airtight container to keep them fresh. If you have leftovers, cut them into squares, wrap each piece individually in plastic wrap, and store them in the freezer, where they can last for up to 3 months. Just be sure to let them cool completely before wrapping!
Can I freeze the brownies? If so, how?
Absolutely! After cooling completely, cut the brownies into squares. Wrap each square tightly in plastic wrap and then place them in a freezer-safe bag or container. This will help preserve their deliciousness for up to 3 months. When you’re ready to enjoy, simply thaw them at room temperature for about an hour or place them in the refrigerator overnight for a slower defrost.
What should I do if my brownies are too dry?
If your brownies turn out dry, it may be because they were overbaked. I recommend checking about 5 minutes before the end of the baking time. Insert a toothpick into the center; it should come out with a few moist crumbs, not wet batter. If your brownies are already baked and dry, there’s hope! You can warm them slightly in the microwave for 10-15 seconds and enjoy them with ice cream or whipped cream, which adds a delightful moisture!
Are these brownies suitable for those with allergies?
For those with allergies, the Red Velvet Brownies with Cheesecake Layer do contain common allergens like gluten (from flour) and dairy (from butter and cream cheese). For a gluten-free alternative, you can use a gluten-free flour mix, which works well in brownie recipes. Always check your ingredients for any specific allergy concerns, especially when it comes to food coloring or flavor extracts as well!
Irresistible Red Velvet Brownies with Creamy Cheesecake Layer
Ingredients
Equipment
Method
- Preheat your oven to 375°F (190°C) and grease an 8x8 inch baking dish.
- In a medium saucepan, melt butter over low heat, then stir in sugar, vanilla extract, and cocoa powder until smooth.
- Lightly beat the eggs, then incorporate them into the mixture and fold in flour until no dry streaks remain.
- In another bowl, beat cream cheese with sugar until fluffy. Add the egg and vanilla, blending until smooth.
- Spread the cheesecake mixture over the brownie base, then dollop reserved brownie batter on top and swirl carefully.
- Bake for 30 to 35 minutes, until edges are set and the center is slightly jiggly.
- Cool on a wire rack for 1 to 2 hours before cutting into squares.
Leave a Reply