
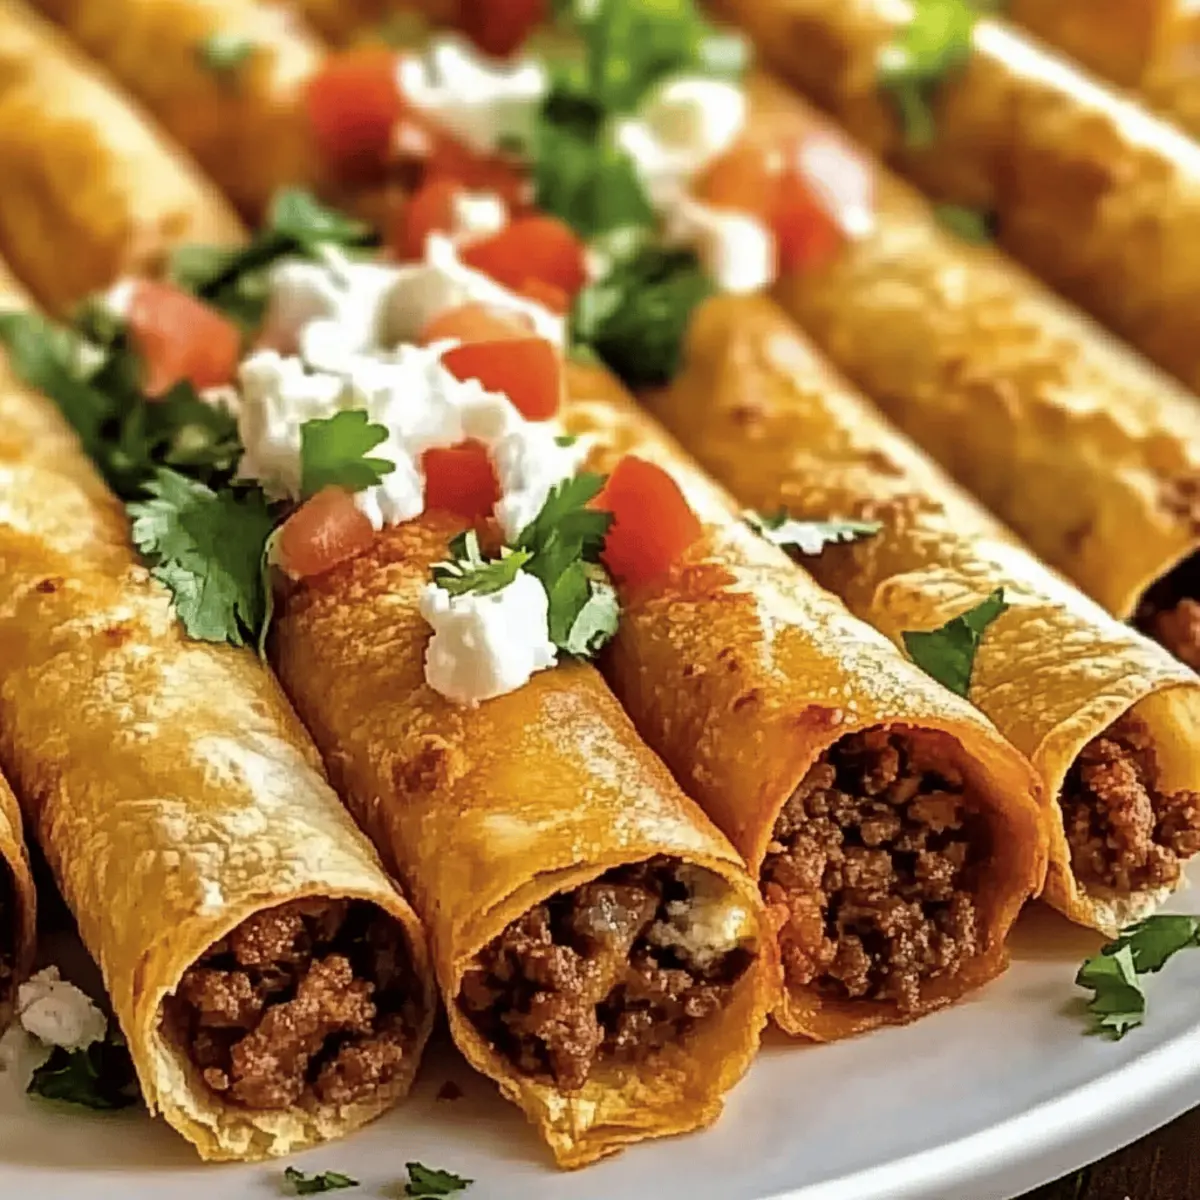
As I stepped into my kitchen, the tantalizing aroma of seasoned beef sizzling on the stove brought an instant smile to my face. There’s something truly magical about homemade snacks, and these Oven-Baked Beef Taquitos are no exception. With a crispy exterior and a savory filling that’s oh-so-satisfying, this recipe offers a healthier crunch without the mess of frying. Perfectly customizable to suit any palate—whether you’re craving something classic or looking to experiment with different fillings—these taquitos are an ideal choice for family dinners, parties, or even casual late-night munching. Who wouldn’t want a quick and delightful dish that’s both easy to make and loved by everyone? Ready to roll your way to a new favorite snack?
Why You’ll Crave These Taquitos?
Healthier Alternative: Enjoy the satisfaction of crispy taquitos without the guilt, thanks to the oven-baking method.
Customizable Fillings: From beef to veggies, personalize your filling to match your taste or dietary needs.
Crowd-Pleasing Snack: Perfect for game nights or family gatherings, these taquitos are sure to impress everyone.
Quick Preparation: With minimal prep time, you can whip these up for spontaneous cravings or planned events.
Easy Cleanup: Baking means no splatter or oil splash—just pop them in the oven and relax! Try pairing with fresh salsa or guacamole for a delightful serving experience.
Oven-Baked Beef Taquitos Ingredients
• Perfect for your next batch of crispy delights!
For the Filling
- Ground Beef – The heart of the taquitos, providing rich flavor; swap it with ground turkey for a lighter dish.
- Cumin – This spice adds warm depth to your filling; oregano can work in a pinch but offers a different flavor profile.
- Chili Powder – Adds a kick of spice; adjust based on your personal heat preference.
- Smoked Paprika – Infuses a delicious smokiness; use regular paprika if you can’t find the smoked version.
- Onion (finely chopped) – Creates a savory backbone for the filling; shallots make a nice substitute if desired.
- Garlic (minced) – Elevates the overall flavor; garlic powder can also serve as a quick alternative.
- Cheddar Cheese – Makes the mixture irresistibly creamy; try Monterey Jack for a melt-in-your-mouth experience.
For Assembly
- Tortillas (corn) – Holds it all together and provides that crunchy bite; feel free to use whole-wheat or gluten-free options.
- Olive Oil (for spraying) – Helps achieve that golden crispiness while baking; can be omitted for a lower-calorie version.
These Oven-Baked Beef Taquitos are not only a healthier alternative to frying but are also a fun way to engage in cooking, making them perfect for any occasion!
Step‑by‑Step Instructions for Oven-Baked Beef Taquitos
Step 1: Preheat Your Oven
Begin by preheating your oven to 425°F (220°C). This ensures that when the taquitos are placed inside, they can bake evenly, developing that perfect crispy exterior you crave. As the oven warms up, you’ll set the stage for a delightful cooking experience filled with the aromas of seasoned beef.
Step 2: Cook Beef Filling
In a large skillet over medium heat, add your ground beef along with finely chopped onion and minced garlic. Sauté for about 5-7 minutes until the beef is browned and cooked through, ensuring there’s no pink left. Next, stir in cumin, chili powder, and smoked paprika, mixing everything well for another minute to meld the flavors into the savory filling of your Oven-Baked Beef Taquitos.
Step 3: Assemble Taquitos
Take your corn tortillas and warm them briefly in a dry pan or microwave; this will make them pliable for rolling. Spoon a generous amount of the beef mixture onto the lower third of each tortilla, followed by a sprinkle of cheddar cheese. Carefully roll the tortillas tightly from bottom to top, securing the filling inside, and place the rolled taquitos seam side down on a baking sheet.
Step 4: Prepare for Baking
Arrange the rolled taquitos on the baking sheet, ensuring they have enough space between them. Use a light spray or brush of olive oil over the top of each taquito to promote that enticing golden color and crunchy texture. If you prefer a lower-calorie option, simply skip the oil for a healthier bake without sacrificing flavor.
Step 5: Bake to Perfection
Slide the baking sheet into the preheated oven and bake for about 20 minutes. Keep an eye on them; you want the taquitos to turn golden brown and crisp, indicative of that delightful crunch. As they bake, prepare yourself for the delicious aroma wafting through your kitchen.
Step 6: Serve with Love
Once baked, carefullyremove the Oven-Baked Beef Taquitos from the oven and let them cool for a few minutes before serving. This brief cooling time helps them to hold their shape. Pair them with your favorite dipping sauces like fresh salsa, guacamole, or sour cream for a well-rounded flavor experience everyone will love!
Oven-Baked Beef Taquitos: Variations & Substitutions
Feel free to get creative and personalize these delicious taquitos to match your taste buds or dietary needs!
- Vegetarian: Swap the beef for a mix of black beans, sautéed bell peppers, or even quinoa for a hearty filling.
- Spicy Kick: Add some diced jalapeños or a pinch of cayenne pepper for an extra heat boost that will awaken your senses.
- Different Cheeses: Experiment with flavors by using pepper jack or a blend of Mexican cheeses for a zesty twist.
- Whole Wheat Tortillas: Choose whole wheat or spinach tortillas for a wholesome twist while still enjoying that satisfying crunch.
- Savory Twist: Mix in some cooked corn or shredded carrots into the filling to add a bit of texture and sweetness.
- Creamy Avocado: Incorporate diced avocado in the filling for a rich and creamy texture that beautifully complements the crispy shell.
- Herb Infusion: Add fresh cilantro or chopped green onions to the filling for a burst of fresh flavor in every bite.
- BBQ Flavor: Drizzle some barbecue sauce in the filling for a fun twist reminiscent of BBQ pulled beef, a true crowd-pleaser!
For more inspiration, try filling your taquitos with flavorful ideas from our delicious Ricotta Beef Stuffed recipe or enjoy a comforting dish with our savory Parmesan Garlic Beef. Happy cooking!
Expert Tips for Oven-Baked Beef Taquitos
- Warm Tortillas First: Gently heat your tortillas before filling to prevent cracking while rolling. This small step makes assembling your oven-baked beef taquitos a breeze.
- Fill Just Right: Avoid overstuffing your taquitos—too much filling can cause them to burst in the oven. Keep fillings to a sensible amount for perfect crunch.
- Use Parchment Paper: Line your baking sheet with parchment paper for easy cleanup and to prevent the taquitos from sticking. It’s a win-win!
- Crispy Finish: For an extra crunch, consider broiling the taquitos for the last 2-3 minutes of baking. Just keep a close watch to avoid burning!
- Storage Tips: If you have leftovers, store your baked taquitos in an airtight container in the fridge for up to 3 days. Reheat in the oven to restore crispness.
Make Ahead Options
These Oven-Baked Beef Taquitos are truly perfect for meal prep enthusiasts! You can prepare the beef filling up to 3 days in advance; simply cook the beef mixture, cool it completely, and store it in an airtight container in the refrigerator. You can also assemble the taquitos and refrigerate them for up to 24 hours before baking. To maintain their crispy texture, be sure to lightly spray them with olive oil just before baking. When you’re ready to enjoy, preheat the oven and bake for about 20 minutes until golden brown and crispy—perfectly delicious and hassle-free for busy weeknights!
What to Serve with Oven-Baked Beef Taquitos?
Enhancing your taquito experience can elevate it from a simple snack to a memorable meal. Let’s explore mouthwatering accompaniments that perfectly balance flavors and textures.
-
Fresh Salsa: Bright, tangy, and bursting with flavor, homemade salsa complements the crispy taquitos beautifully. It adds a refreshing bite that contrasts with the savory filling.
-
Guacamole: Creamy and rich, this avocado-based dip adds a luscious texture that pairs perfectly with the crunchy taquitos. Each bite becomes an indulgent experience!
-
Sour Cream: A classic choice, sour cream offers a cool and creamy contrast to the warmth of the taquitos. This combo creates a delightful harmony of flavors.
-
Queso Dip: For cheese lovers, creamy queso dip creates an irresistible dip for your taquitos. Its gooey texture and warm spices enhance the overall indulgence.
-
Mexican Street Corn Salad: With its sweet corn, lime, and cotija cheese, this colorful salad adds a fresh, zesty element that pairs wonderfully with the beefy goodness.
-
Pico de Gallo: A vibrant mix of tomatoes, onions, and peppers, pico de gallo offers a fresh crunch that complements the richness of the taquitos while adding a lively flavor profile.
-
Margaritas: For a drink pairing, a classic margarita brings brightness with its citrusy notes, enhancing the meal’s festive atmosphere. Perfect for any gathering!
-
Churros: Finish off your meal with a sweet touch by serving churros. Their cinnamon-sugar coating provides a delightful contrast to the savory taquitos, making for a well-rounded experience.
How to Store and Freeze Oven-Baked Beef Taquitos
Fridge: Store leftover taquitos in an airtight container for up to 3 days to maintain their flavor and texture.
Freezer: For longer storage, freeze the taquitos in a single layer on a baking sheet until solid, then transfer to a freezer bag for up to 3 months.
Reheating: To reheat, place the taquitos in a preheated oven at 375°F (190°C) for about 10-15 minutes, ensuring they regain their crispy exterior.
Make-Ahead Tips: Prepare the filling and wrap the taquitos ahead of time; store them in the fridge for up to 24 hours before baking for a quick, delicious meal!

Oven-Baked Beef Taquitos Recipe FAQs
What type of beef should I use for the filling?
Absolutely! Ground beef is the classic choice, but you can substitute it with ground turkey or chicken for a lighter option. Use lean cuts to minimize excess grease for an even healthier meal.
How should I store leftover taquitos?
To keep your leftover taquitos fresh, store them in an airtight container in the fridge for up to 3 days. Make sure they are completely cooled before sealing them to avoid sogginess!
Can I freeze Oven-Baked Beef Taquitos?
Yes! To freeze, arrange your baked taquitos in a single layer on a baking sheet and place them in the freezer until they’re firm. Then, transfer them to a freezer bag or container, where they’ll stay good for up to 3 months. When you’re ready to enjoy them, just reheat in the oven until crispy.
What’s the best way to reheat taquitos without losing their crunch?
For the best results, preheat your oven to 375°F (190°C) and reheat the taquitos for about 10-15 minutes. This will help them regain their delicious crispy exterior while ensuring the filling is warmed through.
Can I make these taquitos vegetarian?
Very! You can easily substitute the beef filling with beans, sautéed vegetables, or quinoa. This keeps the dish hearty and satisfying while catering to vegetarian diets. Feel free to get creative with spices to enhance the flavors!
How do I know if the beef is cooked through?
As a rule of thumb, ground beef should be cooked to an internal temperature of 160°F (71°C). You’ll know it’s ready when it’s no longer pink and crumbles easily. Use a meat thermometer for an accurate reading, or cut into a piece to check for any pink before moving on to assembling the taquitos.
Crispy Oven-Baked Beef Taquitos for Perfect Party Snacks
Ingredients
Equipment
Method
- Preheat your oven to 425°F (220°C).
- In a large skillet over medium heat, add your ground beef along with finely chopped onion and minced garlic. Sauté for about 5-7 minutes until the beef is browned and cooked through.
- Stir in cumin, chili powder, and smoked paprika, mixing for another minute to meld the flavors.
- Warm the corn tortillas briefly in a dry pan or microwave. Spoon a generous amount of the beef mixture onto the lower third of each tortilla. Sprinkle with cheddar cheese and roll tightly.
- Arrange the rolled taquitos seam side down on a baking sheet and spray lightly with olive oil.
- Bake for about 20 minutes until golden brown and crisp.
- Let them cool for a few minutes before serving with your favorite dipping sauces.
Leave a Reply