
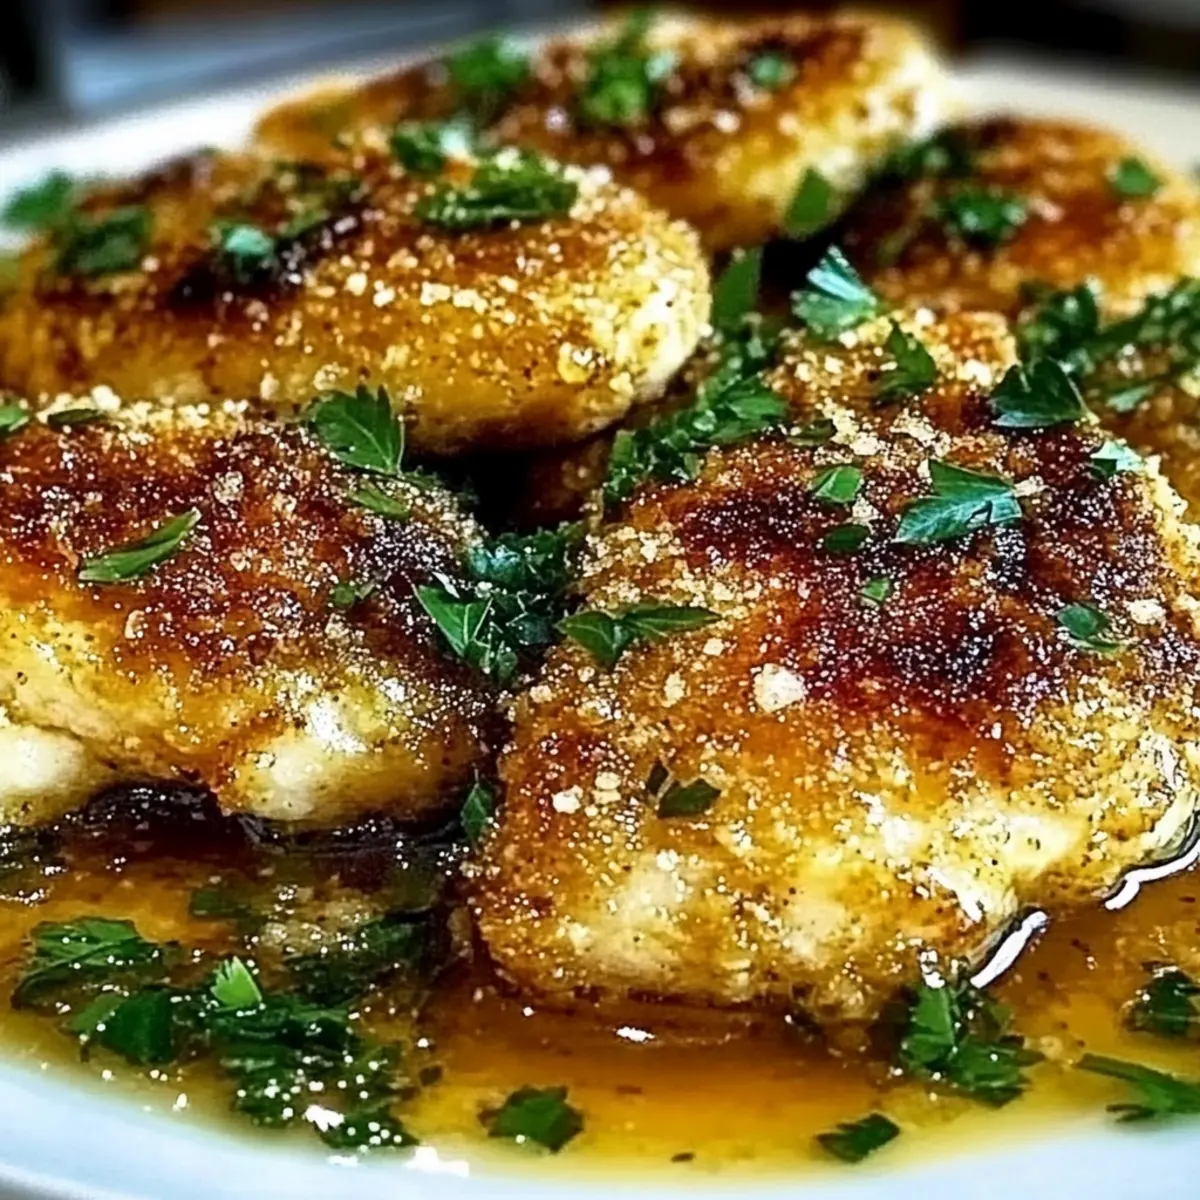
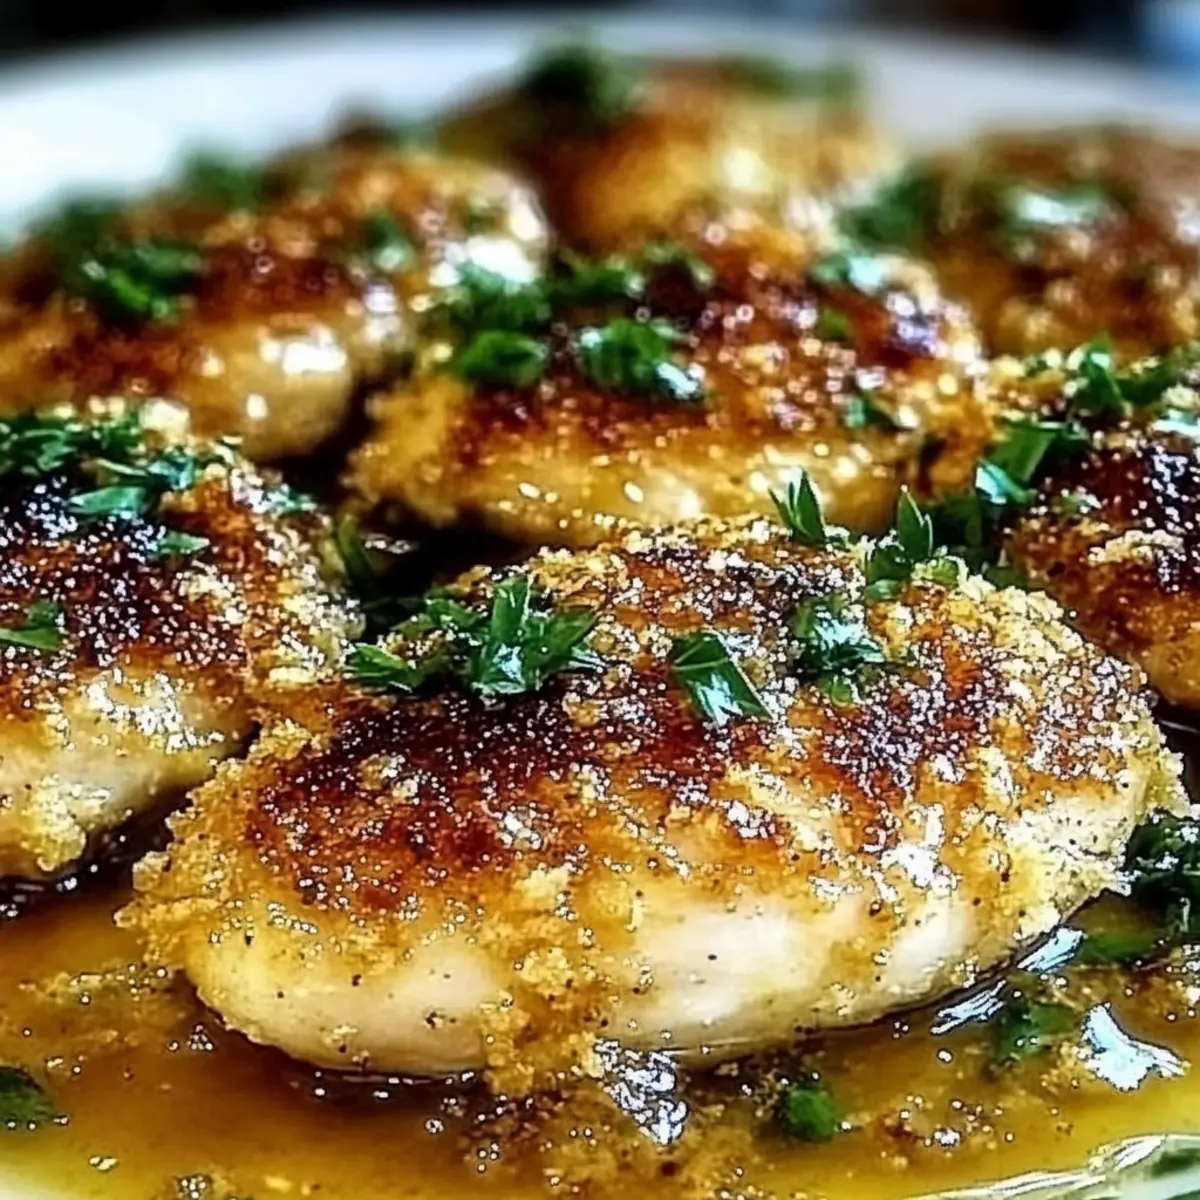
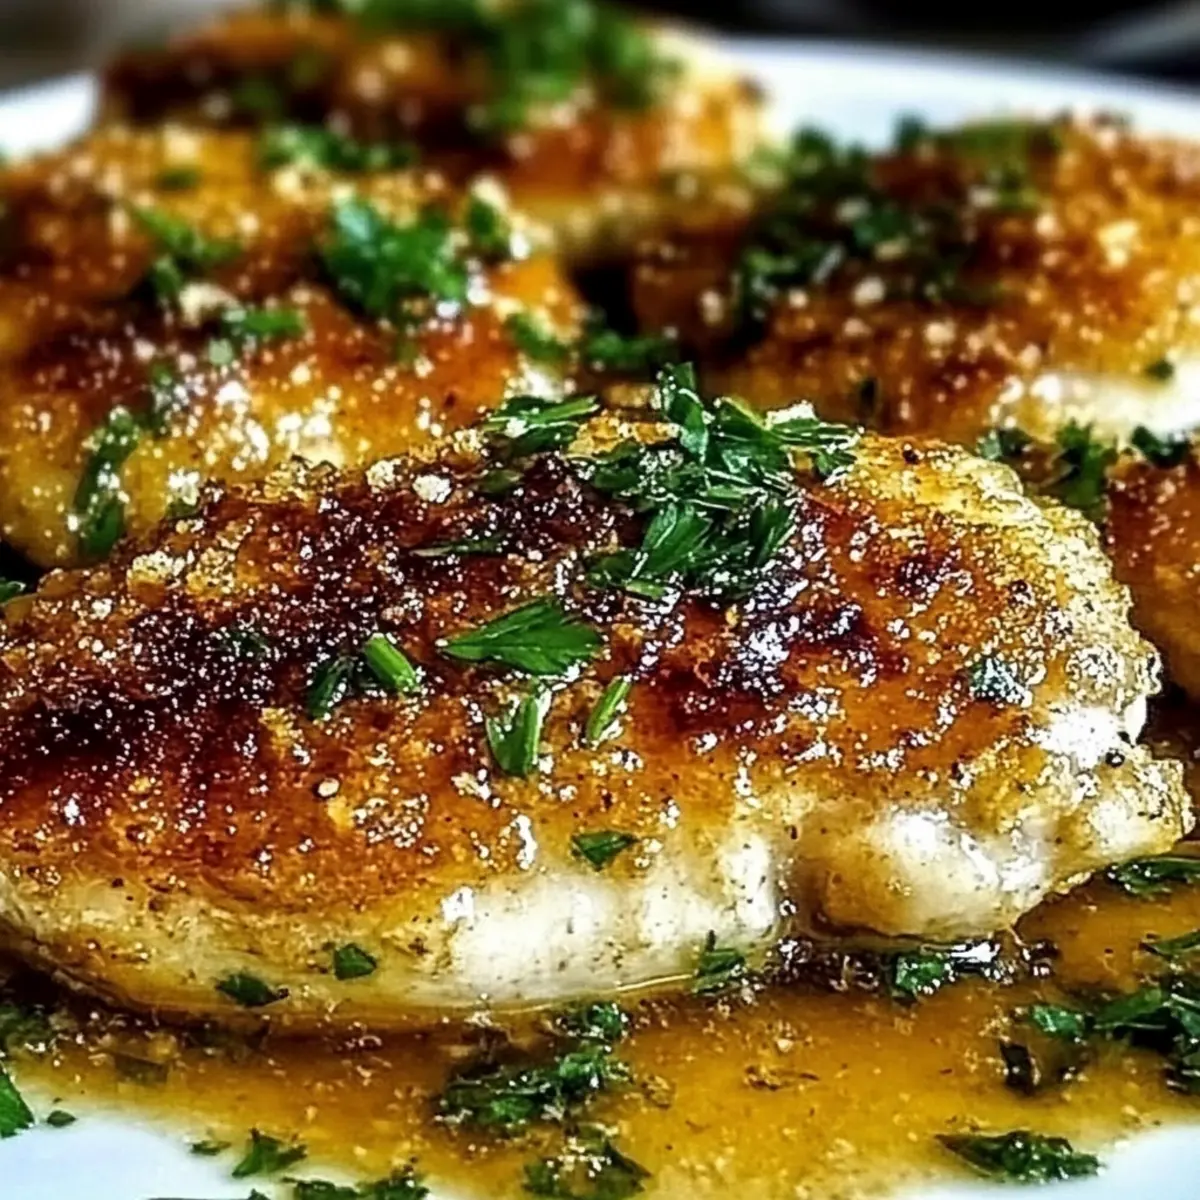
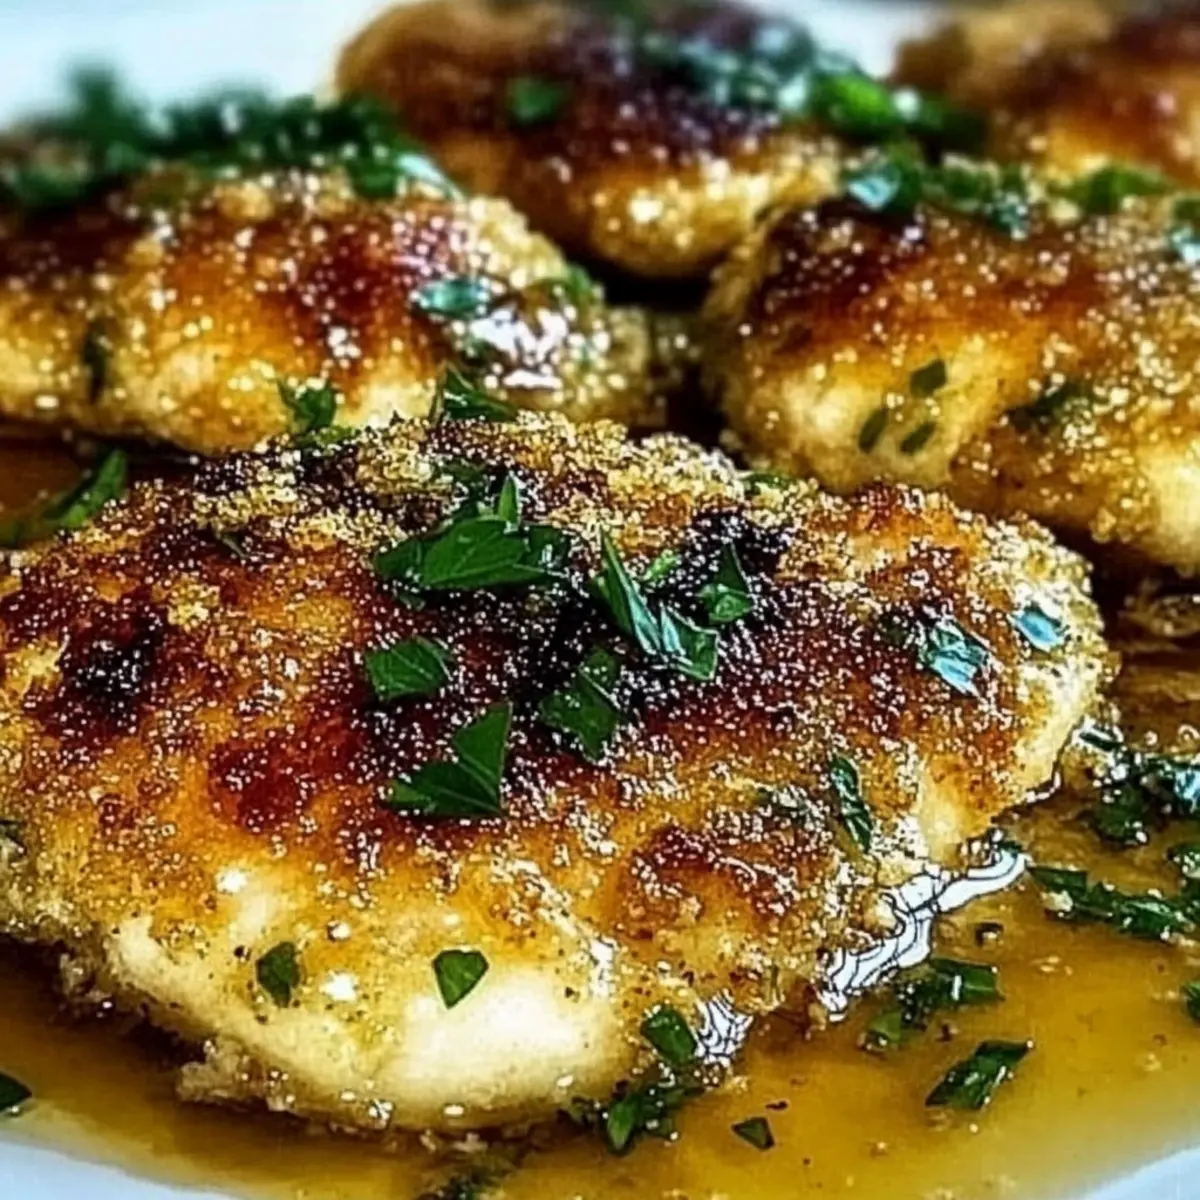
Once, while wandering through the charming streets of Italy, I stumbled upon a dish that captivated my senses—a crunchy, golden chicken slathered in a luscious garlic butter sauce. The irresistible Crispy Italian Chicken Christopher with Garlic Butter Sauce is my homage to that enchanting moment. Not only is this recipe family-friendly and quick to whip up, but it also brings a delightful crunch and mouth-watering flavor to the dinner table. Imagine serving up golden chicken, succulent in the center with an added burst of garlicky goodness—perfect for satisfying even the pickiest eaters. Whether you’re a passionate home-chef or simply craving a tasty homemade meal, this dish is sure to become a staple in your kitchen. Are you ready to dive into this culinary adventure and impress your loved ones?
Why is this chicken recipe a must-try?
Crispy Texture: Each bite of the Crispy Italian Chicken Christopher offers an addictive crunch that you won’t be able to resist.
Luscious Garlic Butter Sauce: Drizzled generously with a rich garlic butter sauce, this dish transforms an ordinary dinner into a gourmet experience.
Quick Prep Time: In just under an hour, you can create a mouthwatering meal that feels a lot more elaborate than it actually is, making it perfect for busy weeknights.
Family Favorite: The combination of crispy chicken and savory sauce is bound to satisfy even the fussiest eaters, turning mealtime into a joyous occasion.
For a delightful side, consider pairing it with fresh ingredients found in recipes like Lemon Garlic Butter Cod Bowls or serve it alongside a hearty pasta dish!
Italian Chicken Christopher Ingredients
• Discover what makes this dish irresistible!
For the Chicken Coating
- Boneless, Skinless Chicken Breasts – Opt for fresh to achieve that ideal tenderness.
- All-Purpose Flour – Provides a base coating for a perfect crunch; gluten-free flour works too!
- Large Eggs – Helps bind the coating; free-range or organic offers richer flavor.
- Bread Crumbs (Italian-style) – Key for crunch and flavor; substitute panko for extra crispiness!
- Garlic Powder – Infuses the breading with savory hints; fresh minced garlic intensifies the taste.
- Salt – Enhances flavor; feel free to use a low-sodium option if desired.
- Black Pepper – Adds a mild heat; freshly ground pepper elevates the dish’s flavor.
- Grated Parmesan Cheese – Offers savory depth; nutritional yeast is great for a vegan swap.
For the Garlic Butter Sauce
- Unsalted Butter – Forms the base of a rich garlic butter sauce; use olive oil for a dairy-free version.
- Minced Garlic – The star flavor; fresh garlic is always the better choice for maximum aroma.
- Lemon – Adds the perfect zest and acidity to enhance the sauce; both zest and juice are recommended.
For Garnishing
- Fresh Parsley (optional) – Lightens the dish visually; substitute basil for a different herb flair!
Step‑by‑Step Instructions for Crispy Italian Chicken Christopher with Garlic Butter Sauce
Step 1: Preheat Oven
Begin your culinary adventure by preheating your oven to 400°F (200°C). This ensures that your Crispy Italian Chicken Christopher bakes evenly, achieving that glorious golden-brown crust. While the oven heats, gather your ingredients and get ready for the delicious process ahead.
Step 2: Prepare Chicken
Take your boneless, skinless chicken breasts and pat them dry with paper towels. This step is crucial as it helps the coating adhere better, ensuring that each piece turns out crispy and flavorful. Place the chicken aside as you set up your breading station.
Step 3: Set Up Breading Station
In three shallow dishes, create your breading station. Fill the first dish with all-purpose flour, the second with whisked eggs, and the third with a mixture of Italian-style breadcrumbs, garlic powder, salt, pepper, and grated Parmesan cheese. This setup will make the coating process smooth and efficient.
Step 4: Coat Chicken
Start by dredging each chicken breast in the flour, coating it evenly. Next, dip the floured chicken into the egg mixture, allowing any excess to drip off. Finally, press the chicken into the breadcrumb mixture until it’s fully coated and the crumbs adhere well, ready to bring a delightful crunch to your Crispy Italian Chicken Christopher.
Step 5: Bake Chicken
Line a baking sheet with parchment paper and arrange the coated chicken breasts on it, ensuring they are spaced apart for even cooking. Bake in the preheated oven for 25-30 minutes. Look for a golden brown color and an internal temperature of 165°F (75°C) to confirm they are cooked through and juicy.
Step 6: Make Garlic Butter Sauce
While the chicken is baking, melt unsalted butter in a small saucepan over medium heat. Add minced garlic and sauté for about 1-2 minutes, or until fragrant but not browned. Remove the saucepan from the heat, then stir in lemon juice and zest to create a luscious garlic butter sauce that enhances your Crispy Italian Chicken Christopher.
Step 7: Serve Chicken
Once baked to perfection, remove the chicken from the oven and place it on serving plates. Drizzle the warm garlic butter sauce generously over each piece, and if desired, garnish with fresh parsley for a burst of color and extra flavor. Serve your delicious Crispy Italian Chicken Christopher with lemon wedges on the side, and enjoy the home-cooked goodness!
Expert Tips for Crispy Italian Chicken
-
Pat Dry First: Ensure chicken breasts are thoroughly dried before coating to help the breading stick and achieve a perfectly crispy Italian Chicken Christopher.
-
Monitor Garlic Closely: While sautéing the minced garlic for the butter sauce, watch it carefully; garlic can burn quickly, turning bitter and adversely affecting your dish’s flavor.
-
Use a Meat Thermometer: To guarantee juicy chicken, check the internal temperature—it should reach 165°F (75°C). This prevents overcooking while ensuring a tender bite.
-
Breadcrumb Variations: Experiment with breadcrumb types for a unique crunch. Panko gives an extra crispiness, whereas homemade breadcrumbs can add freshness to your Italian Chicken Christopher.
-
Serve Hot: For the best experience, serve immediately after drizzling the garlic butter sauce—this way, you capture that delicious, rich essence and crispy texture.
Variations of Italian Chicken Christopher
Feel free to get creative and customize this delicious dish to suit your taste buds!
-
Gluten-Free: Substitute all-purpose flour and breadcrumbs with gluten-free alternatives for a delightful twist that everyone can enjoy.
-
Dairy-Free: Use olive oil in place of butter to create a rich garlic sauce, ensuring a scrumptious meal for those avoiding dairy.
-
Vegetarian Delight: Replace chicken with thinly sliced eggplant or zucchini for a heartwarming vegetarian version that still delivers on flavor and crunch.
-
Spicy Upgrade: Add a pinch of red pepper flakes to the breadcrumb mixture or drizzle sriracha over the dish for a fun kick to the classic recipe!
-
Herb-Infused: Experiment with fresh herbs such as basil or oregano mixed into the breadcrumbs for an added layer of aromatic flavor that elevates the dish.
-
Extra Crunch: Switch to panko breadcrumbs for an even crispier texture, or consider mixing in crushed nuts for unexpected crunch and flavor!
-
Flavorful Marinade: Marinate the chicken in lemon juice, garlic, and herbs for at least an hour before coating to infuse each bite with vibrant flavors.
For more delicious ideas, consider pairing this dish with a zesty side like Lemon Garlic Butter Cod Bowls or enjoy the hearty flavors found in Cowboy Butter Chicken for a complete meal experience!
Make Ahead Options
These Crispy Italian Chicken Christopher with Garlic Butter Sauce are perfect for busy weeknights and meal prep enthusiasts! You can bread the chicken up to 24 hours in advance; simply coat the chicken as instructed, then cover and refrigerate until you’re ready to bake. The garlic butter sauce can also be prepared up to 3 days ahead; store it in an airtight container in the fridge. When you’re ready to serve, simply bake the chicken directly from the fridge for about 30-35 minutes, adding an extra few minutes if it’s cold, then warm the garlic butter sauce on the stove just before drizzling. This way, you’ll enjoy restaurant-quality results with minimal effort, and your chicken will be just as delicious and crispy!
How to Store and Freeze Italian Chicken Christopher
Fridge: Store leftover Italian Chicken Christopher in an airtight container for up to 3 days. Reheat in the oven to keep it crispy.
Freezer: To freeze, wrap each chicken piece tightly in plastic wrap, then place in a freezer bag. It can be frozen for up to 3 months—perfect for enjoying later!
Reheating: When ready to serve, thaw in the fridge overnight, then bake at 350°F (175°C) for about 15 minutes to restore its crispy texture.
Tip: If possible, store the garlic butter sauce separately to maintain its freshness and flavor!
What to Serve with Crispy Italian Chicken Christopher?
Elevate your dinner table by pairing delicious, crispy flavors with fresh, complementary sides that enhance every bite.
- Garlic Bread: The perfect vessel for that delectable garlic butter sauce, enhancing the meal with a comforting crunch.
- Caesar Salad: Crisp romaine and zesty dressing contrast beautifully with the chicken’s savory richness, bringing a fresh pop.
- Roasted Vegetables: A colorful medley of seasonal veggies adds earthy flavors and vibrant colors, balancing the dish.
- Lemon Risotto: Creamy and lemony, this dish mirrors the bright notes in the chicken’s sauce and adds a luxurious touch.
- Pasta Aglio e Olio: Simple spaghetti with garlic and olive oil complements the chicken’s flavors splendidly, creating a satisfying meal.
- Sautéed Spinach: Lightly sautéed with garlic, this side provides a nutritious burst of greens, enhancing the overall experience.
- Cold Glass of Prosecco: A bubbly drink that cuts through the richness of the chicken, making for an elegant, Italian-inspired pairing.
- Tiramisu for Dessert: Complete your meal with this classic dessert, which offers coffee-infused sweetness—an indulgent finish to your dining experience.
Crispy Italian Chicken Christopher with Garlic Butter Sauce Recipe FAQs
How do I choose the best chicken for this recipe?
Absolutely! When selecting chicken breasts, look for boneless and skinless pieces that are fresh with a pinkish hue and no dark spots. The fresher the chicken, the better the flavor and tenderness will be in your Crispy Italian Chicken Christopher.
How should I store leftovers?
After enjoying your meal, store any leftover Crispy Italian Chicken in an airtight container in the refrigerator for up to 3 days. Ensure it’s completely cooled before storing to maintain freshness.
Can I freeze the Crispy Italian Chicken Christopher?
Yes, you can! To freeze, individually wrap each chicken piece in plastic wrap, then place them in a freezer bag. This method keeps them fresh for up to 3 months. When you’re ready to enjoy, thaw in the fridge overnight, then reheat in the oven at 350°F (175°C) for about 15 minutes to regain that crispy texture.
What should I do if my chicken doesn’t get crispy?
Very often, a lack of crispiness can be due to moisture. Ensure your chicken breasts are properly dried before breading, and after coating, let them sit for a few minutes before baking. This resting period helps the breading adhere better. Also, make sure your oven is preheated, as this is crucial for achieving that golden crunch!
Are there any dietary considerations for this recipe?
Absolutely! If you’re cooking for someone with gluten sensitivities, try substituting the all-purpose flour and Italian-style breadcrumbs with gluten-free options. Additionally, the garlic butter sauce can be made dairy-free by using olive oil instead of butter. Always check ingredient labels to avoid allergens.
Can I use frozen chicken breasts for this recipe?
Certainly! If you’re using frozen chicken breasts, it’s best to thaw them in the refrigerator overnight before cooking. Additionally, pat them dry thoroughly before proceeding with the breading process for optimal adherence and crunch in your Crispy Italian Chicken Christopher.
Crispy Italian Chicken Christopher with Garlic Butter Bliss
Ingredients
Equipment
Method
- Preheat your oven to 400°F (200°C).
- Pat the chicken breasts dry with paper towels.
- Set up your breading station with flour, whisked eggs, and breadcrumb mixture.
- Dredge each chicken breast in flour, dip in egg, then coat in breadcrumbs.
- Arrange coated chicken breasts on a lined baking sheet and bake for 25-30 minutes.
- Melt butter in a saucepan, sauté minced garlic, then add lemon juice and zest.
- Serve chicken with garlic butter sauce drizzled on top and garnish with parsley.
Leave a Reply