
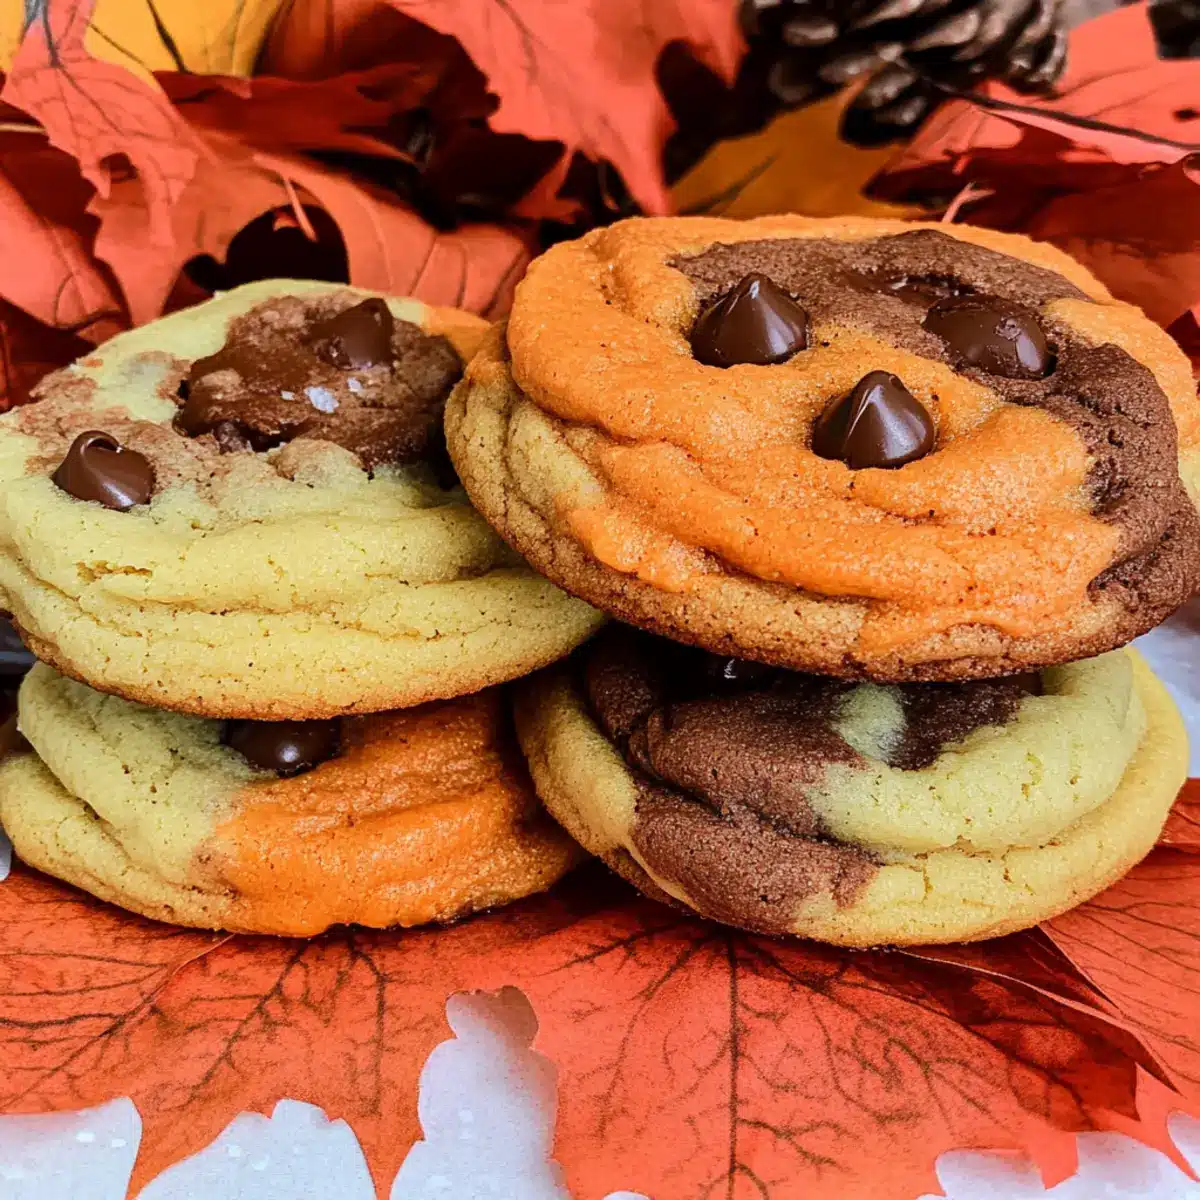
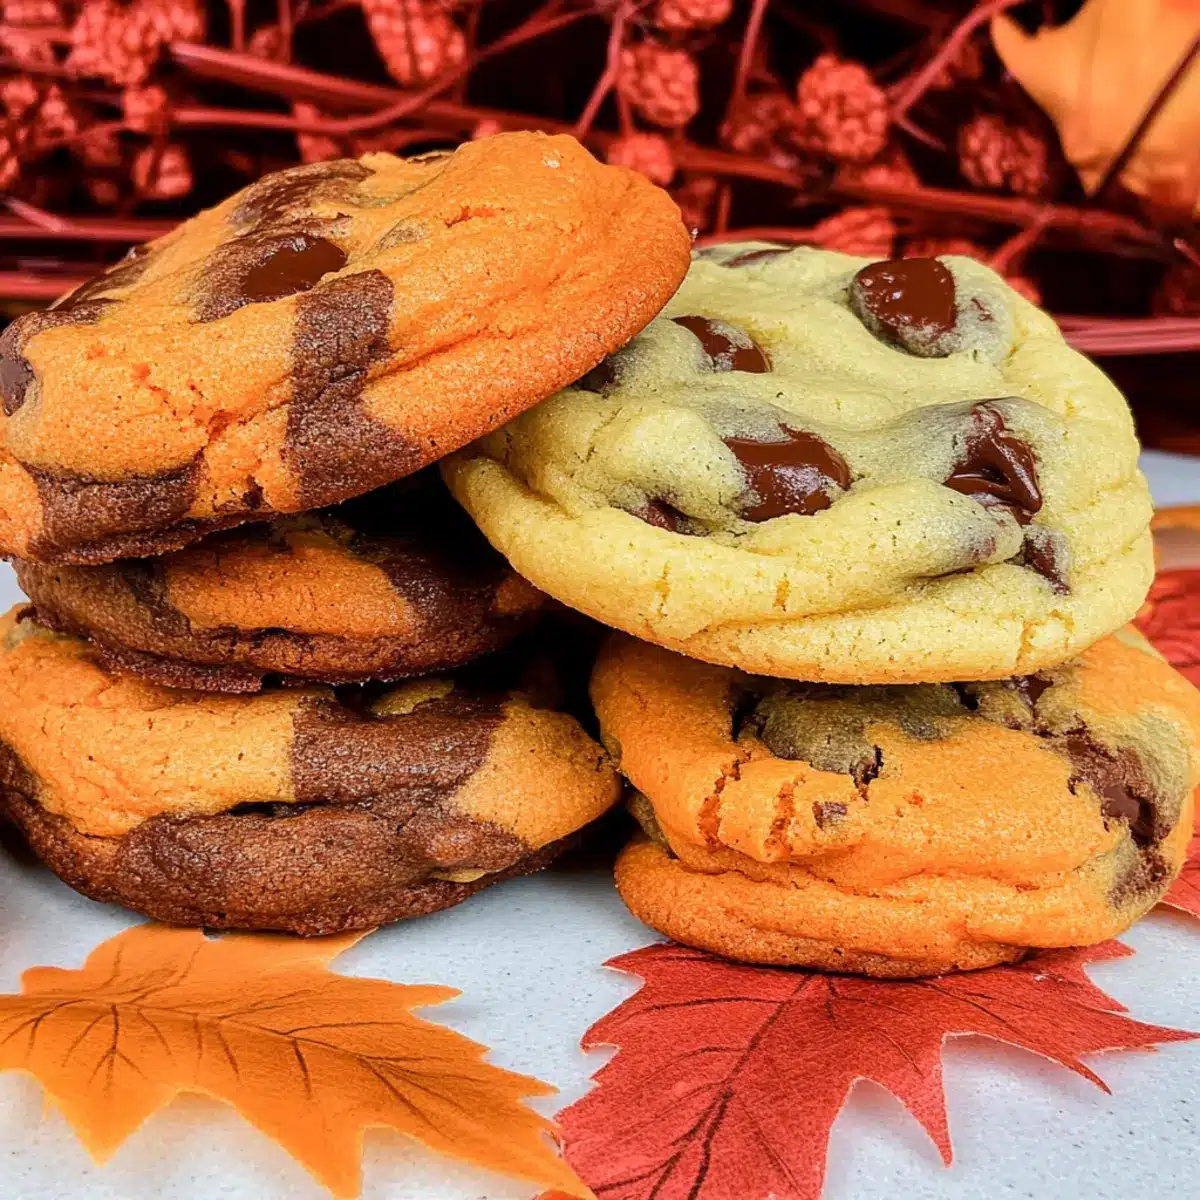
With the first crisp breeze of autumn nipping at my nose, I find myself craving warm, comforting flavors that evoke the spirit of the season. Enter the Harvest Marble Chocolate Chip Cookies—these delightful bites are a whimsical twist on a classic that’s perfect for cozy evenings or festive gatherings. Veined in stunning hues of orange and brown, these cookies invite you to embrace fall’s colorful bounty while delivering that satisfying chewy texture we all adore. They’re not just visually striking; they’re oh-so-simple to whip up, making them a go-to for any home chef looking to uplift their dessert game. Whether you’re enjoying them fresh out of the oven or sharing them at Thanksgiving, these cookies are bound to be a hit. What flavor masterpiece will you create while baking your batch?
Why Are These Cookies So Special?
Visual Appeal: Bursting with autumn colors, these cookies are a feast for the eyes, perfect for festive gatherings.
Easy to Make: With straightforward steps, even novice bakers can enjoy success in the kitchen!
Deliciously Chewy: Soft, chewy texture balances beautifully with the crunchy edges, creating a delightful bite.
Family Favorite: Perfect for everyone, whether paired with warm apple cider or served as a sweet ending to Thanksgiving dinner.
Versatile Variations: Feel free to brighten up the flavors by adding nuts or swapping chocolate chips for white chocolate! Don’t forget to check out our recipe for Chewy Pumpkin Chocolate cookies for a seasonal twist.
Harvest Marble Chocolate Chip Cookies Ingredients
For the Dough
- Butter – 1 cup, softened to room temperature; it’s essential for moisture and richness.
- Granulated Sugar – 1 cup; provides sweetness, but can be swapped with coconut sugar for a deeper caramel flavor.
- Brown Sugar – ½ cup; adds moisture with a hint of molasses flavor—light or dark can be used interchangeably.
- Eggs – 2 large; crucial for structure and richness—room temperature is best for blending.
- Vanilla Extract – 2 teaspoons; contributes a lovely sweet flavor—use pure vanilla for the finest results.
- Baking Soda – 1 teaspoon; this leavening agent helps your cookies rise perfectly.
- Salt – ½ teaspoon; enhances sweetness and balances overall flavors.
- All-Purpose Flour – 2¾ cups; provides structure—substitute with a 1-to-1 gluten-free flour blend for a gluten-free version.
For the Chocolate
- Nestle Toll House Chocolate Chips – 1 bag (approximately 2 cups); offers melty chocolate bits in every delicious bite.
For Coloring
- Food Coloring – Use orange and brown; for vibrant fall colors, you can easily create a festive marbled effect!
Step‑by‑Step Instructions for Harvest Marble Chocolate Chip Cookies
Step 1: Cream Ingredients
In a large mixing bowl, combine 1 cup of softened butter, 1 cup of granulated sugar, and ½ cup of brown sugar. Using an electric mixer, beat the mixture on medium speed for 2-3 minutes until it becomes light and fluffy. This process helps to incorporate air into the dough, resulting in a softer cookie.
Step 2: Add Wet Ingredients
Next, add 2 large room-temperature eggs and 2 teaspoons of vanilla extract to your creamed mixture. Beat the ingredients together for an additional 2-3 minutes until everything is well combined and has a smooth consistency. This step ensures that the wet ingredients will blend seamlessly into the dry components of your Harvest Marble Chocolate Chip Cookies.
Step 3: Combine Dry Ingredients
In a separate bowl, whisk together 2¾ cups of all-purpose flour, 1 teaspoon of baking soda, and ½ teaspoon of salt. Gradually add this dry mixture to your wet ingredients while mixing on low speed. Stop mixing just as the flour disappears; over-mixing can lead to tougher cookies. The dough should look slightly crumbly but hold together when pressed.
Step 4: Divide Dough
Once combined, turn the cookie dough onto a lightly floured surface. Divide the dough into three equal portions. Carefully shape each portion into a ball; this will allow for even coloring and easier marbling in the next steps.
Step 5: Color Dough
In two of the divided portions, add food coloring—one portion with brown and the other with orange. Mix the colors in thoroughly until you achieve a vibrant hue. Then, fold ⅓ of the chocolate chips into each colored dough ball, ensuring that every cookie gets the rich flavor of chocolate.
Step 6: Form Cookies
Using a kitchen scale, weigh each dough ball into 2 oz. portions. Take pieces of each colored dough and gently press them together to create a marbled effect. Roll them into smooth balls and place them on a parchment-lined cookie sheet, ensuring they have space to spread as they bake.
Step 7: Bake
Preheat your oven to 375°F. Slightly flatten each cookie ball before placing them in the oven to ensure they bake evenly. Bake for 8-10 minutes or until the edges are golden brown and the centers appear set but soft. Keep an eye on them, as baking time can vary depending on your oven.

How to Store and Freeze Harvest Marble Chocolate Chip Cookies
Room Temperature: Keep your cookies in an airtight container at room temperature for up to 1 week, ensuring they stay soft and chewy.
Fridge: If you prefer a firmer texture, store them in the fridge for up to 2 weeks in an airtight container.
Freezer: For longer storage, freeze the cookies for up to 3 months. Place them in a freezer-safe bag and separate with parchment paper to prevent sticking.
Reheating: To enjoy your Harvest Marble Chocolate Chip Cookies warm, pop them in the microwave for about 10-15 seconds, or reheat them in a 350°F oven for 5 minutes.
Harvest Marble Chocolate Chip Cookies Variations
Feel free to get creative and customize these cookies to suit your taste and mood!
-
Add Nuts: Incorporate chopped walnuts or pecans for a delightful crunch that complements the chewy cookie texture. The nuttiness adds a rich layer of flavor, making every bite even more satisfying.
-
White Chocolate Twist: Substitute a portion of chocolate chips with white chocolate for a sweet flavor contrast. This brightens the cookies while maintaining a delightful chewiness in each bite.
-
Dried Cranberries: Mix in dried cranberries for a fruity burst of flavor that pairs beautifully with the chocolate. Their tartness adds a festive touch, perfect for holiday gatherings.
-
Pumpkin Spice: Infuse the dough with a teaspoon of pumpkin spice for warm, autumnal notes. This creates an inviting aroma that transports you straight into fall festivities.
-
Chili Chocolate Cookies: For a spicy kick, add a pinch of cayenne pepper or chili powder to the dough. It’s a surprising twist that really elevates the chocolate flavor and warms your palate.
-
Gluten-Free Option: Use a 1-to-1 gluten-free flour blend to cater to gluten-sensitive bakers. This substitution keeps the same beloved texture while ensuring everyone can join in on the treat.
-
Mini Muffin Version: Transform the cookie dough into mini muffin bites! Simply bake at 350°F for 12-15 minutes in a greased mini muffin pan, creating soft, chewy treats that are perfect for lunchboxes.
-
Pairing Suggestions: Enjoy these cookies fresh with a warm cup of apple cider, or serve them alongside a scoop of creamy vanilla ice cream. For another delicious dessert idea, don’t miss out on our scrumptious recipes for Chocolate Chip Cookies or Dark Chocolate Quinoa Crisps.
Embrace the joy of baking and let your unique flavors shine!
Make Ahead Options
These Harvest Marble Chocolate Chip Cookies are a fantastic choice for meal prep! You can prepare the cookie dough up to 24 hours in advance by following the initial steps and then refrigerating the wrapped dough. To maintain quality, make sure to cover it tightly with plastic wrap to prevent drying. Alternatively, you can freeze the formed cookie balls for up to 3 months. When you’re ready to bake, simply place your frozen dough on a baking sheet and add an extra minute or two to the baking time. This allows you to enjoy freshly baked cookies anytime with minimal effort—perfect for busy weeknights or last-minute entertaining!
What to Serve with Harvest Marble Chocolate Chip Cookies
Bring the warmth of autumn to your table with delightful pairings that enhance the joy of your baking!
-
Warm Apple Cider: Sipping on spiced apple cider creates a cozy atmosphere, complementing the sweet autumn flavors in your cookies.
-
Vanilla Ice Cream: A scoop of creamy vanilla ice cream on the side adds a rich contrast to the soft, chewy cookies, making each bite heavenly.
-
Pumpkin Spice Latte: The warm spices and creamy texture of a pumpkin spice latte echo the fall theme perfectly while enhancing the cookies’ vibrant flavors.
-
Charcuterie Board: Assemble a harvest-themed charcuterie board of cheeses, nuts, and fruits for a charming accompaniment that invites sharing and exploration.
-
Cranberry Sauce: A dollop of tangy cranberry sauce provides a delightful contrast, enhancing the sweetness of the cookies while adding that festive touch.
-
Chai Tea: Steeped in warming spices, chai tea nurtures the senses and pairs beautifully with cookies, making it the perfect treat on a chilly day.
-
Chocolate Milk: Indulge your sweet tooth even further by pairing these cookies with a glass of rich chocolate milk, ensuring a fun, nostalgic experience.
The heartwarming flavors and textures from these pairings will surely create memorable moments for you and your loved ones.
Expert Tips for Harvest Marble Chocolate Chip Cookies
-
Avoid Over-Mixing: When you add flour, mix just until combined. Over-mixing can lead to tough cookies instead of the soft, chewy texture we love.
-
Room Temperature Eggs: Make sure your eggs are at room temperature before mixing. This ensures better incorporation into the dough for optimal flavor.
-
Coloring Caution: Use gel or paste food coloring for vibrant hues without adding too much liquid, keeping your cookie dough at the right consistency.
-
Perfect Baking Time: Ovens can vary, so start checking your cookies at 8 minutes. Look for golden edges and soft centers—they’ll continue to set while cooling.
-
Quality Chocolate Chips: Invest in high-quality chocolate chips for richer flavor. They’ll elevate your Harvest Marble Chocolate Chip Cookies to the next level!

Harvest Marble Chocolate Chip Cookies Recipe FAQs
What is the best way to select ripe ingredients for this recipe?
Absolutely! When choosing butter, opt for unsalted and ensure it’s at room temperature for a perfect cream texture. For the eggs, select large, fresh ones—look for a good weight and no cracks. For sugar, make sure the granulated and brown sugars are fresh and not clumped. This ensures your cookies turn out delightful and consistent!
How should I store my Harvest Marble Chocolate Chip Cookies?
To keep your cookies at their best, store them in an airtight container at room temperature for up to 1 week. If you’re in a warmer climate, consider refrigerating them; they can last up to 2 weeks in the fridge while maintaining a firmer texture!
Can I freeze Harvest Marble Chocolate Chip Cookies?
Yes, you can freeze them! To freeze, place your cookies in a single layer on a baking sheet and freeze until solid. Then, transfer them to a freezer-safe bag, separating layers with parchment paper to avoid sticking. They can be stored frozen for up to 3 months. When you’re ready to enjoy, just thaw at room temperature for a bit or warm them in the oven at 350°F for 5 minutes.
What if my cookies don’t rise properly?
Worry not! If your cookies aren’t rising, it could be due to expired baking soda. Double-check that your baking soda is fresh—there’s an easy test: mix a teaspoon with vinegar; it should fizz! Also, ensure you’re not over-mixing the dough after adding the flour, which can result in dense cookies. Just mix until ingredients are combined!
Are there any dietary considerations for these cookies?
Very! The recipe is quite adaptable; for a gluten-free version, substitute the all-purpose flour with a 1-to-1 gluten-free flour blend. If you have allergies or dietary restrictions, be cautious with the chocolate chips—choose brands that are dairy-free if needed. And of course, keep them away from any pets, as chocolate is not safe for them!
What can I do with leftover dough?
I recommend portioning any leftover dough into balls and freezing them for a later baking session! Just place them on a baking sheet until frozen, then transfer them to a freezer-safe bag. You can bake them straight from the freezer; just add a minute or two to the baking time. Enjoy freshly baked cookies anytime!
Harvest Marble Chocolate Chip Cookies for a Festive Fall Treat
Ingredients
Equipment
Method
- In a large mixing bowl, combine 1 cup of softened butter, 1 cup of granulated sugar, and ½ cup of brown sugar. Beat on medium speed for 2-3 minutes until light and fluffy.
- Add 2 large room-temperature eggs and 2 teaspoons of vanilla extract. Beat together for an additional 2-3 minutes until well combined.
- In a separate bowl, whisk together 2¾ cups of all-purpose flour, 1 teaspoon of baking soda, and ½ teaspoon of salt. Gradually add to the wet ingredients while mixing on low speed.
- Turn the cookie dough onto a floured surface. Divide it into three equal portions and shape into balls.
- Add food coloring to two portions (one brown and one orange) and mix in thoroughly. Fold ⅓ of the chocolate chips into each portion.
- Weigh each dough ball into 2 oz. portions, gently press them together to marble, and place them on a parchment-lined cookie sheet.
- Preheat the oven to 375°F. Slightly flatten each ball and bake for 8-10 minutes until edges are golden and centers are soft.
Leave a Reply