
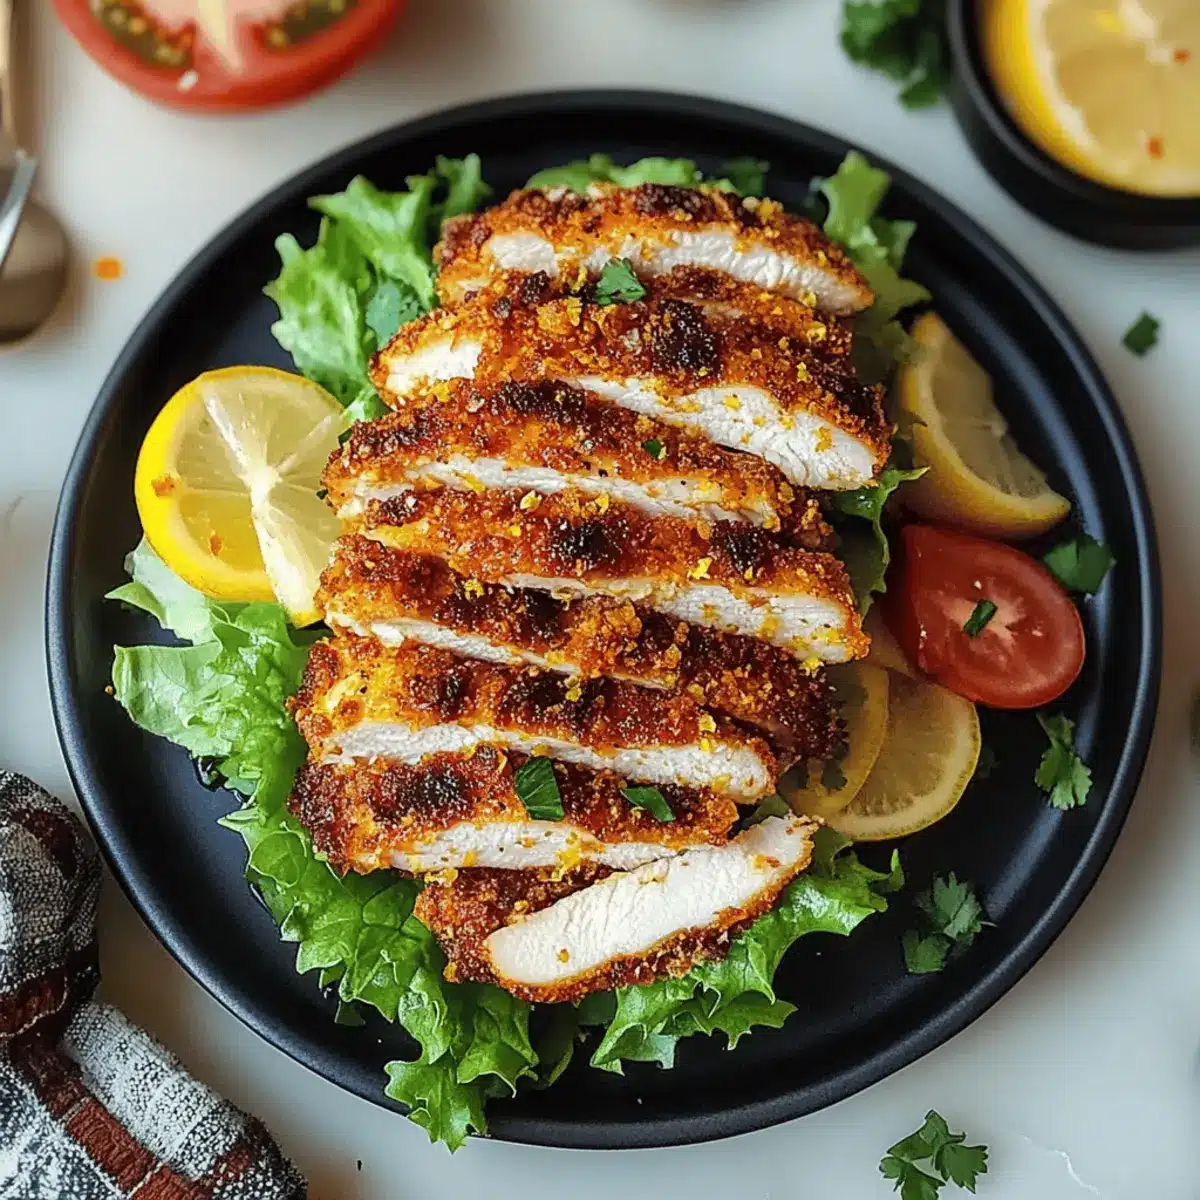
“Crispy.” “Zesty.” “Homemade.” As I listened to my friends rave about the latest food truck craze, I couldn’t help but think of my own twist on a beloved classic: the Crispy Lemon Pepper Chicken Sandwich. Combining tender, juicy chicken with a crunchy coating and a punch of zesty lemon, this recipe is my go-to when I want to create a satisfying meal that’s both quick and delicious. It’s a weeknight winner that not only fills you up but also brings elevated flavors to your dinner table without any fast-food guilt. Are you ready to transform dinnertime with this crispy marvel? Let’s dive in!

Why is this crispy sandwich a must-try?
Crispy Texture: Each bite features a delightful crunch that perfectly contrasts with the tender chicken inside.
Zesty Flavor: A tangy lemon pepper seasoning elevates this sandwich beyond the ordinary.
Quick & Easy: Whip it up in under 30 minutes, perfect for busy weeknights.
Crowd-Pleaser: This sandwich is sure to impress family and friends, making it an ideal dinner option.
Customizable: Add toppings like avocado or switch up the sauce for a personal touch. For more delicious chicken ideas, check out my Honey Pepper Chicken recipe for a unique twist!
Crispy Lemon Pepper Chicken Sandwich Ingredients
For the Chicken
- Boneless, skinless chicken breasts – The star of this dish, ensuring tenderness and juiciness; feel free to swap with chicken thighs for richer flavor.
- Buttermilk – Helps keep the chicken moist during cooking; a milk-lemon juice mixture can serve as a substitute.
For the Breading
- All-purpose flour – The foundational ingredient for breading; use a gluten-free flour mix if needed.
- Salt – Enhances overall flavor; adjust based on your preference.
- Black pepper – Adds warmth; feel free to increase for a spicier kick.
- Garlic powder – Introduces savory depth; fresh garlic could also be used in a pinch.
- Onion powder – Improves the seasoning blend; fresh onion is another option, just be cautious with moisture.
- Paprika – Adds a subtle sweetness and color; smoked paprika can give a different flavor profile.
- Cayenne pepper – Provides a hint of heat; adjust quantity according to your spice tolerance.
- Large egg – Serves as a binding agent for the breadcrumbs; can substitute with a flax egg for a plant-based version.
- Breadcrumbs – Coats the chicken for that delightful crunch; choose panko for an extra crispy finish.
For Assembly
- Vegetable oil – Used for frying; canola oil or avocado oil are suitable alternatives.
- Hamburger buns – The base holding everything together; whole wheat buns can be a healthier choice.
- Mayonnaise – For creaminess in your sandwich; swap with Greek yogurt for a lighter option.
- Dijon mustard – Adds tanginess to the sauce; experiment with yellow mustard for a milder taste.
- Lemon juice – Essential for that zesty touch; fresh lemon juice is always best.
- Lemon zest – Boosts the lemon flavor profile; dried lemon peel can be used as a backup.
- Chopped fresh parsley – For garnish and to enhance freshness; feel free to substitute with cilantro for a different flavor.
- Shredded lettuce and tomato slices – Classic crunchy toppings; customize with other veggies like pickles for varied texture.
Excited to bring this Crispy Lemon Pepper Chicken Sandwich to life? Let’s get cooking!
Step‑by‑Step Instructions for Crispy Lemon Pepper Chicken Sandwich
Step 1: Prep Chicken
Start by slicing the boneless, skinless chicken breasts horizontally to create thinner fillets. This will ensure even cooking and a tender bite. Aim for about 1/2-inch thickness to achieve that perfect crispy exterior.
Step 2: Season Flour
In a shallow bowl, combine all-purpose flour with salt, black pepper, garlic powder, onion powder, paprika, and cayenne pepper. Whisk the mixture until evenly blended, creating the foundation for your crispy lemon pepper chicken sandwich. This seasoning will elevate the flavor of the chicken when coated.
Step 3: Egg Mixture
In another bowl, whisk together one large egg with a splash of water until combined. This egg mixture will serve as a binder for the breadcrumbs, ensuring they stick to the chicken during frying. Have it ready next to the seasoned flour for efficient breading.
Step 4: Breadcrumb Coating
Place your breadcrumbs in a third bowl, making sure they’re spread out for easy access. For an extra crunch, consider using panko breadcrumbs. They’ll provide that delightful texture in your crispy lemon pepper chicken sandwich that everyone loves.
Step 5: Coat Chicken
Now it’s time to dredge the chicken! Take each fillet and coat it first in the seasoned flour, shaking off any excess. Then dip it into the egg mixture, allowing it to coat evenly, and finally toss it in the breadcrumbs to achieve a thick, crispy layer. Repeat until all chicken pieces are coated.
Step 6: Heat Oil
In a skillet, heat vegetable oil over medium-high heat until it shimmers, about 4-5 minutes. To ensure your crispy lemon pepper chicken turns out perfect, the oil needs to be hot before adding the chicken. A drop of water should sizzle upon contact to confirm readiness.
Step 7: Fry Chicken
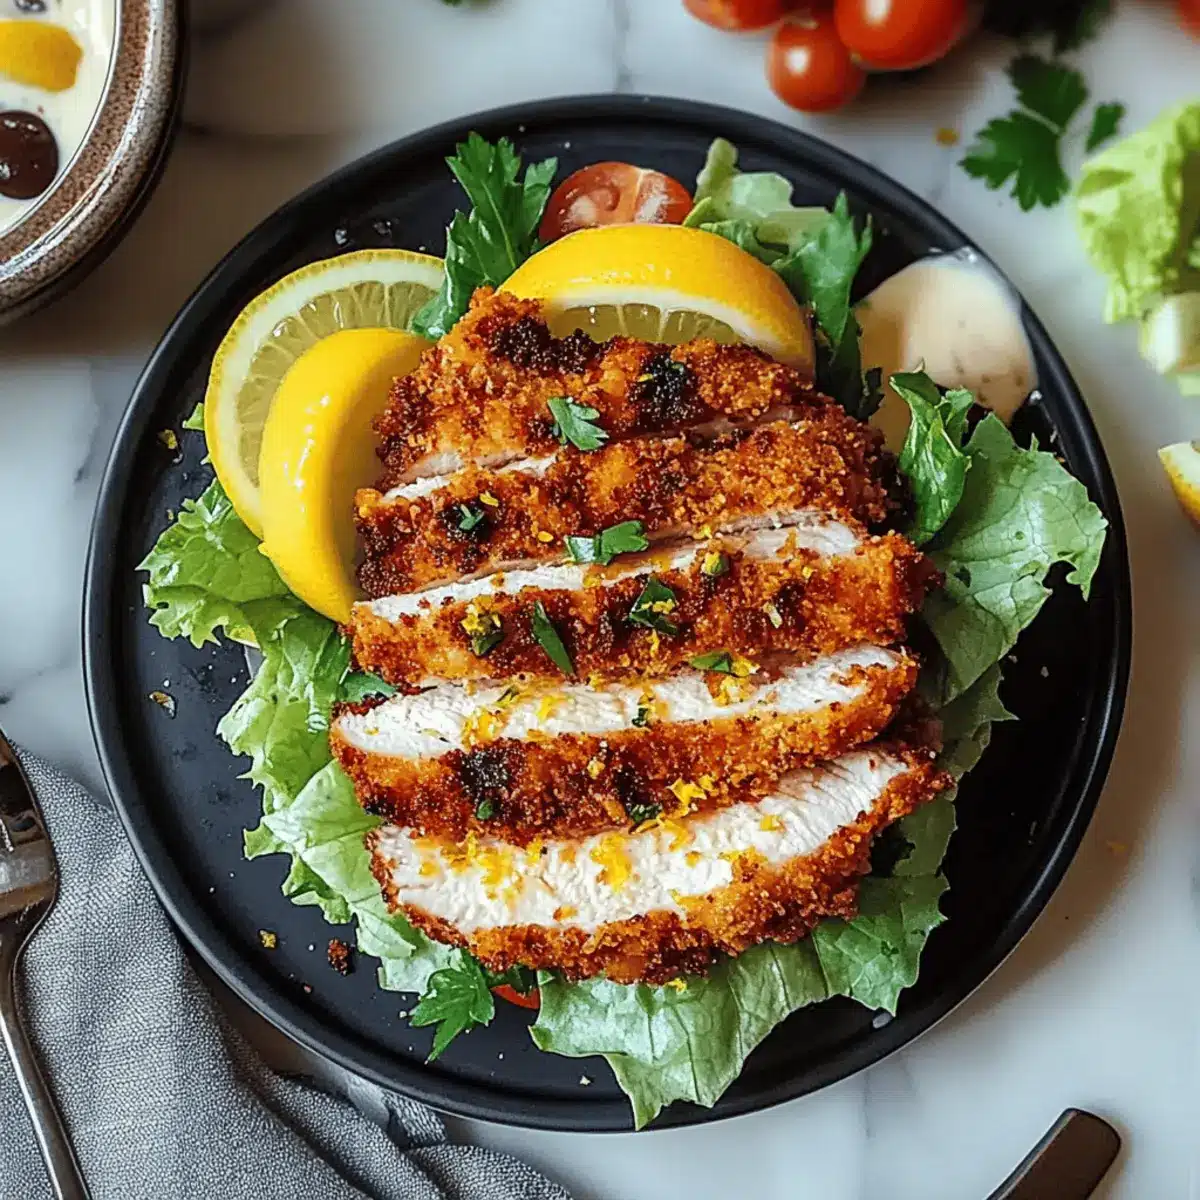
Carefully place the coated chicken fillets in the hot oil, making sure not to overcrowd the skillet. Fry each side for 4-5 minutes, or until they’re golden brown and crispy. The chicken should reach an internal temperature of 165°F. Once cooked, drain on paper towels to remove excess oil.
Step 8: Toast Buns
While the chicken is frying, toast your hamburger buns until they’re golden brown. This step is crucial as it adds crunch and prevents the buns from getting soggy. You can do this in a toaster or on a hot skillet for about 1-2 minutes per side.
Step 9: Make Sauce
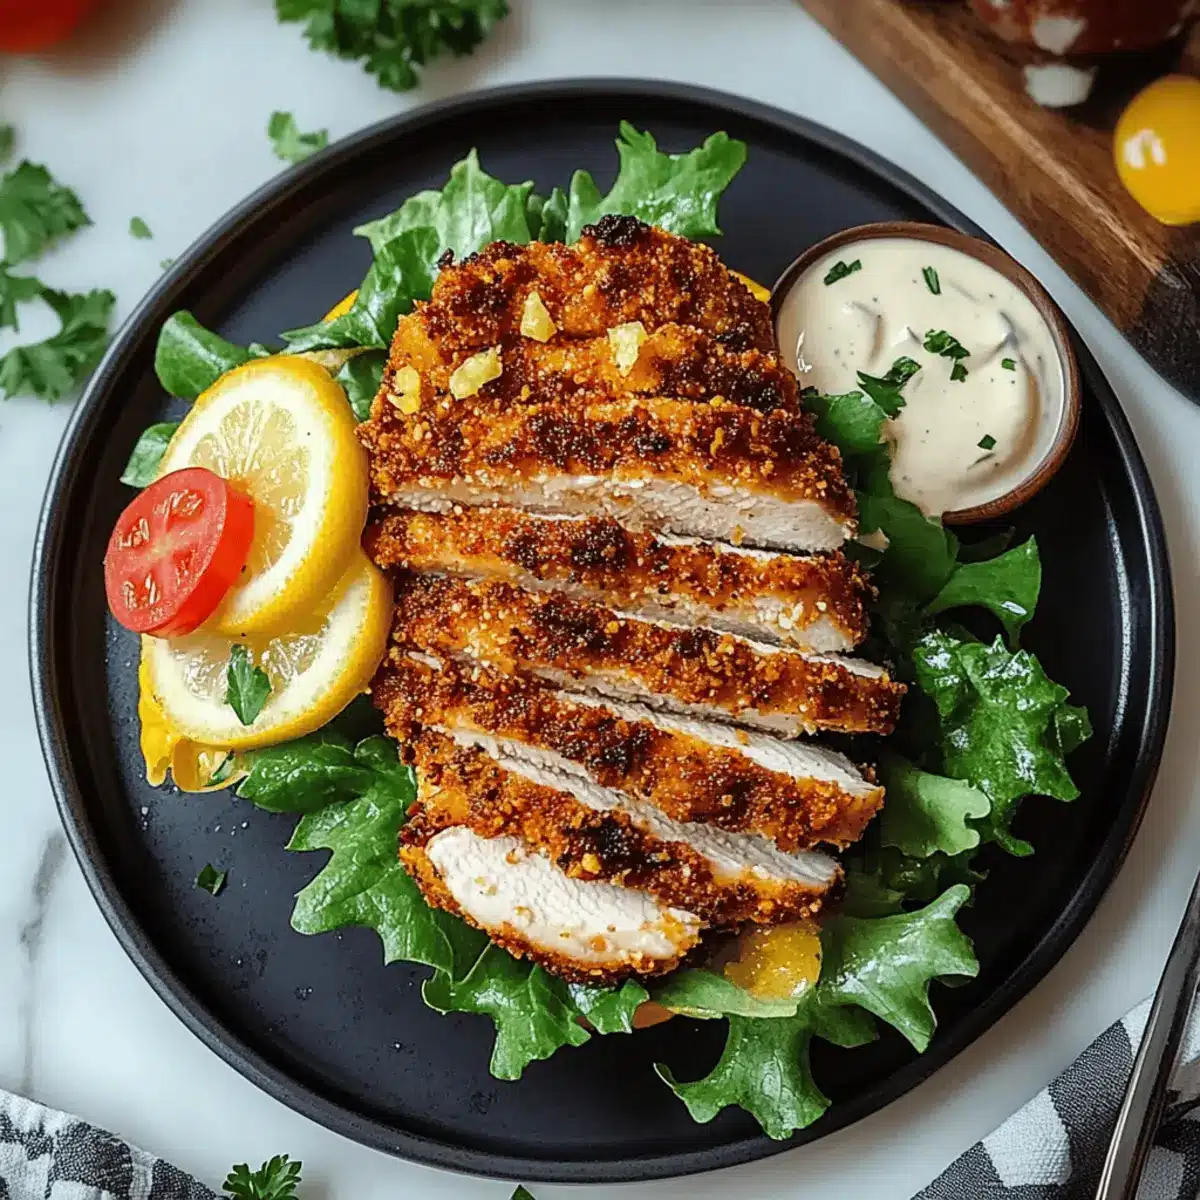
In a bowl, mix together mayonnaise, Dijon mustard, lemon juice, and lemon zest. Stir until smooth. This sauce will complement your crispy lemon pepper chicken perfectly, adding creaminess and a zesty kick that elevates the entire sandwich experience.
Step 10: Assemble Sandwich
It’s assembly time! Spread the zesty sauce onto the toasted buns, then layer on the crispy chicken fillets. Top with fresh shredded lettuce, tomato slices, and chopped parsley to add color and crunch. Close the sandwich and prepare to indulge in your delicious creation!
Step 11: Serve
Dig into your homemade crispy lemon pepper chicken sandwich immediately while it’s warm and crispy. Consider pairing it with crispy fries or a fresh salad for a complete meal that’s sure to impress your family!
Crispy Lemon Pepper Chicken Sandwich Variations
Feel free to explore these exciting variations to make your crispy lemon pepper chicken sandwich even more delightful!
-
Spicy Kick: Add extra cayenne pepper or jalapeños to the seasoning blend for a fiery flavor. Your taste buds will thank you for this exciting twist!
-
Avocado Bliss: Layer slices of creamy avocado on the toasted bun. The creaminess complements the crispy chicken and adds a luxurious touch to each bite.
-
Pickled Crunch: Pickle slices not only add tang but also serve to cut through the richness of the chicken. Consider making your own quick pickles for a vibrant addition!
-
Baked Option: For a healthier alternative, try baking the coated chicken at 425°F until golden and crispy, about 20–25 minutes. This method retains all the delicious flavors without the frying guilt.
-
Zesty Herb Sauce: Swap the mayonnaise for a sauce made of Greek yogurt, herbs, and lemon zest. This fresh alternative brightens up the flavor with every bite.
-
Cheesy Delight: Melt your favorite cheese, like cheddar or pepper jack, on top of the fried chicken during the last minute of cooking. This gooey addition elevates your sandwich to gourmet status!
-
Whole Wheat Swap: Use whole wheat buns for an added nutritional boost. They provide a nutty flavor that pairs beautifully with the zesty chicken.
-
Creamy Garlic Dip: Offer a creamy garlic dip on the side instead of sauce. It adds a rich flavor profile that brings a new level of enjoyment to your sandwich experience.
If you’re looking for more chicken inspiration, don’t miss out on my Chicken Parmesan Air recipe for another delicious, homemade treat!
What to Serve with Crispy Lemon Pepper Chicken Sandwich
Transform your meal into a flavorful feast by pairing it with these delightful sides and drinks.
-
Crispy Fries: Endless flavor and satisfying crunch make fries the perfect companion for your sandwich, offering a familiar comfort texture.
-
Fresh Garden Salad: A crisp salad featuring mixed greens, cucumbers, and cherry tomatoes adds lightness and balance, cutting through the richness of the chicken. The refreshing flavors offer a delightful contrast.
-
Coleslaw: Creamy coleslaw with a zesty dressing brings a tangy crunch that complements the sandwich’s savory elements beautifully. The bright taste of slaw heightens every bite!
-
Sweet Potato Fries: The natural sweetness of sweet potato fries pairs wonderfully with the zesty lemon pepper flavors, creating a harmonious blend of savory and sweet.
-
Garlic Bread: With a toasty, buttery goodness, garlic bread brings an additional layer of flavor and warmth, making for a cozy meal. The texture and aroma are irresistible!
-
Refreshing Lemonade: A chilled glass of homemade lemonade is the ideal drink to balance the meal, enhancing the lemon flavor in the sandwich while providing a refreshing finish.
-
Chocolate Chip Cookies: End the meal with some warm chocolate chip cookies for a sweet touch that everyone will love. They provide a comforting closure to a delicious dinner!
How to Store and Freeze Crispy Lemon Pepper Chicken Sandwich
Fridge: Store leftover chicken in airtight containers for up to 2 days. Reheating in a skillet helps maintain that crispy texture you love.
Freezer: For longer storage, wrap cooked chicken individually in plastic wrap and foil, then freeze for up to 3 months. Thaw in the fridge before reheating.
Reheating: When ready to enjoy, reheat the chicken at 375°F (190°C) in the oven or skillet until heated through, ensuring it stays crispy.
Assembly Tips: Store buns separately to keep them fresh and avoid sogginess. Add sauces and toppings right before serving to keep everything perfectly crunchy and flavorful in your crispy lemon pepper chicken sandwich.
Tips for the Best Crispy Lemon Pepper Chicken Sandwich
- Hot Oil: Ensure the oil is hot enough before frying to achieve maximum crispiness. A drop of water should sizzle upon contact.
- Avoid Overcrowding: Fry the chicken in batches to prevent steaming and ensure even cooking. This helps maintain that delightful crunch in your crispy lemon pepper chicken sandwich.
- Proper Coating: Make sure to shake off excess flour and egg to prevent clumping and uneven breading. This will elevate the texture of your sandwich.
- Storage Tips: If you have leftovers, store the chicken and buns separately to avoid sogginess and keep the chicken crisp.
- Fresh Toppings: Wait to add lettuce and tomato until right before serving to retain their freshness and crunchiness.
Make Ahead Options
These Crispy Lemon Pepper Chicken Sandwiches are a lifesaver for busy weeknights! You can marinate the chicken in buttermilk and seasonings up to 24 hours in advance, ensuring the meat is flavorful and tender. Additionally, you can prepare the breading mixture and even coat the chicken; just store it in the fridge to maintain its freshness. Keep the cooked chicken in an airtight container in the refrigerator for 2-3 days. When you’re ready to serve, simply reheat the chicken in a skillet to retain its crispy texture, toast the buns, and assemble with your prepared sauces and toppings for a delicious meal that tastes just as fantastic as when freshly made!
Crispy Lemon Pepper Chicken Sandwich Recipe FAQs
How do I choose the right chicken breasts for this recipe?
Absolutely! When selecting chicken breasts, look for boneless and skinless options that are plump and have a slightly glossy appearance. Avoid any with dark spots or a slimy texture, as these may indicate spoilage. If you prefer a richer flavor, consider using chicken thighs instead, as they can keep the sandwich juicy and flavorful.
How can I store leftover crispy chicken sandwiches?
Very good question! For optimal freshness, store leftover chicken in airtight containers for up to 2 days in the refrigerator. To maintain texture, I recommend keeping the toppings and sauces separate until you’re ready to indulge. Reheat the chicken in a skillet over medium heat to keep it crispy before enjoying your meal again!
Can I freeze the crispy lemon pepper chicken for later use?
Absolutely! To freeze, wrap each cooked chicken piece individually in plastic wrap, then in foil, and store in a freezer-safe bag. They can be kept frozen for up to 3 months. To reheat, thaw in the refrigerator overnight, then place the chicken on a baking sheet and heat in the oven at 375°F (190°C) until crispy. This way, you’ll enjoy that delightful crunch again!
What should I do if my chicken isn’t crispy after frying?
If your chicken isn’t crispy, there are a few things you can adjust next time. First, make sure your oil is hot enough before adding the chicken; a shimmer on the surface is a good sign. Avoid overcrowding the skillet, as this can lower the oil temperature. Lastly, ensure you thoroughly coat the chicken with breadcrumbs, pressing gently to help them adhere. Try these tips, and you’ll get that perfect crunch every time!
Are there any dietary considerations for this recipe to be aware of?
Yes! Some alternative ingredients can accommodate dietary restrictions. If you’re gluten-free, swap the all-purpose flour and breadcrumbs for a gluten-free mix. For those avoiding eggs, you can use a flax egg (1 tablespoon of flaxseed meal mixed with 2.5 tablespoons of water) as a binder. Additionally, if someone has allergies to dairy, using a milk-lemon juice mixture as a substitute for buttermilk is a great option!
Crispy Lemon Pepper Chicken Sandwich for the Ultimate Feast
Ingredients
Equipment
Method
- Start by slicing the chicken breasts horizontally to create thinner fillets.
- In a shallow bowl, combine all-purpose flour with salt, black pepper, garlic powder, onion powder, paprika, and cayenne pepper.
- In another bowl, whisk together the egg with a splash of water.
- Place your breadcrumbs in a third bowl.
- Dredge the chicken in the seasoned flour, dip into the egg mixture, and then coat with breadcrumbs.
- Heat vegetable oil in a skillet over medium-high heat.
- Carefully fry the chicken fillets until golden brown and crispy, about 4-5 minutes per side.
- Toast your hamburger buns until golden brown.
- In a bowl, mix together mayonnaise, Dijon mustard, lemon juice, and lemon zest.
- Spread the sauce on the toasted buns, layer on the crispy chicken, and top with lettuce, tomato, and parsley.
- Serve immediately while warm.
Leave a Reply