
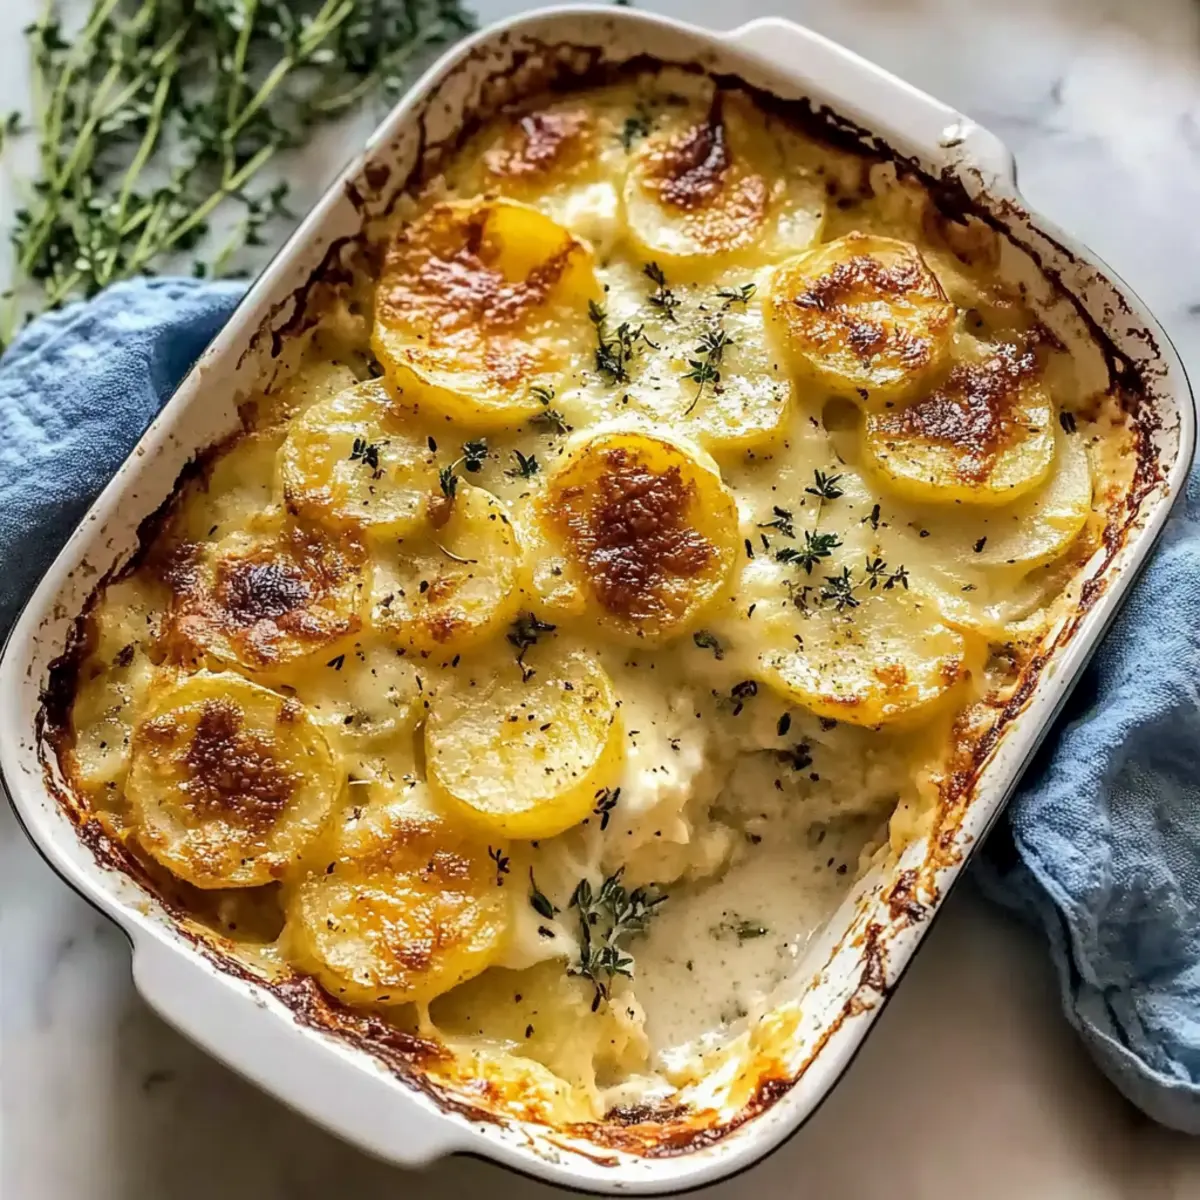
There’s something magical about the intoxicating aroma of garlic roasting in the oven, isn’t there? When I dive into my kitchen to whip up a batch of Cheesy Garlic Scalloped Potatoes, the moment those Yukon Gold slices meet the silky, rich cheese sauce, I know I’m in for a comforting treat. This dish is a pure crowd-pleaser—perfect for both cozy weeknight dinners and festive gatherings. With its creamy texture and layers of cheesy goodness infused with the roasted garlic’s warm embrace, each bite is like a hug from the inside. Whether you’re looking to impress guests or simply indulge yourself after a long day, these scalloped potatoes bring joy and satisfaction to the table. Curious about how to make this irresistible side dish a staple on your dinner plate? Let’s dig in!
Why are these scalloped potatoes irresistible?
Creamy Comfort: The sumptuous combination of rich cheeses and roasted garlic creates a warm embrace in every bite.
Unforgettable Flavor: Twelve cloves of garlic intensify the dish, making it a delightful centerpiece for any meal.
Easy Layers: With minimal effort, you can create stunning layers of flavor that will wow your guests.
Perfect Any Time: Whether it’s a cozy family dinner or a festive gathering, this dish fits every occasion!
Versatile Pairing: These potatoes pair beautifully with dishes like roasted chicken or grilled steak, making it a flexible side.
For even more delicious inspiration, check out my recipes for Cheesy Garlic Butter or Cheesy Cajun Garlic in case you want to elevate your next meal.
Cheesy Garlic Scalloped Potatoes Ingredients
For the Potatoes
• Yukon Gold Potatoes – The perfect choice for creaminess; substitute with russet for fluffiness or red potatoes for a firmer texture.
For the Cheese Sauce
• Butter – Adds richness to the sauce; use unsalted (Kerrygold is preferred) to control salt levels.
• Onion – Enhances the flavor base; shallots can be a milder substitute.
• Garlic (12 cloves) – Provides the distinctive flavor; roasting can mellow the intensity if desired.
• Flour (5 tablespoons) – Thickens the cheese sauce; King Arthur all-purpose flour is ideal for consistency.
• Milk (2 cups) – The sauce’s creamy base; replace with heavy cream for richness or use a dairy-free alternative if needed.
• Chicken Broth (1 cup) – Adds depth; vegetable broth is a great vegetarian option.
• Thyme (1/2 tsp) – Boosts flavor; feel free to swap for oregano or rosemary.
• Salt (1 1/4 tsp) – Essential for seasoning; adjust according to your taste and other sodium sources.
• Black Pepper (1/4 tsp) – Adds warmth and depth; white pepper is a milder alternative.
• Cheddar (1 1/4 cups), Mozzarella (1 1/4 cups), Parmesan (3/4 cup) – Creates a creamy blend; freshly grated cheese melts better—avoid pre-shredded for a smooth texture.
These Cheesy Garlic Scalloped Potatoes are not only comforting but also a showstopper at any meal. Enjoy the blend of flavors and textures, making each bite a delicious journey!
Step‑by‑Step Instructions for Cheesy Garlic Scalloped Potatoes
Step 1: Preheat Your Oven
Begin by preheating your oven to 350°F (175°C) to ensure it’s ready for the final baking. This is an essential step for achieving that golden top on your Cheesy Garlic Scalloped Potatoes. While the oven warms up, gather your equipment—a mandoline for slicing, a large saucepan, and a 9×13 inch baking dish.
Step 2: Slice the Potatoes
Using a mandoline, slice your Yukon Gold potatoes into uniform 1/8-inch rounds, which helps them cook evenly. Aim for a smooth and consistent thickness to ensure every bite of these Cheesy Garlic Scalloped Potatoes is just as delicious as the last. Once sliced, set them aside in a bowl of cold water to prevent browning.
Step 3: Prepare Aromatics
Finely dice the onion and mince the garlic to create a flavorful base for your cheese sauce. This step is crucial, as the aromatic blend will bring warmth and depth to the dish. You can opt for roasting the garlic ahead of time if you prefer a milder garlic flavor in your Cheesy Garlic Scalloped Potatoes.
Step 4: Sauté the Aromatics
In a large saucepan, melt 5 tablespoons of butter over medium heat. Once melted, add the minced garlic and diced onion, sautéing until fragrant for about 1-2 minutes—be careful not to brown them. This process enhances the flavors that will be enveloping your potatoes shortly.
Step 5: Create the Roux
Sprinkle in the flour, stirring constantly for about 1-2 minutes until you form a roux. This step thickens your sauce and is essential for the creamy texture of the Cheesy Garlic Scalloped Potatoes. You’ll know it’s ready when it turns a light golden color yet remains smooth.
Step 6: Make the Sauce
Gradually whisk in 2 cups of milk and 1 cup of chicken broth while increasing the heat to medium-high. Bring the mixture to a gentle boil, stirring consistently for 2-3 minutes until it thickens enough to coat the back of a spoon. This creates the luscious cheese sauce that will complement the potatoes beautifully.
Step 7: Add Spices and Cheese
Remove the saucepan from the heat, then stir in the thyme, salt, black pepper, and your cheese blends: cheddar, mozzarella, and Parmesan. The residual heat will melt the cheeses, creating a rich and creamy sauce. Ensure all the cheese is thoroughly combined before moving on to layering.
Step 8: Layer the Potatoes and Sauce
In your greased 9×13 inch baking dish, start by laying down one-third of the sliced potatoes. Spoon one-third of the creamy cheese sauce over the layer of potatoes, ensuring every slice gets a taste of that rich goodness. Repeat this two more times for a total of three layers, finishing with the sauce on top.
Step 9: Bake Covered Then Uncovered
Cover the baking dish with aluminum foil and place it in the preheated oven. Bake for 30 minutes to allow the flavors to meld and the potatoes to begin softening. After this initial bake, remove the foil and continue baking for an additional 35-45 minutes until the top is golden and crispy, and the potatoes are fork-tender.
Step 10: Let Rest Before Serving
Once baked to perfection, remove your Cheesy Garlic Scalloped Potatoes from the oven and let them rest for 10 minutes. This important step allows the sauce to set, making it easier to serve clean slices. Enjoy the amazing aromas as you prepare to indulge!
Expert Tips for Cheesy Garlic Scalloped Potatoes
-
Uniform Slices: Ensure even cooking by slicing Yukon Gold potatoes uniformly about 1/8-inch thick with a mandoline. This avoids any undercooked or mushy pieces.
-
Avoid Watery Sauce: Monitor the sauce while cooking to achieve a thick consistency before adding cheese. A watery sauce will lead to an unsatisfying final dish.
-
Resting is Key: Allow the Cheesy Garlic Scalloped Potatoes to rest for 10 minutes after baking. This helps the sauce set, making serving cleaner and more enjoyable.
-
Use Fresh Cheese: Opt for freshly grated cheese rather than pre-shredded for a creamy melt. The anti-caking agents in pre-shredded options can affect texture.
-
Covering is Crucial: If the top browns too quickly during baking, tent it with foil. This prevents burning while allowing the potatoes to cook thoroughly.
-
Flavor Variations: Feel free to experiment with cheese blends or herbs, such as using Gruyère or rosemary, to add different flavors to your Cheesy Garlic Scalloped Potatoes.
What to Serve with Cheesy Garlic Scalloped Potatoes
Imagine a dinner table filled with delightful aromas and colorful dishes that complement each other perfectly.
-
Roasted Chicken: The juicy tenderness of roasted chicken pairs beautifully with the creamy richness of scalloped potatoes. It’s a classic combo that never disappoints!
-
Grilled Steak: A perfectly grilled steak adds a hearty touch, elevating the meal’s flavor profile alongside the cheesy goodness of the potatoes.
-
Steamed Broccoli: Bright, vibrant steamed broccoli provides a fresh contrast to the rich dish, enhancing both flavor and visual appeal on the plate.
-
Caesar Salad: A crisp Caesar salad with its tangy dressing refreshes the palate, making every creamy mouthful of your cheesy garlic scalloped potatoes feel light and satisfying.
-
Garlic Bread: For garlic lovers, serving warm garlic bread is like hitting a flavor trifecta. It’s a delicious way to soak up every bit of cheese sauce.
-
White Wine: A chilled glass of Sauvignon Blanc harmonizes beautifully, amplifying the garlic and creamy flavors while providing a refreshing sip between bites.
These pairings will ensure that your Cheesy Garlic Scalloped Potatoes shine at the center of your meal, making every gathering special!
Make Ahead Options
These Cheesy Garlic Scalloped Potatoes are perfect for busy weeknights or meal prepping! You can slice the Yukon Gold potatoes and store them submerged in cold water in the refrigerator up to 24 hours in advance to prevent browning. Additionally, the cheese sauce can be made ahead and refrigerated for 3 days. Just ensure to cover it tightly to preserve the creamy texture. When you’re ready to cook, simply layer the prepared potatoes and sauce in your baking dish and bake as instructed. This will allow you to enjoy a comforting, home-cooked meal with minimal effort, just as delicious and perfect for serving family or guests!
Cheesy Garlic Scalloped Potatoes Variations
Feel free to customize this recipe and make it your own! Each idea adds a unique twist while keeping that creamy comfort intact.
-
Different Cheeses:
Swap cheddar for Gruyère or fontina to introduce a nutty flavor, enriching the sauce’s complexity. -
Add Protein:
Layer in cooked bacon or ham for an indulgent, smoky flavor. A little goes a long way to elevate every bite. -
Veggie Boost:
Toss in sautéed mushrooms or spinach for extra nutrients. Their earthy flavors enhance the rich cheese sauce beautifully. -
Herb Infusion:
Experiment with fresh herbs like rosemary or sage instead of thyme for a fragrant twist. These herbs lend a delightful freshness. -
Spicy Kick:
Add diced jalapeños or a pinch of cayenne pepper for a touch of heat, balancing the creaminess with a little zing. -
Dairy-Free Delight:
Substitute all dairy with nut milk and dairy-free cheese. Your guests may not even realize they’re enjoying a healthier option! -
Nutty Crunch:
Top with panko breadcrumbs mixed with olive oil before baking for a delightful crispy topping that contrasts with the creamy layers. -
Gourmet Touch:
Stir in a splash of truffle oil or sprinkle with truffle salt just before serving for an upscale finish that definitely impresses.
For more delicious recipes that can inspire your next meal, check out my Cheesy Garlic Butter or Slow Cooker Garlic dishes!
How to Store and Freeze Cheesy Garlic Scalloped Potatoes
- Fridge: Store leftovers in an airtight container for up to 4 days. Make sure the dish is cooled before sealing to maintain freshness and prevent sogginess.
- Freezer: Wrap the scalloped potatoes tightly in plastic wrap or aluminum foil before placing them in a freezer-safe container. They can be frozen for up to 2 months.
- Reheating: For best results, reheat in the oven at 350°F (175°C) until warmed through, about 25-30 minutes, to retain that creamy texture and cheesy goodness.
- Defrosting: When ready to enjoy, thaw frozen Cheesy Garlic Scalloped Potatoes overnight in the fridge before reheating for even cooking and flavor retention.
Cheesy Garlic Scalloped Potatoes Recipe FAQs
How do I choose the right potatoes?
For the best texture, I recommend using Yukon Gold potatoes as they provide a creamy consistency. If you prefer a fluffier texture, russet potatoes are a good alternative, while red potatoes offer a firmer bite. Make sure the potatoes are free of any dark spots or blemishes, which can indicate that they’re past their prime.
How should I store leftovers?
Store any leftovers of your Cheesy Garlic Scalloped Potatoes in an airtight container in the fridge for up to 4 days. It’s best to allow the dish to cool completely before sealing to keep the texture intact. When you’re ready to enjoy, simply reheat in the oven at 350°F (175°C) until warmed through.
Can I freeze scalloped potatoes?
Absolutely! You can freeze your Cheesy Garlic Scalloped Potatoes for up to 2 months. To do this, wrap the pan tightly in plastic wrap or aluminum foil, then place it in a freezer-safe container. When you’re ready to enjoy, thaw them overnight in the refrigerator before reheating in the oven at 350°F (175°C) until heated through, about 25-30 minutes.
What should I do if my cheese sauce is too thin?
No worries! If your cheese sauce turns out too thin, you can thicken it up. Simply return it to low heat, add a little more flour mixed with water to create a slurry, and whisk it in while stirring. Let it cook for a few more minutes until it thickens to your desired consistency. Remember that the sauce should coat the back of a spoon for optimal texture before pouring over the potatoes.
Are scalloped potatoes safe for my pets?
While moderate amounts of potatoes are generally safe for pets, the rich and creamy cheese sauce can be problematic for them. Ingredients like garlic and excessive dairy are not ideal for pets, so it’s best to keep those servings strictly for human enjoyment. Always check with your vet if you’re uncertain about specific ingredients.
How can I make these potatoes dairy-free?
To make your Cheesy Garlic Scalloped Potatoes dairy-free, substitute the milk with a plant-based milk alternative like almond or oat milk. For the cheese, use a vegan cheese blend that melts well. Additionally, coconut cream can be used instead of heavy cream for a rich, creamy texture.
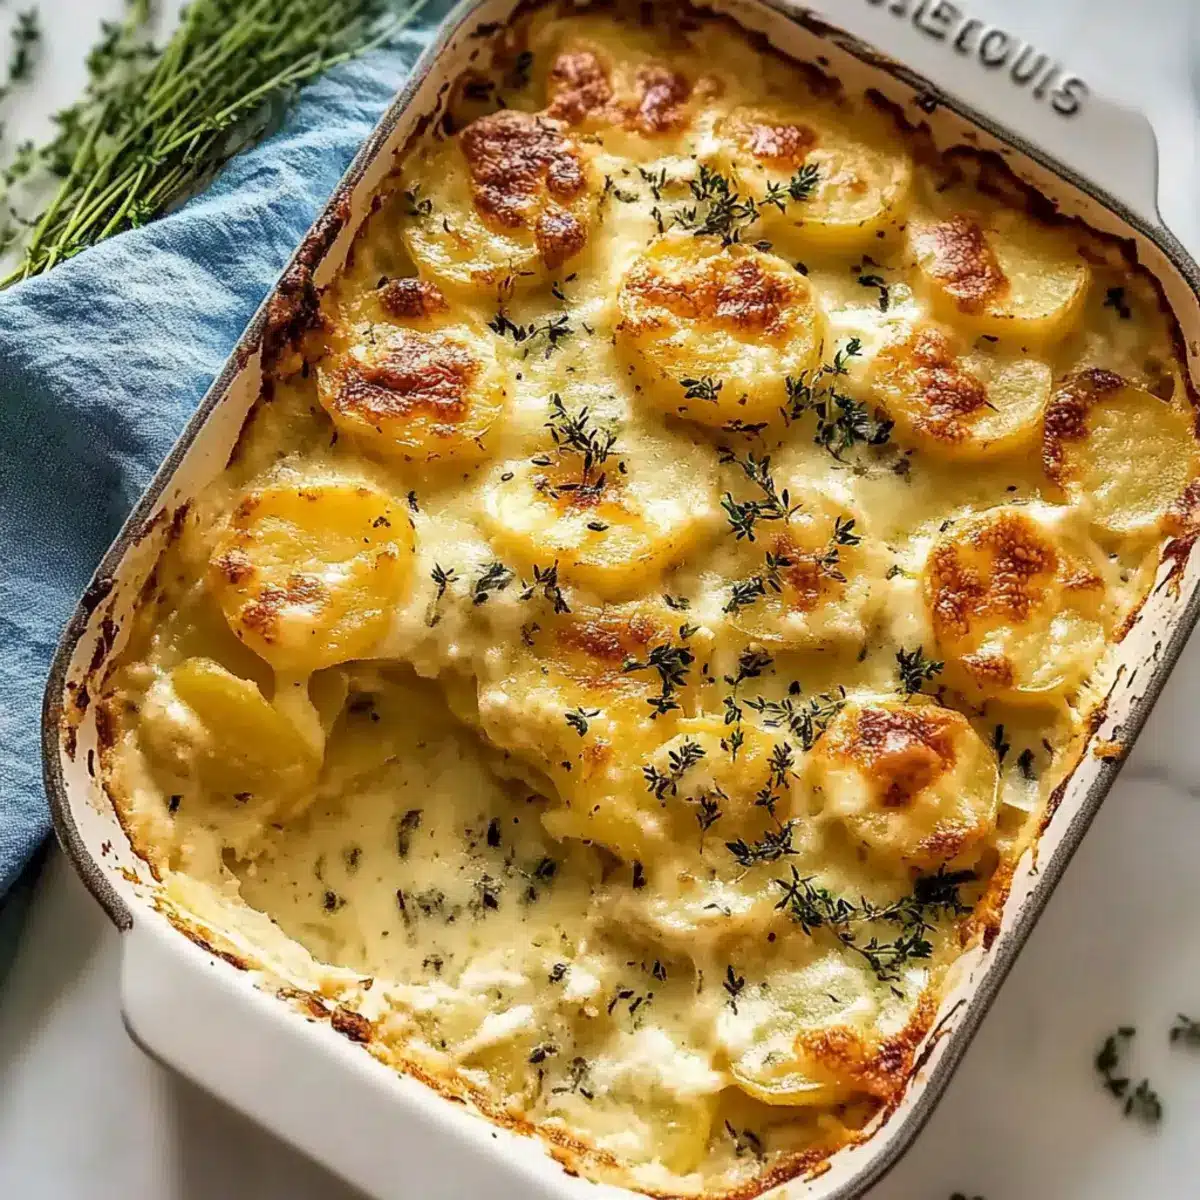
Savory Cheesy Garlic Scalloped Potatoes That Steal the Show
Ingredients
Equipment
Method
- Preheat your oven to 350°F (175°C).
- Slice your Yukon Gold potatoes into uniform 1/8-inch rounds using a mandoline.
- Finely dice the onion and mince the garlic.
- Melt 5 tablespoons of butter in a large saucepan over medium heat and sauté the garlic and onion until fragrant.
- Sprinkle in the flour and stir constantly to form a roux.
- Gradually whisk in the milk and chicken broth; bring to a gentle boil and thicken.
- Remove from heat and stir in thyme, salt, black pepper, and all cheeses.
- In a greased baking dish, layer one-third of the sliced potatoes and one-third of the cheese sauce, repeating two more times.
- Cover with foil and bake for 30 minutes, then uncover and bake for an additional 35-45 minutes.
- Allow to rest for 10 minutes before serving.
Leave a Reply