
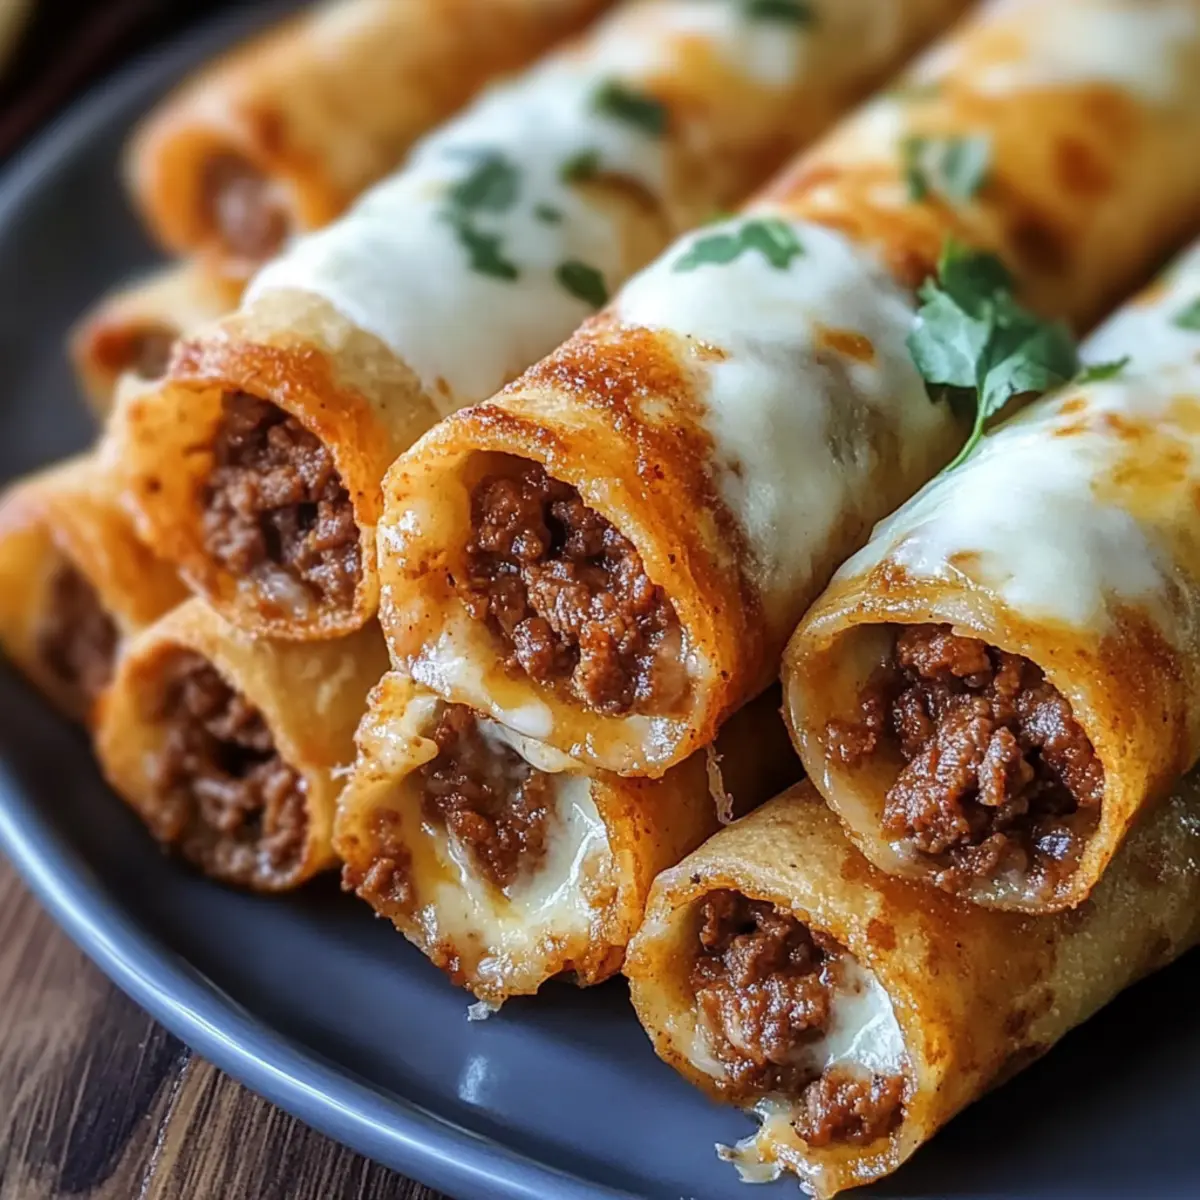
As the aroma of my kitchen filled with the scent of Crispy Cheesy Beef Taquitos, I couldn’t help but feel a wave of nostalgia rush over me. These delightful snacks are not just your average finger food; they encapsulate the perfect blend of crunchy tortillas and savory beef seasoned to perfection. What I love most about this recipe is its versatility—ready in just 40 minutes, it’s a fantastic quick meal option for a busy weeknight or a show-stopping addition to your game day spread. Plus, they’re easily customizable, allowing you to swap in chicken or even black beans for a heartwarming twist. Curious about how to bring this tasty treat to your table? Let’s dive in!

Why are Crispy Cheesy Beef Taquitos a Must-Try?
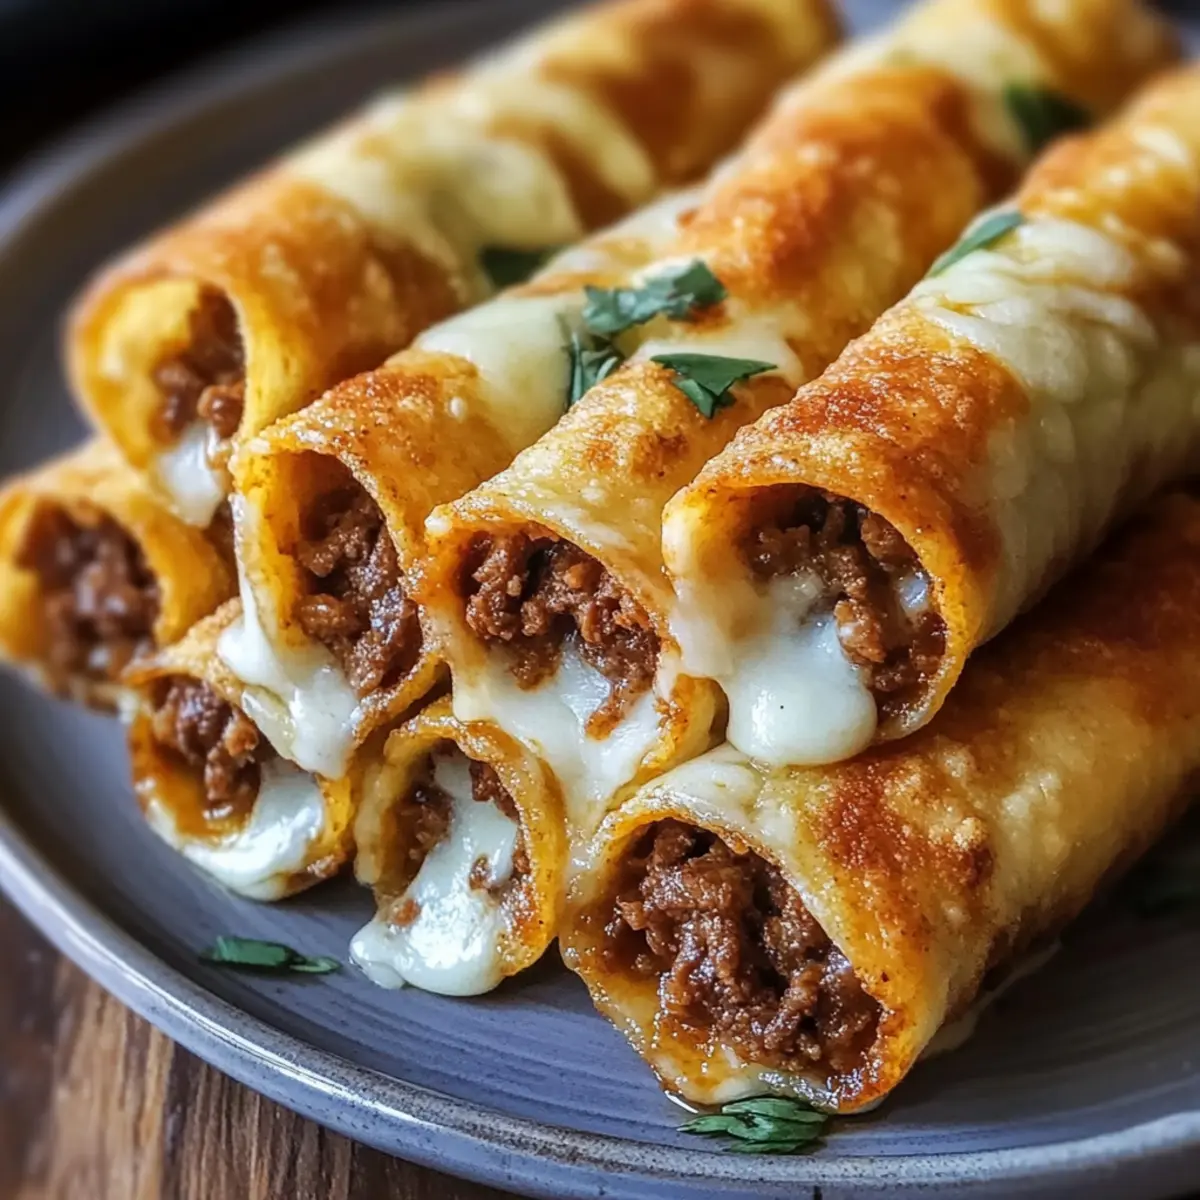
Irresistible Flavor: Loaded with seasoned beef and gooey cheese, these taquitos deliver a taste sensation that keeps you coming back for more.
Quick and Easy: Ready in just 40 minutes, they’re perfect for busy nights when you crave a homemade snack without the fuss.
Endless Customization: Whether you choose to use chicken or black beans, the versatility of this recipe allows your creativity to shine.
Crowd-Pleasing Appeal: These cheesy delights are ideal for game nights or gatherings, sure to impress family and friends alike.
Perfect Texture: The crispy exterior contrasts beautifully with the tender beef and melty cheese, creating a satisfying bite every time.
Serve them alongside your favorite dipping sauces, like guacamole or salsa, and experience a flavor explosion that’s hard to resist!
Cheesy Beef Taquitos Ingredients
• Get ready for flavor!
For the Filling
- Ground Beef – Provides flavor and protein; substitute with shredded chicken or black beans for a vegetarian twist.
- Onion – Adds savory depth; yellow or white onions work best for balancing the beef.
- Garlic – Enhances overall flavor; fresh minced garlic is ideal or use garlic powder if you’re in a hurry.
- Spices (Chili Powder, Cumin, Paprika, Black Pepper, Salt) – Essential for a flavorful filling; adjust according to taste preferences to match your family’s palate.
- Tomato Sauce – Binds the mixture and adds moisture; swap with salsa for an extra kick of flavor.
For the Taquitos
- Tortillas – The vessel for the filling; corn tortillas are recommended for authenticity, remember to warm them for easy rolling.
- Shredded Cheese – Provides richness and creaminess; cheddar or Monterey Jack are great, but feel free to explore other varieties for fun twists.
Enjoy crafting your Cheesy Beef Taquitos with these simple ingredients!
Step‑by‑Step Instructions for Crispy Cheesy Beef Taquitos
Step 1: Cook the Beef Mixture
In a large skillet, heat the pan over medium heat and add the ground beef and chopped onion. Cook for 5–7 minutes, stirring occasionally, until the beef is browned and the onions are translucent. Add minced garlic along with chili powder, cumin, paprika, black pepper, and salt. Sauté for an additional 2 minutes until fragrant, then stir in the tomato sauce. Let everything simmer for 2 minutes until heated through.
Step 2: Prepare the Tortillas
While the beef mixture is simmering, warm your tortillas to ensure they remain pliable. You can do this by placing them in a skillet over low heat for about 30 seconds on each side or microwaving them wrapped in a damp paper towel for around 15-20 seconds. Properly warmed tortillas make rolling the cheesy beef taquitos easy and prevent cracking.
Step 3: Assemble the Taquitos
Take a warmed tortilla and place about 2 tablespoons of the beef mixture along one edge, followed by a sprinkle of shredded cheese. Gently roll the tortilla tightly, tucking in the sides as you go. This will secure the filling inside, creating a neat, compact taquito. Repeat this process for the remaining tortillas until all the filling is used.
Step 4: Bake the Taquitos
Preheat your oven to 425°F (220°C) and line a baking sheet with parchment paper for easy cleanup. Carefully place the assembled taquitos seam-side down on the baking sheet. Brush a light layer of oil on top of each taquito and sprinkle with a bit more shredded cheese for an extra golden finish. Bake for 15–18 minutes until they are golden brown and crispy.
Step 5: Optional Broil for Extra Crunch
For an irresistible crunch, switch the oven to broil in the last 1–2 minutes of baking. Keep a close eye on the taquitos during this time to prevent burning. Once they’ve turned a deep golden brown and are bubbling with deliciousness, pull them out of the oven and let them cool for a couple of minutes before serving.
Step 6: Serve with Dipping Sauces
Plate your Crispy Cheesy Beef Taquitos and serve them warm alongside your favorite dipping sauces like guacamole, sour cream, or salsa. The combination of flavors will elevate your snack experience, making it a hit at family gatherings or game nights.
Expert Tips for Crispy Cheesy Beef Taquitos
-
Warm Tortillas: Always warm your tortillas before assembling to prevent cracking and make rolling easier.
-
Avoid Overfilling: Stick to about 2 tablespoons of filling per taquito to ensure they cook evenly and don’t burst open.
-
Cheese Choices: Experiment with various cheeses to find your favorite combo; pepper jack adds a nice kick, while Monterey Jack keeps it creamy.
-
Bake for Crispiness: For that perfect crunch, ensure your oven is preheated. Broil for 1-2 minutes at the end for an extra crispy finish on your taquitos.
-
Storage Wisdom: If you have leftovers, store them in an airtight container for up to 3 days; reheat in the oven for the best texture.
Enjoy your homemade Cheesy Beef Taquitos with these helpful tips!
How to Store and Freeze Cheesy Beef Taquitos
Fridge: Store leftovers in an airtight container for up to 3 days. Reheat in the oven for best results, maintaining that crispy texture you love.
Freezer: Assemble the taquitos without baking and freeze them in a single layer on a baking sheet. Once frozen, transfer them to a zip-top bag for up to 2 months. Bake from frozen, adding about 10 minutes to the cooking time.
Reheating: To enjoy leftover taquitos, reheat them in the oven at 350°F (175°C) for about 15 minutes, or until heated through and crispy again.
Avoiding Sogginess: Do not store taquitos covered in sauce in the fridge, as this will make them soggy. Keep sauces separate for dipping when serving!
Make Ahead Options
These Crispy Cheesy Beef Taquitos are perfect for meal prep and can be made ahead to save time on busy weeknights! You can prepare the beef mixture and assemble the taquitos up to 24 hours in advance; simply store them in an airtight container in the refrigerator to maintain their freshness. For even longer storage, feel free to freeze the assembled taquitos for up to 2 months. To finish, bake them directly from the freezer, adding a few extra minutes to the cooking time for perfectly crispy results. Just remember to warm your tortillas before assembling to avoid cracking, ensuring they remain as delicious as when freshly made!
Cheesy Beef Taquitos Variations
Feel free to get creative and adapt these taquitos to your liking—the possibilities are endless!
-
Dairy-Free: Use dairy-free cheese or skip the cheese entirely for a lighter option while still enjoying the savory flavors.
-
Spicy Kick: Add diced jalapeños or sprinkle cayenne pepper into the beef mixture for those who crave some heat in every bite.
-
Veggie Delight: Replace beef with a medley of sautéed bell peppers, zucchini, and corn for a colorful, vegetarian twist that’s bursting with flavor.
-
Flavorful Add-Ins: Stir in some black olives or chopped green onions into the beef mixture for added texture and taste with every bite.
-
Sweet and Savory: Incorporate some diced pineapple into the filling for a sweet contrast that wonderfully complements the savory beef and cheese.
-
Herb Infusion: Add fresh cilantro or parsley to the beef mixture before filling the tortillas for a refreshing herbaceous touch.
-
Extra Crunch: For a delightful contrast, sprinkle crushed tortilla chips inside the taquito before rolling, giving each bite a satisfying crunch.
-
Savory Sauce: Drizzle with homemade or store-bought enchilada sauce after baking for an extra layer of flavor—much like being served at your favorite Mexican restaurant!
For even more culinary inspiration, consider pairing your creations with Cheesy Garlic Butter Steak with Rigatoni in Four Cheese Sauce or rounding out your meal with a side of Creamy Parmesan Garlic Beef Bowtie Pasta. Happy cooking!
What to Serve with Crispy Cheesy Beef Taquitos
Experience the joy of a well-rounded meal by pairing these crispy delights with satisfying sides and dips.
-
Guacamole: The creamy texture of guacamole perfectly balances the crunch of the taquitos, adding richness without overpowering the flavors.
-
Sour Cream: A classic pairing, sour cream offers a cool contrast that complements the savory beef and spices beautifully.
-
Spicy Salsa: A zesty salsa adds a burst of freshness and heat, enhancing every bite of your crispy cheesy beef taquitos.
-
Mexican Street Corn Salad: This vibrant dish brings together sweet corn and tangy flavors, offering a refreshing side that’s full of texture.
-
Refried Beans: Velvety refried beans provide a comforting side, enriching the meal with added protein and heartiness.
-
Chips and Queso: Crispy tortilla chips served with a warm cheese dip create a fun, shareable appetizer that pairs wonderfully with taquitos.
-
Cabbage Slaw: A light, crunchy slaw adds a fresh element, balancing the richness of the taquitos with its tangy dressing.
-
Margaritas: A refreshing drink option like a margarita can elevate the meal with a delightful mix of citrus and sweetness.
-
Tres Leches Cake: For dessert, a slice of this moist cake offers a sweet ending to an already delicious experience, keeping the fiesta going!
Crispy Cheesy Beef Taquitos Recipe FAQs
What type of tortillas should I use for taquitos?
I highly recommend using corn tortillas for authenticity! They provide the perfect crispiness and flavor. Make sure to warm them before assembling; this keeps them pliable and helps avoid cracking.
How should I store leftover taquitos?
Store any leftover taquitos in an airtight container in the refrigerator for up to 3 days. For the best texture when reheating, pop them in the oven at 350°F (175°C) for about 15 minutes until they regain their crispy exterior.
Can I freeze Cheesy Beef Taquitos?
Absolutely! To freeze, assemble your taquitos without baking them first. Arrange them in a single layer on a baking sheet and place them in the freezer until solid. Then, transfer to a zip-top bag and freeze for up to 2 months. When ready to bake, cook them from frozen, adding around 10 minutes to the original baking time.
What are some common issues when making taquitos?
One common issue is cracking tortillas during assembly. To avoid this, always warm your tortillas before filling. If you find them cracking, you can microwave them for about 15-20 seconds wrapped in a damp paper towel to keep them moist and supple.
Can I make these taquitos gluten-free?
Yes, you can! Just choose gluten-free corn tortillas, and you’ll have the same delicious taquitos that cater to gluten-sensitive diets. Always double-check that your other ingredients, like spices and cheese, don’t contain gluten.
What ingredients can I substitute for a healthier option?
For a lighter version, consider swapping ground beef for ground turkey or chicken. You can also add more veggies to the filling, such as chopped bell peppers or spinach, to enhance the nutritional value while keeping the delightful flavors intact.

Crispy Cheesy Beef Taquitos: The Ultimate Game Night Snack
Ingredients
Equipment
Method
- In a large skillet, add the ground beef and chopped onion. Cook for 5–7 minutes until browned and onions are translucent. Add garlic and spices, sauté for 2 minutes, then stir in the tomato sauce and simmer for 2 minutes.
- Warm the tortillas to ensure they are pliable, either in a skillet or microwave for around 15-20 seconds.
- Place about 2 tablespoons of the beef mixture along one edge of a warmed tortilla, topped with shredded cheese. Roll tightly and tuck in the sides.
- Preheat your oven to 425°F (220°C). Place the taquitos seam-side down on a lined baking sheet, brush with oil, and sprinkle with cheese. Bake for 15–18 minutes until golden brown and crispy.
- Broil for 1–2 minutes for extra crunch, watching to prevent burning.
- Serve warm with dipping sauces like guacamole or salsa.
Leave a Reply