
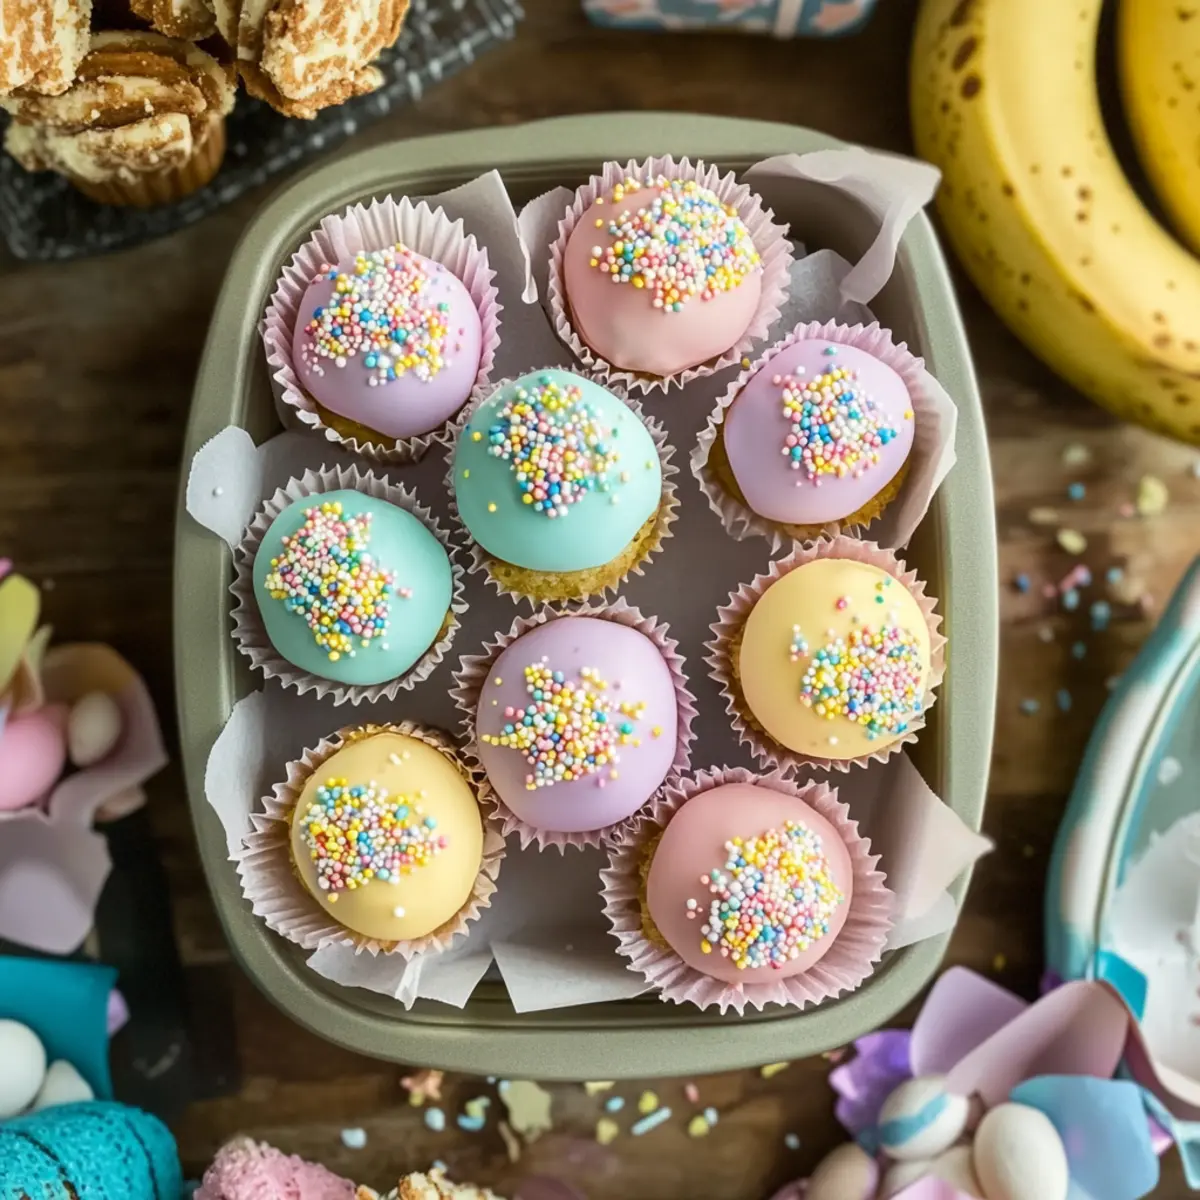
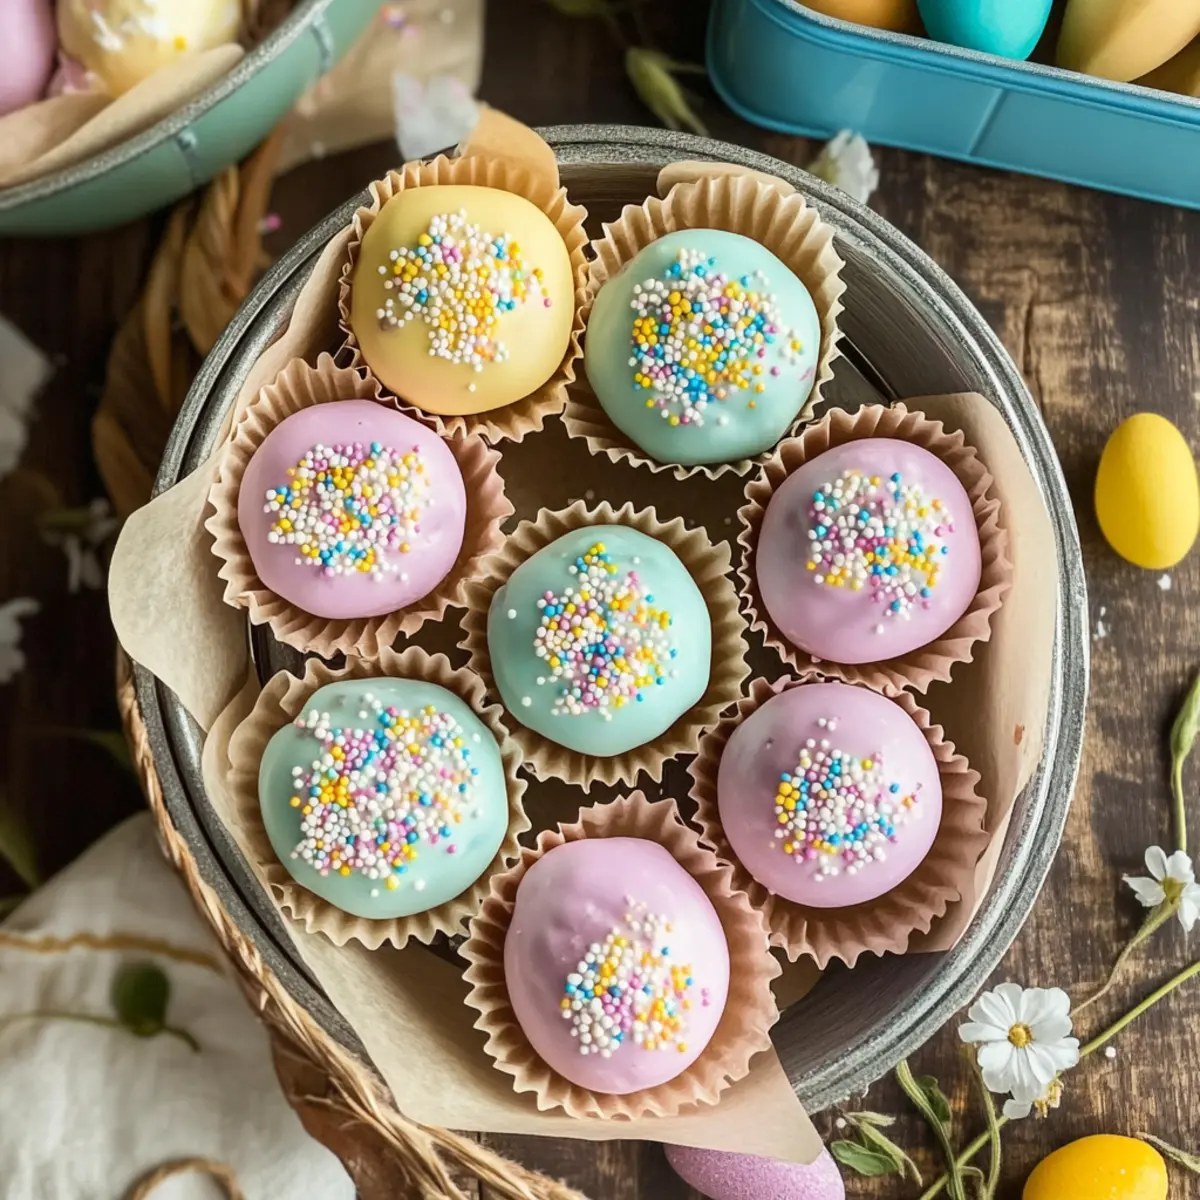
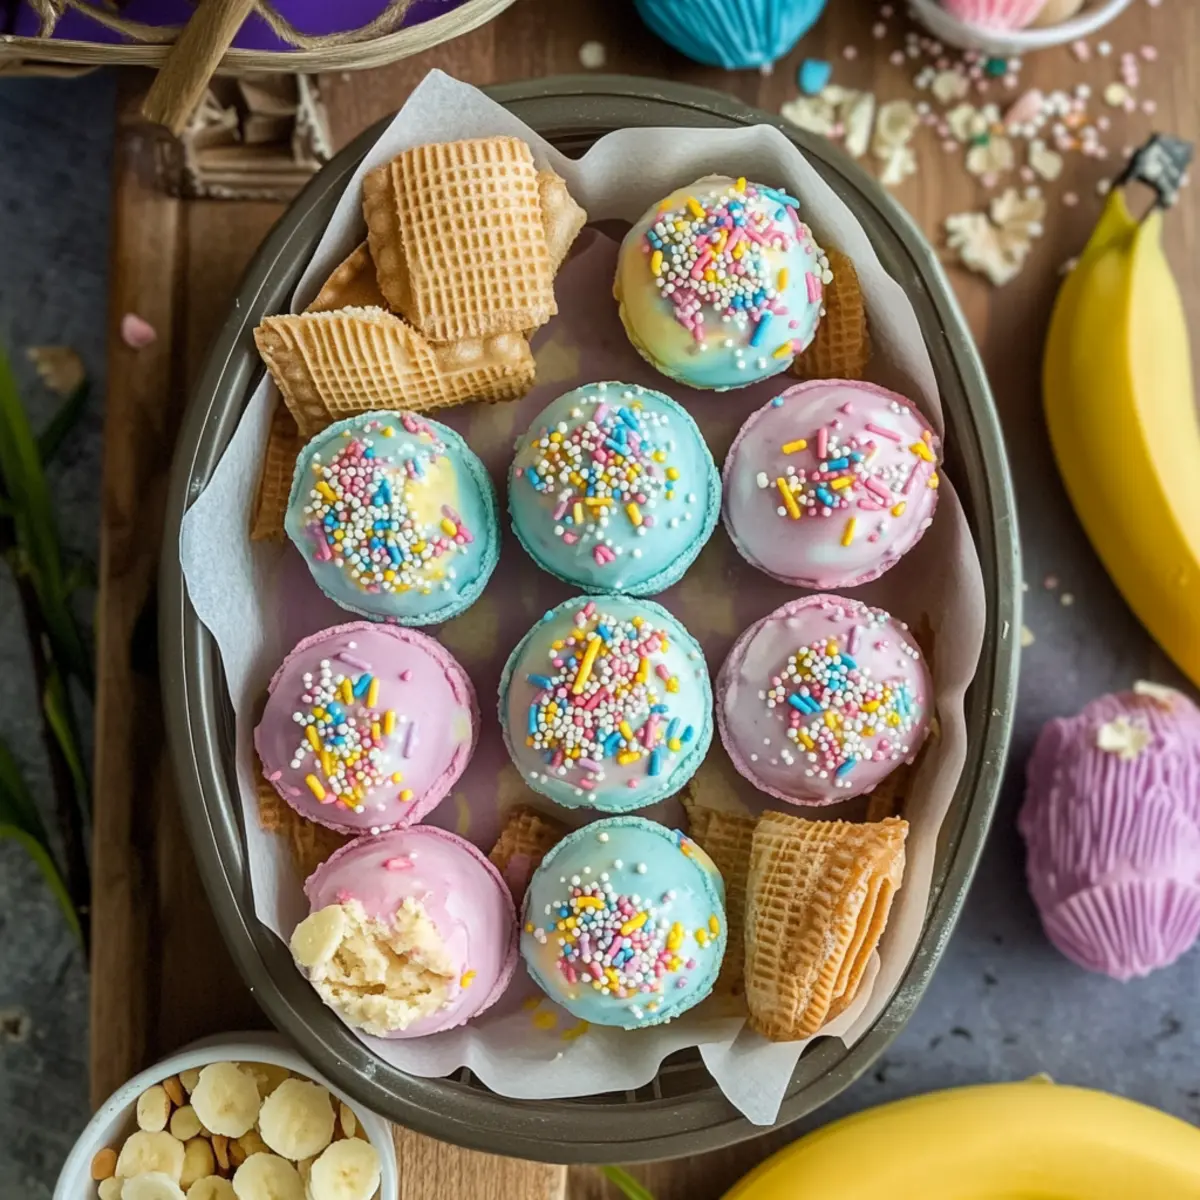
The first hint of spring always brings a rush of excitement, doesn’t it? One of my favorite ways to celebrate is by making these Banana Pudding Easter Truffles. This delightful no-bake recipe marries the nostalgic flavor of creamy banana pudding with the crunch of vanilla wafers, all enveloped in a pastel-hued chocolate shell that’s simply irresistible. Not only are they incredibly easy to whip up, but they’re also a perfect project to involve the kids—imagine their faces as they decorate these festive treats! These little bites are perfect for Easter gatherings or as thoughtful gifts for loved ones. Curious how to make your own batch of joy this spring? Let’s dive into the recipe!
Why Are These Truffles So Irresistible?
No-Bake Convenience: Who doesn’t love a recipe that doesn’t require turning on the oven? These truffles can be prepared effortlessly, making them a stress-free choice for your spring celebrations.
Kid-Friendly Fun: With their vibrant colors and easy assembly, these treats are perfect for little hands to help out in the kitchen. It’s a delightful way to bond while creating delicious memories.
Flavor Explosion: The creamy banana filling, paired with a crunchy vanilla wafer base, creates a harmonious blend of textures and flavors that will have everyone asking for seconds!
Versatile Treats: Whether you’re dressing these truffles for Easter or a casual gathering, you can customize them with colorful sprinkles or other toppings to match any occasion.
Gift-Worthy Goodness: Packaged in a cute box or decorative tin, these Banana Pudding Easter Truffles make a charming gift that shows you care. For a more classic option, check out Savory Bread Pudding as another delightful treat for loved ones!
Banana Pudding Easter Truffles Ingredients
For the Truffle Filling
• Crushed Vanilla Wafers – Provides the base and texture of the truffles; can substitute with graham crackers for a different flavor.
• Cream Cheese (softened) – Adds creaminess and structure; ensure it’s at room temperature for easy mixing.
• Banana Pudding Mix – Delivers the classic banana flavor; use high-quality mix for best results.
• Milk – Helps moisten the mixture; any milk can be used, including dairy-free alternatives.
• Vanilla Extract – Enhances the overall flavor of the filling; opt for pure vanilla for optimal taste.
For Coating and Decoration
• White Chocolate Chips or Candy Melts – For coating the truffles, providing sweetness and a smooth finish; can substitute with milk or dark chocolate for a different taste.
• Food Coloring – Pastel colors enhance the festive look; optional but recommended for decorating.
• Crushed Vanilla Wafers/Easter Sprinkles (Optional) – Used for decoration, adding texture and visual appeal; fun for a festive touch.
Step‑by‑Step Instructions for Banana Pudding Easter Truffles
Step 1: Make the Filling
In a large mixing bowl, combine 1 ½ cups of crushed vanilla wafers, 8 oz of softened cream cheese, 1 package of banana pudding mix, ¼ cup of milk, and 1 tsp of vanilla extract. Use a hand mixer or spatula to blend these ingredients together until a smooth, dough-like consistency forms, resembling cookie dough. This will serve as the flavorful base for your Banana Pudding Easter Truffles.
Step 2: Shape the Truffles
Once the filling is ready, scoop out tablespoon-sized measures and roll them gently between your palms to form smooth balls. Place the shaped truffles on a parchment-lined baking sheet, ensuring they have enough space to breathe. The goal is to have about 24 truffles, evenly sized for a delightful presentation when serving.
Step 3: Chill
Transfer the baking sheet with the rolled truffles to the refrigerator and chill for 30 to 45 minutes. This step is crucial for firming up the truffles, making them easier to coat in chocolate later. Keep an eye on them; they should be firm to the touch and hold their shape well when ready.
Step 4: Melt the Chocolate
While the truffles chill, prepare for coating by melting 12 oz of white chocolate chips in a microwave-safe bowl. Heat in 30-second intervals, stirring in between, until the chocolate is completely smooth and glossy. If desired, add a few drops of food coloring to give your chocolate a festive, pastel hue—perfect for those Easter celebrations!
Step 5: Coat the Truffles
Once the chocolate is melted, carefully dip each chilled truffle into the warm chocolate, ensuring it’s fully coated. Allow any excess chocolate to drip back into the bowl before placing each truffle back on the parchment-lined sheet. Make sure you work quickly so the truffles stay firm while being coated.
Step 6: Decorate
Before the chocolate sets, sprinkle the tops of the truffles with crushed vanilla wafers or colorful Easter-themed sprinkles for a festive touch. This adds both texture and visual appeal, elevating your Banana Pudding Easter Truffles beyond just a treat into a charming dessert centerpiece.
Step 7: Set and Serve
Let the truffles sit at room temperature for around 15-20 minutes until the chocolate has completely hardened, or you can speed up the process by placing them back in the refrigerator. Once set, your delightful Banana Pudding Easter Truffles are ready to be enjoyed or gifted. They can be stored in an airtight container for up to 5 days, keeping your sweet spring celebration going!

Expert Tips for Banana Pudding Easter Truffles
-
Quality Ingredients: Use high-quality banana pudding mix and pure vanilla extract to elevate the flavor of your Banana Pudding Easter Truffles. Don’t skimp on quality!
-
Cream Cheese Prep: Make sure your cream cheese is well-softened at room temperature. This ensures a smooth mixture that’s easy to combine without lumps.
-
Chill Properly: Don’t skip the chilling step after shaping the truffles. This helps them maintain their shape during the chocolate coating process.
-
Chocolate Melting: When melting the chocolate, be patient and use low heat. Overheating can cause the chocolate to seize up, ruining your coating.
-
Decorate Quickly: Sprinkles and decorations should be added before the chocolate sets. Work quickly to ensure the toppings stick well to the coating.
How to Store and Freeze Banana Pudding Easter Truffles
Airtight Container: Store the truffles in an airtight container at room temperature for up to 3 days. This keeps them fresh and preserves their delightful texture.
Refrigeration: For longer storage, refrigerate the truffles where they can last up to 5 days. Keep them covered to prevent drying out.
Freezing: Freeze Banana Pudding Easter Truffles for up to 2 months. Place them in a single layer on a baking sheet until firm, then transfer to a freezer-safe container.
Thawing: When ready to enjoy, thaw the truffles in the fridge for a few hours before serving to maintain the creamy filling and chocolate coating.
Banana Pudding Easter Truffles Variations
Feel free to get creative and make these truffles your own with a few simple swaps and additions!
-
Chocolate Twist: Substitute milk or dark chocolate for the coating instead of white chocolate for a richer flavor. This simple change can bring a whole new dimension to your truffles!
-
Coconut Coating: Roll the truffles in shredded coconut after coating them in chocolate for a tropical flair. The crunchy coconut pairs beautifully with the creamy filling, creating an enticing contrast.
-
Peanut Butter Infusion: Add 2 tablespoons of creamy peanut butter to the filling for a delicious nutty twist. This variation introduces a delightful flavor that complements the banana perfectly.
-
Minty Freshness: Mix a drop or two of mint extract into the chocolate coating for a refreshing zing. This lovely hint of mint elevates the classic flavor profile into something extraordinary.
-
Cookie Crunch: Incorporate finely crushed Oreos into the filling for an added crunch and cookies-and-cream flavor. The combination of banana and chocolate cookie will surely satisfy anyone’s sweet tooth!
-
Fruit Medley: Add a handful of mini chocolate chips or dried fruit such as raisins or diced strawberries into the filling. This enhances the texture and adds extra flavor bursts in every bite.
-
Spicy Surprise: For those who enjoy a bit of heat, sprinkle a pinch of cayenne pepper into the chocolate coating. This subtle spice adds an interesting kick and balances the sweetness beautifully.
-
Brownie Base: Swap the vanilla wafers for crushed brownie pieces for a fudgy twist. This variation transforms the truffles into a decadent dessert that brownie lovers will adore.
These variations are just the beginning! Embrace the joy of experimentation and create your very own signature version of Banana Pudding Easter Truffles that your friends and family will absolutely love.
What to Serve with Banana Pudding Easter Truffles
These festive treats shine brightest when accompanied by complementary flavors and textures that enhance your celebration.
-
Creamy Vanilla Ice Cream: A scoop of rich vanilla ice cream creates a delightful contrast, balancing the sweetness of the truffles.
-
Fresh Fruit Salad: Bright, colorful fruit adds a refreshing pop, cleansing the palate between bites of decadent truffles.
-
Chocolate-Covered Strawberries: Elevate the indulgence with luscious chocolate-dipped strawberries, mirroring the truffle’s coating and enhancing the dessert platter.
-
Sparkling Lemonade: This bubbly, citrusy drink provides a refreshing zing that brightens your taste buds and complements the banana flavor beautifully.
-
Chocolate Milkshake: For a sweet and nostalgic pairing, serve thick chocolate milkshakes that bring out the richness of the truffles.
-
Mini Carrot Cake Cupcakes: These moist, spiced treats offer a wonderful texture contrast while fitting perfectly into the Easter theme.
-
Coconut Macaroons: Add a tropical twist with chewy coconut macaroons that echo the sweetness found in the truffles, creating a cohesive dessert buffet.
-
Hot Cocoa: The warm, rich flavors of hot cocoa provide a cozy atmosphere that beautifully contrasts the cool, creamy truffles.
-
Easter-themed Cookies: Cute cookies decorated with spring motifs will not only look adorable but also tie the festive theme together for your gathering.
Make Ahead Options
These Banana Pudding Easter Truffles are perfect for busy home cooks looking to save time! You can prepare the filling up to 24 hours in advance by mixing the crushed vanilla wafers, cream cheese, banana pudding mix, milk, and vanilla extract, then chilling it in the refrigerator. You can also roll the truffles into balls and refrigerate them for up to 3 days before dipping in chocolate. To maintain their quality, store the truffles in an airtight container to prevent them from drying out. When you’re ready to serve, simply coat them in melted chocolate and allow them to set. These make-ahead steps ensure that you can enjoy delightful, homemade treats with minimal last-minute effort!
Banana Pudding Easter Truffles Recipe FAQs
What kind of bananas should I use for banana pudding truffles?
Absolutely! When selecting bananas, look for ones that are ripe but not overly mushy. They should have a few brown spots but still be firm enough to slice easily. The natural sweetness from ripe bananas enhances the flavor of your truffles, creating that luscious banana pudding taste.
How should I store leftover Banana Pudding Easter Truffles?
For the best results, store your truffles in an airtight container at room temperature for up to 3 days. If you want to keep them longer, pop them in the refrigerator where they’ll stay fresh for up to 5 days. Just ensure they are covered to prevent them from drying out.
Can I freeze Banana Pudding Easter Truffles?
Definitely! You can freeze these delightful truffles for up to 2 months. First, place them in a single layer on a baking sheet lined with parchment paper and freeze until firm. Once they’re set, transfer them to a freezer-safe container or plastic bag. When you’re ready to enjoy, thaw them in the refrigerator for a few hours before serving.
What if my chocolate coating is too thick?
Very! If you find that your chocolate coating is too thick, try adding a teaspoon of vegetable oil or coconut oil to smooth it out. Make sure to melt the chocolate gently, stirring frequently. This will help achieve that perfect, glossy finish, ensuring your truffles look as good as they taste!
Are these truffles suitable for people with allergies?
Good question! Be mindful if you’re serving to someone with dietary restrictions. The truffles contain dairy and may not be suitable for those with lactose intolerance or dairy allergies. To make a dairy-free version, substitute the cream cheese with vegan cream cheese and use dairy-free chocolate. Always check labels for possible allergens!
How long do these truffles last once made?
These Banana Pudding Easter Truffles can last for up to 5 days in the refrigerator when stored correctly. However, for the best taste and texture, I recommend consuming them within a few days of making them. Trust me, they’re so delicious, they might not last long!
Banana Pudding Easter Truffles: No-Bake Joy for Spring Celebrations
Ingredients
Equipment
Method
- In a large mixing bowl, combine crushed vanilla wafers, softened cream cheese, banana pudding mix, milk, and vanilla extract. Blend until smooth.
- Scoop tablespoon-sized measures and roll them into smooth balls, placing them on a parchment-lined baking sheet.
- Chill the baking sheet with truffles in the refrigerator for 30 to 45 minutes.
- Melt white chocolate chips in a microwave-safe bowl, stirring until smooth. Optionally add food coloring.
- Dip each chilled truffle into melted chocolate and place them back on the parchment-lined sheet.
- Before the chocolate sets, sprinkle tops with crushed vanilla wafers or colorful sprinkles for decoration.
- Let truffles sit at room temperature for 15-20 minutes until chocolate hardens, or refrigerate to speed up.
Leave a Reply