
As the leaves turn golden and the air fills with a crispness that beckons comfort, I often find myself in the kitchen, dreaming up ways to capture the essence of fall. Enter the Ultimate Bloomin’ Apples—a stunning dessert that not only delights the eyes but also warms the heart. These tender baked apples reveal a gooey caramel center as they bloom open, transforming your kitchen into a haven of sweet aromas and cozy vibes. What I love most about this easy fall dessert is how quickly it comes together, making it perfect for gatherings or a weeknight treat. Plus, with gluten-free options, everyone can enjoy this delectable dish. Ready to fill your home with the charm of autumn? Let’s dive into creating these irresistible Bloomin’ Apples together!
Why Make Ultimate Bloomin’ Apples?
Simplicity at its Best: This easy fall dessert comes together quickly, perfect for busy weeknights or surprise guests.
Visual Appeal: Each apple blooms into a stunning floral shape, making it an impressive centerpiece for any gathering.
Versatile Options: Feel free to customize with your favorite fillings like oats or nuts, ensuring everyone gets a taste they love.
Delicious Aroma: The warm spices and caramel create an irresistible scent that fills your home with autumn comfort.
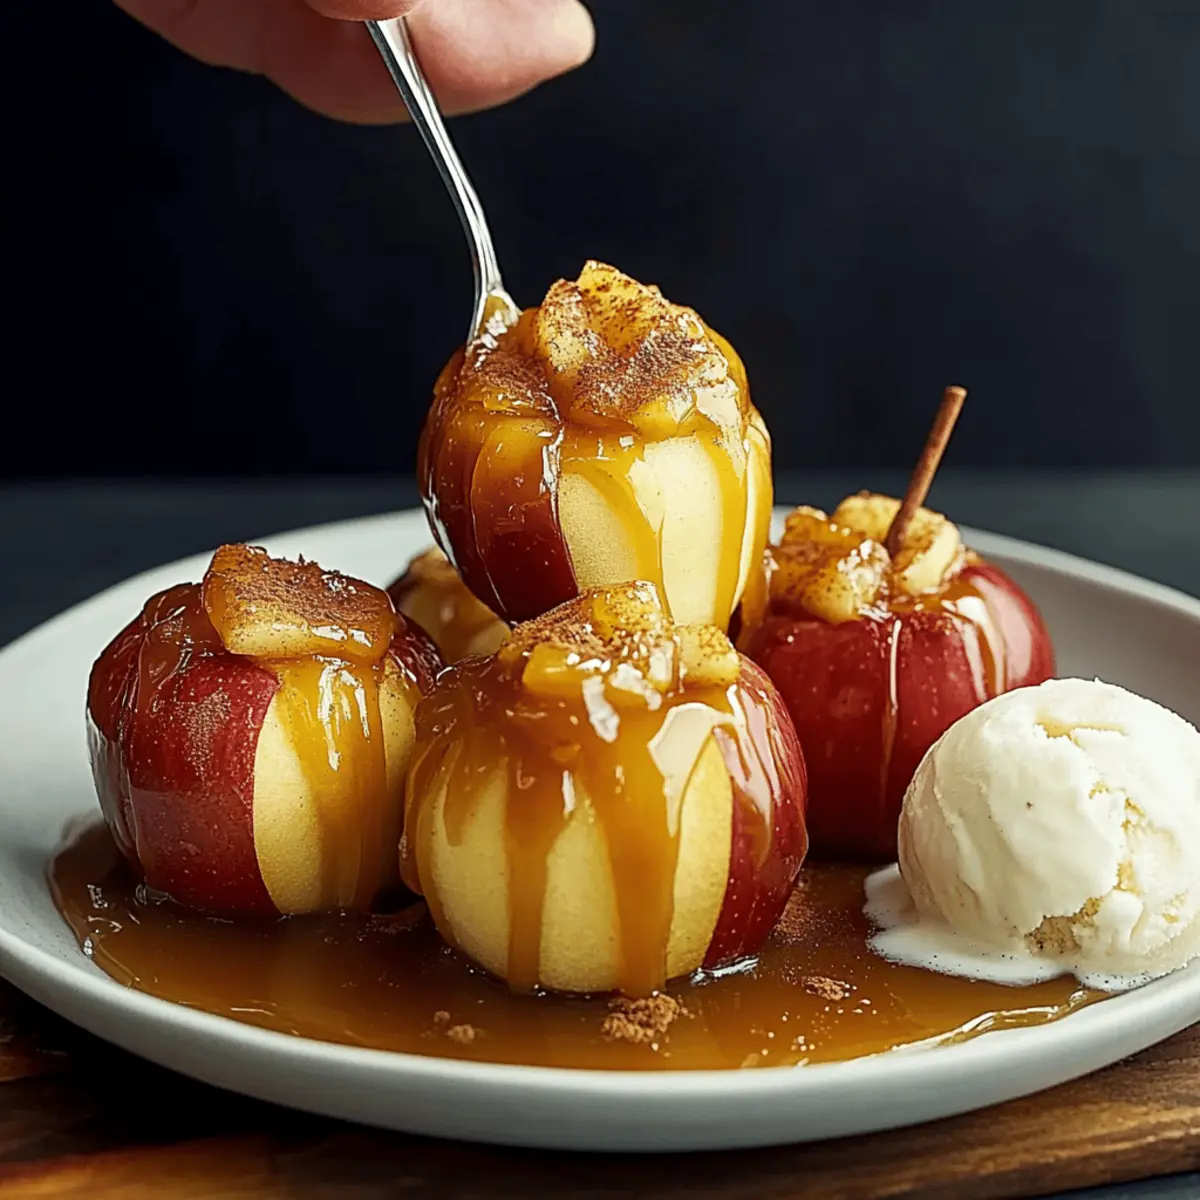
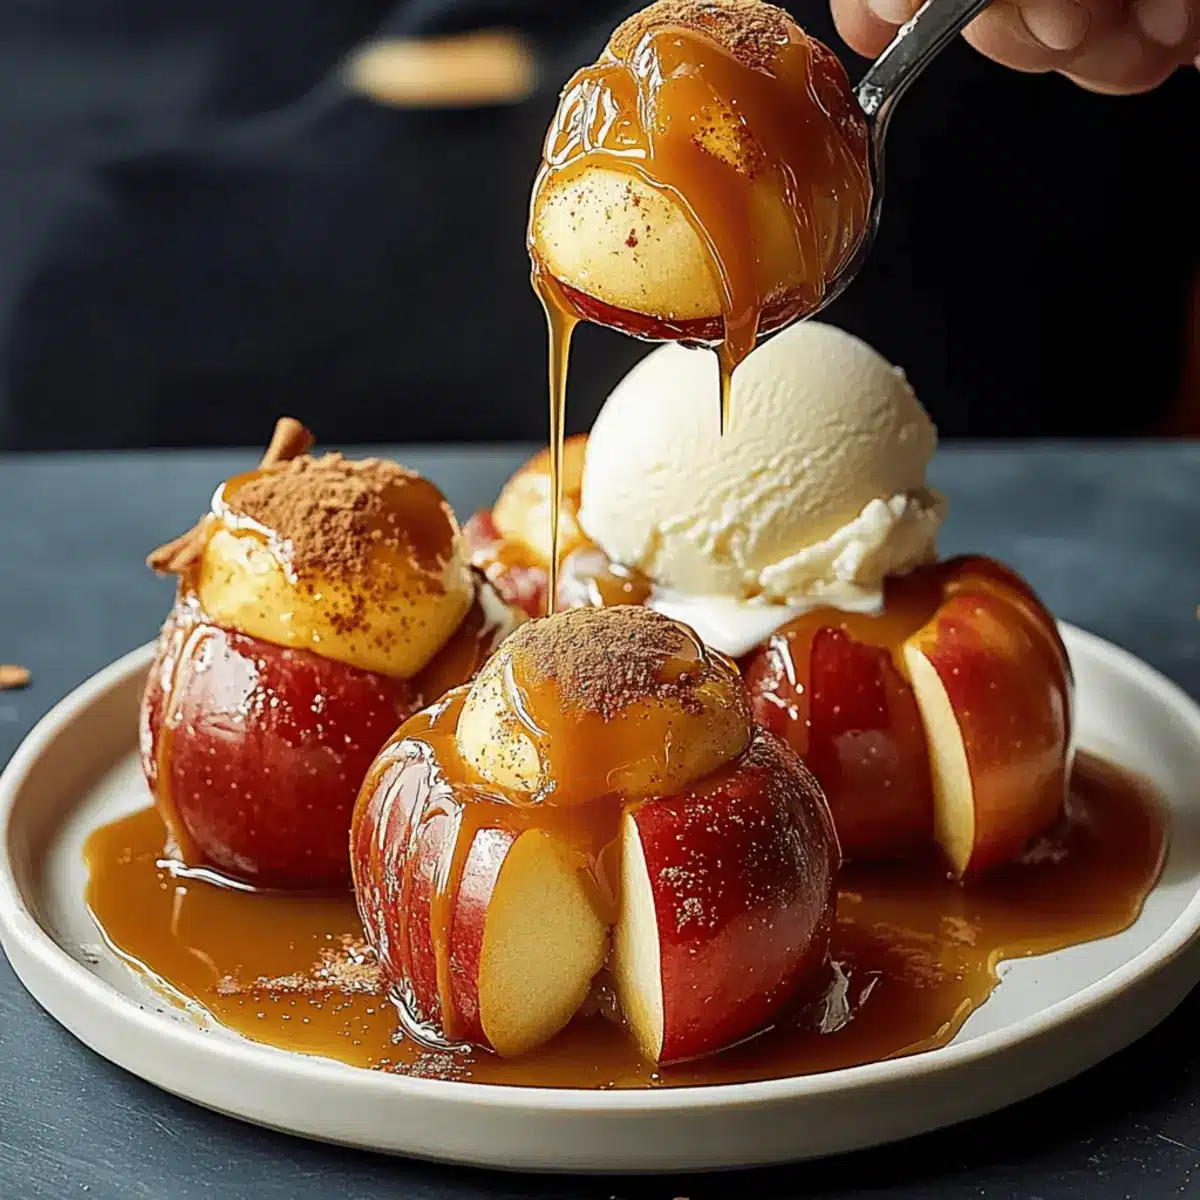
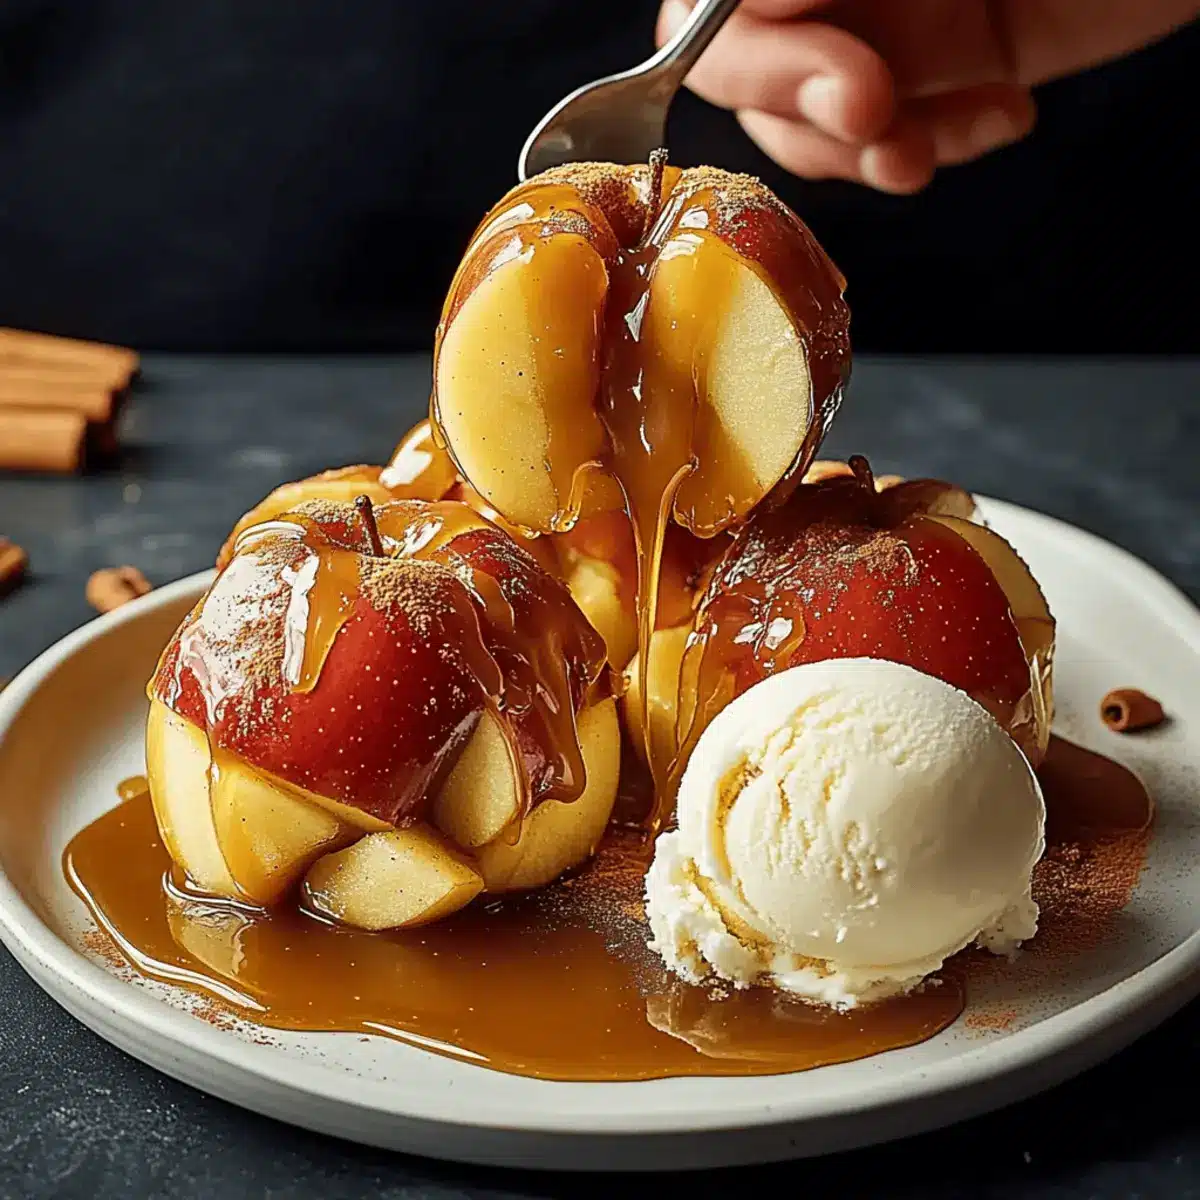
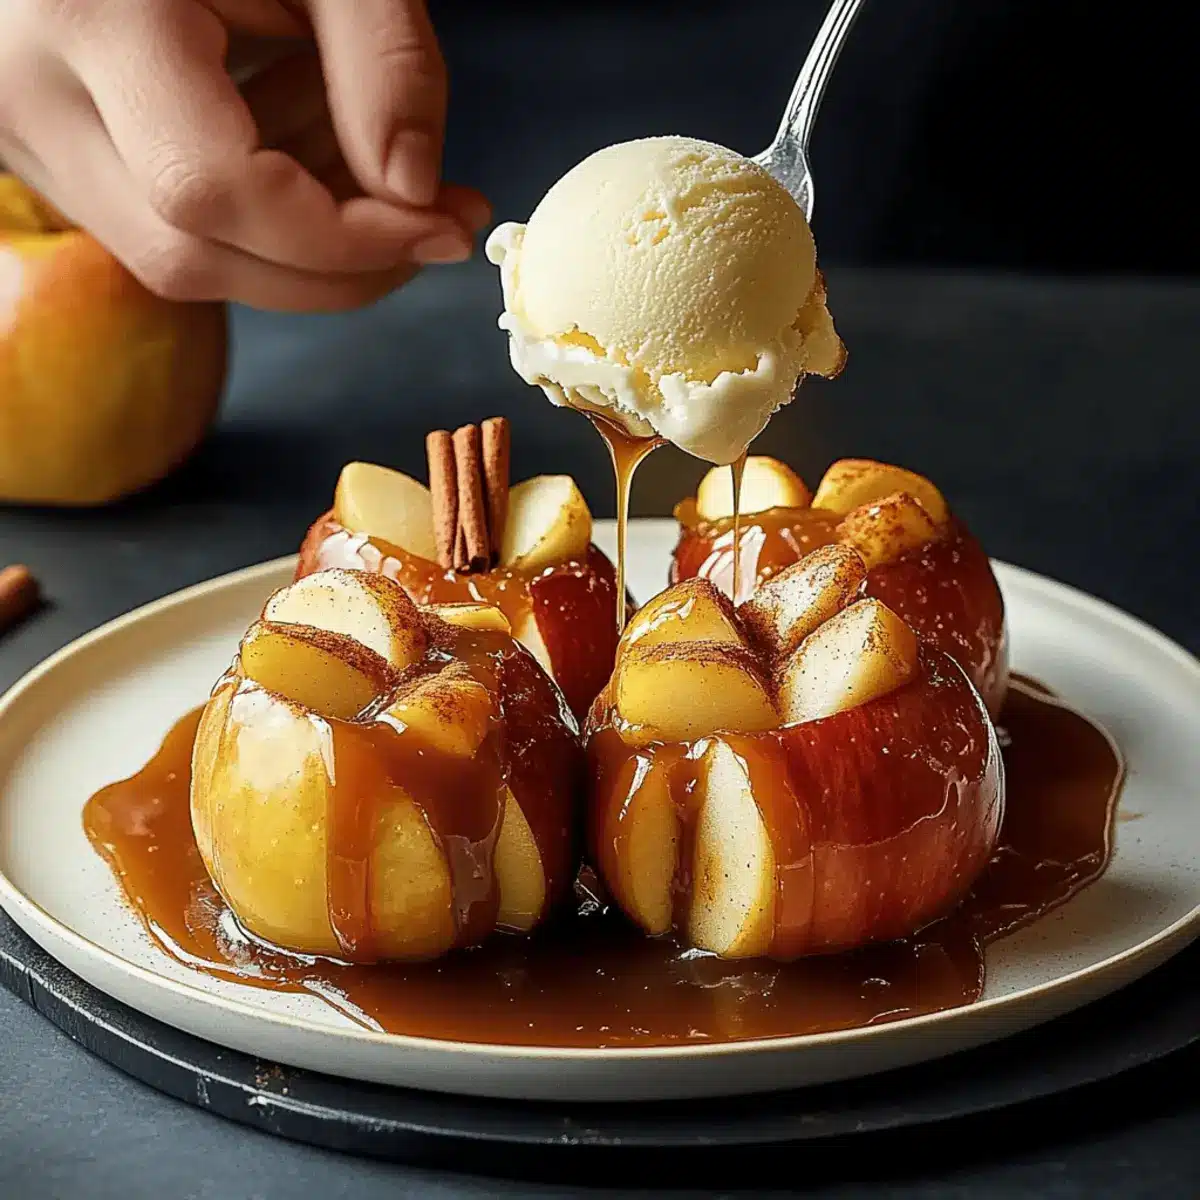
Crowd-Pleaser: Serve alongside a scoop of ice cream for a delightful contrast that will leave everyone asking for seconds.
For more cozy fall favorites, try Parmesan Italian Sausage or indulge in a slice of Wisconsin Apple Kringle.
Ultimate Bloomin’ Apples Ingredients
For the Apples
• Firm Apples – Choose varieties like Honeycrisp or Granny Smith for the best texture and flavor.
• Melted Butter – Adds richness and helps the apples caramelize beautifully; coconut oil is a great dairy-free alternative.
• Brown Sugar – Provides deep sweetness; substitute with coconut sugar for a healthier touch.
• Granulated Sugar – Enhances overall sweetness; honey or maple syrup can work well if preferred.
• Ground Cinnamon – Brings warm, cozy notes; adjust to taste or sprinkle in some nutmeg for extra warmth.
For the Filling
• Chewy Caramel Squares – Creates a deliciously gooey center that melts perfectly as the apples bake; soft chocolate can also be used for a twist.
For Serving
• Vanilla Ice Cream – A creamy topping that pairs wonderfully with warm apples; opt for dairy-free ice cream to accommodate vegan diets.
• Caramel Sauce – Drizzle over the dessert for an extra touch of sweetness; make sure to check for gluten-free options if needed.
• Cooking Spray – Prevents sticking; olive oil or butter are suitable substitutes for greasing your baking dish.
These Ultimate Bloomin’ Apples are sure to captivate your guests with their stunning presentation and mouthwatering aroma!
Step‑by‑Step Instructions for Ultimate Bloomin’ Apples
Step 1: Preheat the Oven
Begin by preheating your oven to 375°F or your air fryer to 350°F. While the oven warms up, grab a mixing bowl and whisk together melted butter, brown sugar, granulated sugar, and ground cinnamon. This mixture will enhance the flavor of your Ultimate Bloomin’ Apples and help caramelize them beautifully as they bake.
Step 2: Prepare the Apples
Next, carefully slice off the top of each apple and hollow them out, leaving the bottoms intact. Use a small spoon or apple corer for this task. Then, make thin crosswise slices down the sides of each apple, stopping just short of the bottom to create that lovely bloom effect. Set the prepared apples aside for the next step.
Step 3: Add the Caramel Filling
Take your hollowed apples and fill each with two chewy caramel squares, nestling them deep within. With a pastry brush, generously coat the outside of each apple with the butter-sugar mixture, ensuring every crevice gets some attention. This will not only add flavor but also help in creating that delightful caramelized crust during baking.
Step 4: Arrange for Baking
Place your prepared apples upright in a greased baking dish, ensuring they don’t topple over. Drizzle any remaining butter-sugar mixture over the tops. This step is crucial as it allows the flavors to meld together as the Ultimate Bloomin’ Apples bake. Slide the baking dish into your preheated oven and set your timer for 30 minutes.
Step 5: Bake to Perfection
Keep a close eye on the apples while they bake; after 30 minutes in the oven (or 20 minutes in an air fryer), check for tenderness. The apples should be soft yet hold their shape, and you should see some bubbling caramel around the edges. If they need a little extra time, let them go for another 5 minutes, but watch closely to avoid overbaking.
Step 6: Serve and Enjoy
Once the Ultimate Bloomin’ Apples are golden and fragrant, remove them from the oven and let them cool slightly on a wire rack. Serve these warm, topped with a generous scoop of creamy vanilla ice cream and a drizzle of caramel sauce. This enchanting presentation is sure to be the star of your fall gatherings!
Expert Tips for Ultimate Bloomin’ Apples
-
Choose the Right Apples: Select firm apples like Honeycrisp or Granny Smith to avoid mushiness. Softer varieties may not hold their shape during baking.
-
Cutting Technique: Carefully slice the apples without cutting all the way through. Use chopsticks as a guide while making crosswise cuts for a beautiful bloom.
-
Butter Mixture Matters: Don’t skimp on the melted butter and sugar mixture; it not only enhances flavor but also promotes caramelization for your Ultimate Bloomin’ Apples.
-
Watch the Baking Time: Check for doneness a few minutes early to ensure the apples are tender but still hold their shape. Overbaking can lead to mushy results.
-
Customize Fillings: Feel free to experiment with various fillings like oats or nuts for extra flavor and texture in your Bloomin’ Apples.
What to Serve with Ultimate Bloomin’ Apples
Warm, fragrant desserts deserve an equally delightful accompaniment to create a well-rounded meal experience.
- Creamy Vanilla Ice Cream: The rich creaminess pairs perfectly with warm, gooey apples, creating a delightful contrast you’ll crave.
- Spiced Hot Cider: A warm mug of spiced hot cider enhances the fall flavors while inviting cozy vibes to your dessert table.
- Gingerbread Cookies: These spiced cookies bring a festive charm and crunch that complements the tenderness of the bloomin’ apples.
- Caramel Sauce Drizzle: Elevate your dessert by drizzling extra caramel sauce over the apples for added sweetness and an indulgent touch.
- Whipped Cream Topping: Light and airy, whipped cream adds a lovely texture that balances the heaviness of the caramel and apples.
Enjoy these delightful pairings that enhance the charming autumn experience while giving your Ultimate Bloomin’ Apples the attention they deserve!
Ultimate Bloomin’ Apples Variations & Substitutions
Feel free to get creative and customize your Bloomin’ Apples for a personal touch that will delight everyone’s taste buds!
-
Nutty Crunch: Add chopped walnuts or pecans to the caramel filling for a delightful crunch. The nutty flavor complements the sweetness of the apples beautifully.
-
Oat Topping: Sprinkle your apples with a mixture of oats, brown sugar, and melted butter before baking for a crispy topping. This adds a cozy, apple crisp feel to your dessert.
-
Pumpkin Spice Twist: Substitute ground cinnamon with pumpkin spice for a festive flavor twist. This variation brings the essence of fall right into your kitchen.
-
Chocolate Delight: Replace the caramel squares with soft chocolate or nut butter for a rich, creamy center. It turns your Bloomin’ Apples into an indulgent, chocolatey treat.
-
Gluten-Free Caramel: Ensure you’re using a gluten-free caramel sauce for a worry-free dessert that everyone can enjoy. Check labels for any hidden gluten.
-
Dairy-Free Creaminess: Use a dairy-free vanilla ice cream made from almond or coconut milk for a vegan-friendly version. It pairs perfectly with the warm apples and adds a creamy texture.
-
Spiced Apple Blend: Mix your apples with a hint of citrus by adding a splash of lemon juice or zest. The brightness will balance the sweetness perfectly.
For more delicious fall ideas, consider making a scrumptious Bacon Egg Burrito or indulge in the warm, comforting flavors of Parmesan Italian Sausage.
Make Ahead Options
These Ultimate Bloomin’ Apples are perfect for busy home cooks looking to save time without sacrificing flavor! You can prepare the apples by slicing and coring them up to 24 hours in advance; simply store the prepared apples in a bowl of water with a splash of lemon juice to prevent browning. Additionally, you can mix the butter-sugar-cinnamon filling and refrigerate it for up to 3 days. When you’re ready to bake, just fill each apple with caramel and brush with the butter mixture, then pop them in the oven or air fryer. This way, you’ll enjoy restaurant-quality results with minimal effort and have more time to relax and enjoy autumn’s cozy moments!
How to Store and Freeze Ultimate Bloomin’ Apples
Fridge: Store any leftover baked Bloomin’ Apples in an airtight container in the fridge for up to 3 days. Reheat in the oven for a warm treat.
Freezer: If you want to prepare ahead, freeze unbaked, stuffed apples. Wrap each apple individually in plastic wrap and place them in a freezer-safe container. They can be stored for up to 2 months.
Reheating: To reheat baked apples, place them in the oven at 350°F for 10-15 minutes until heated through. If frozen, no need to thaw—just add a few extra minutes to the baking time.
Serving Fresh: For the best taste, ultimate Bloomin’ Apples are best served warm right after baking, but following these tips will keep them delightful for later enjoyment.
Ultimate Bloomin’ Apples Recipe FAQs
What type of apples are best for Bloomin’ Apples?
Absolutely! For the best texture and flavor, choose firm varieties such as Honeycrisp, Gala, or Granny Smith. These apples hold their shape during baking and provide a delightful contrast to the gooey caramel filling.
How should I store leftover Bloomin’ Apples?
To keep your leftover baked Bloomin’ Apples fresh, place them in an airtight container in the refrigerator. They will stay delicious for up to 3 days. When you’re ready to enjoy them again, just reheat in the oven at 350°F for about 10-15 minutes until warmed through.
Can I freeze prepared Bloomin’ Apples?
Yes, you can absolutely freeze unbaked Bloomin’ Apples! To do so, wrap each stuffed apple individually in plastic wrap and place them in a freezer-safe container. They can stay fresh for up to 2 months. When you’re ready to bake them, pop them straight from the freezer into the oven, just add an extra 5-10 minutes to the baking time.
What should I do if my apples turn mushy while baking?
To avoid mushy apples, make sure you’re using a firmer variety and keep an eye on the baking time. Baking them for too long can lead to this issue. If you’re unsure, start checking for tenderness a few minutes before the suggested baking time and remove them when they’re soft but still holding their shape.
Are there any allergy concerns I should be aware of?
Definitely, if serving to guests with dietary restrictions, be mindful of the ingredients you use. Some store-bought caramel may contain allergens like dairy or gluten, so check the labels carefully. You can also make homemade caramel or use alternative fillings like nut butter for a gluten-free version.
Can I customize the filling of my Bloomin’ Apples?
Very much so! One of the best parts of making Ultimate Bloomin’ Apples is their versatility. You can add fillings like granola, oats, or chopped nuts for extra texture and flavor. Feel free to get creative with spices like nutmeg or pumpkin spice to tailor the taste to your liking.
Ultimate Bloomin’ Apples: A Cozy Fall Dessert Delight
Ingredients
Equipment
Method
- Preheat the oven to 375°F (or air fryer to 350°F). Whisk melted butter, brown sugar, granulated sugar, and ground cinnamon together in a bowl.
- Slice off the tops of the apples and hollow them out, leaving bottoms intact. Make thin crosswise slices down the sides without cutting through the bottom.
- Fill each hollowed apple with two chewy caramel squares. Coat the outside of each apple with the butter-sugar mixture.
- Arrange the apples in a greased baking dish. Drizzle any remaining butter-sugar mixture on top. Bake for 30 minutes.
- Check apples for tenderness after 30 minutes (20 in air fryer). If needed, bake an additional 5 minutes. They should be soft yet hold shape.
- Once golden and fragrant, let the apples cool slightly. Serve warm with ice cream and caramel sauce.
Leave a Reply