
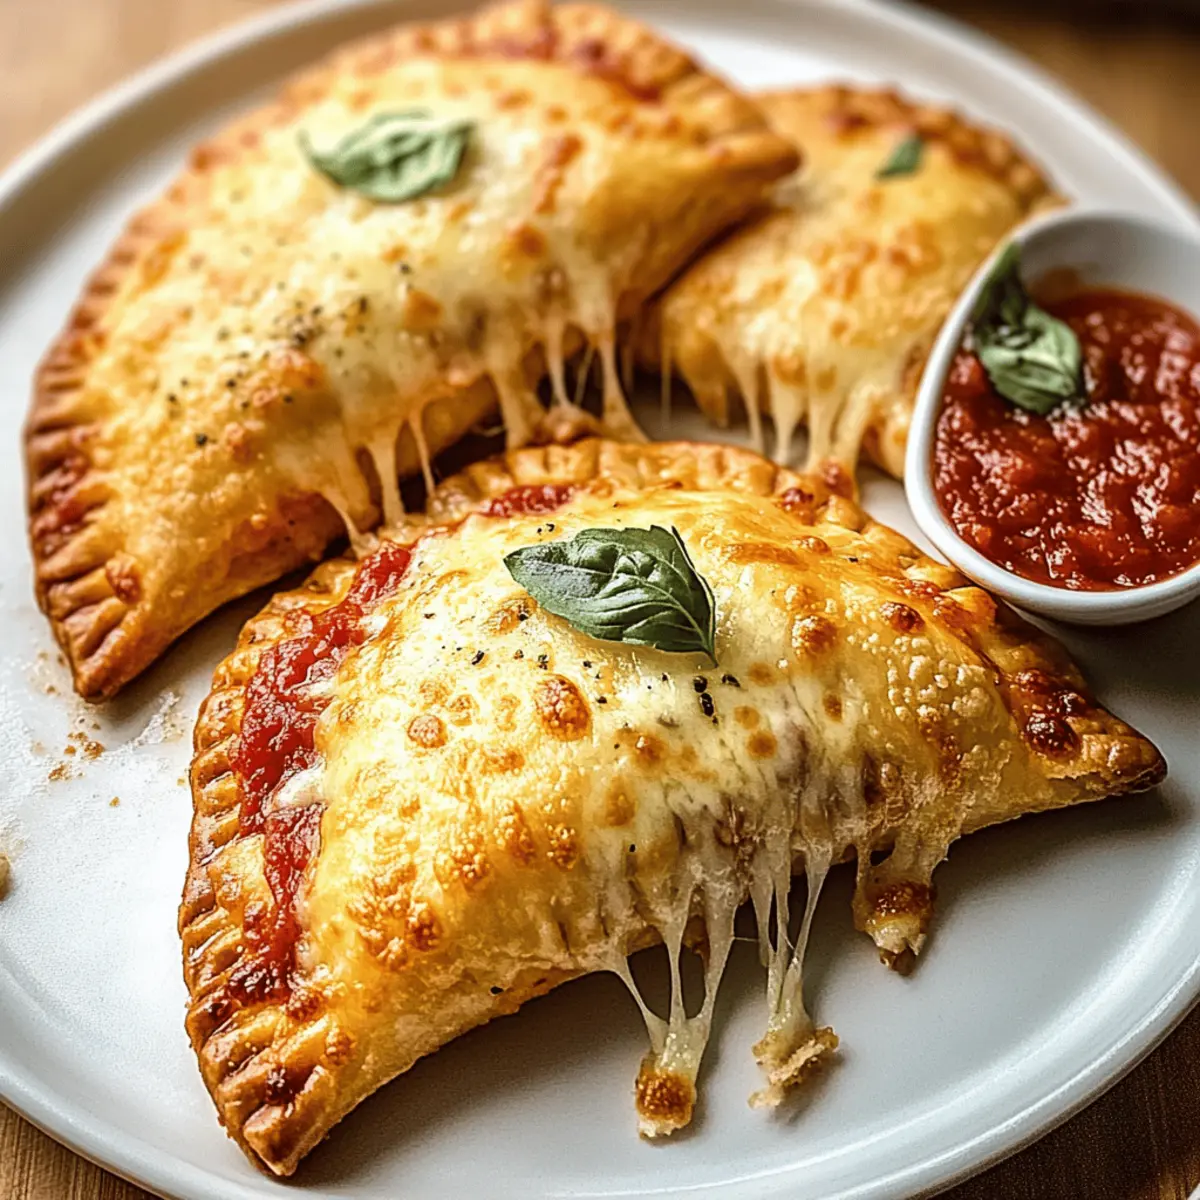
As I stood in my kitchen, the scent of warm dough filled the air, instantly transporting me back to carefree childhood afternoons. There’s something magical about creating Homemade Cheesy Pizza Pockets that blends nostalgia with culinary creativity. Picture flaky pastry enveloping a delicious gooey cheese and savory sauce—each bite is a comforting reminder of family gatherings and casual movie nights. The best part? This easy recipe caters to all taste buds with a variety of customizable fillings, perfect for every occasion, from quick snacks to dinner parties. Whether you choose classic pepperoni or opt for vibrant veggies, these pockets promise to be a crowd-pleaser for adults and kids alike. Are you ready to dive into the joy of making your very own pizza pockets at home?
Why Are Homemade Pizza Pockets Amazing?
Comforting, Nostalgic Flavor: Enjoy the familiar taste of pizza wrapped in a flaky crust, evoking fond memories.
Easy to Make: With simple ingredients and steps, anyone can whip these up with confidence—perfect for kitchen novices!
Endless Variations: Swap fillings to suit your mood—think veggie delights or spicy pepperoni! Feeling adventurous? Check out options like Cheesy Cajun Garlic or Cheesy Garlic Butter for inspiration.
Family-Friendly Fun: Engage the whole family in the kitchen to create tailored snacks everyone will love.
Ideal for Meal Prep: Make a batch in advance; they freeze beautifully and reheat crisply for later enjoyment!
Whether it’s snack time or a cozy dinner, these pizza pockets are sure to satisfy your cravings!
Homemade Cheesy Pizza Pockets Ingredients
For the Dough
- All-Purpose Flour – Creates the dough structure; consider using whole wheat flour for extra fiber or gluten-free flour for a different twist.
- Salt – Enhances flavor and balances the sweetness of the dough.
- Baking Powder – Acts as a leavening agent to ensure a light and flaky texture.
- Unsalted Butter (chilled and diced) – Provides tenderness and helps create those flaky layers.
- Milk – Binds the dry ingredients together to ensure a soft and workable dough.
For the Filling
- Shredded Mozzarella Cheese – Offers that classic, gooey cheese stretch synonymous with comfort food.
- Grated Parmesan Cheese – Adds a delightful nuttiness and depth of flavor to your pockets.
- Tomato Sauce – The base of the filling that infuses each bite with rich flavor.
- Dried Oregano and Basil – Delivers herby notes reminiscent of your favorite Italian pizza.
- Pepperoni Slices / Preferred Toppings – Customize to taste; feel free to add veggies or other proteins!
For Finishing
- Beaten Egg (for egg wash) – Brush this on for a golden-brown finish that makes each pocket irresistible.
Ready to whip up your own batch of Homemade Cheesy Pizza Pockets? Enjoy the fun of filling and baking these delightful snacks!
Step‑by‑Step Instructions for Homemade Cheesy Pizza Pockets
Step 1: Preheat and Prepare Baking Sheet
Begin by preheating your oven to 375°F (190°C). While the oven warms, line a baking sheet with parchment paper to prevent sticking. This simple step will ensure a clean surface for your delicious Homemade Cheesy Pizza Pockets and make cleanup a breeze after you enjoy these cheesy delights.
Step 2: Mix the Dry Ingredients
In a large mixing bowl, whisk together the all-purpose flour, salt, and baking powder until well combined. This dry mixture is the foundation of your dough and will create that flaky texture. Take a moment to enjoy the fresh smell of flour as you prepare to create the dough for your tasty pizza pockets.
Step 3: Cut in the Butter
Next, take your chilled and diced unsalted butter and cut it into the flour mixture using a pastry cutter or your fingers. Continue until the mixture resembles coarse crumbs, with a few larger pea-sized pieces remaining. This step is crucial for achieving those delightful flaky layers in your Homemade Cheesy Pizza Pockets.
Step 4: Add the Milk
Pour in the milk, stirring gently until a dough begins to form. Be sure not to overmix, as this can toughen the dough. The goal is a soft, cohesive texture that holds together but maintains a lightness. Once your dough is ready, it’s time to bring it together on a lightly floured surface.
Step 5: Knead the Dough
Transfer the dough to a floured surface and gently knead it for about 2 minutes until it’s smooth and elastic. This quick knead helps develop the dough’s structure, which is essential for your Homemade Cheesy Pizza Pockets. Take care not to overwork it, as you want to keep that lovely tender texture.
Step 6: Roll Out the Dough
Using a rolling pin, roll out the dough to about 1/8-inch thickness. Aim for an even surface, as this will help your pizza pockets cook uniformly. The sight of the dough transforming into a smooth sheet will boost your excitement as you prepare to fill it with cheesy goodness!
Step 7: Cut Dough Circles
Now, use a round cutter or a glass to cut out circles from the rolled dough, each measuring about 3-4 inches in diameter. Gather any scraps to reroll them if needed. These rounds will cradle your savory filling, setting the stage for your Homemade Cheesy Pizza Pockets.
Step 8: Prepare the Sauce
In a small bowl, mix together your tomato sauce with dried oregano and basil. This herby infusion will enhance the flavors of your filling and add that classic pizza taste. Take a moment to enjoy the rich aroma of the sauce; it will be the heart of your delicious pizza pockets.
Step 9: Assemble the Pockets
Place a spoonful of the prepared sauce on each dough circle, then generously sprinkle mozzarella and Parmesan cheese on top. If you’re adding pepperoni slices or other toppings, now is the time to layer them on. This step is where your creativity shines, making each pocket uniquely delicious!
Step 10: Seal the Pockets
Carefully fold each dough circle over the filling to form a crescent shape. Press the edges firmly to seal, crimping them with a fork for extra security. Ensure none of the filling escapes during baking, as this will keep your Cheesy Pizza Pockets perfectly gooey and delightful.
Step 11: Prepare for Baking
Arrange the filled pockets on your prepared baking sheet, leaving space between them. Brush the tops with the beaten egg for that irresistible golden-brown finish. This simple step adds shine and enhances the visual appeal of your beautiful Homemade Cheesy Pizza Pockets.
Step 12: Bake to Perfection
Bake in the preheated oven for 15-20 minutes, or until the pockets are puffed up and turning golden brown. The enticing aroma of baked dough and melted cheese will fill your kitchen, making it hard to resist them as they come out of the oven!
Step 13: Cool and Serve
Once baked to perfection, allow your Homemade Cheesy Pizza Pockets to cool for a few minutes before serving. This brief cooling time ensures you don’t burn your mouth on the molten cheese. Serve warm alongside marinara sauce for dipping—enjoy the melty, cheesy goodness!
What to Serve with Homemade Cheesy Pizza Pockets?
Transform your delightful pizza pockets into a complete meal with these tempting pairings that enhance every bite.
- Marinara Sauce: The classic dipping companion adds a tangy burst that perfectly complements the cheesy goodness.
- Garlic Breadsticks: These buttery, garlicky treats provide a delectable crunch, inviting a more indulgent pizza night experience.
- Caesar Salad: Crisp romaine, creamy dressing, and crunchy croutons offer a refreshing contrast to the rich pockets.
- Vegetable Platter: A colorful array of fresh veggies with dip adds a light, healthy balance alongside your cheesy pockets.
- Coleslaw: The crunchy and tangy slaw brings texture and brightness to the meal, enhancing flavors without overwhelming them.
- Potato Wedges: Crispy outside, fluffy inside, these seasoned wedges add substance to your dinner while pairing beautifully with your pizza pockets.
- Sparkling Lemonade: This refreshing drink offers a zesty finish that cuts through the richness, perfect for family gatherings.
- Brownies: End your meal on a sweet note with fudgy brownies, maintaining that comforting vibe while satisfying sweet tooth cravings.
- Fruit Salad: A medley of fresh fruits brightens up the table and adds a natural sweetness, balancing the meal beautifully.
Homemade Cheesy Pizza Pockets Variations
Get ready to explore a world of flavors by customizing your pizza pockets with these delicious suggestions!
-
Cheese Swap:
Enhance the taste by swapping mozzarella for cheddar or pepper jack. Each variety brings its unique meltiness and flavor kick. -
Veggie Delight:
Fill with sautéed mushrooms, colorful bell peppers, or fresh spinach for a nutritious twist. These veggie-packed pockets are a feast for both the eyes and the palate! -
Meat Lovers:
Add cooked sausage, diced ham, or crispy bacon to satisfy those hearty cravings. Combining different meats can transform each bite into a savory sensation. -
Spicy Kick:
Incorporate banana peppers or jalapeños for a spicy edge. Feel the heat that elevates your homemade pizza pockets from delightful to dynamite! -
Vegan Friendly:
Use plant-based cheese and milk alternatives for a delicious vegan version. It allows everyone to join in the cheesy goodness! -
Flavorful Dips:
Serve with marinara, ranch, or garlic aioli for an additional layer of taste. Dipping adds a fun interactive element to your snacking experience! -
Mini Pockets:
Create bite-sized versions for parties! Perfect for gatherings or movie nights, these mini pockets make sharing easy and enjoyable. -
Sweet Surprise:
Experiment with dessert pockets using Nutella or fruit preserves, topped with powdered sugar. A sweet twist that’s irresistible!
These variations ensure that everyone can find their perfect pizza pocket delight. Don’t forget to check out other hand-held treats like Homemade Pumpkin Bagels or Cheesy Stuffed Meatloaf to ignite your creativity!
Make Ahead Options
These Homemade Cheesy Pizza Pockets are perfect for meal prep, allowing you to enjoy this delightful snack even on the busiest days! You can prepare the dough and fill it with your favorite ingredients up to 24 hours in advance; simply refrigerate until you’re ready to bake. Alternatively, assemble the filled pockets and freeze them—good for up to three months—for a quick snack later. Just ensure they are well-sealed in an airtight container to maintain quality. When you’re ready to enjoy, bake straight from the freezer for 20-25 minutes until golden brown and delicious, and savor the same mouthwatering comfort!
Storage Tips for Homemade Cheesy Pizza Pockets
Room Temperature: Enjoy your Homemade Cheesy Pizza Pockets fresh from the oven for the best flavor and texture. If left out, consume within 2 hours to ensure safety.
Fridge: Store leftover pizza pockets in an airtight container in the fridge for up to 2 days. Reheating in the oven preserves that crispy texture wonderfully!
Freezer: For longer storage, freeze the pizza pockets in a single layer on a baking sheet, then transfer them to a freezer-safe bag for up to 2 months. Thaw before reheating for best results.
Reheating: To reheat, place frozen pockets directly on a baking sheet and bake at 375°F (190°C) for about 15-20 minutes, or until heated through and golden brown.
Expert Tips for Homemade Cheesy Pizza Pockets
-
Chill the Butter: Ensure your unsalted butter is chilled before cutting it into the flour for a flakier crust—warm butter leads to a dense dough.
-
Avoid Overfilling: Resist the temptation to overstuff your pizza pockets. Keeping the filling to a reasonable amount prevents bursting during baking.
-
Seal Securely: Press and crimp the edges firmly to lock in that gooey goodness. Consider brushing a little water on the edges before sealing for better adhesion.
-
Watch the Bake Time: Keep an eye on your pizza pockets as they bake; they can go from golden to overdone quickly. Aim for that perfect golden-brown hue!
-
Mix Filling Wisely: Experiment with different fillings, but avoid ingredients with too much moisture—wet fillings can make the dough soggy. Homemade Cheesy Pizza Pockets are all about balance!
Homemade Cheesy Pizza Pockets Recipe FAQs
How do I choose the best ingredients for my pizza pockets?
Absolutely! When selecting ingredients for your Homemade Cheesy Pizza Pockets, look for all-purpose flour that’s fresh and free of lumps for an ideal dough consistency. Ensure your dairy products, like milk and butter, are properly chilled—this helps create that flaky texture! When picking cheeses, buy good-quality mozzarella for the best melt and flavor. If choosing toppings, fresh veggies should be firm and colorful, avoiding those with dark spots or signs of softness.
How should I store my leftover pizza pockets?
Very! To store your Homemade Cheesy Pizza Pockets, place them in an airtight container in the fridge for up to 2 days. If you want to keep them longer, they freeze beautifully. Just make sure to wrap them in plastic wrap or store in a freezer-safe container; they can last in the freezer for up to 2 months. Thaw them before reheating for a delightful crispy texture!
Can I freeze the pizza pockets? If so, how?
Absolutely! Here’s how you can freeze your Homemade Cheesy Pizza Pockets: after assembling and before baking, place the filled pockets on a baking sheet lined with parchment paper. Freeze them in a single layer until they’re solid, about 1 to 2 hours. Then transfer the individually frozen pockets to a freezer-safe bag, removing as much air as possible. They can be stored in the freezer for up to 2 months. When ready to bake, simply preheat your oven and bake them straight from frozen—just add a few extra minutes to the baking time!
What should I do if my dough is too sticky?
Very! If your dough becomes sticky while preparing your Homemade Cheesy Pizza Pockets, it’s likely due to excess moisture. Simply sprinkle a little more flour on your work surface and knead it gently. Add just enough flour until it’s manageable but be cautious not to overdo it, as too much flour can make your dough tough. Aim for a soft, cohesive dough that doesn’t stick to your hands!
Are there any dietary considerations I should keep in mind?
Absolutely! When making Homemade Cheesy Pizza Pockets, consider your guests’ dietary needs. If anyone has a gluten allergy, using gluten-free flour is a great alternative. You can also make a tasty vegan version by swapping out dairy cheese for plant-based cheese and using almond milk or any other milk alternative. If you’re adding meats, be sure to check for any allergies, such as to pork or beef. There’s room for everyone to enjoy this delightful snack!
Irresistibly Gooey Homemade Cheesy Pizza Pockets
Ingredients
Equipment
Method
- Preheat your oven to 375°F (190°C) and line a baking sheet with parchment paper.
- In a large mixing bowl, whisk together the all-purpose flour, salt, and baking powder.
- Cut in the chilled unsalted butter until the mixture resembles coarse crumbs.
- Add the milk and stir gently until a dough forms.
- Knead the dough on a floured surface for about 2 minutes until smooth.
- Roll out the dough to about 1/8-inch thickness.
- Use a round cutter to cut out circles measuring about 3-4 inches.
- Mix the tomato sauce with dried oregano and basil.
- Place a spoonful of sauce on each dough circle, then sprinkle mozzarella and Parmesan cheese on top.
- Layer pepperoni slices or other toppings on top.
- Fold each dough circle over the filling and press edges to seal.
- Arrange the filled pockets on the baking sheet, brush with beaten egg.
- Bake for 15-20 minutes until golden brown.
- Allow to cool for a few minutes before serving.
Leave a Reply