
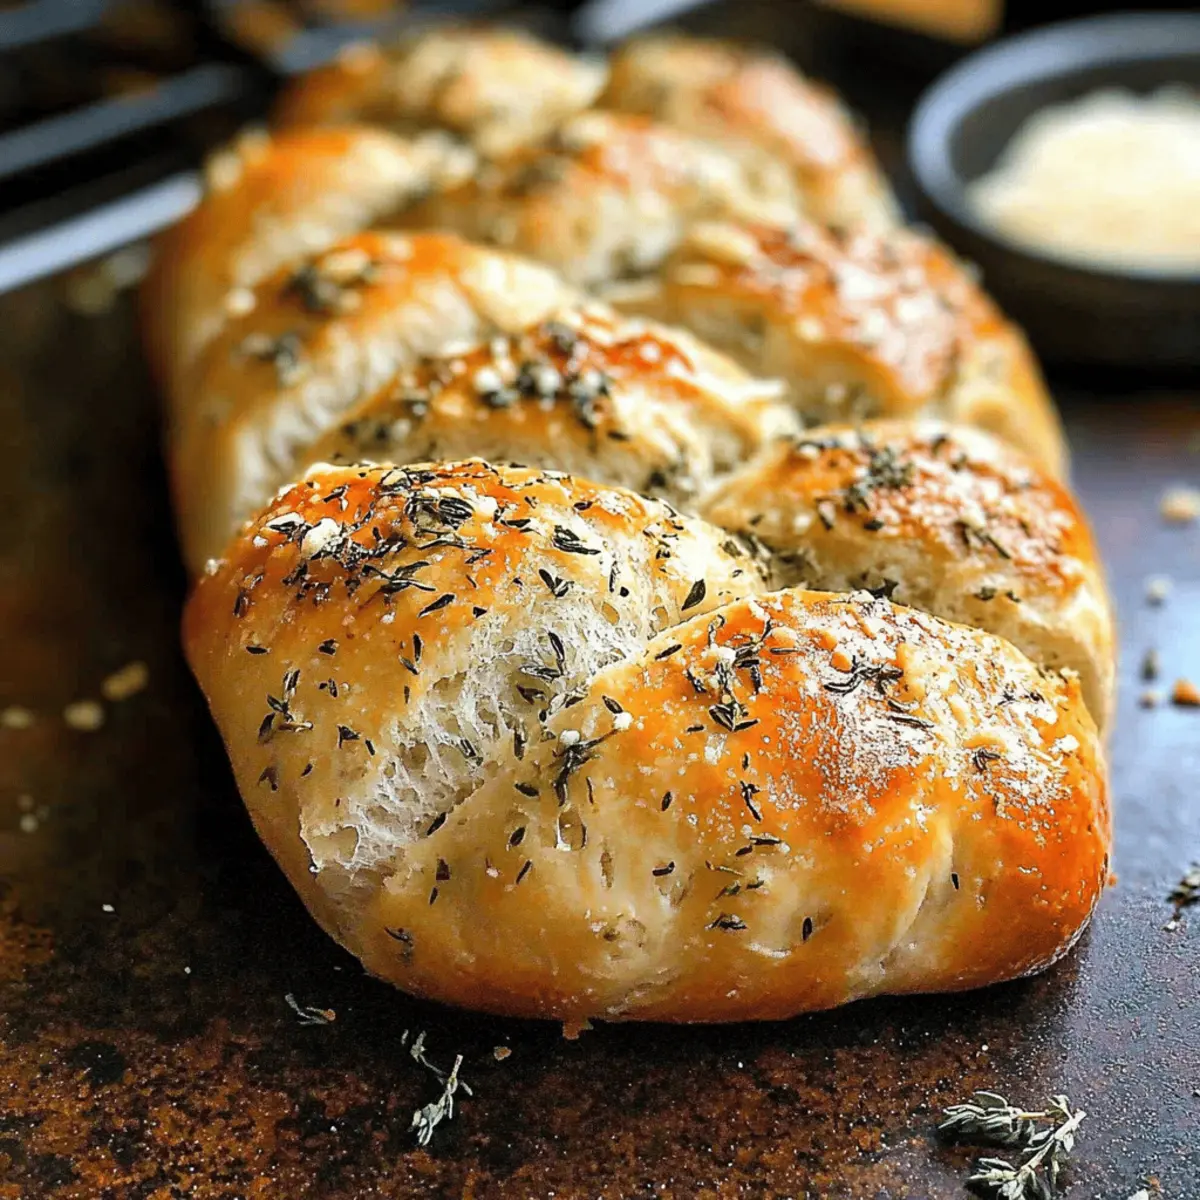
The rich scent of freshly baked bread wafting through the kitchen is something I cherish, and with this Rustic Garlic Parmesan Herb Bread, you can create that magic in your own home. Each slice boasts a tender interior filled with aromatic herbs and savory Parmesan, all wrapped in a beautifully rustic crust that’s both crispy and buttery. Whether you’re hosting a gathering or simply seeking a cozy meal at home, this homemade bread is the ultimate companion for soups, sauces, or just slathered in butter. The best part? It’s effortlessly easy to make and allows for a customizable mix of herbs to fit your taste. Ready to embark on your baking journey? Let’s dive into this delicious recipe!
Why is Garlic Parmesan Herb Bread a Must-Try?
Irresistible Aroma: Imagine the delightful scent of freshly baked bread dancing through your home—this bread delivers that joy.
Endless Customization: With a customizable herb selection, you can tailor each loaf to your taste, making it perfect for any meal.
Quick and Simple: Even if you’re a novice baker, this recipe’s straightforward instructions make it easy to whip up delicious, homemade bread.
Perfect for Sharing: Whether at a dinner party or just a cozy family meal, this bread is sure to impress and disappear fast!
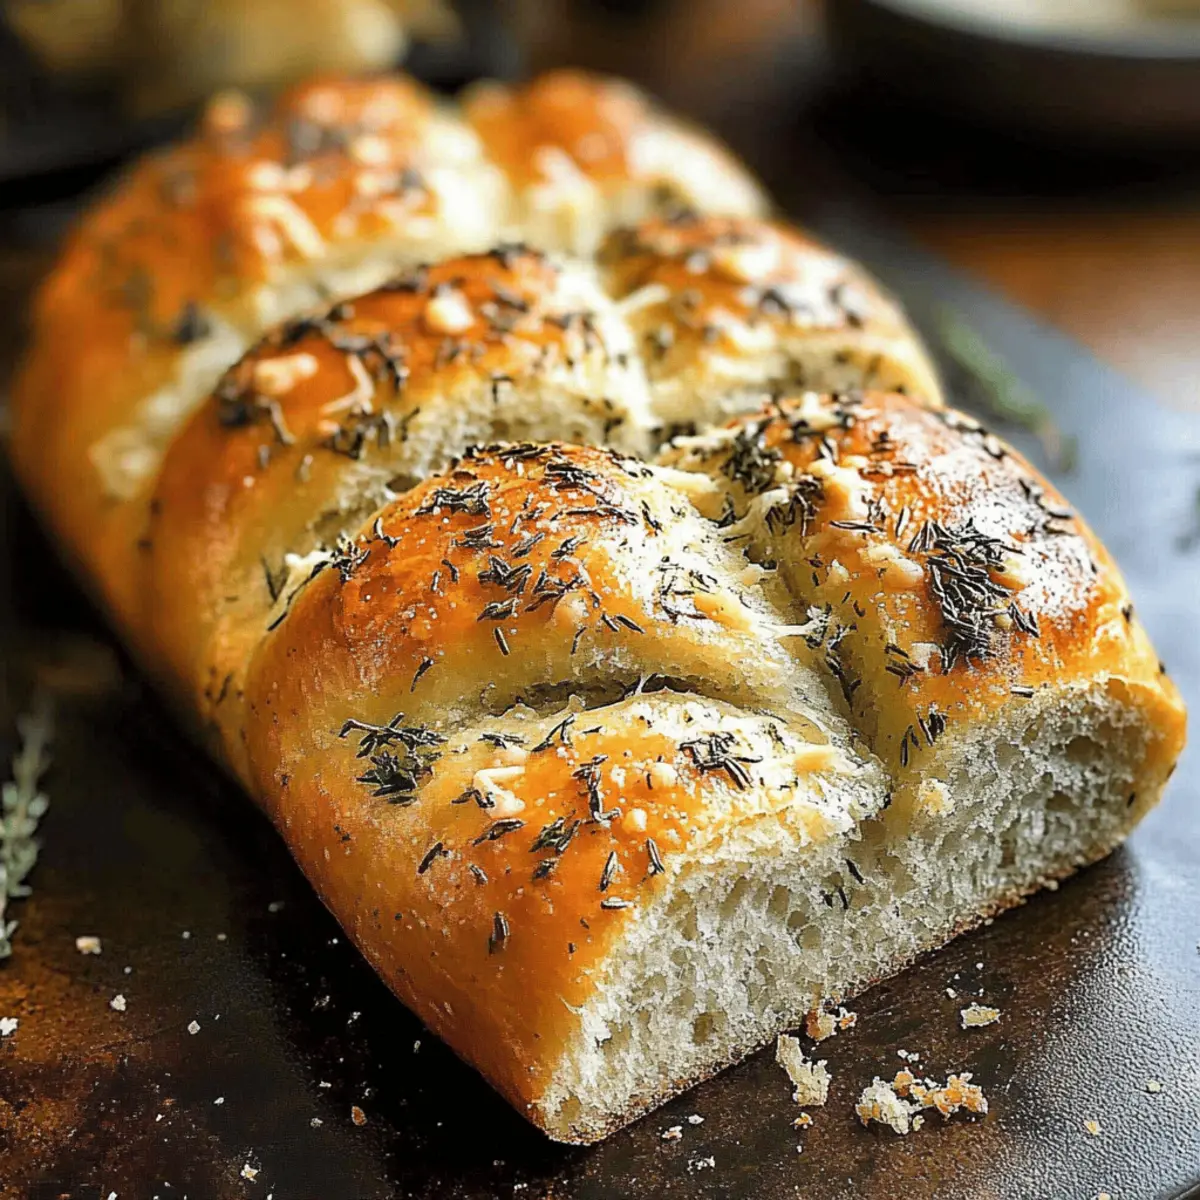
Satisfying Texture: The contrast of a crispy crust with a soft, airy interior creates a delightful eating experience. For more fantastic bread recipes, check out Parmesan Bread Bites for another spin on cheesy goodness!
Versatile Pairing: Enjoy it with soups, alongside gourmet sandwiches, or even as a tasty snack with herb-infused olive oil. Your culinary creativity knows no bounds!
Garlic Parmesan Herb Bread Ingredients
For the Dough
- Instant Dry Yeast – Activator for dough rise; make sure it’s fresh for optimal lifting.
- Granulated Sugar – Fuels yeast activity and fermentation; can be reduced if you prefer less sweetness.
- Warm Water (100-110°F) – Hydrates the dough and activates yeast; use the correct temperature for the best rise.
- Salt – Enhances flavor and strengthens gluten structure; avoid too much salt to keep yeast happy.
- All-Purpose Flour (2 to 2½ cups) – Creates the bread’s structure; consider whole wheat for a heartier loaf.
For the Flavor
- Dried Rosemary – Adds earthy notes; substitute with thyme for a delightful twist.
- Dried Basil – Offers sweet, aromatic flavor; feel free to adjust proportions to match your taste.
- Dried Oregano – Contributes a robust flavor profile; fresh oregano is a great alternative if you have it on hand.
- Minced Garlic (6 cloves) – Infuses a rich, savory taste; fresh is ideal, but granulated can work in a pinch.
- Grated Parmesan Cheese (⅓ cup) – Adds a savory, nutty flavor to the bread; Pecorino Romano is a tasty substitute.
For Moisture and Richness
- Olive Oil (2 tablespoons) – Keeps the bread moist while enriching the flavor; melted butter is a good swap if desired.
- Butter (1 tablespoon, divided for topping) – Brings an extra layer of richness; melt some before serving for a finishing touch.
Step‑by‑Step Instructions for Garlic Parmesan Herb Bread
Step 1: Prepare Dough
In a large mixing bowl, combine 2 teaspoons of instant dry yeast, 1 tablespoon of granulated sugar, and 1 cup of warm water (100-110°F). Let the mixture sit for about 1 minute until it becomes frothy, signifying that the yeast is activated. Next, stir in 1 teaspoon of salt, 2 teaspoons of dried rosemary, 2 teaspoons of dried basil, 2 teaspoons of dried oregano, and 6 cloves of minced garlic. Gradually add 2 to 2½ cups of all-purpose flour and ⅓ cup of grated Parmesan cheese until a smooth, elastic dough forms.
Step 2: First Rise
Transfer the dough to a lightly greased bowl, ensuring it’s well-coated to prevent sticking. Cover the bowl with a clean kitchen towel or plastic wrap and let it rise in a warm spot for about 1 hour, or until the dough has doubled in size. This is crucial for developing the texture of your Garlic Parmesan Herb Bread, so find a cozy spot away from chilly drafts.
Step 3: Preheat Oven
Once the dough has risen, preheat your oven to 375°F (190°C). This step ensures that the oven reaches the optimal temperature for baking once you’re ready. Give yourself a moment to enjoy the fragrant aroma developing from the dough as it continues to rise—this is a sign of good things to come!
Step 4: Shape Loaves
After the first rise, punch down the dough gently to release the air bubbles. Divide the dough into two equal pieces and shape each one into rustic loaves by tucking the edges under. Place the shaped loaves onto a greased baking sheet, allowing space between them for rising. Cover the loaves again and let them rise for another 15-20 minutes; they should puff up slightly during this time.
Step 5: Bake
Just before placing your loaves in the oven, brush the tops with 1 tablespoon of melted butter for added flavor and a beautiful finish. Bake the Garlic Parmesan Herb Bread in the preheated oven for 18-20 minutes. The loaves are done when they are golden brown and sound hollow when tapped on the bottom; the aroma will be heavenly.
Step 6: Cool and Serve
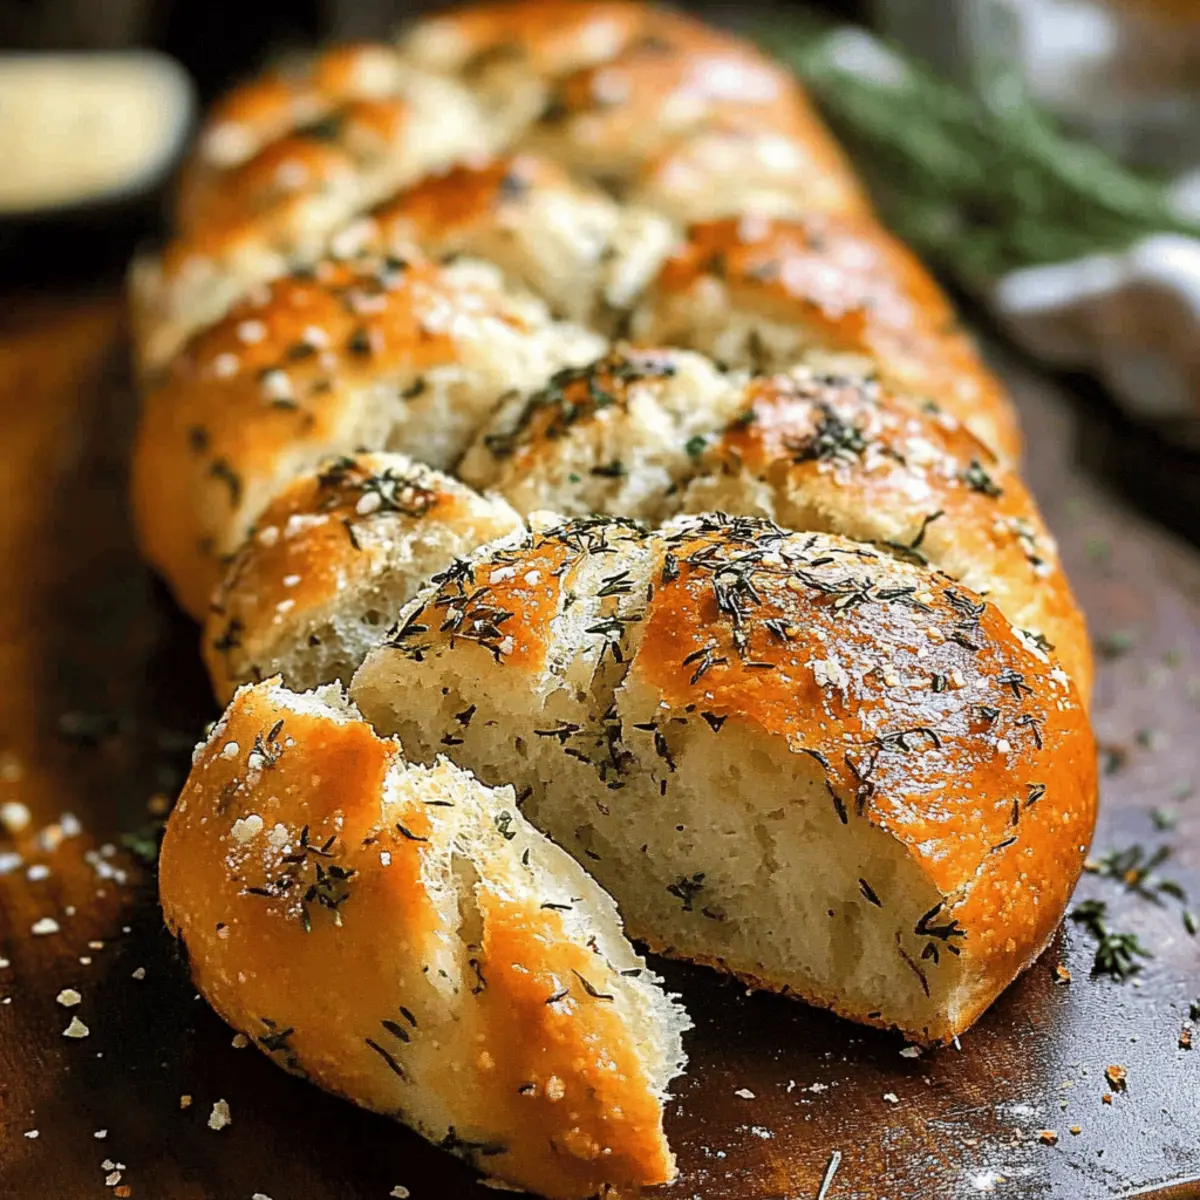
Once baked, remove the loaves from the oven and transfer them to a wire rack to cool for about 5-10 minutes. This step is important for setting the crumb while still allowing you to slice into warm, delectable bread. Enjoy your Garlic Parmesan Herb Bread warm, ideally slathered with butter or served alongside hearty soups.

Make Ahead Options
These Garlic Parmesan Herb Bread loaves are perfect for meal prep enthusiasts! You can prepare the dough up to 24 hours in advance, allowing it to rise, then refrigerate it to develop flavor (make sure to cover it tightly). Alternatively, after shaping the loaves, they can rest in the fridge for up to 3 days before baking. Just bring them to room temperature and let them rise for about 30 minutes before you pop them in the oven. To maintain quality, be sure to wrap the shaped loaves tightly or cover them with a damp towel. When ready to bake, simply brush with melted butter and follow the baking instructions for delicious, fresh Garlic Parmesan Herb Bread with minimal effort!
Storage Tips for Garlic Parmesan Herb Bread
Room Temperature: Store the bread wrapped in a clean kitchen towel for up to 3 days to maintain its soft texture and protect it from drying out.
Fridge: While refrigeration is generally not recommended as it can dry out the bread, if necessary, keep it in an airtight container for up to 5 days.
Freezer: For longer storage, slice the Garlic Parmesan Herb Bread and place it in a zip-top bag, ensuring to remove as much air as possible. It can be frozen for up to 3 months.
Reheating: To enjoy your bread warm again, simply toast slices in the oven or a toaster for a few minutes, or wrap the entire loaf in foil and warm it in a preheated oven at 350°F (175°C) for about 10-15 minutes.
Expert Tips for Garlic Parmesan Herb Bread
-
Use Fresh Yeast: Ensure your instant dry yeast is fresh. If it doesn’t froth after mixing with sugar and warm water, it’s time for a new batch.
-
Perfect Temperature: Activate your yeast in water that’s precisely 100-110°F. Too hot can kill it, while too cold won’t wake it properly.
-
Avoid Overkneading: Stop mixing when your dough is smooth and slightly sticky. Overkneading can result in tough bread instead of tender Garlic Parmesan Herb Bread.
-
Create a Warm Environment: If your kitchen is chilly, find a warm spot for dough rising—like a preheated oven that’s turned off or a sunny window.
-
Store Correctly: Wrap your bread in a kitchen towel for short-term storage, or slice and freeze for longer freshness. Don’t let it sit uncovered to avoid staleness!
-
Customize Your Herbs: Feel free to swap or add herbs based on your meal pairings. A little creativity with spices can enhance your basic bread recipe beautifully!
What to Serve with Rustic Garlic Parmesan Herb Bread?
Elevate your meal with delightful pairings that bring out the best flavors of this irresistible bread.
-
Creamy Tomato Soup: This classic pairing creates a comforting duo, balancing the bread’s savory notes with the soup’s sweetness.
-
Herb-Infused Olive Oil: A simple mix of olive oil and fresh herbs for dipping enhances the bread’s rich taste while offering a burst of freshness.
-
Mixed Green Salad: The lightness and crunch of a fresh salad provide a refreshing contrast, making every bite delightful and balancing the meal.
-
Baked Chicken: Serve with rosemary or lemon-infused chicken for a savory feast; the bread is perfect for sopping up leftover juices.
-
Garlic Roasted Vegetables: Pairing with caramelized veggies provides a colorful, nutritious twist that echoes the garlic in the bread.
-
Classic Caesar Salad: The creamy dressing and crunchy croutons complement the Parmesan in the bread and create a satisfying meal experience.
-
Red Wine: A glass of robust red wine pairs beautifully, enhancing both the savory flavors of the bread and any main dish served alongside it.
-
Chocolate Fondue: For dessert, dip pieces of the bread into warm chocolate for an indulgent treat that’s fun and unexpected!
The Rustic Garlic Parmesan Herb Bread not only takes center stage but also enhances these delightful accompaniments, creating meal experiences you’ll cherish.
Garlic Parmesan Herb Bread Variations
Feel free to adapt this Garlic Parmesan Herb Bread to fit your personal taste—there’s no end to the creative possibilities!
-
Dairy-Free: Swap Parmesan for nutritional yeast and use a dairy-free butter alternative for a lovely vegan touch.
Experiment with different flavor combinations to find your favorite. -
Whole Wheat: Substitute half of the all-purpose flour with whole wheat flour for a heartier, more nutritious loaf.
This will lend a lovely nutty flavor while keeping the bread deliciously soft. -
Spicy Kick: Add crushed red pepper flakes or finely chopped jalapeños to the dough for a delightful heat that complements the savory notes.
The warmth will linger with every bite, enhancing your bread experience. -
Herb Blend: Customize your herbs by using dried thyme, sage, or even Italian seasoning for a distinct twist.
Changing your herb mix will transform the flavor profile and add excitement to this classic recipe. -
Savory Additions: Fold in chopped olives, sun-dried tomatoes, or caramelized onions to add complexity to the bread.
These add-ins not only create texture but also elevate the overall flavor, making each bite memorable. -
Cheesy Variations: Experiment with different cheeses like feta, Gruyère, or smoked Gouda to find your ideal flavor.
Switching up the cheese offers a new richness, enhancing the bread’s character even further. -
Garlic Lovers: Use roasted garlic instead of minced for a sweeter, mellower garlic flavor throughout the loaf.
Roasting brings out an entirely new dimension, making the bread a standout at any gathering.
As you explore these variations, don’t forget to serve your delicious creation with a side of herb-infused olive oil or alongside one of your favorite soups for a lovely home-cooked experience! For more cheesy goodness, take a look at my Parmesan Bread Bites. Happy baking!
Garlic Parmesan Herb Bread Recipe FAQs
How do I select ripe ingredients for this bread?
Absolutely! Choosing fresh ingredients is key for the best flavor. When selecting garlic, look for firm bulbs with no dark spots or sprouting. For herbs, dried varieties should be aromatic and fresh. If you choose fresh herbs, ensure they look vibrant and not wilted or discolored.
How should I store leftover Garlic Parmesan Herb Bread?
To keep your bread fresh, wrap it in a clean kitchen towel for short-term storage, which will allow it to breathe while preventing it from drying out—perfect for about 3 days. For longer storage, slice the bread, place it in a zip-top bag, remove excess air, and freeze it. It will stay great for up to 3 months!
Can I freeze Garlic Parmesan Herb Bread?
Certainly! After slicing the bread, lay it flat in a zip-top bag, removing as much air as possible to prevent freezer burn. You can freeze it for up to 3 months. When you want to enjoy it, simply toast the slices or reheat the whole loaf in a preheated oven wrapped in foil for about 10-15 minutes.
What should I do if my dough doesn’t rise properly?
Very! If your dough doesn’t rise, it could be due to inactive yeast or a too-cold environment. First, ensure your yeast is fresh by checking its expiration date and looking for froth after combining it with sugar and warm water. Next, try rising the dough in a warmer spot or even using a slightly warmed oven that’s turned off. If all else fails, a little patience can go a long way—just give it more time!
Are there any dietary considerations for Garlic Parmesan Herb Bread?
Absolutely! This recipe is vegetarian and can be easily adapted. For those with gluten sensitivities, consider using gluten-free flour blends. If you have dairy allergies, substitute the Parmesan cheese with nutritional yeast for a cheesy flavor or use a dairy-free cheese alternative. Always check labels if incorporating any pre-packaged ingredients to ensure they meet your dietary needs.
How can I customize the herbs in this bread?
Very! The customizable herb selection allows you to get creative! If you want a bolder flavor, you can increase the amounts of rosemary, basil, or oregano. Alternatively, you could add fresh chopped herbs if you have them on hand—just remember that fresh herbs have a stronger flavor than dried ones, so adjust accordingly. Feel free to experiment with herbs like thyme, dill, or even a pinch of chili flakes for a kick!
Garlic Parmesan Herb Bread: Your New Favorite Homemade Delight
Ingredients
Equipment
Method
- In a large mixing bowl, combine 2 teaspoons of instant dry yeast, 1 tablespoon of granulated sugar, and 1 cup of warm water. Let sit until frothy.
- Stir in 1 teaspoon of salt, 2 teaspoons of dried rosemary, 2 teaspoons of dried basil, 2 teaspoons of dried oregano, and 6 cloves of minced garlic.
- Gradually add 2 to 2½ cups of all-purpose flour and ⅓ cup of grated Parmesan cheese until a smooth dough forms.
- Transfer dough to a greased bowl, cover, and let rise for about 1 hour until doubled in size.
- Preheat oven to 375°F. Enjoy the aroma as the dough rises.
- Punch down dough, divide into two, shape into loaves, and let rise for another 15-20 minutes.
- Brush with 1 tablespoon melted butter before baking in the oven for 18-20 minutes.
- Cool on a wire rack for 5-10 minutes before slicing.
Leave a Reply