
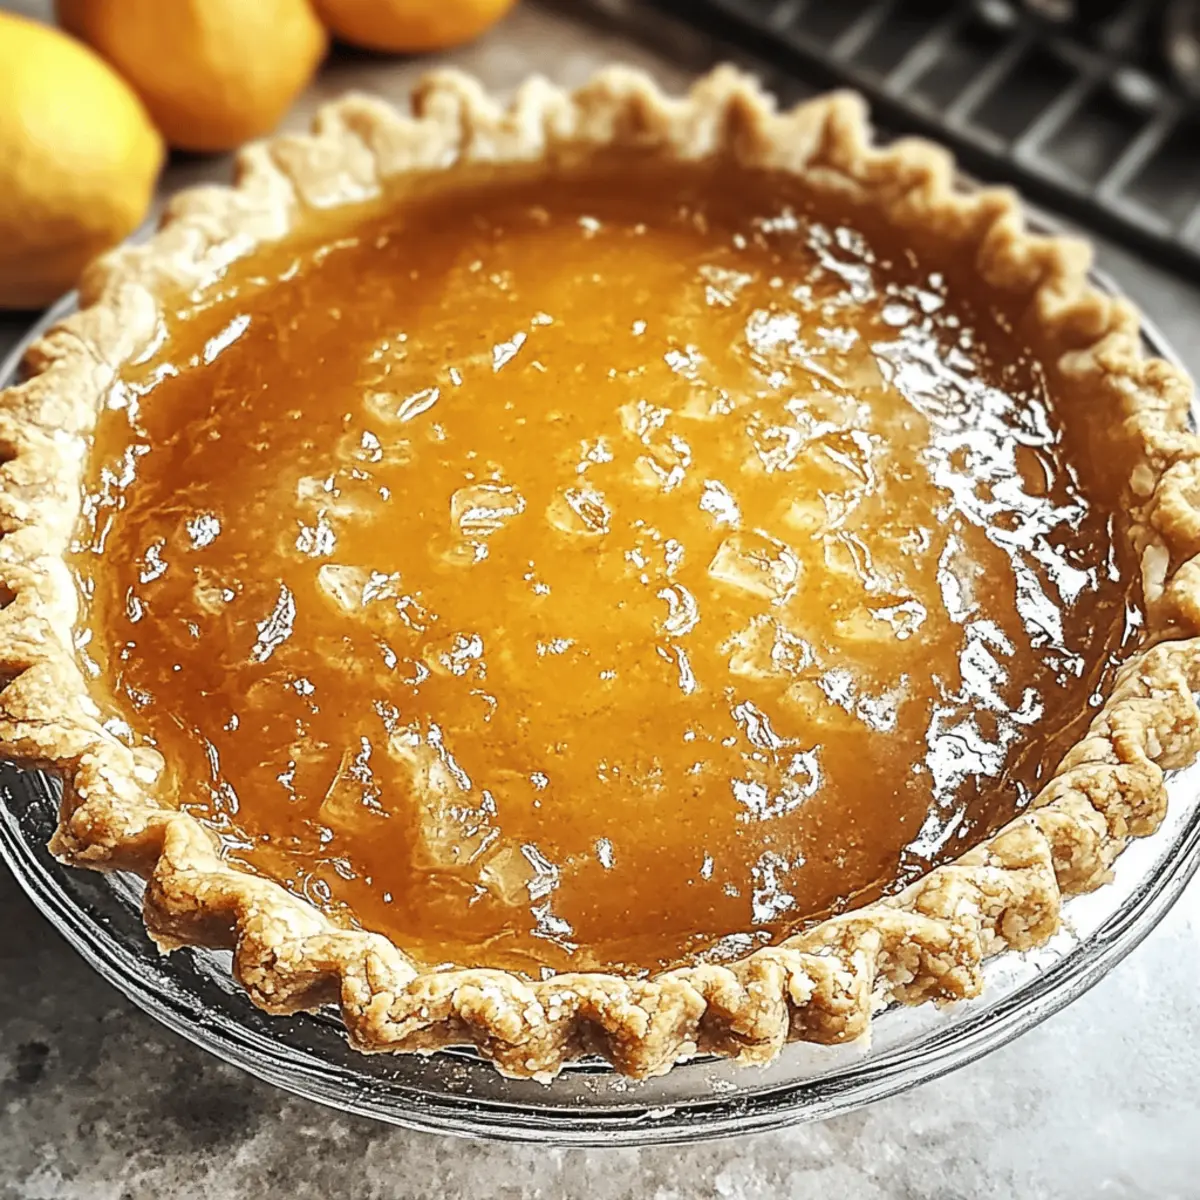
As I ventured into my kitchen one breezy afternoon, the scent of warm honey wafting through the air whisked me away to sweet childhood memories. Today, I’m excited to share my Easy Salted Honey Pie, a delightful dessert that captures the essence of home. Whipping this pie together takes only 10 minutes, allowing you to focus on what really matters—creating memories with family or friends. The creamy honey filling, enhanced by a pinch of salt, nestled in a flaky crust, makes this pie a crowd-pleaser that requires minimal effort yet delivers maximum joy. Whether you’re entertaining guests or simply treating yourself, this pie’s unique twist on sweetness and salt will surely entice your taste buds. Ready to dive into a slice of bliss? Let’s get baking!
Why is Salted Honey Pie So Special?
Simplicity at Its Best: This Easy Salted Honey Pie is a breeze to whip up, taking just 10 minutes of your time.
Irresistible Flavor: The luxurious blend of rich honey and a hint of salt creates a flavor explosion that will leave your taste buds dancing.
Versatile Enjoyment: Serve it fresh from the fridge or pair it with a scoop of vanilla ice cream for extra indulgence, making it perfect for any occasion.
Perfect for Gatherings: Whether it’s a festive feast or a casual dinner, this pie is sure to impress your guests, sparking joy and sweet conversations.
Make-Ahead Magic: Easily prepare this pie a day or two in advance, making it an ideal choice for busy hosts. Sprinkle the flaky sea salt just before serving for peak flavor!
Salted Honey Pie Ingredients
• Here’s everything you need for your creamy delight!
For the Pie Crust
- Pie Crust – The base for the pie; you can easily use store-bought for convenience if time is short.
For the Creamy Filling
- Honey – Main sweetener providing rich flavor; for a twist, try maple syrup or agave syrup!
- Heavy Cream – Adds richness to the filling; feel free to substitute with whole milk or coconut cream for a lighter touch.
- Unsalted Butter – Enhances flavor without overpowering the honey; swap with coconut oil or vegan butter for a dairy-free version.
- Salt – A pinch of flaky sea salt just before serving elevates the pie’s flavors beautifully.
Enjoy this simple yet delightful Salted Honey Pie that brings sweetness and warmth to every occasion!
Step‑by‑Step Instructions for Salted Honey Pie
Step 1: Preheat the Oven
Begin by preheating your oven to 350°F (175°C) to ensure even baking for your Salted Honey Pie. This step is crucial as it helps achieve that perfect creamy filling with a beautifully baked crust. While the oven warms up, gather your necessary equipment—a 9-inch pie plate and mixing bowls.
Step 2: Prepare the Pie Crust
Next, lay your pie crust into the 9-inch pie plate, gently pressing it down to eliminate any air pockets. Crimp the edges of the crust to create a decorative finish, which not only adds beauty but also helps contain the luscious filling. If you’re using a store-bought crust, this step will be quick and straightforward!
Step 3: Whisk the Filling
In a medium bowl, combine eggs, honey, heavy cream, melted unsalted butter, and a pinch of salt. Use a whisk to blend the ingredients until the mixture is completely smooth and well combined, taking about 2-3 minutes. The goal is to create a creamy consistency that showcases the unique flavors of your Salted Honey Pie.
Step 4: Pour the Filling
Carefully pour the honey filling into the prepared pie crust, ensuring an even distribution. Take care not to overfill, as the mixture can bubble over while baking. This allows the filling to set perfectly, creating that delicious texture you’ll love in your Salted Honey Pie.
Step 5: Bake to Perfection
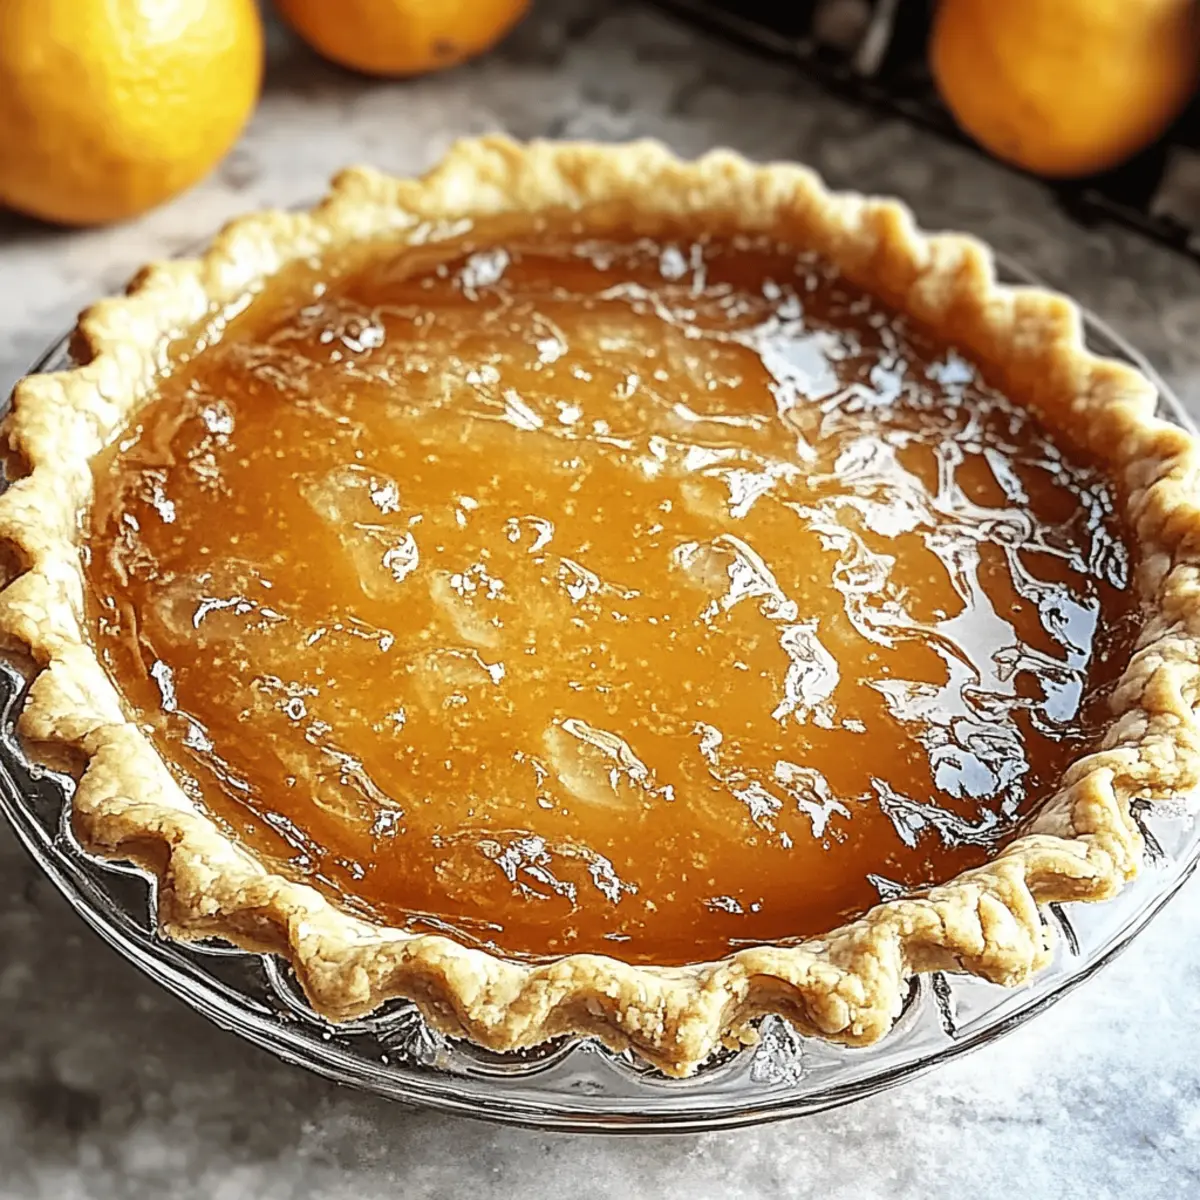
Place the pie in your preheated oven and bake for 35-40 minutes. Keep an eye on it; the filling should be set with just a slight wobble in the center when done. This ensures a creamy texture that’s delightful and satisfying to eat, embodying the essence of your Salted Honey Pie.
Step 6: Cool and Chill
Once baked, remove the pie from the oven and let it cool completely at room temperature for about 1 hour. After cooling, refrigerate the pie for at least 2 hours. This chilling time is essential for helping the filling fully set and allows all those wonderful honey flavors to meld.
Step 7: Serve with a Touch of Salt
Before serving your Salted Honey Pie, sprinkle a pinch of flaky sea salt over the top to enhance the flavors beautifully. Slice your pie into wedges, and revel in the creamy texture that awaits you. Enjoy this sweet indulgence with family and friends for a truly memorable dessert experience!

How to Store and Freeze Salted Honey Pie
Fridge: Store any leftover Salted Honey Pie in an airtight container for up to 3-4 days to maintain its creamy texture and delightful flavor.
Freezer: For longer storage, wrap the pie tightly in plastic wrap followed by aluminum foil and freeze it for up to 2 months. Thaw in the fridge before serving.
Reheating: To enjoy your pie warm, place slices in the microwave for about 15-20 seconds. This enhances the flavors while keeping the texture delightful!
Make-Ahead: Consider preparing the Salted Honey Pie a day in advance—just remember to add the flaky sea salt right before serving for optimal flavor!
Expert Tips for Salted Honey Pie
• Smooth Filling: Whisk thoroughly until the mixture is completely smooth, ensuring a creamy texture in your Salted Honey Pie.
• Avoid Overfilling: Be cautious when pouring the filling into the crust; leave a little space at the top to prevent spilling during baking.
• Chill Completely: Allow the pie to cool and chill properly to achieve the perfect, set creamy filling. This step is crucial for your pie’s success!
• Salt at the Right Time: To enhance flavors, always sprinkle flaky sea salt just before serving for the best taste experience.
• Customize Honey Flavor: For a fun twist, substitute honey with maple syrup or agave syrup, but remember the flavor will change subtly!
Salted Honey Pie Variations & Substitutions
Feel free to unleash your creativity and make this delightful pie your own!
-
Maple Syrup: Substitute honey with maple syrup for an earthy sweetness that complements the creamy filling beautifully.
Just imagine that warm, woodsy aroma filling your kitchen—it’s simply heavenly! -
Coconut Cream: For a lighter option, replace heavy cream with coconut cream for a luxurious dairy-free delight.
The subtle coconut flavor adds a new layer of richness, setting your pie apart from the ordinary. -
Graham Cracker Crust: Use crushed graham crackers mixed with butter for a fun, cookie-like crust that’s both crunchy and sweet.
This twist makes for a delightful contrast to the creamy filling, adding textural interest with every bite! -
Spiced Filling: Add a dash of cinnamon or nutmeg to the filling mixture for a warm, cozy flavor that embraces the season.
Just a pinch will elevate the pie’s essence and fill your home with inviting aromas. -
Lemon Zest: Introduce some lemon zest into the filling to lend brightness and balance to the sweetness.
This refreshing element will tantalize your taste buds and bring a vibrant twist to your dessert! -
Nutty Crunch: Top the pie with chopped nuts for extra texture and richness; pecans or walnuts would work beautifully.
The nutty crunch adds a delightful surprise in each forkful, making the experience even more memorable! -
Chili Flakes: For those who love heat, sprinkle a pinch of chili flakes over the finished pie for an unexpected zing.
This clever twist will engage your palate and keep guests guessing—what a fun conversation starter! -
Whipped Topping: Serve with a dollop of whipped cream or drizzle of honey-infused mascarpone for an indulgent finish.
This addition elevates your pie to new heights, creating an unforgettable dessert experience that everyone will rave about!
For more ideas on how to enhance your dishes, check out my variations on Sticky Honey Gochujang or a comforting twist with Honey Pepper Chicken. Happy baking!
Make Ahead Options
These Easy Salted Honey Pies are a dream for busy home cooks looking to save time! You can prepare the pie up to 24 hours in advance by baking it and allowing it to cool completely. Once cooled, refrigerate the pie to maintain its creamy texture and flavors. For best results, cover it with plastic wrap to prevent any absorption of odors or moisture. When you’re ready to serve, simply sprinkle the flaky sea salt on top just before slicing. This way, you’ll treat your family or guests to a delicious dessert that tastes just as fresh as the day it was made, all while saving you precious time!
What to Serve with Easy Salted Honey Pie
Indulging in a slice of this golden delight opens up a world of delicious pairings that elevate your dessert experience.
-
Whipped Cream: This light and airy addition contrasts beautifully with the rich filling, adding a creamy touch that feels luxurious with every bite.
-
Vanilla Ice Cream: A scoop of smooth vanilla ice cream on the side adds a refreshing chill that enhances the warm, sweet notes of the pie.
-
Fresh Berries: Bright, tart berries provide a delightful burst of flavor that balances the sweetness of the pie beautifully. Strawberries or raspberries offer a stunning visual appeal too.
-
Coffee or Espresso: A warm cup of coffee or a shot of espresso complements the pie’s sweetness perfectly, creating a delightful contrast that many crave.
-
Toasted Nuts: Sprinkling some toasted pecans or walnuts not only adds a delightful crunch but also brings in a nutty richness that pairs wonderfully with the honey.
-
Lemon Zest: Grating a little lemon zest over the pie just before serving adds a fresh, zesty finish that brightens up the flavors and cuts through the creaminess.
-
Chilled Rosé Wine: A glass of chilled rosé adds a fruity, refreshing layer that enhances the dessert’s flavors, making it perfect for gatherings.
-
Chocolate Drizzle: A decadent drizzle of melted chocolate over top introduces a rich, indulgent contrast to the honey sweetness, elevating the dessert to new heights.
Let your taste buds explore these delightful pairings and watch as your Easy Salted Honey Pie turns into the star of your dessert table!

Easy Salted Honey Pie Recipe FAQs
What type of honey should I use for the pie?
Absolutely! Using high-quality honey enhances the flavor of your Easy Salted Honey Pie significantly. I recommend local wildflower honey or clover honey for a rich taste. If you’re feeling adventurous, experimenting with flavored honey could add an interesting twist!
How should I store leftovers of the Salted Honey Pie?
Store any leftover Salted Honey Pie in an airtight container in the refrigerator for 3-4 days. This ensures the creamy texture remains intact while retaining its delightful honey flavor. Just remember, cover it well to prevent it from absorbing other odors!
Can I freeze the Salted Honey Pie?
Certainly! To freeze your Salted Honey Pie, wrap it tightly in plastic wrap followed by aluminum foil to protect against freezer burn. It can keep well for up to 2 months. When you’re ready to enjoy it, simply thaw it in the fridge overnight before serving.
What should I do if my pie overflows while baking?
If your pie spills over while baking, it’s no biggie! Just place a baking sheet on the rack below to catch any drips. To prevent overflowing in the future, ensure you leave a little space at the top of the crust when pouring in the filling. It’s all about that perfect balance!
Is this pie suitable for people with allergies?
The Easy Salted Honey Pie contains eggs, dairy (heavy cream and butter), and honey. Make sure to check for any allergies before serving to guests. For dairy-free options, you can substitute heavy cream with coconut cream and butter with vegan options. Always be mindful of any specific dietary needs you may encounter!
Can I make this pie in advance?
Very much so! You can prepare the Salted Honey Pie a day in advance, which is perfect for busy schedules. Just remember to sprinkle the flaky sea salt just before serving to ensure that delicious salty-sweet burst of flavor when it hits your palate!
Indulge in Creamy Salted Honey Pie for Sweet Moments
Ingredients
Equipment
Method
- Preheat the oven to 350°F (175°C) to ensure even baking.
- Prepare the pie crust in a 9-inch pie plate, ensuring it's pressed down and crimped.
- Whisk together eggs, honey, heavy cream, melted butter, and salt until smooth, about 2-3 minutes.
- Pour the filling into the prepared crust, ensuring even distribution.
- Bake in the preheated oven for 35-40 minutes, until the filling has just a slight wobble.
- Let the pie cool at room temperature for about 1 hour, then refrigerate for at least 2 hours.
- Before serving, sprinkle flaky sea salt over the top and slice into wedges.
Leave a Reply