
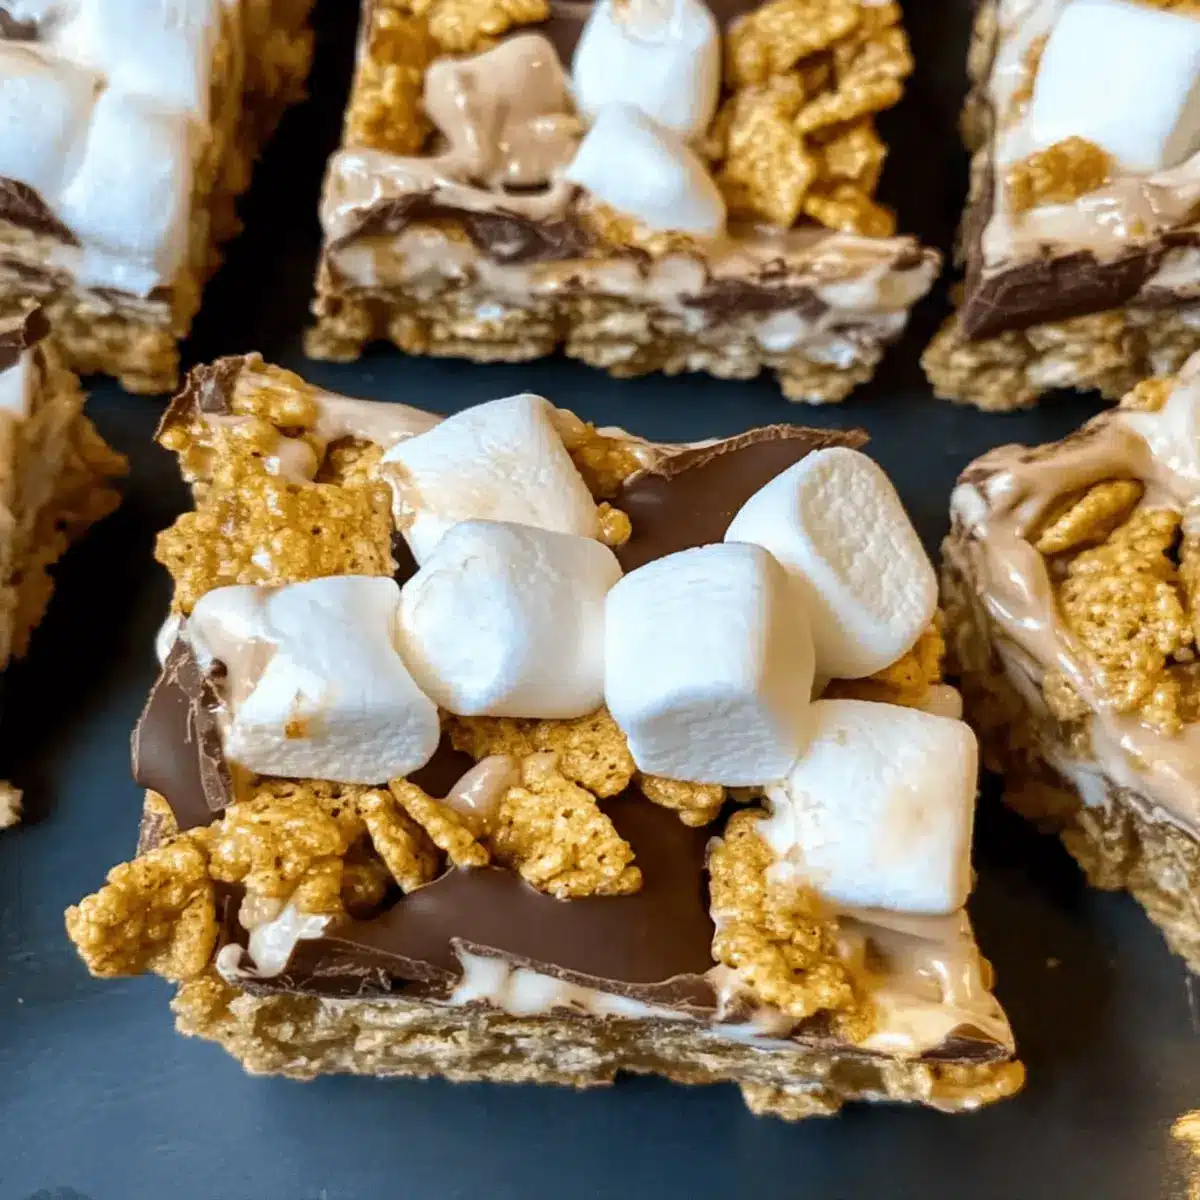
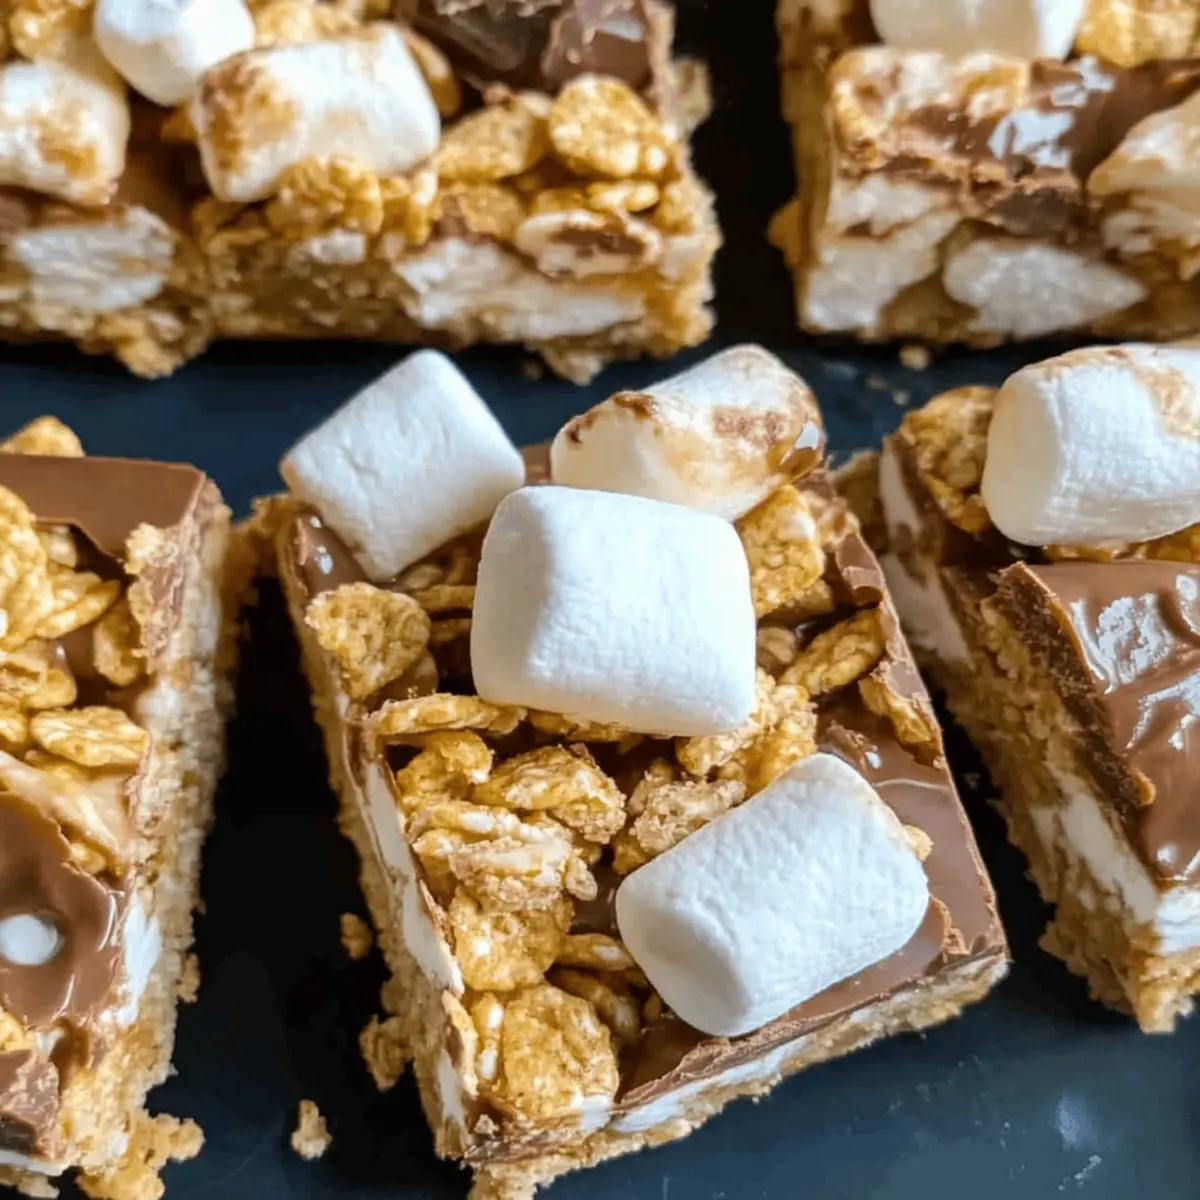
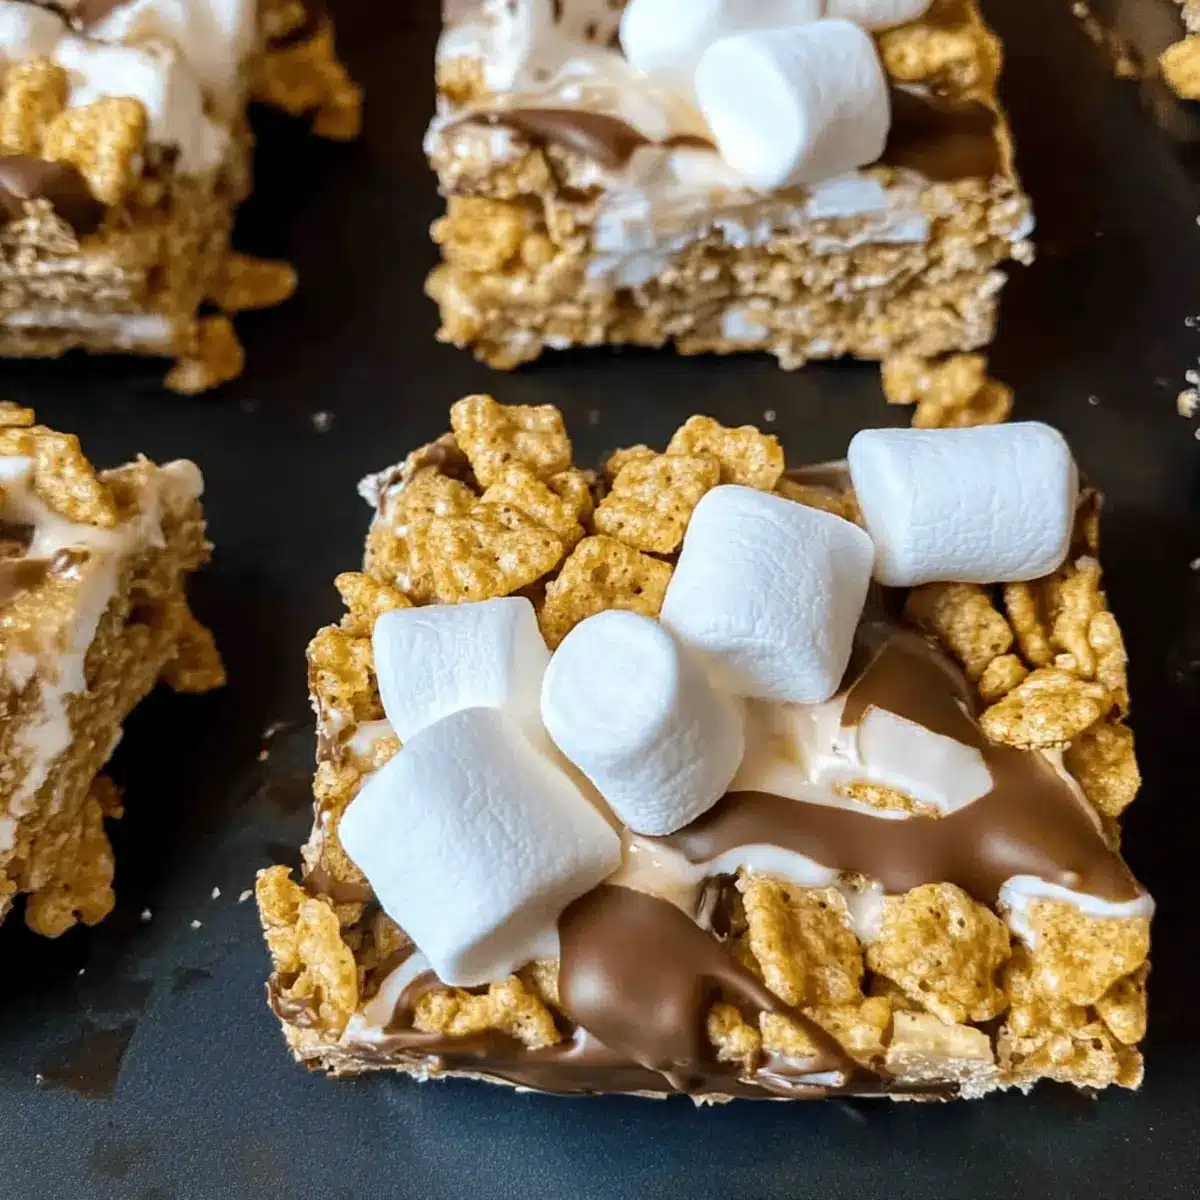
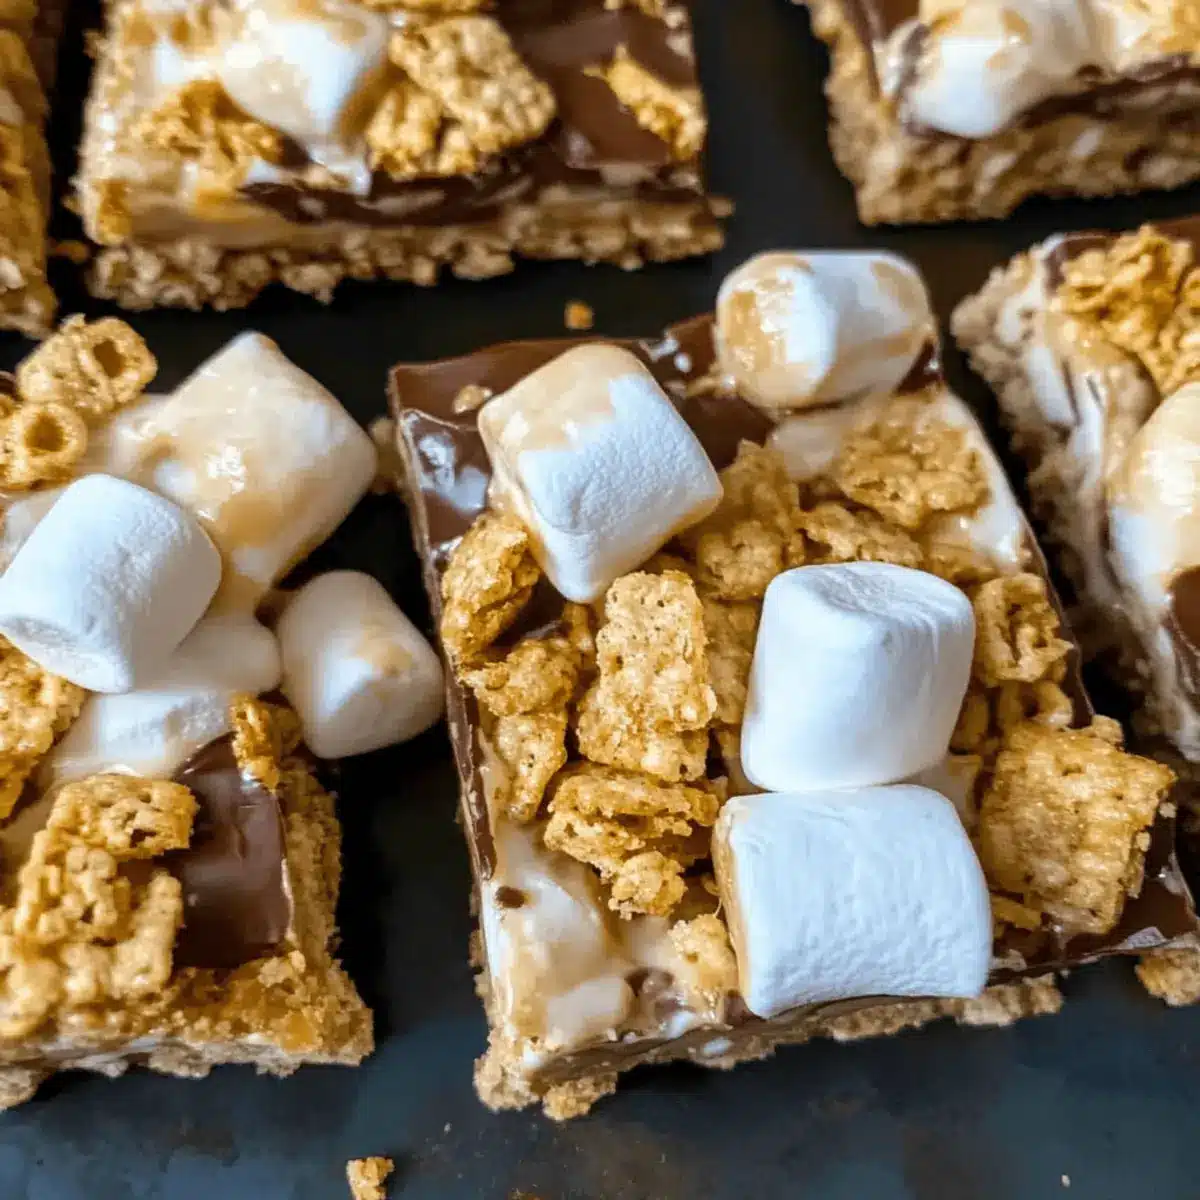
There’s something magical about those late nights around a campfire, the air filled with laughter as marshmallows toast to perfection. With my No-Bake S’mores Bars, you can relive that nostalgia without ever lighting a flame! In just 20 minutes, you’ll whip up a creamy, gooey treat that combines crunchy graham cracker cereal, sweet mini marshmallows, and rich Hershey’s chocolate. Ideal for warm summer days or cozy evenings at home, these bars offer the classic campfire flavor while being incredibly versatile; feel free to customize them with your favorite ingredients like peanut butter cups or crushed Oreos. Not only are they a quick dessert option, but they also make a crowd-pleasing snack for gatherings! What’s your favorite twist on classic s’mores?
Why Are No-Bake S’mores Bars So Amazing?
Gooey Goodness: The delightful combination of marshmallows and chocolate delivers a flavor burst that brings memories of campfires to life.
Quick & Easy: With just 20 minutes prep time, you can have these scrumptious bars ready to enjoy, making them a perfect go-to for unexpected cravings.
Customizable Delights: Feel free to personalize with ingredients like peanut butter cups or crushed Oreos, allowing everyone to enjoy their favorite flavors.
Crowd-Pleasing Treat: Ideal for parties, camping trips, or an afternoon snack, these bars are sure to impress guests young and old alike.
No Baking Required: Skip the oven and any messy clean-up; simply mix and set for perfect results every time! Want something similar to savor? Try my delicious Mashed Potato Bake.
No-Bake S’mores Bars Ingredients
Here’s everything you need to create these delightful No-Bake S’mores Bars!
For the Base
- Graham Cracker Cereal – Provides a crispy texture and foundational structure; feel free to swap for similar cereal if unavailable.
- Mini Marshmallows – Adds sweetness and gooeyness that binds the ingredients; for a healthier touch, consider alternative marshmallow brands.
- Butter – Delivers richness while helping bind the bars; can be substituted with coconut oil for a dairy-free version.
For the Chocolate Layer
- Hershey’s Bars – Imparts that classic chocolate flavor reminiscent of traditional s’mores; you can use any chocolate bar or chips that you prefer.
Optional Add-Ins
- Peanut Butter Cups – Mix in for an exciting nutty twist, elevating your bars to a new level!
- Crushed Oreos – Swap them in for the graham cracker cereal for a unique flavor and texture.
- Nuts or Dried Fruits – These can add delightful crunch, so feel free to experiment with your favorites.
Step‑by‑Step Instructions for No Bake S’mores Bars
Step 1: Prepare Your Pan
Begin by greasing a 9 x 13-inch pan with butter or oil, ensuring every corner is covered. This step is important to prevent the No Bake S’mores Bars from sticking later. Set aside about 2 cups of mini marshmallows, as these will be mixed in later for added gooey goodness.
Step 2: Melt Marshmallows and Butter
In a large microwave-safe bowl, combine the remaining mini marshmallows and butter. Microwave the mixture on high for 1.5 minutes, stopping every 30 seconds to stir until smooth and fully melted. You’ll know it’s ready when the mixture is creamy and teetering on a gentle bubble, perfect for combining with the other ingredients.
Step 3: Mix in the Cereal
Once your marshmallow and butter blend is smooth, gently fold in the graham cracker cereal. Use a spatula to ensure each piece is well-coated; scraping down the bowl helps for even mixing. Keep stirring until the cereal is thoroughly combined, yielding a sticky but manageable mixture that forms the base of your No Bake S’mores Bars.
Step 4: Add Chocolate and Remaining Marshmallows
Next, fold in the set-aside mini marshmallows and broken Hershey’s chocolate pieces into the mixture. The chocolate should start melting slightly, giving a beautiful marbled effect. Be careful not to over-mix, as you want pockets of chocolate and marshmallows to create that irresistible texture.
Step 5: Press the Mixture into the Pan
Using a piece of parchment or wax paper, press the mixture firmly into the prepared pan. Make sure it’s evenly distributed and tightly packed for the best structure in your No Bake S’mores Bars. This step is crucial for achieving bars that hold together when cut, so take your time.
Step 6: Let It Set
Now, let your bars sit at room temperature for about 20 minutes, allowing them to firm up nicely. As they cool, the combination of chocolate and marshmallows will meld together, creating that delightful chewy texture. If you prefer firmer bars, refrigerating them for a short time can also be beneficial.
Make Ahead Options
These No-Bake S’mores Bars are perfect for busy home cooks looking to save time! You can prepare the base mixture up to 24 hours in advance, simply melting the marshmallows and butter, and then mixing in the graham cracker cereal. Store the mixture in an airtight container in the refrigerator. When you’re ready to serve, just press it into the prepared pan, fold in the remaining mini marshmallows and chocolate, and let it set for about 20 minutes. For optimal texture, consider refrigerating them for a short while, as this will keep the bars firm and fresh, ensuring they remain just as delicious when it’s time to enjoy your delightful treats!
No Bake S’mores Bars Variations
Feel free to explore your creative side with these tasty twists that will elevate your No-Bake S’mores Bars!
-
Nutty Delight: Add peanut butter chips for a creamy, nutty flavor that complements the chocolatey goodness. It’s like a s’more meets a peanut butter cup!
-
Oreo Magic: Swap the graham cracker cereal for crushed Oreos; you’ll get a rich, chocolatey bite that enhances the classic treat even more.
-
Fruit Fusion: Mix in chopped dried fruits, like cranberries or bananas, for a chewy, fruity aspect that balances the sweetness. Consider incorporating nuts like walnuts for a crunchy surprise.
-
Mallow Swap: Try using flavored marshmallows, like strawberry or chocolate, to take the taste to another level. The playful colors and flavors will also be a hit with kids!
-
Spicy Kick: Add a pinch of cayenne pepper or a sprinkle of cinnamon for unexpected heat or warmth in every bite. A little spice elevates the classic flavor profile wonderfully!
-
Coconut Twist: Fold in sweetened shredded coconut to give the bars a tropical flair that transports you straight to the beach.
-
Chocolate Lovers: Use assorted chocolate chips—milk, dark, and white—so every bite has a different chocolate experience to savor. It’s pure bliss for chocolate lovers!
For even more sweet inspirations, don’t miss my delightful Lemon Raspberry Bake or the comforting Baked Eggs Napoleon for ideas that can easily complement your s’mores creations!
What to Serve with No-Bake S’mores Bars?
Imagine a delightful evening where the sweet aroma of chocolate and marshmallows fills the air while you enjoy these easy-to-make bars.
- Fresh Fruit Skewers: Fresh strawberries, bananas, and pineapple add a refreshing contrast to the sweetness of s’mores bars, balancing the flavors beautifully.
- Chocolate Dipped Pretzels: The salty crunch of pretzels coated in rich chocolate brings an extra dimension of flavor that makes each bite exciting!
- Vanilla Ice Cream: Creamy vanilla ice cream perfectly complements the gooey, rich bars, creating a luscious dessert experience that’s hard to resist.
- Milkshakes: An indulgent chocolate or vanilla milkshake is a delightful drink pairing that enhances the nostalgic vibes of the s’mores experience.
- Nutty Granola: A sprinkle of nutty granola on the side adds a crunchy texture, making it a great contrast which complements the bars’ softness.
- S’mores Dip: Serve with graham crackers and more marshmallows for dipping, indulging in an even richer s’mores experience that brings out the flavors!
How to Store and Freeze No Bake S’mores Bars
Room Temperature: Keep the bars in an airtight container at room temperature for up to 4-5 days. Enjoy them fresh to maintain that delightful crunch!
Fridge: For an even firmer texture, store the No Bake S’mores Bars in the refrigerator for up to a week, wrapped tightly to prevent drying out.
Freezer: Freeze the bars for longer storage, up to 2 months. Wrap them individually in plastic wrap, then place in a freezer-safe bag. Thaw overnight in the fridge before enjoying.
Reheating: For a warm treat, microwave individual bars for 5-10 seconds. Be careful not to overheat, or the chocolate may melt too much!
Expert Tips for No-Bake S’mores Bars
-
Cooling Time Matters: Let the bars cool for at least 20 minutes for optimal firmness. Extended cooling makes them easier to cut and enhances their texture.
-
Adjust Marshmallow Amount: If you prefer your bars more solid, reduce the amount of mini marshmallows set aside. This will lead to firmer No Bake S’mores Bars.
-
Grease Your Utensils: Use a greased spoon or spatula to mix and press down the ingredients. This prevents the sticky mixture from clinging to your tools and makes the process smoother.
-
Mix Gently: When adding chocolate and marshmallows, fold them in gently to maintain distinct pockets of flavor. Over-mixing can lead to a homogeneous texture instead of delightful bites.
-
Experiment with Substitutes: Feel free to swap ingredients based on your preferences. Using different cereals or chocolates can create unique variations of No Bake S’mores Bars everyone will love!
No-Bake S’mores Bars Recipe FAQs
What type of graham cracker cereal should I use?
You can use traditional graham cracker cereal, but feel free to swap it for any similar cereal if you can’t find it. Look for options that provide a crispy texture as the base for your bars!
How should I store the No-Bake S’mores Bars?
Store the bars in an airtight container at room temperature for up to 4-5 days. This keeps them fresh while maintaining their delightful crunch! If you prefer a firmer texture, then pop them in the refrigerator, where they will stay good for up to a week.
Can I freeze No-Bake S’mores Bars?
Absolutely! For long-term storage, wrap the bars individually in plastic wrap, then place them in a freezer-safe bag. They can be frozen for up to 2 months. When you’re ready to enjoy, just thaw them overnight in the refrigerator!
What can I do if my bars are too sticky?
If your No-Bake S’mores Bars are overly sticky, you may have added too many marshmallows or not let them set long enough. To remedy this, try letting them cool for a bit longer, or if they’re still too gooey, consider refrigerating them for better firmness.
Are No-Bake S’mores Bars suitable for people with allergies?
Make sure to check ingredient labels, especially for alternatives to butter or marshmallows, as these can sometimes contain allergens. For dairy-free options, use coconut oil in place of butter and seek out allergy-friendly marshmallows.
What can I substitute for mini marshmallows?
If you want a healthier alternative, consider using homemade marshmallow fluff or a marshmallow cream spread. Just be aware that this may alter the texture slightly. For a twist, you could also use soft caramel candies melted into the mixture!
No Bake S'mores Bars: Your Quick Path to Campfire Bliss
Ingredients
Equipment
Method
- Grease a 9 x 13-inch pan with butter or oil and set aside about 2 cups of mini marshmallows.
- In a large microwave-safe bowl, combine remaining mini marshmallows and butter. Microwave on high for 1.5 minutes, stirring every 30 seconds until smooth.
- Once melted, gently fold in graham cracker cereal until well-coated.
- Fold in set-aside mini marshmallows and broken Hershey’s chocolate pieces, being careful not to over-mix.
- Press mixture firmly into the prepared pan using parchment or wax paper.
- Let bars sit at room temperature for about 20 minutes to firm up.
Leave a Reply