
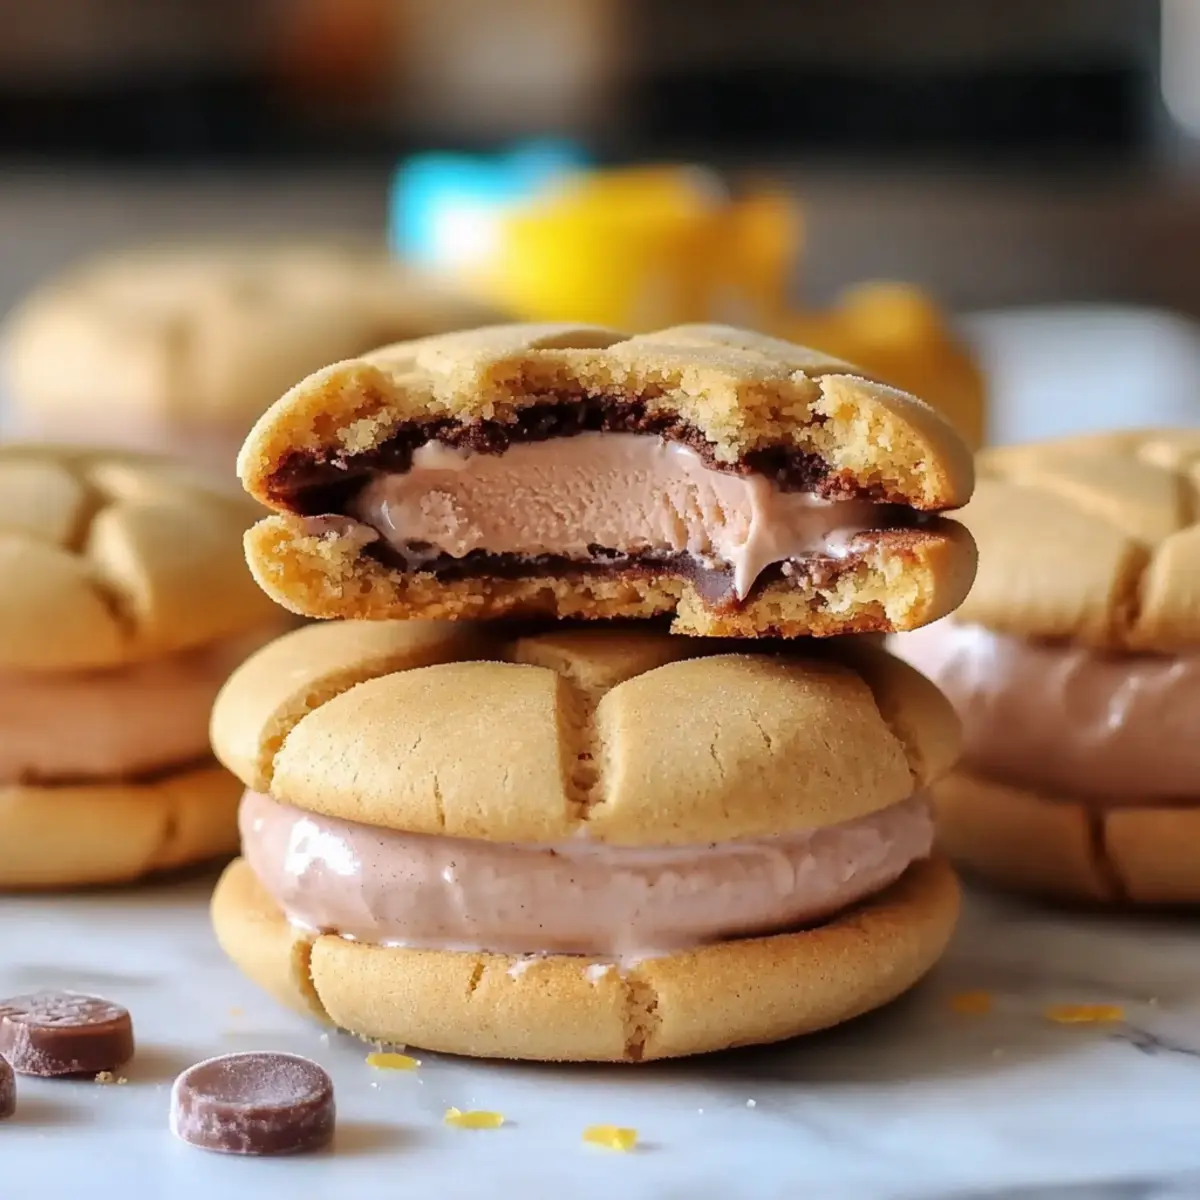
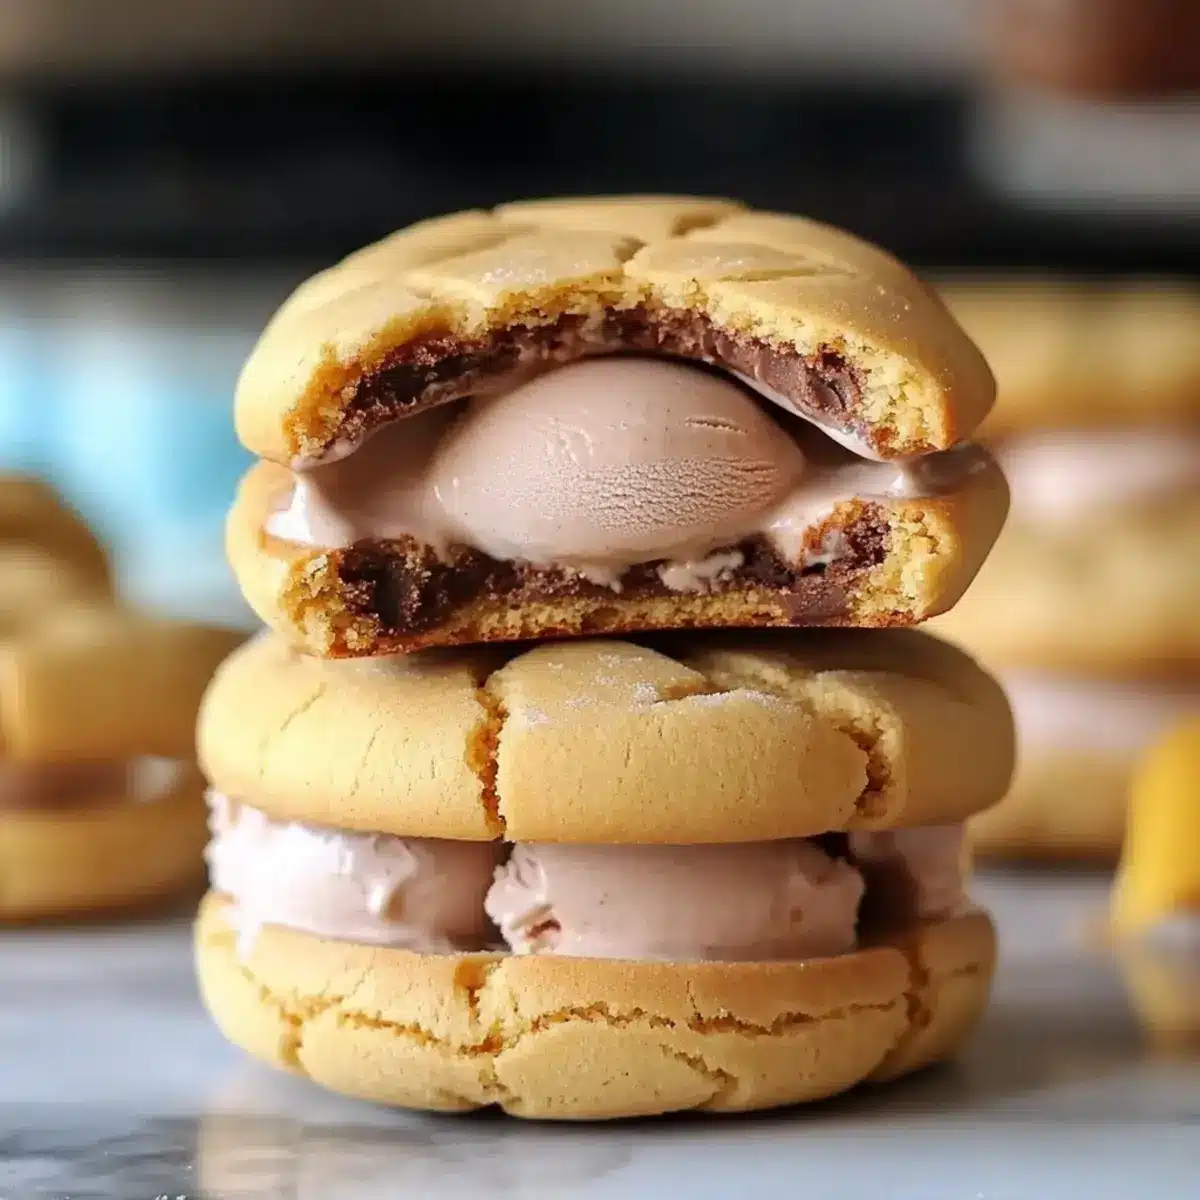
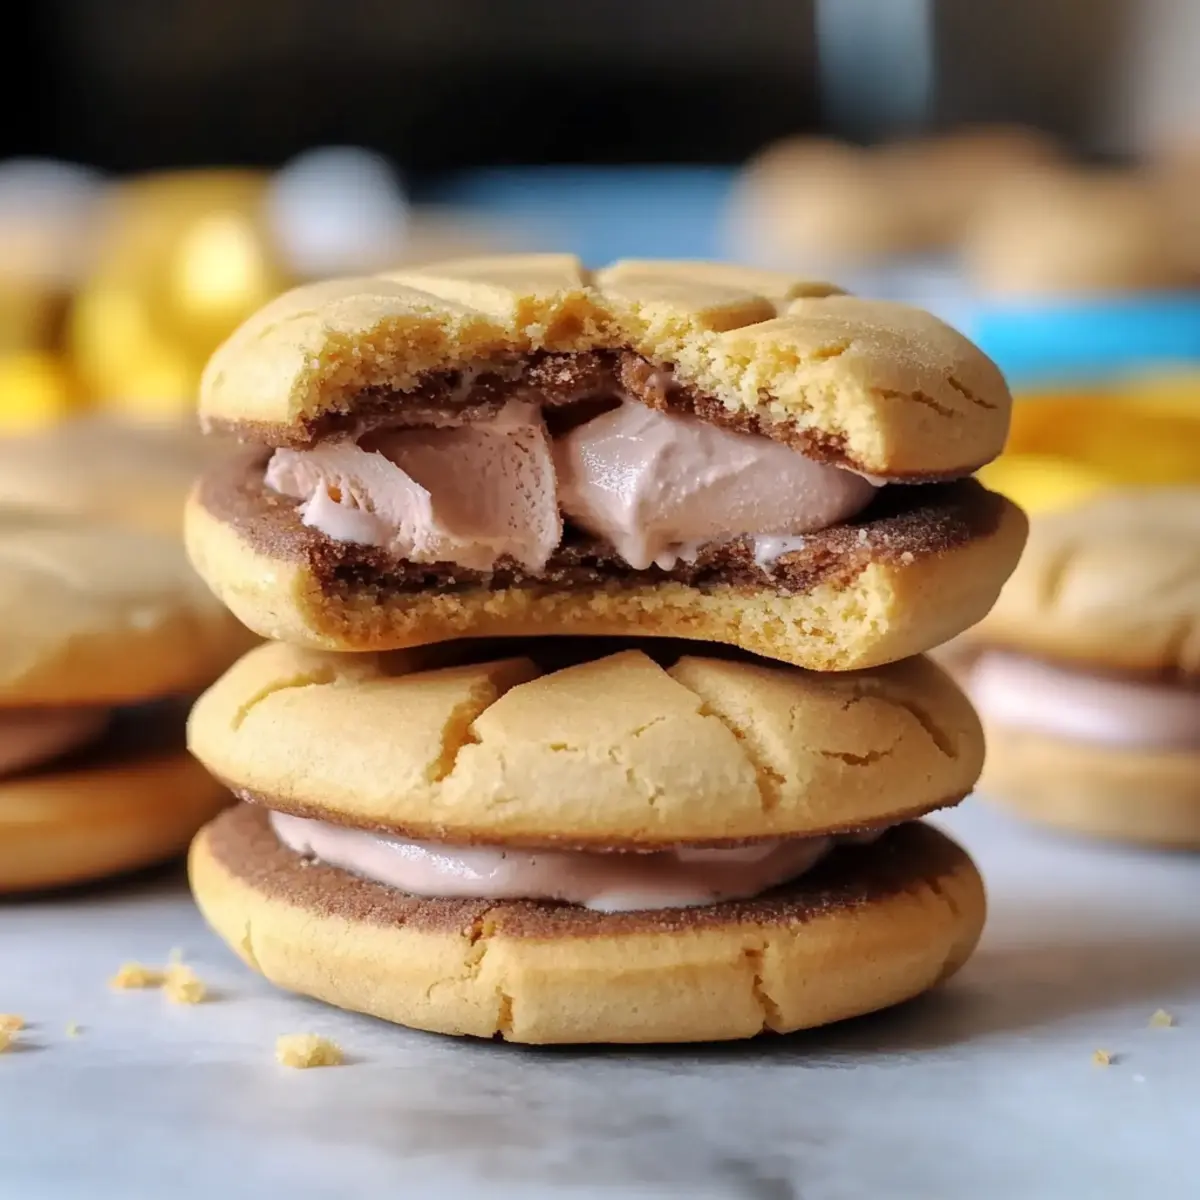
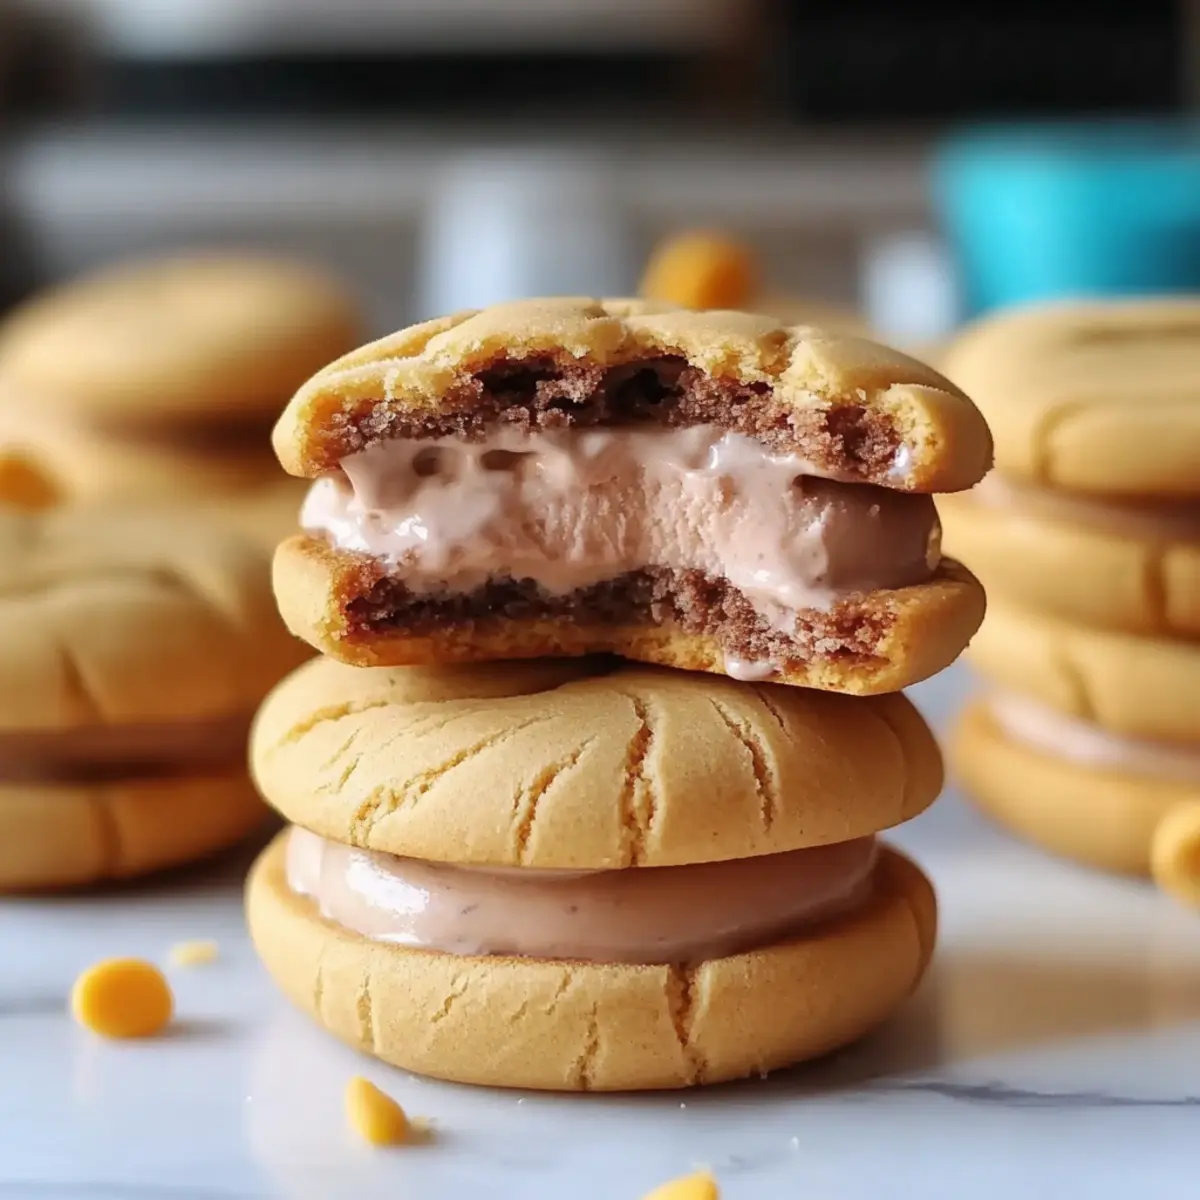
As I strolled through a local summer festival, the scent of freshly baked cookies wafted through the air, enticing me to pause. That’s when I spotted the ultimate crowd-pleaser: Peanut Butter Cup Ice Cream Sandwiches! Imagine indulging in chewy cookies, rich with peanut butter, hugging a creamy, velvety core of ice cream loaded with chocolatey goodness. Not only are these treats fun to customize—you can switch up the flavors to fit any palate—but they’re also incredibly quick to whip up, perfect for last-minute gatherings or movie nights at home. Join me as we embark on a delightful journey through 26 creative ice cream sandwich recipes that will have everyone asking for seconds. What flavors would you dare to create?
Why Choose Peanut Butter Cup Sandwiches?
Irresistible Combination: Chewy peanut butter cookies paired with a rich ice cream center create a decadent treat that’s hard to resist!
Customizable Flavors: Mix and match your favorite ice creams and cookie variations to surprise your taste buds each time.
Quick to Prepare: With minimal ingredients and straightforward steps, these sandwiches can be ready in no time—ideal for spontaneous summer gatherings.
Kid-Friendly Treats: Perfect for kids and adults alike, these sandwiches are sure to please anyone with a sweet tooth at your next movie night!
Perfect for Warm Days: Enjoying these delightful creations after spending time outdoors will elevate your summer experience to new heights!
Dive into this fun recipe adventure, and don’t forget to check out my Cowboy Butter Chicken for another easy-to-make favorite!
Peanut Butter Cup Ice Cream Sandwich Ingredients
For the Peanut Butter Cookies
• Peanut Butter – adds a rich, nutty flavor that complements the sweetness of the cookies.
• Unsalted Butter – provides creaminess and moisture; you can use vegan butter for a dairy-free version.
• Granulated Sugar – sweetens the cookies and helps create a chewy texture.
• Brown Sugar – adds depth and richness; it also keeps cookies from becoming too dry.
• Egg – binds the ingredients together; substitute with flaxseed meal for a vegan option.
• All-Purpose Flour – forms the structure of the cookies; use gluten-free flour for gluten-free options.
• Baking Soda – leavens the dough for a light texture; ensure it’s fresh for the best results.
For the Ice Cream Filling
• Chocolate Ice Cream – pairs perfectly with peanut butter cookies and adds a creamy, indulgent flavor; any other favorite flavor can be used for variety.
Optional Add-ins
• Mini Peanut Butter Cups – sprinkle them inside the ice cream filling for extra peanut butter chocolate bliss.
• Crushed Nuts – add a bit of crunch and nuttiness to enhance the overall flavor profile.
• Chocolate Chips – mix into the cookie dough for an added chocolatey touch.
Step‑by‑Step Instructions for Peanut Butter Cup Ice Cream Sandwiches
Step 1: Preheat the Oven
Begin by preheating your oven to 350°F (175°C). While the oven warms up, line two baking sheets with parchment paper to ensure your Peanut Butter Cup Ice Cream Sandwich cookies bake evenly and don’t stick. This prep work will save time later, allowing you to focus on your delicious cookie dough preparation.
Step 2: Cream the Butters and Sugars
In a large mixing bowl, combine the unsalted butter and both granulated and brown sugars. Using an electric mixer, cream the mixture on medium speed until it becomes light and fluffy, which should take about 2-3 minutes. Embrace the heavenly aroma as the sugars blend with the butter, creating a sweet base for your cookies.
Step 3: Mix in the Peanut Butter and Egg
Add the peanut butter and the egg (or your chosen egg substitute) to the creamed mixture. Beat everything together on medium speed until fully incorporated and smooth—this should take another minute or so. The mixture will take on a delightful texture, promising deliciously rich cookies for your Peanut Butter Cup Ice Cream Sandwiches.
Step 4: Combine Dry Ingredients
In a separate bowl, whisk together the all-purpose flour and baking soda until combined. Gradually add this flour mixture to the wet ingredients, mixing on low speed until just combined. Be careful not to overmix, as this can result in dense cookies. The dough should be thick and slightly sticky, ready to be shaped into cookies.
Step 5: Scoop and Shape the Cookies
Using a cookie scoop or tablespoon, drop rounded portions of dough onto the prepared baking sheets. Leave a few inches between each scoop, as the cookies will spread while baking. You’ll want about 12 cookies per sheet to allow them room for expansion—this is a key step to ensure perfect Peanut Butter Cup Ice Cream Sandwiches.
Step 6: Bake the Cookies
Place the baking sheets in the preheated oven and bake for 10-12 minutes, or until the edges are golden brown and the centers are set but still soft. Keep an eye on them, as baking times can vary slightly, and you want that perfect chewy texture in your cookies. The aroma of baking peanut butter cookies will fill your kitchen!
Step 7: Cool the Cookies
Once baked, remove the cookies from the oven and allow them to cool on the baking sheets for about 5 minutes. Then, transfer them to a wire rack to cool completely. This step is crucial; completely cool cookies will prevent your ice cream from melting too quickly during assembly.
Step 8: Assemble the Sandwiches
Take one cooled cookie and scoop your favorite chocolate ice cream onto the center. Press a second cookie on top, gently but firmly, to create a sandwich. Feel free to sprinkle in mini peanut butter cups or crushed nuts for an extra treat as you assemble your Peanut Butter Cup Ice Cream Sandwiches—this is where your creativity shines!
Step 9: Freeze the Sandwiches (Optional)
To firm up the ice cream and make the sandwiches easier to handle, place them in the freezer for about 20-30 minutes. This will give your Peanut Butter Cup Ice Cream Sandwiches a delightful, chilled bite that’s perfect for hot summer days. Enjoy the anticipation of indulging in these homemade delights!
Make Ahead Options
These Peanut Butter Cup Ice Cream Sandwiches are perfect for meal prep! You can prepare the cookie dough up to 3 days in advance and refrigerate it to keep it fresh. Simply scoop the dough onto baking sheets and bake when you’re ready for a sweet treat. After baked, allow the cookies to cool completely before assembling your sandwiches. The ice cream can be scooped and filled between cookies an up to 24 hours ahead of time, just make sure to tightly wrap or store them in an airtight container to maintain their delightful texture. When ready to serve, pop them in the freezer for about 20-30 minutes for that refreshing effect. This strategy will help you enjoy homemade desserts with minimal effort during busy days!
Variations & Substitutions for Peanut Butter Cup Ice Cream Sandwiches
Feel free to experiment with delectable twists that will elevate your ice cream sandwich game to new heights!
-
Nut-Free: Replace peanut butter with sunflower seed butter for a similar taste without the nuts. It’s just as creamy and delicious!
-
Vegan: Use a plant-based butter and substitute the egg with flaxseed meal or aquafaba. You’ll still achieve those rich cookies everyone loves!
-
Gluten-Free: Swap all-purpose flour for a gluten-free flour blend. This ensures your sandwiches are still scrumptious for your gluten-sensitive friends.
-
Chocolate Lovers: Mix cocoa powder into the cookie dough for a chocolate-infused cookie. This extra layer of flavor pairs beautifully with the chocolate ice cream.
-
Different Ice Cream Flavors: Go beyond chocolate; try strawberry, mint chocolate chip, or even coffee ice cream for unexpected delights. Each flavor twist offers a new experience!
-
Crunchy Additions: Fold in crushed pretzels or graham crackers to the cookie dough. The added crunch creates a delightful contrast to the creamy filling.
-
Spicy Kick: Add a pinch of cayenne pepper or chili powder to the cookie dough for a surprising spicy twist that contrasts nicely with the sweetness.
-
Classic Mix-ins: Incorporate mini chocolate chips, chopped candy bars, or crushed cookies into the ice cream filling. This adds both texture and flavor to your treats.
And while you’re at it, why not explore serving these sandwiches alongside Crockpot Butter Chicken for an unforgettable meal followed by sweet treats? Embrace the joy of customizing your treats!
What to Serve with Peanut Butter Cup Ice Cream Sandwiches?
As the summer sun warms your backyard, complete the experience with delightful pairings that complement your ice cream sandwiches perfectly.
-
Fresh Fruit Salad: Bright and refreshing, fruit salad adds a burst of color and natural sweetness, balancing the richness of the sandwiches. A mix of berries, melons, and citrus is especially delightful!
-
Chocolate Fudge Brownies: The dense, fudgy texture of brownies offers a delightful contrast to the creamy ice cream, creating a chocoholic dream. Serve them warm alongside ice cream sandwiches for an indulgent treat.
-
Crushed Nuts: Sprinkle some crushed nuts, like pecans or peanuts, on top of the sandwiches for an extra layer of crunch. The nutty flavor enhances the peanut butter goodness beautifully.
-
Iced Coffee or Cold Brew: The rich and aromatic notes in iced coffee provide a delicious cold beverage option that pairs well with the sweet decadence of the sandwiches.
-
Vanilla Whipped Cream: A dollop of fluffy whipped cream on the side brings a light and airy texture that cuts through the richness of the ice cream.
-
Chocolate Chip Cookies: For a cookie lover’s delight, serve classic chocolate chip cookies as a side. The combination of flavors makes for a comforting and nostalgic experience.
-
Chocolate Milkshake: Enhance the indulgence by pairing the sandwiches with a silky chocolate milkshake. The creamy sip complements the chewy cookies perfectly!
Expert Tips for Peanut Butter Cup Ice Cream Sandwiches
-
Choose the Right Peanut Butter: Use creamy peanut butter for smooth dough and a consistent texture, avoiding natural kinds with oil separation that can affect cookie consistency.
-
Cooling is Key: Make sure your cookies are completely cool before adding ice cream, or you risk a melty mess! This ensures a delightful bite right from the start.
-
Avoid Overmixing: When combining dry and wet ingredients, mix until just combined to maintain the desired chewiness in your cookies.
-
Customize Wisely: Feel free to add mini peanut butter cups or chocolate chips to the cookie dough; however, don’t overwhelm the texture—balance is essential for the best Peanut Butter Cup Ice Cream Sandwiches.
-
Adjust Freezing Time: If you like a firmer ice cream center, extending the freeze time to an hour or so can enhance the eating experience during hot days.
-
Batch Variations: Experiment with different ice cream flavors like vanilla or cookies and cream, and switch up the cookie recipe for creative variations that cater to everyone’s palate!
Storage Tips for Peanut Butter Cup Ice Cream Sandwiches
Fridge: Store any leftover assembled Peanut Butter Cup Ice Cream Sandwiches for up to 1 day in the refrigerator, but be aware they may become soft due to the ice cream melting slightly.
Freezer: Keep your sandwiches in an airtight container in the freezer for up to 2 weeks for the best flavor and texture. For easier serving, layer parchment paper between sandwiches.
Reheating: If desired, you can soften them for a few minutes at room temperature before serving, enhancing the creamy center while keeping the cookies chewy.
Cookie Dough: Freeze unbaked cookie dough balls in a single layer, then transfer to a resealable bag for up to 3 months. When you’re craving a fresh treat, bake straight from the freezer!
Peanut Butter Cup Ice Cream Sandwich Recipe FAQs
How do I choose the best peanut butter for my cookies?
Absolutely! For the best results, opt for a creamy peanut butter that blends well into the dough. Avoid natural varieties that might have oil separation, as they can cause your cookie texture to be inconsistent. Brands like Jif or Skippy work wonderfully for a smooth, rich flavor and even consistency.
What’s the best way to store leftover Peanut Butter Cup Ice Cream Sandwiches?
To maintain their deliciousness, store any assembled sandwiches in an airtight container in the freezer for up to 2 weeks. For even better texture, place parchment paper between sandwiches to prevent sticking. They can also be kept in the fridge for up to 1 day, but do note they may soften due to melting ice cream.
Can I freeze the cookie dough for later use?
Very! You can freeze unbaked cookie dough balls for up to 3 months. Simply scoop the dough onto a baking sheet lined with parchment paper, freeze until solid, then transfer to a resealable bag. When you’re ready to bake, just pop them directly into a preheated oven—no thawing necessary!
What if my cookies are too soft after baking?
If you find that your cookies are overly soft, it might be that they were underbaked. Be sure to bake until the edges are golden and the centers are set but not hard. Allow them to cool completely before assembling with ice cream; if they’re still too soft, pop them in the fridge for a bit before adding the ice cream.
Can these ice cream sandwiches accommodate dietary restrictions?
Absolutely! To make gluten-free Peanut Butter Cup Ice Cream Sandwiches, just substitute regular all-purpose flour with a gluten-free blend. For a vegan option, use flaxseed meal mixed with water in place of the egg and dairy-free ice cream. Be sure to check the labels on all ingredients for allergens!
How long should I freeze the assembled sandwiches before serving?
For best results, freeze the assembled ice cream sandwiches for about 20-30 minutes. This helps the ice cream become firmer and makes them easier to handle while enjoying. If you prefer an extra-chilled treat, feel free to leave them in the freezer longer!
Peanut Butter Cup Ice Cream Sandwiches to Satisfy Cravings
Ingredients
Equipment
Method
- Preheat your oven to 350°F (175°C) and line two baking sheets with parchment paper.
- Cream the unsalted butter, granulated sugar, and brown sugar until light and fluffy.
- Mix in the peanut butter and egg until fully incorporated.
- Combine flour and baking soda in a separate bowl, then add to the wet ingredients and mix until just combined.
- Drop rounded portions of dough onto baking sheets, leaving space for spreading.
- Bake for 10-12 minutes or until edges are golden brown and centers are still soft.
- Allow cookies to cool on baking sheets for about 5 minutes, then transfer to a wire rack to cool completely.
- Assemble the sandwiches by scooping ice cream onto one cookie and topping with another cookie.
- Optionally, freeze the sandwiches for 20-30 minutes to firm up ice cream before serving.
Leave a Reply