
As I stood in my kitchen, a smooth peanut butter jar in one hand and a tub of Greek yogurt in the other, inspiration struck for an easy, 3-ingredient delight—Peanut Butter Yogurt Bowls & Pots. Combining these pantry staples not only packs a protein punch but also brings an incredible versatility that makes it suitable for breakfast, snacks, or even dessert. Imagine creating a creamy and dreamy treat that can be loaded with your favorite toppings—whether it’s crunchy granola, fresh berries, or a sprinkle of chocolate chips, the options are endless! Not only is this recipe a hit with both adults and kids, but it’s also a guilt-free way to satisfy those cravings without resorting to fast food. Ready to indulge in a bowl of deliciousness that’s as easy to whip up as it is to customize? Let’s dive in!
Why are Peanut Butter Yogurt Bowls irresistible?
Simplicity makes this dish a favorite, with just three ingredients needed for a delightful treat. Customizable toppings let you create a unique flavor profile suited to any craving—from sweet chocolate to fresh fruit. Protein-packed, these bowls make for an energizing breakfast or snack, filling you up without the guilt. Meal prep friendly, whip up jars in advance for quick grab-and-go options. Plus, the luxurious texture is truly a crowd-pleaser, ensuring everyone leaves the table satisfied. Enjoy with a sprinkle of granola for that perfect crunch!
Peanut Butter Yogurt Bowls & Pots Ingredients
• Dive into creating these delightful Peanut Butter Yogurt Bowls & Pots with just a handful of ingredients!
For the Yogurt Base
- Greek Yogurt – A creamy, protein-rich base that adds thick texture. Substitute with non-dairy yogurt for a vegan twist.
- Smooth Peanut Butter – Adds richness and nutty flavor, enhancing the creaminess. Opt for almond or cashew butter if you’d like a different taste.
- Honey – Naturally sweetens the mixture for a touch of indulgence. For babies under 12 months, maple syrup is a safe alternative.
Optional Toppings
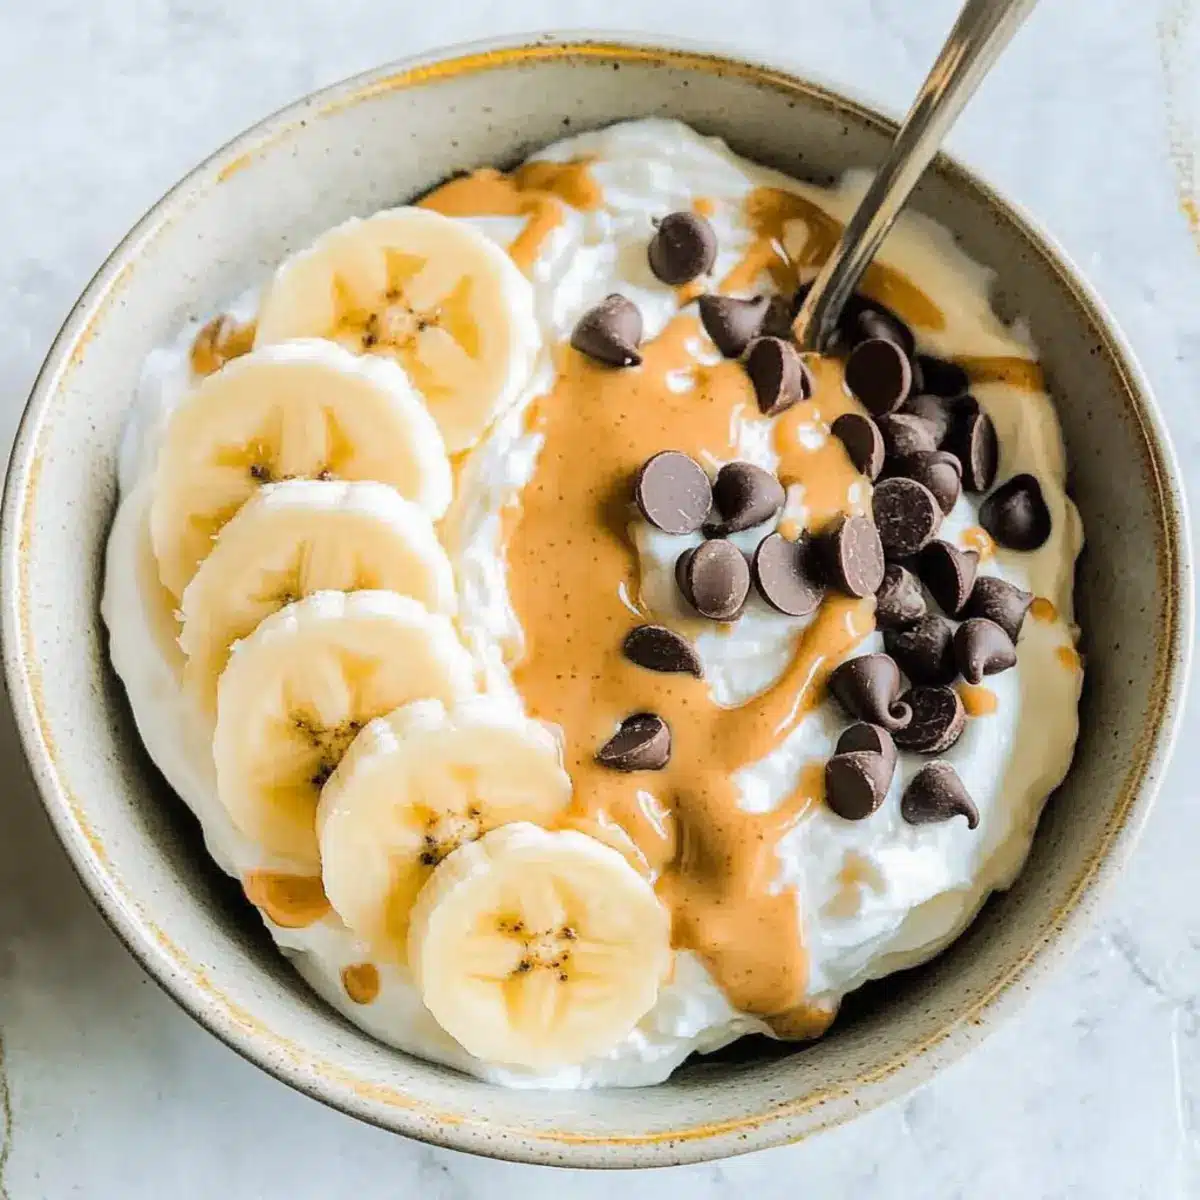
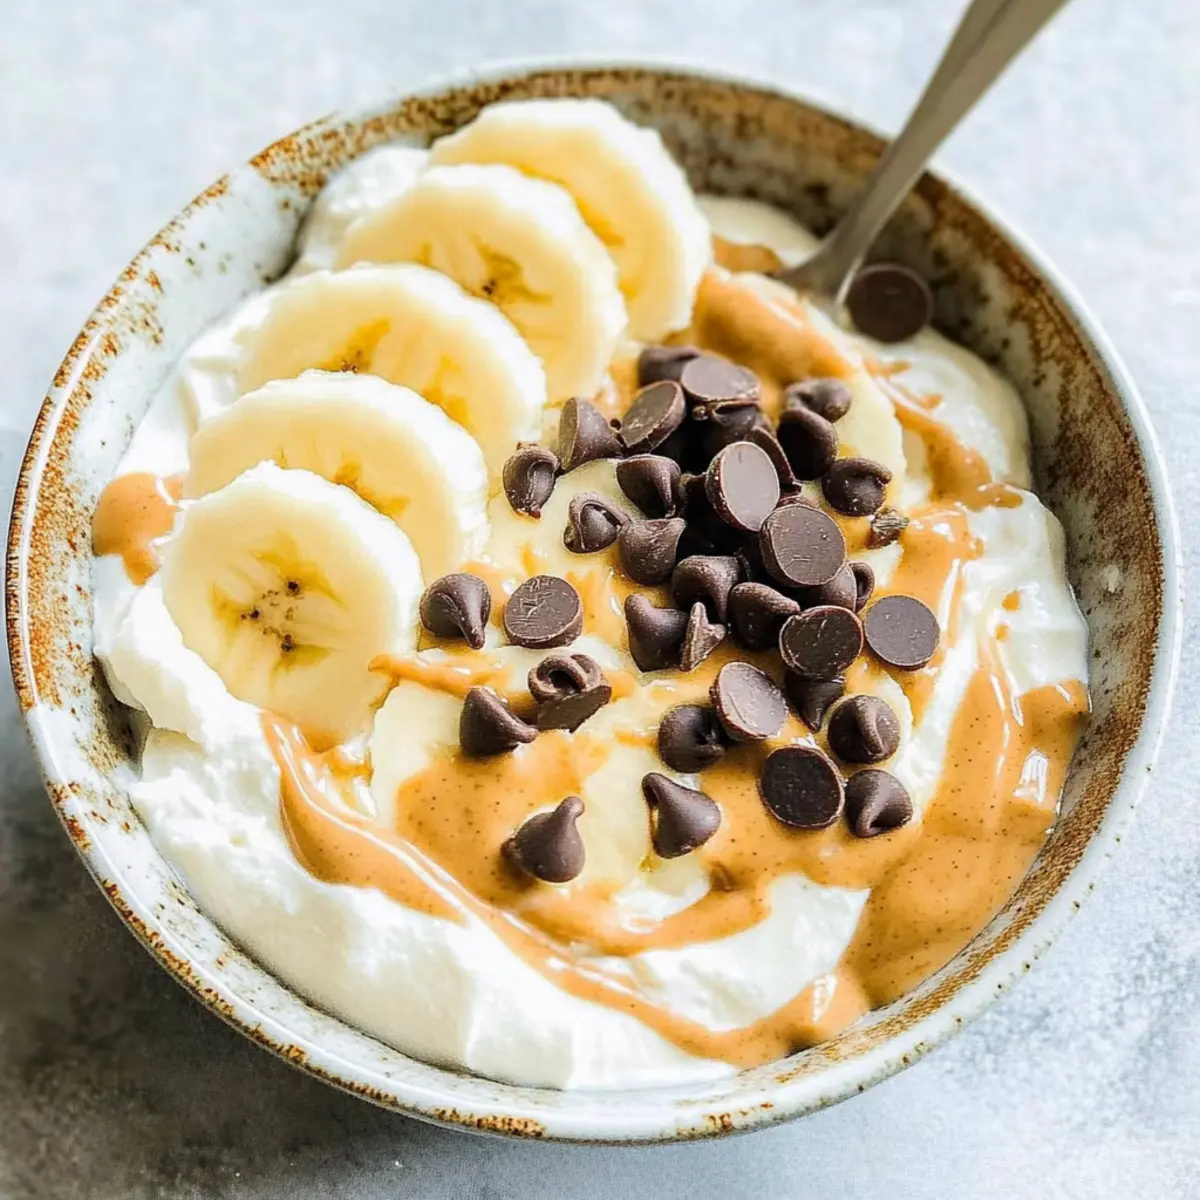
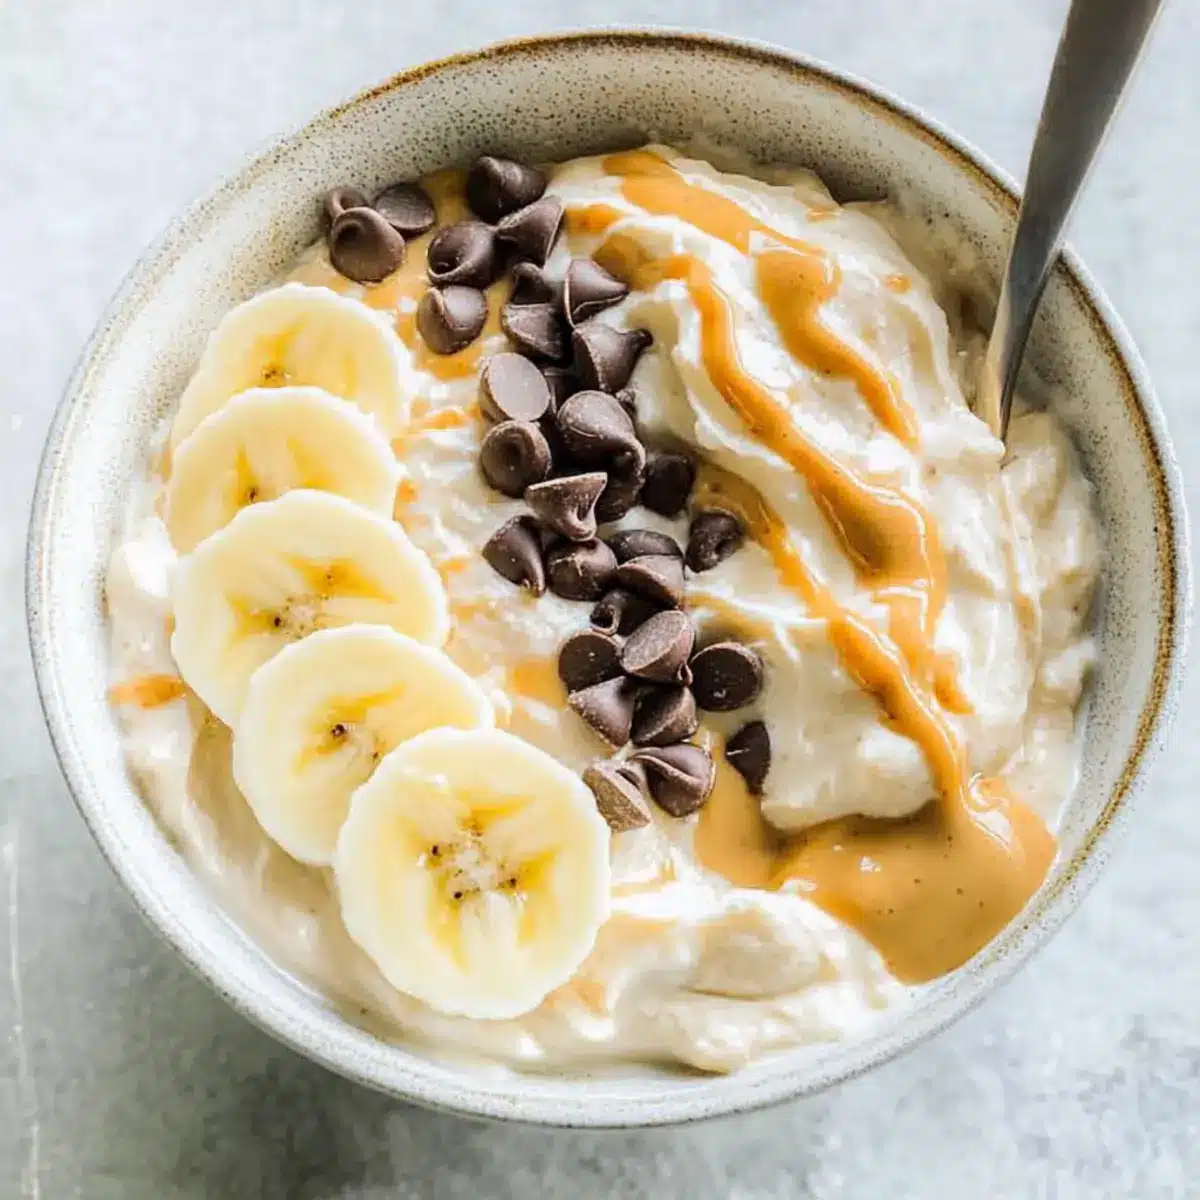
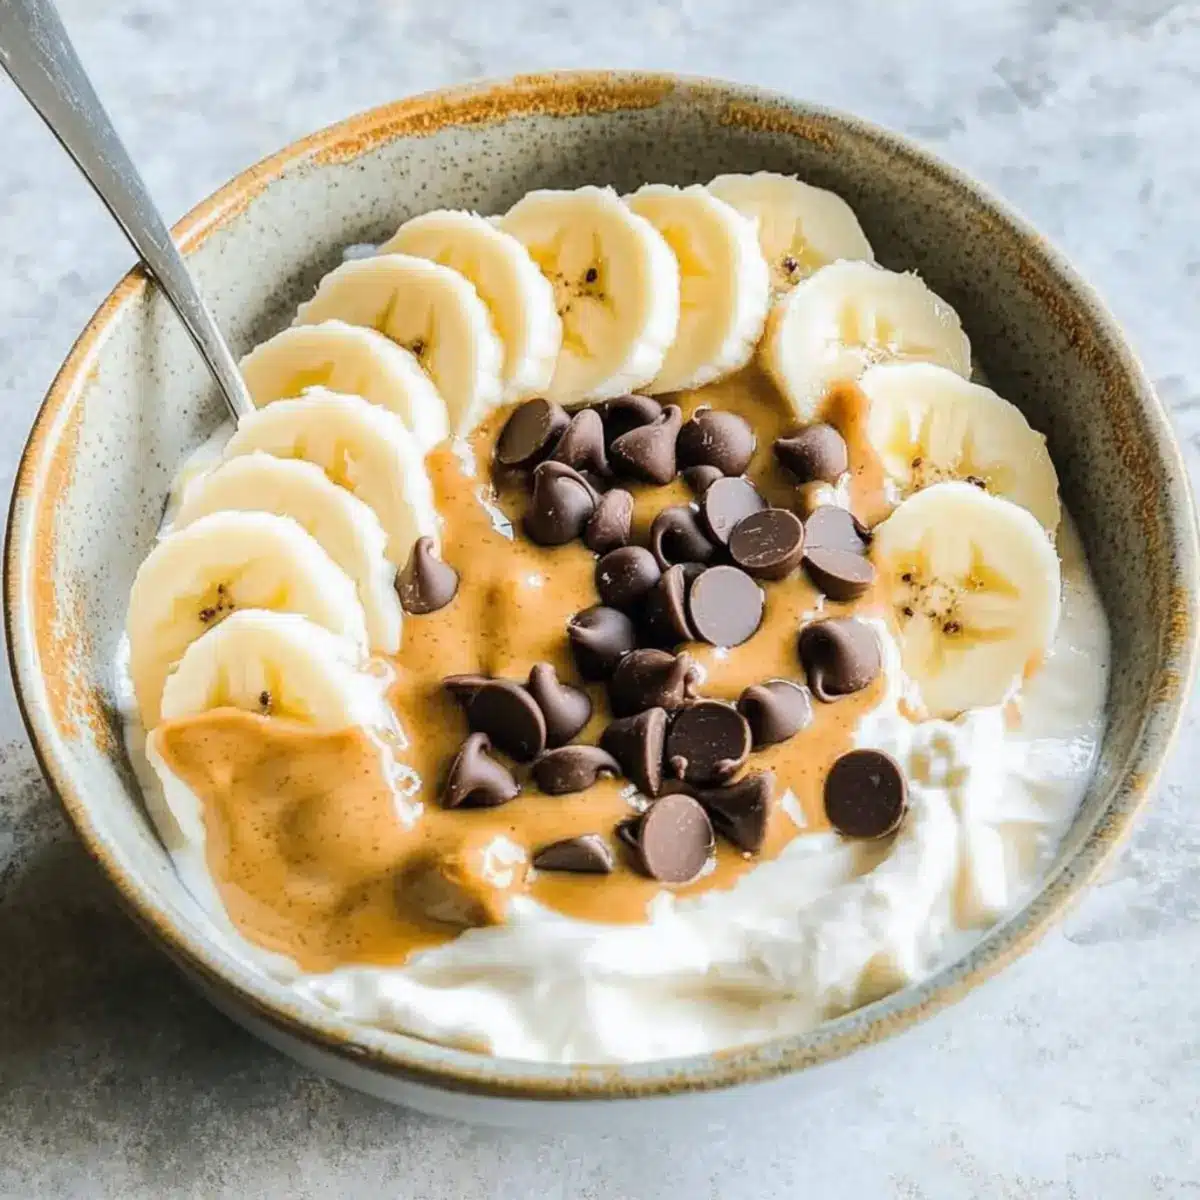
- Banana – Sliced banana adds natural sweetness and a soft texture.
- Chocolate Chips – For a sweet crunch, toss in some chocolate chips for that dessert-like feel.
- Crushed Oreos – A fun, crunchy topping that brings a cookies-and-cream vibe to your bowls.
- Peanuts – Chopped peanuts add an extra crunch and nutty flavor.
- Sprinkles – Perfect for making this treat feel festive and fun, especially for the kids!
- Berries – Fresh berries add a juicy burst of flavor while being nutritious.
- Granola – A sprinkle of granola introduces that delightful crunch and extra fiber.
Get creative with these toppings and craft your ideal Peanut Butter Yogurt Bowl!
Step‑by‑Step Instructions for Peanut Butter Yogurt Bowls & Pots
Step 1: Mix Base Ingredients
Start by grabbing a mixing bowl and measuring cup. Add 1 cup of Greek yogurt, 3 tablespoons of smooth peanut butter, and 1 tablespoon of honey into the bowl. Using a spatula or a whisk, blend the ingredients together until the mixture is smooth and creamy, taking about 2-3 minutes. This velvety base will be the heart of your Peanut Butter Yogurt Bowls.
Step 2: Adjust Sweetness
Once your yogurt base is well mixed, take a moment to taste it. If you desire a little more sweetness, feel free to add an additional drizzle of honey, about 1 teaspoon at a time. Stir well for another minute until fully incorporated and the flavor meets your expectations. Enjoy this deliciously creamy mixture that will serve as a versatile base for your Peanut Butter Yogurt Bowls & Pots.
Step 3: Serve or Store
Prepare your serving bowls or jars by ensuring they are clean and dry. Spoon the peanut butter yogurt mixture evenly into each bowl or jar, filling them about three-quarters full to leave room for toppings. If you’re meal prepping, cover securely with lids and store in the fridge for up to 5 days. The irresistible texture of your Peanut Butter Yogurt Bowls awaits!
Step 4: Add Toppings
Just before serving, unleash your creativity with toppings! Consider adding sliced bananas, a sprinkle of chocolate chips, or a handful of granola—whatever tickles your fancy. This step is where your Peanut Butter Yogurt Bowls & Pots truly come alive, allowing you to personalize each serving. Arrange the toppings artistically on top and get ready to dive into your delicious creation!
Make Ahead Options
These Peanut Butter Yogurt Bowls & Pots are perfect for meal prep! You can mix the yogurt base (1 cup of Greek yogurt, 3 tablespoons of peanut butter, and 1 tablespoon of honey) up to 5 days in advance, allowing the flavors to meld beautifully. Just store the mixture in airtight jars in the refrigerator to keep it fresh and creamy. When you’re ready to enjoy, simply add your toppings like sliced bananas or granola right before serving for that delightful crunch and extra flavor. This way, you save precious time on busy mornings or snacks while indulging in a delicious, protein-packed treat anytime!
What to Serve with Easy 3-Ingredient Peanut Butter Yogurt Bowls
Create a complete meal experience with delightful pairings that enhance each creamy scoop of peanut butter joy.
-
Fresh Fruit: Juicy berries or sliced bananas add a burst of flavor and natural sweetness, balancing the richness of the yogurt.
-
Homemade Granola: Crunchy granola offers a wonderful texture contrast, bringing extra fiber and nutty notes that harmonize beautifully with the creaminess.
-
Nutty Trail Mix: A sprinkle of trail mix with almonds, walnuts, and dried fruit introduces delightful crunch and unique flavors that complement the peanut butter base.
-
Coconut Flakes: Toasted coconut flakes add a tropical twist, pairing excellently with the creamy yogurt for a delightful bite.
-
Herbal Tea: A soothing cup of chamomile or peppermint tea complements the desserts without overpowering their subtle sweetness.
-
Iced Coffee: For a caffeinated kick, pair these yogurt bowls with a refreshing iced coffee, creating a harmonious blend of flavors to start your morning right.
-
Chia Seed Pudding: A scoop of chia seed pudding adds a satisfying texture and is packed with omega-3 fatty acids, further enhancing the nutritious appeal of your meal.
-
Dark Chocolate Shavings: A sprinkle of dark chocolate shavings transforms your yogurt bowl into a decadent dessert experience, delightful for indulgent moments.
How to Store and Freeze Peanut Butter Yogurt Bowls
- Fridge: Store the peanut butter yogurt mixture in airtight jars for up to 5 days. This keeps it fresh and ready for quick snacks or breakfasts.
- Freezer: For longer storage, freeze the yogurt mixture in portion-sized containers. It can last up to 2 months; thaw in the fridge overnight before serving.
- Reheating: There’s no need to heat these bowls; simply stir and enjoy them cold, adding fresh toppings just before serving for the best flavor and texture.
- Separation Tip: If the yogurt thickens during storage, stir well before enjoying to regain its luscious, creamy consistency!
Peanut Butter Yogurt Bowls & Pots Variations
Feel free to unleash your creativity and personalize these delicious bowls to suit your cravings!
- Nut-Free: Swap peanut butter for sunflower seed butter, perfect for allergy-friendly delights.
- Vegan Delight: Use non-dairy yogurt and maple syrup instead of honey for a fully plant-based treat.
- Chocolate Lovers: Stir in cocoa powder or top with chocolate chips for a sweet, rich chocolate flavor that’s to die for!
Mixing in some dark cocoa transforms your creation into a delightful dessert-worthy treat, making it perfect for everyone who adores chocolate.
- Spiced Up: Add a dash of cinnamon or pumpkin spice to warm up the flavor profile, providing a cozy, inviting taste.
Those spices not only add warmth but also a lovely aromatic element you’ll look forward to with each bite.
- Fresh Fruit Boost: Top with sliced apples or peaches to bring a juicy sweetness that complements the creamy base perfectly.
In addition, a splash of fresh fruit creates a vibrant pop of color, making your bowls not just tasty, but visually appealing too.
- Crunch Factor: Integrate crushed granola or even toasted coconut flakes for a delightful crunch that contrasts beautifully with the smooth yogurt.
Adding texture is key! The crunch elevates the entire experience, ensuring that each mouthful is exciting and satisfying.
- Tropical Twist: Add sliced banana and a drizzle of coconut cream to introduce a tropical flair that transports you to a sunny beach with every spoonful.
This combination creates a taste sensation reminiscent of island flavors, making every bowl a mini vacation.
Feel free to try these variations or mix and match to find your perfect Peanut Butter Yogurt Bowl. If you’re looking for even more inspiration, check out my mouthwatering Lemon Garlic Butter or indulge in my delightful Greek Yogurt Cookie recipes!
Expert Tips for Peanut Butter Yogurt Bowls
- Fresh Ingredients: Ensure your yogurt is fresh for optimal flavor and texture, as stale yogurt can result in an unpleasant taste.
- Adjust Sweetness: If using lower fat yogurt, plan to adjust the honey amount; lower-fat varieties can taste less sweet than full-fat options.
- Storage Ease: For meal prepping, store jars in the fridge for up to 5 days. Remember, the yogurt might thicken when chilled, so stir before enjoying!
- Creative Customization: Experiment with various toppings! Mixing in spices like cinnamon or cocoa powder can elevate your Peanut Butter Yogurt Bowls with new flavors.
- Layering Technique: When adding toppings, layer them for a visually appealing presentation that makes each spoonful delightful.
Peanut Butter Yogurt Bowls Recipe FAQs
How do I choose the right Greek yogurt?
When selecting Greek yogurt, look for containers that boast high protein content and minimal added sugars. Aim for varieties that have a thick, creamy texture with no dark spots or separation. If you’re looking for a plant-based option, non-dairy yogurt made from almond, coconut, or soy can serve as great substitutes without sacrificing flavor.
How should I store Peanut Butter Yogurt Bowls?
To keep your Peanut Butter Yogurt Bowls fresh, store the mixture in airtight jars in the fridge for up to 5 days. This way, you can easily grab them for a quick snack or breakfast. Just remember that the yogurt may thicken in the fridge, so give it a good stir before diving in!
Can I freeze the Peanut Butter Yogurt mixture?
Absolutely! You can freeze the Peanut Butter Yogurt mixture in portion-sized containers for up to 2 months. To thaw, simply move a container to the fridge the night before you plan to indulge, allowing it to slowly defrost. Stir well before serving, and don’t forget to top it with your favorite delicious additions right before enjoying!
What if I have a peanut allergy?
If you’re dealing with a peanut allergy, no worries! You can easily replace smooth peanut butter with almond butter, sunflower seed butter, or cashew butter. Each option brings its own unique flavor while keeping your Peanut Butter Yogurt Bowls just as creamy and delightful.
Are there any dietary considerations for kids?
For children under 12 months, it’s best to substitute honey with maple syrup to avoid the risk of botulism. And if your little one is lactose intolerant, you can opt for lactose-free or non-dairy yogurt options. This way, you can ensure everyone can safely enjoy these delicious bowls without worry!
Irresistible Peanut Butter Yogurt Bowls & Pots for Every Craving
Ingredients
Equipment
Method
- Start by grabbing a mixing bowl and measuring cup. Add 1 cup of Greek yogurt, 3 tablespoons of smooth peanut butter, and 1 tablespoon of honey into the bowl. Using a spatula or a whisk, blend the ingredients together until the mixture is smooth and creamy, taking about 2-3 minutes.
- Once your yogurt base is well mixed, take a moment to taste it. If you desire a little more sweetness, feel free to add an additional drizzle of honey, about 1 teaspoon at a time. Stir well until fully incorporated.
- Prepare your serving bowls or jars by ensuring they are clean and dry. Spoon the peanut butter yogurt mixture evenly into each bowl or jar, filling them about three-quarters full.
- Just before serving, unleash your creativity with toppings! Add sliced bananas, chocolate chips, or granola, arranging them artistically on top.
Leave a Reply