
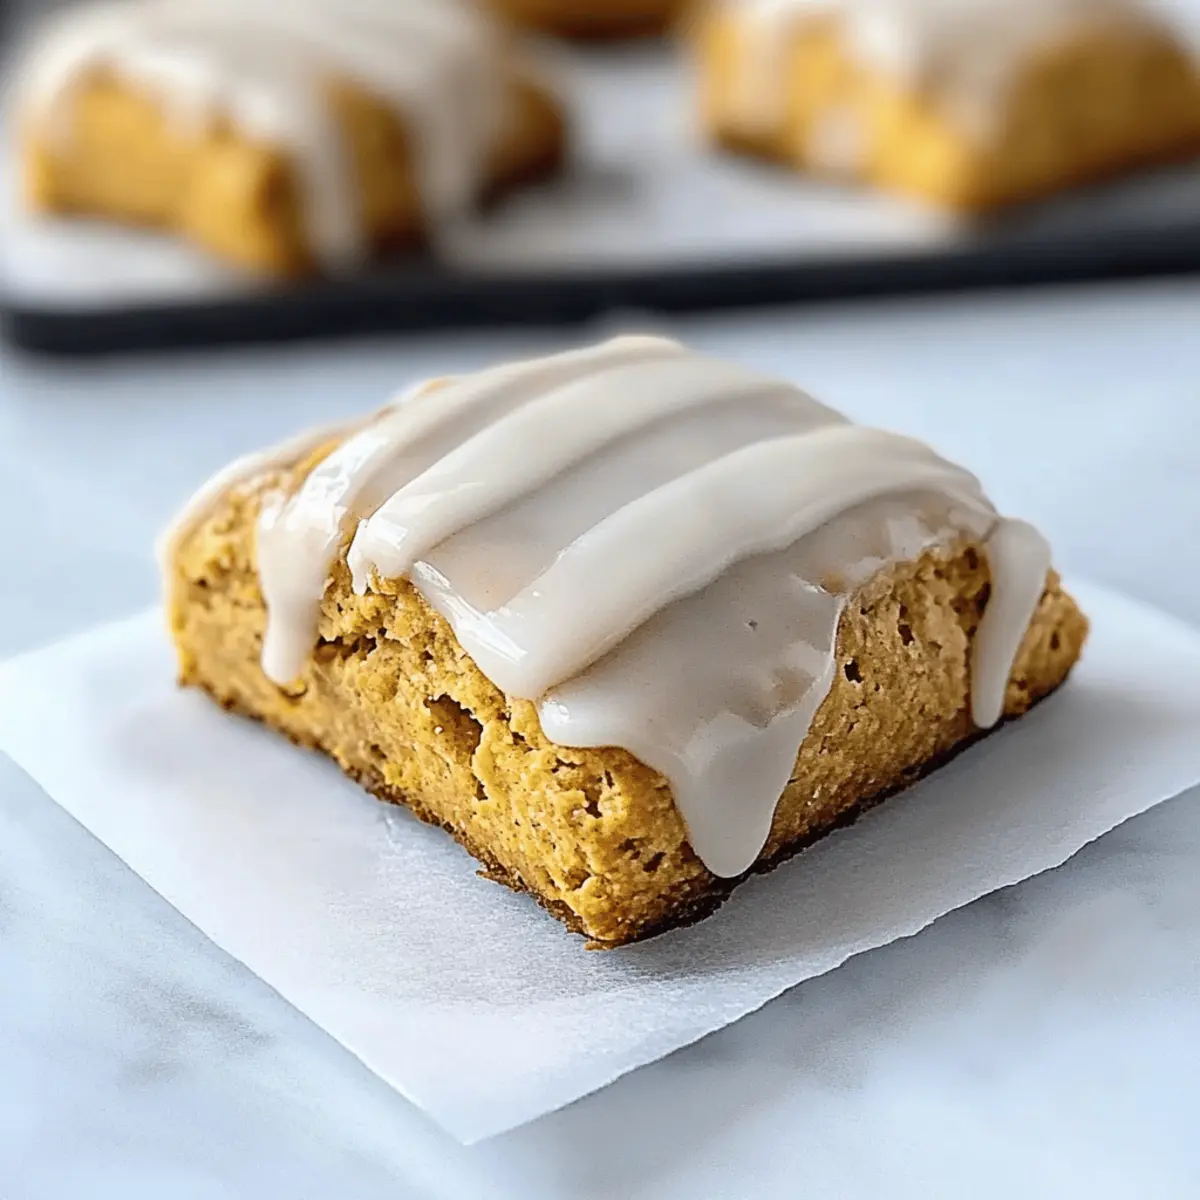
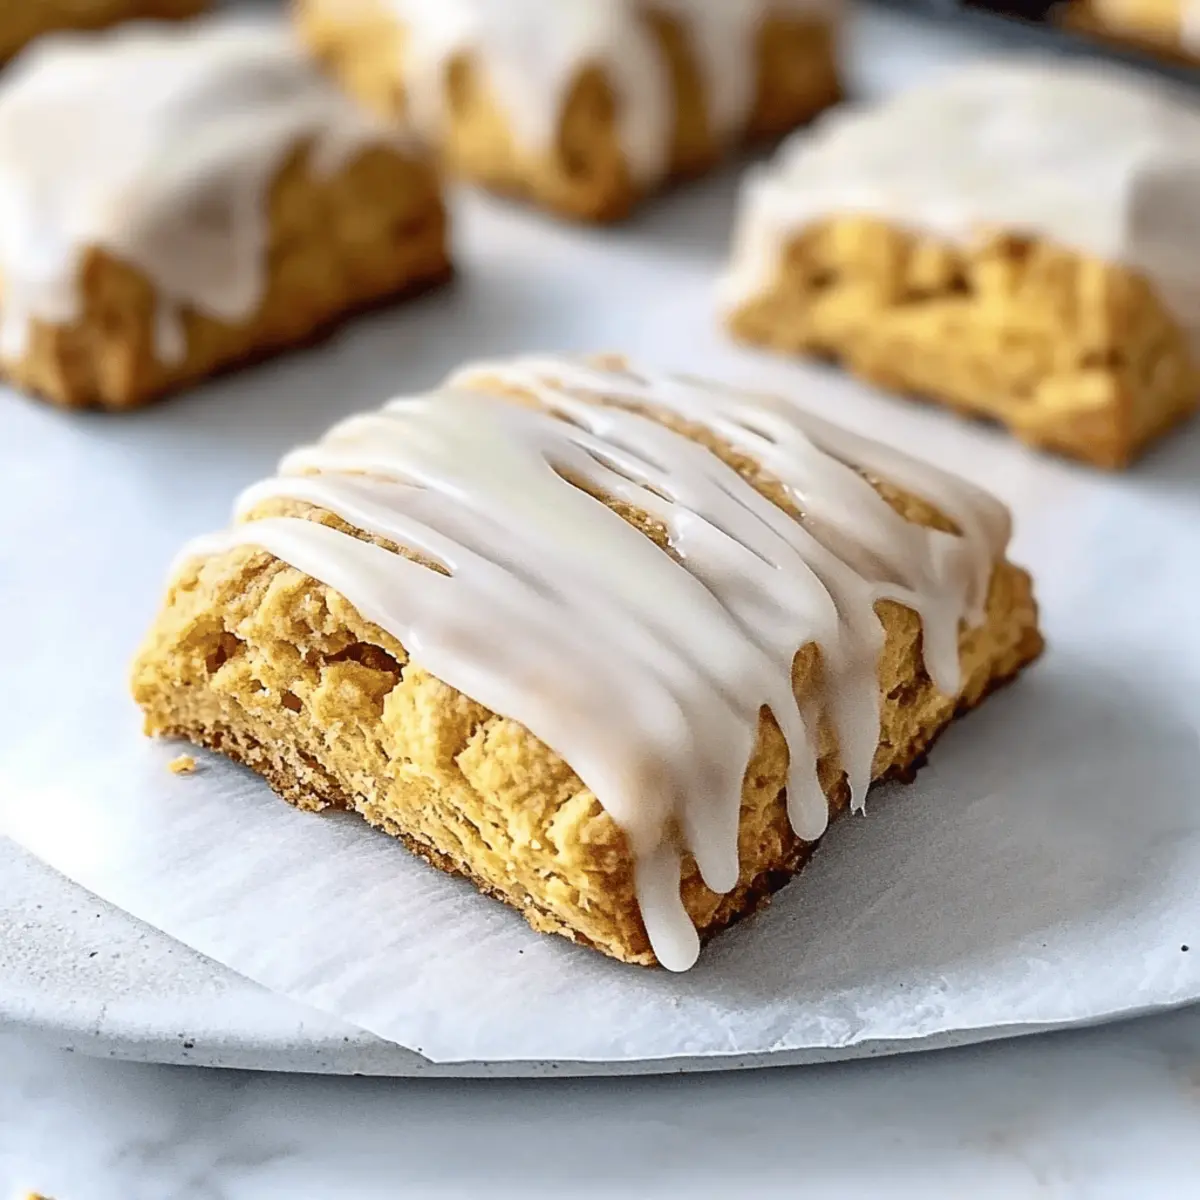
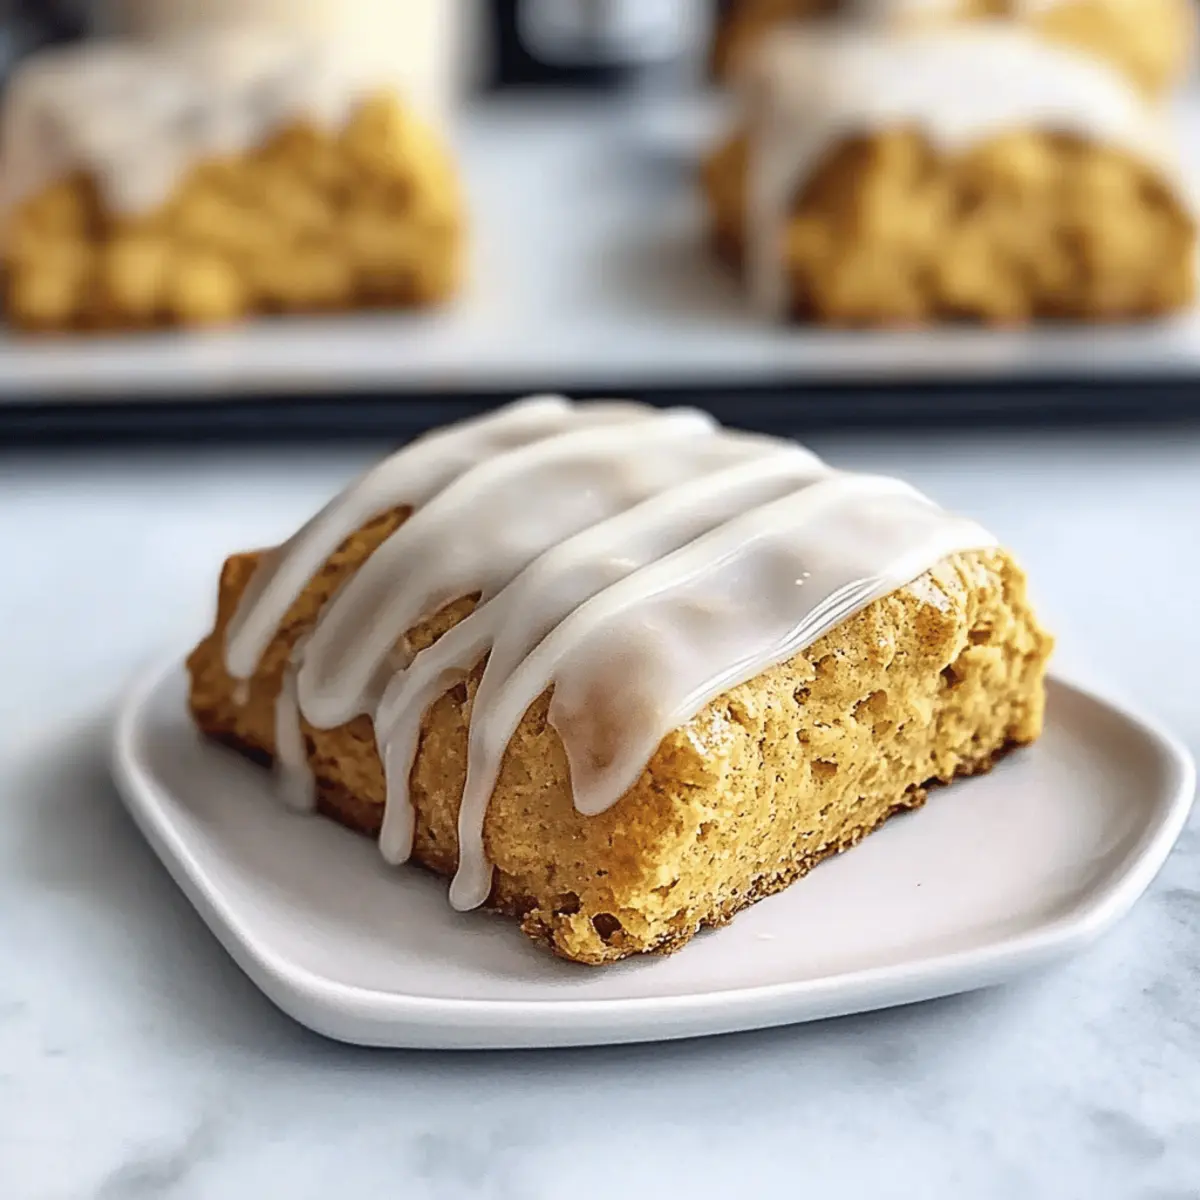
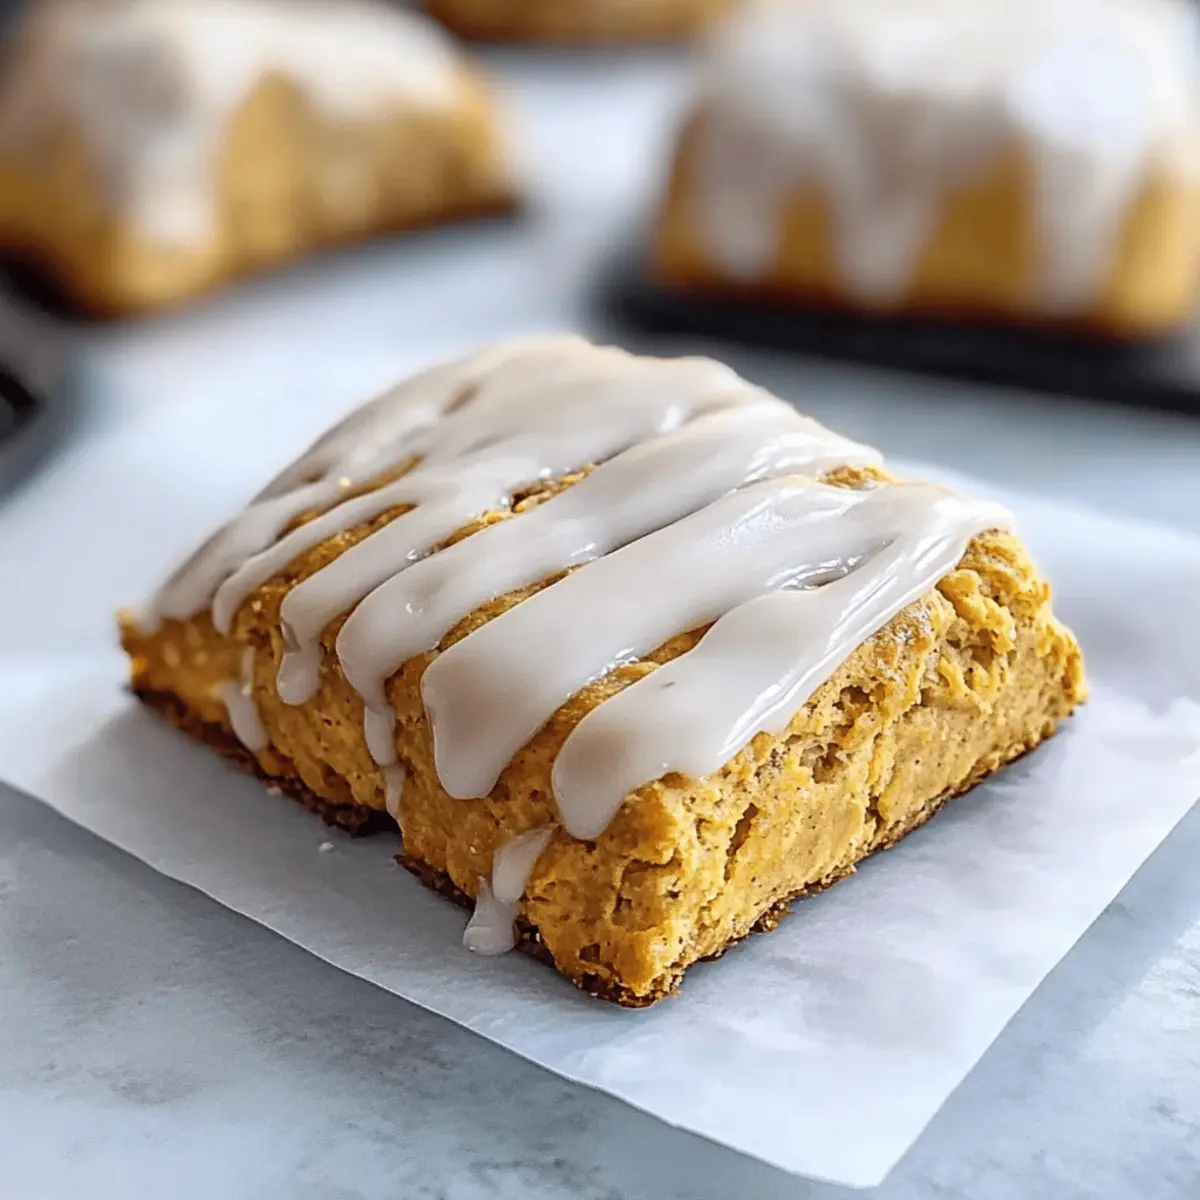
As the leaves start to change and the air turns crisp, there’s a simple pleasure in baking that always draws me in. These Homemade Pumpkin Scones are my delightful tribute to the Starbucks treat I just can’t resist during fall. Bursting with warm spices and topped with a luscious glaze, these scones are not only incredibly easy to whip up at home, but they also bring a taste of your favorite coffee shop right to your kitchen. Plus, making them yourself means you’ll save both time and money while diffusing that blissful autumn aroma throughout your home. So, are you ready to elevate your morning routine with these scrumptious pumpkin scones? Let’s dive in!
Why make Starbucks Pumpkin Scones at home?
Irresistible Flavor: These scones are packed with warm pumpkin spices, recreating that cozy coffee shop experience right in your kitchen. Simple Preparation: Just follow a few easy steps to whip up a delightful batch that rivals any café version. Perfect Pairing: Enjoy them with coffee, tea, or cocoa for a hearty breakfast or snack. Crowd-Pleaser: They’re sure to impress friends and family, making them ideal for gatherings or cozy weekend mornings. Versatile Options: Feel free to customize by adding chocolate chips or nuts for an extra twist! Don’t forget to check out our Thick Chewy Pumpkin Chocolate Chip Cookies for another delicious pumpkin treat!
Starbucks Pumpkin Scones Ingredients
For the Scones
• All-Purpose Flour – Provides structure to the scones; you can use a 1:1 gluten-free flour if needed.
• Packed Brown Sugar – Adds moisture and depth of flavor; can be substituted with granulated sugar for less sweetness.
• White Sugar – Enhances sweetness; feel free to omit if you prefer a less sweet scone.
• Ground Cinnamon – Essential for that warm, cozy pumpkin flavor; allspice can be a delightful substitute.
• Ground Cloves – Contributes to the classic autumn spice profile; adjust based on preference.
• Ground Ginger – Offers a zingy warmth; can also be replaced with a pumpkin spice blend.
• Ground Nutmeg – Adds a unique nutty flavor; use according to your taste for that perfect autumn vibe.
• Baking Soda – Ensures the scones rise; always check for freshness.
• Baking Powder – An additional leavening agent; confirming its expiration date is crucial for success.
• Salt – Balances sweetness and enhances overall flavors.
• Unsalted Butter (cold and diced) – Key for achieving a flaky texture; keep it cold for best results.
• Chilled Pumpkin Puree – Provides moisture and that signature pumpkin flavor; be sure to use pure pumpkin puree, not pie filling.
• Cold Milk – Binds the dough; almond or oat milk can serve as a dairy-free alternative.
• Cold Egg – Enriches the dough; substitute with a flax egg for a vegan option.
• Vanilla Extract – Enhances the overall flavor; omit if you prefer.
For the Glaze
• Powdered Sugar – Necessary for creating a sweet and smooth glaze.
• Heavy Cream – Creates a luscious glaze; you can substitute milk for a lighter version.
• Pumpkin Puree & Pumpkin Pie Spice – Adds yummy dimension to the glaze; these are optional but highly recommended for extra flavor.
With these ingredients at hand, you’re all set to create your own delicious Starbucks Pumpkin Scones right at home—bringing the flavors of your favorite coffee shop to your kitchen and savoring the glorious essence of fall.
Step‑by‑Step Instructions for Starbucks Pumpkin Scones
Step 1: Preheat the Oven
Begin by preheating your oven to 400°F (200°C). While the oven heats up, line a baking sheet with parchment paper to ensure the scones don’t stick. This setup will create a perfect environment for your Starbucks Pumpkin Scones to rise and become golden brown.
Step 2: Mix Wet Ingredients
In a large bowl, whisk together the chilled pumpkin puree, cold milk, cold egg, and vanilla extract until smooth and well combined. It’s important to keep everything cold to prevent the butter from melting prematurely, which ensures your scones will be light and flaky.
Step 3: Combine Dry Ingredients
In another bowl, whisk together the all-purpose flour, packed brown sugar, white sugar, baking soda, baking powder, ground cinnamon, ground cloves, ground ginger, ground nutmeg, and salt. Mix thoroughly until everything is well blended and dry, preparing these ingredients to create the flavorful base of your pumpkin scones.
Step 4: Incorporate Butter
Using a pastry cutter or two forks, cut the cold diced butter into the dry mixture. Continue until the mixture resembles coarse crumbs. This step is crucial for achieving that flaky texture typical of Starbucks Pumpkin Scones, so work swiftly to keep the butter cold and firm.
Step 5: Form the Dough
Create a well in the center of your dry mixture and pour in the wet ingredients. Gently combine until just incorporated, being careful not to overmix. Once mixed, transfer the dough onto a floured surface and fold it over a few times. This step helps to develop the scones’ structure while keeping them tender.
Step 6: Shape and Cut
Shape the dough into an 8×5 inch rectangle on the floured surface. With a sharp knife or dough cutter, slice the rectangle into 6 equal squares. Make sure to create distinct cuts to ensure the scones rise evenly during baking, embodying the familiar shape of Starbucks Pumpkin Scones.
Step 7: Bake the Scones
Place the cut squares onto the prepared baking sheet, ensuring some space between each piece. Bake in the preheated oven for 17–18 minutes, or until they are golden brown on top and a toothpick inserted in the center comes out clean. The delightful aroma of warm spices will fill your kitchen!
Step 8: Cool and Glaze
Once baked, remove the scones from the oven and allow them to cool on the baking sheet for about 10 minutes. While they cool, prepare the glaze by mixing powdered sugar, heavy cream, and optional pumpkin puree and pumpkin pie spice. Drizzle the glaze over your scones, letting it set before serving for a sweet finishing touch.
What to Serve with Homemade Pumpkin Scones
As the cozy scent of fresh pumpkin scones fills your kitchen, consider rounding out your meal with delightful pairings that enhance the experience.
- Coffee: A classic companion, the rich flavor of freshly brewed coffee complements the warm spices in the scones, providing a comforting breakfast option.
- Spiced Chai Tea: The fragrant spices in chai beautifully accentuate the pumpkin and cinnamon in the scones, making for a fantastic afternoon treat.
- Maple Syrup Drizzle: A light drizzle of maple syrup adds an extra layer of sweetness and contrasts wonderfully with the scones’ glaze, creating a delightful flavor harmony.
- Creamy Yogurt: Consider serving with a dollop of yogurt for a creamy texture; its tanginess balances the sweet notes of the pumpkin scones.
- Warm Apple Cider: Nothing says fall quite like apple cider; serve it warm alongside for a cozy beverage that echoes the season’s essence.
- Nutty Granola: Adding a side of crunchy granola introduces a delightful textural contrast; the nutty flavors bring out the scones’ spices perfectly.
- Pumpkin Spice Latte: Embrace the full autumn experience with a pumpkin spice latte, echoing the flavors in the scones for a cohesive seasonal treat.
- Fresh Fruit Salad: A refreshing fruit salad adds a vibrant burst of flavor, balancing the sweetness of the scones and bringing brightness to the table.
- Chocolate Chunks: If you like a sweeter bite, serve a small bowl of chocolate chunks for anyone who wants a rich, chocolaty treat alongside the scones.
- Vanilla Ice Cream: For a decadent dessert twist, pair warm scones with a scoop of vanilla ice cream—truly a match made in heaven!
Expert Tips for Starbucks Pumpkin Scones
- Keep Ingredients Cold: Use chilled butter, milk, and egg for the best texture. Warm ingredients can lead to dense scones instead of light and flaky Starbucks Pumpkin Scones.
- Don’t Overmix: Combine the dough just until incorporated. Overworking can make the scones tough, losing that delicate crumb we love.
- Chill Before Baking: Right after shaping, place the scones in the fridge for 15-20 minutes. This helps them hold their shape and prevents spreading during baking.
- Adjust Glaze Thickness: Gradually add liquid to the glaze for the desired consistency. A thicker glaze sets better and prevents a soggy finish.
- Fresh Ingredients Matter: Ensure your baking soda and baking powder are fresh for optimal rising; expired leavening agents can lead to flat scones.
- Experiment with Flavors: Feel free to add mix-ins like chocolate chips or nuts for added texture and flavor; customizing your scones makes them uniquely yours!
Storage Tips for Starbucks Pumpkin Scones
Room Temperature: Store the scones in an airtight container and keep them at room temperature for up to 3 days to maintain their softness.
Fridge: If you prefer a longer shelf life, you can refrigerate them in an airtight container for up to 1 week, but note they may lose some moisture.
Freezer: For freezing, flash freeze the scones before glazing them, then wrap them tightly in plastic wrap and foil. They can be stored in the freezer for up to 3 months.
Reheating: To reheat frozen scones, simply bake at 350°F (175°C) for about 10–15 minutes, or until warmed through, restoring that fresh-baked feel to your Starbucks Pumpkin Scones.
Variations & Substitutions for Starbucks Pumpkin Scones
Feel free to customize these scones to suit your taste and dietary preferences—let your creativity shine!
- Gluten-Free: Substitute all-purpose flour with a 1:1 gluten-free flour blend for a gluten-free treat. Enjoy the same great texture without sacrificing flavor.
- Dairy-Free: Use almond, oat, or coconut milk instead of regular milk, and swap out the butter for vegetable shortening or coconut oil. These simple swaps maintain that cozy flavor.
- Vegan: Replace the egg with a flax egg (1 tablespoon ground flaxseed mixed with 2.5 tablespoons water) for a delicious vegan version that doesn’t compromise on taste.
- Add-Ins: Toss in chocolate chips or chopped nuts for delightful bursts of flavor and texture. Just imagine sinking your teeth into a scone with warm chocolate melting inside!
- Enhanced Spice: Add a teaspoon of pumpkin pie spice to the dough for an extra kick of flavor that truly captures the essence of fall. It’ll make your kitchen smell heavenly!
- Cranberry Surprise: Mix in dried cranberries or chopped pecans for a festive twist that adds both sweetness and crunch. This combination brings a delightful contrast to the soft scone.
- Cinnamon Sugar Topping: Before baking, sprinkle a mixture of cinnamon and sugar on top for a sweet, crunchy crust that takes these scones to the next level. It’s like autumn in every bite!
- Glaze Variations: Experiment with flavors by infusing the glaze with maple syrup or using a splash of bourbon for a boozy twist. It creates an unforgettable finishing touch that will wow your guests.
Looking for more pumpkin delights? You should definitely explore our Healthy Pumpkin Oat Cookies and Pumpkin Chocolate Chip Cookies for a variety of tasty options!
Make Ahead Options
These Starbucks Pumpkin Scones are perfect for busy home cooks looking to streamline their meal planning! You can prepare the dry ingredients (flour, sugars, and spices) up to 3 days in advance and store them in an airtight container to maintain freshness. Alternatively, you can shape the scones and refrigerate them for up to 24 hours before baking. This way, they retain their shape and won’t spread during baking. Just remember to bake them straight from the fridge for the best results! When you’re ready to enjoy, simply preheat the oven, bake as directed, and indulge in freshly baked scones that taste just as delicious as if made from scratch that same day!
Starbucks Pumpkin Scones Recipe FAQs
What kind of pumpkin puree should I use?
Absolutely, make sure to use chilled plain pumpkin puree and not pumpkin pie filling. The latter contains added sugars and spices that can alter the flavor of your scones. If you prefer, you can use homemade pumpkin puree; just ensure it’s well strained to avoid excess moisture.
How should I store the scones?
For optimal freshness, place the scones in an airtight container at room temperature for up to 3 days. If you want them to last longer, refrigerate them in an airtight container for up to a week, though they may lose some moisture. Alternatively, you can flash freeze them for up to 3 months — just wrap each one tightly in plastic wrap and then foil.
Can I freeze Starbucks Pumpkin Scones?
Yes, you can! First, flash freeze the unglazed scones on a baking sheet for about 1 hour until firm. Then, wrap them tightly in plastic wrap and foil to prevent freezer burn. When you’re ready to enjoy them, simply reheat in the oven at 350°F (175°C) for about 10–15 minutes until warmed through.
How do I know if my scones are ready?
The scones are ready when they are golden brown on top and a toothpick inserted into the center comes out clean. Typically, this takes about 17–18 minutes of baking time at 400°F (200°C). Keep an eye on them, as oven temperatures can vary slightly!
Can I make these scones vegan or gluten-free?
Very! To make the scones vegan, you can replace the egg with a flax egg (1 tablespoon ground flaxseed mixed with 2.5 tablespoons water; let it sit until gel-like). For gluten-free options, simply substitute the all-purpose flour with a 1:1 gluten-free baking blend. Just ensure your baking powder and other components are also gluten-free for the best results.
What if my scones turn out dense?
Don’t worry, it happens! Next time, ensure that your ingredients are cold, particularly the butter, and avoid overmixing the dough. Keep an eye on the consistency; your dough should be gently mixed until just combined to maintain a light and flaky texture.
Delicious Starbucks Pumpkin Scones You Can Make at Home
Ingredients
Equipment
Method
- Preheat your oven to 400°F (200°C) and line a baking sheet with parchment paper.
- In a large bowl, whisk together the chilled pumpkin puree, cold milk, cold egg, and vanilla extract until smooth.
- In another bowl, whisk together the flour, brown sugar, white sugar, baking soda, baking powder, cinnamon, cloves, ginger, nutmeg, and salt.
- Cut cold diced butter into the dry mixture until it resembles coarse crumbs.
- Pour the wet ingredients into the dry mixture and combine until just incorporated.
- Transfer the dough onto a floured surface and fold it over a few times.
- Shape the dough into an 8x5 inch rectangle and slice into 6 equal squares.
- Place the squares on the baking sheet and bake for 17–18 minutes or until golden brown.
- Allow the scones to cool for 10 minutes, then prepare the glaze by mixing powdered sugar, heavy cream, and optional ingredients.
- Drizzle the glaze over the scones and let it set before serving.
Leave a Reply