
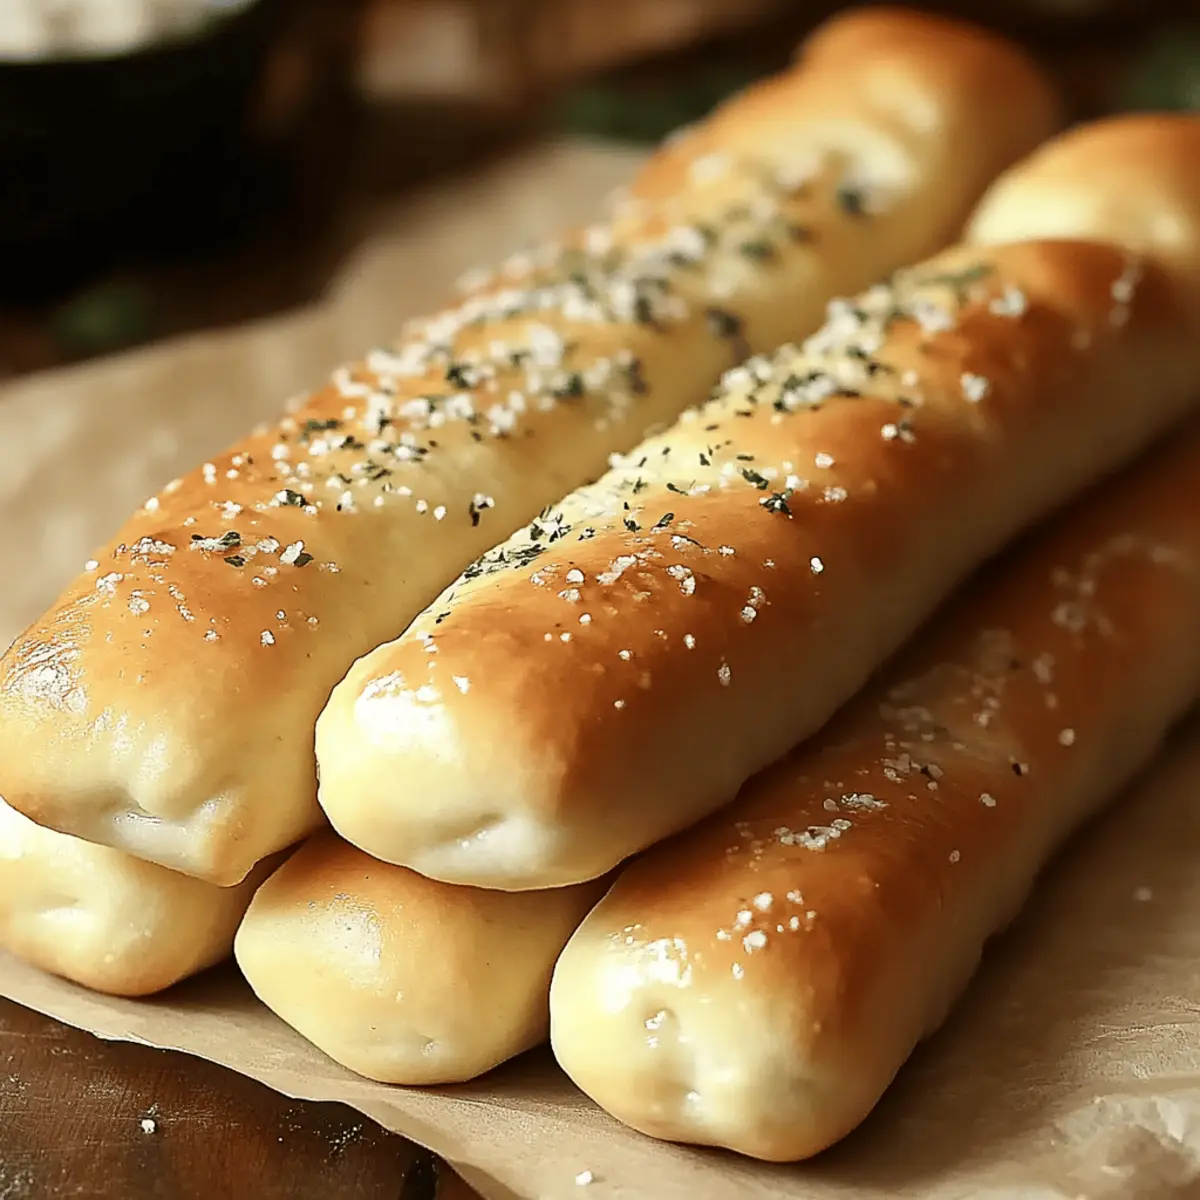
As the aroma of freshly baked bread fills my kitchen, I’m transported back to cozy dinners at Olive Garden, where those famous breadsticks always stole the show. You won’t believe how easy it is to recreate this beloved comfort food at home with my Homemade Olive Garden Breadsticks with Garlic Butter recipe! These soft, fluffy breadsticks are perfect for dipping and make an impressive side for any meal. The best part? They’re simple to whip up and offer that warm, inviting touch that’s perfect for family gatherings or cozy nights in. Imagine pulling a tray of these golden, garlic-kissed delights from the oven and watching them disappear as quickly as they’re served. Are you ready to elevate your homemade bread game?

Why are Homemade Breadsticks the Best?
Simplicity, these homemade Olive Garden breadsticks come together with just a few basic ingredients and minimal effort, making them perfect for bakers of all skill levels. Irresistible flavor shines through with a buttery garlic topping that will have everyone asking for seconds. Versatile pairing options abound—serve them alongside pasta dishes or dip them in marinara sauce for a delightful snack. Comfort food at its finest, these breadsticks evoke nostalgia with every fluffy bite, creating warm memories at your dinner table. Why not add a twist by making them with Olive Garden Five cheese ziti on the side? Enjoy fresh breadsticks that will be the star of your next meal!
Olive Garden Breadsticks Ingredients
For the Dough
- Warm Water (1 ½ cups at 110°F) – Activates yeast and hydrates dough; ensure the water isn’t too hot to avoid killing the yeast.
- Active Dry Yeast (2 ¼ teaspoons) – The leavening agent that allows the dough to rise; check it’s fresh for the best results.
- All-Purpose Flour (4 cups) – Provides the structure and texture of the breadsticks; for chewier ones, feel free to substitute with bread flour.
- Granulated Sugar (2 tablespoons) – Enhances yeast activation and adds a subtle sweetness, making the dough a bit more flavorful.
- Unsalted Butter, melted (2 tablespoons) – Adds richness and moisture to the dough, making it deliciously tender.
- Salt (1 ½ teaspoons) – Enhances flavor and controls yeast growth, important for the dough’s overall taste.
For Garlic Butter Topping
- Unsalted Butter, melted (3 tablespoons) – Coats the hot breadsticks with flavor and depth.
- Garlic Powder (½ teaspoon) – Infuses each breadstick with that irresistible garlic flavor reminiscent of Olive Garden.
- Salt (½ teaspoon) – Enhances the taste of the garlic butter mixture, making it more vibrant.
These Olive Garden Breadsticks are not just a treat; they’re an experience that will bring comfort and joy to your home!
Step‑by‑Step Instructions for Olive Garden Breadsticks
Step 1: Activate the Yeast
In a large mixing bowl, combine 1 ½ cups of warm water at 110°F with 2 ¼ teaspoons of active dry yeast and 2 tablespoons of granulated sugar. Stir gently and allow the mixture to sit for 5–10 minutes, until it becomes frothy. This well-activated yeast will give your Olive Garden breadsticks the perfect rise and fluffy texture.
Step 2: Mix the Dough
Once the yeast is activated, add 4 cups of all-purpose flour, 2 tablespoons of melted unsalted butter, and 1 ½ teaspoons of salt into the bowl. Mix until the dough begins to come together, using a wooden spoon or your hands. The dough should be slightly sticky but manageable, mimicking the comforting texture of restaurant-style breadsticks.
Step 3: Knead the Dough
Transfer the dough to a floured surface and knead it for about 8–10 minutes, until it becomes smooth and elastic. As you knead, ensure you develop the gluten, which is essential for achieving the delightful chewiness in your Olive Garden breadsticks. You’ll know it’s ready when the dough springs back when lightly touched.
Step 4: First Rise
Place the kneaded dough in a greased bowl, turning it to coat all sides. Cover the bowl with a clean kitchen towel or plastic wrap and let it rise in a warm area for approximately 1 hour, or until it doubles in size. This step is crucial for making your breadsticks light and fluffy, so be patient!
Step 5: Preheat the Oven
While the dough is rising, preheat your oven to 400°F (200°C). Ensuring your oven is fully heated will create a beautifully golden crust on your Olive Garden breadsticks. Prepare a baking sheet by lining it with parchment paper for easy clean-up after baking.
Step 6: Shape the Breadsticks
Once the dough has risen, punch it down gently to release any air bubbles. Divide the dough into 12 equal pieces, and roll each piece into a rope approximately 7 inches long. Place the shaped breadsticks onto the prepared baking sheet, making sure they have enough space to expand during their second rise.
Step 7: Second Rise
Cover the baking sheet with a kitchen towel and allow the breadsticks to rise for another 30 minutes. During this time, the dough will puff up beautifully, ensuring your Olive Garden breadsticks will be extra light and airy when baked.
Step 8: Bake the Breadsticks
After the second rise, place the baking sheet in the preheated oven. Bake the breadsticks for 12–15 minutes, or until they are golden brown and your kitchen is filled with an irresistible aroma. Keep an eye on them, as you want to achieve that perfect golden hue without overbaking.
Step 9: Prepare the Garlic Butter Topping
While the breadsticks are baking, mix together 3 tablespoons of melted unsalted butter, ½ teaspoon of garlic powder, and ½ teaspoon of salt in a small bowl. This simple yet flavorful mixture will be brushed on the warm breadsticks, enhancing their delectable taste and giving them that signature garlic flavor.
Step 10: Brush and Serve
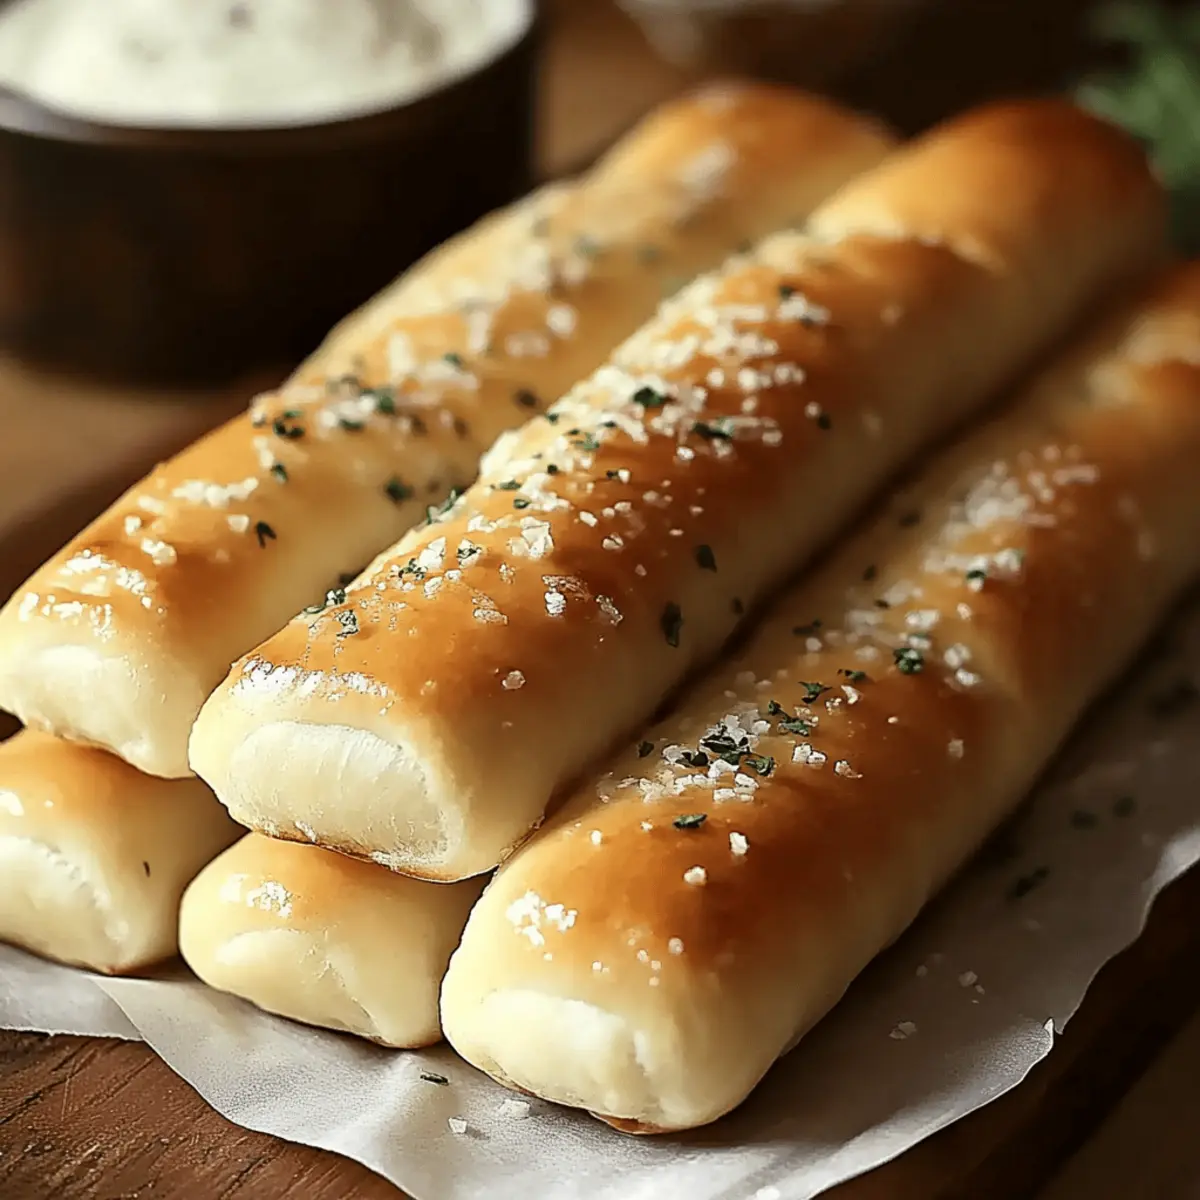
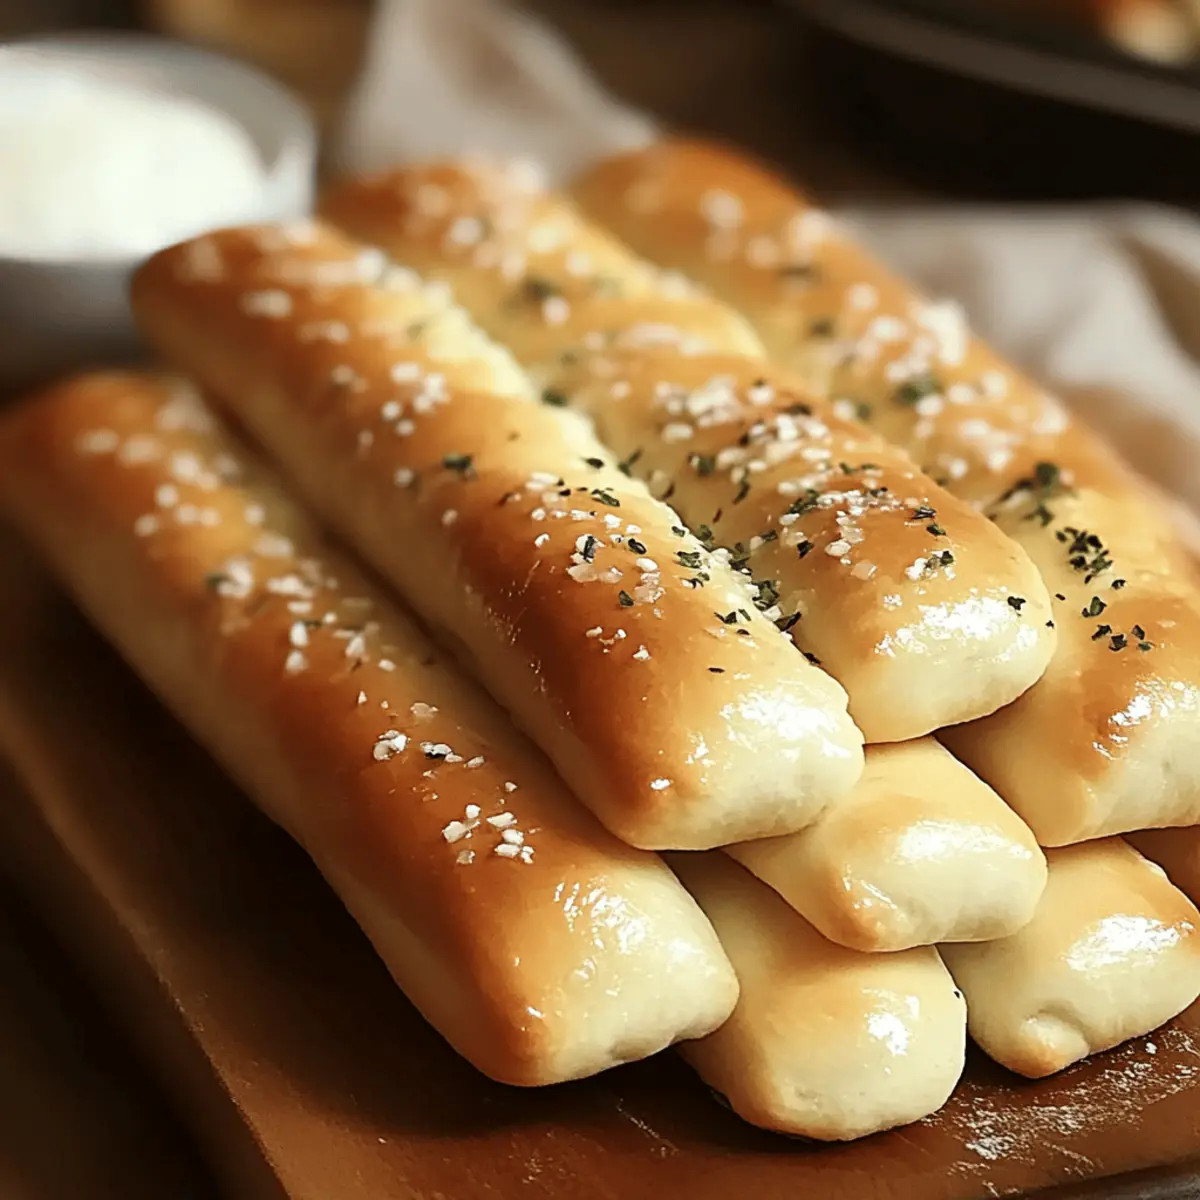
Once the breadsticks are out of the oven, immediately brush them with the garlic butter topping using a pastry brush. This step allows the flavor to soak in while they’re still hot. Serve your homemade Olive Garden breadsticks warm and enjoy them as a delightful side or irresistible snack!
Tips for the Best Olive Garden Breadsticks
- Water Temperature: Always ensure your water is around 110°F; too hot or too cold can kill the yeast and prevent proper rising.
- Knead Well: Knead the dough thoroughly for about 8-10 minutes to develop gluten; this guarantees the soft, chewy texture we love in breadsticks.
- Don’t Skip the Second Rise: Allowing the shaped dough to rise again for 30 minutes is essential; this guarantees a light and fluffy result.
- Immediate Butter Brush: Brush the garlic butter on while the breadsticks are still hot to ensure maximum flavor absorption; this makes a big difference!
- Check for Doneness: Bake until they are golden brown; overbaking can lead to dryness, ruining your Olive Garden breadsticks experience.
Storage Tips for Olive Garden Breadsticks
-
Room Temperature: Store breadsticks in an airtight container for up to 2 days to maintain their softness; enjoy them fresh for the best flavor.
-
Refrigerator: Wrap the breadsticks in plastic wrap or foil and store them in the fridge for up to 5 days; they may lose some freshness but still taste great.
-
Freezer: For long-term storage, wrap the breadsticks in plastic wrap and then place them in a freezer bag. They can be stored for up to 2 months without losing flavor.
-
Reheating: Warm the breadsticks in a 350°F oven for 5-7 minutes to refresh their texture, or microwave them for 15-20 seconds with an extra brush of melted butter to retain moisture.
Olive Garden Breadsticks Variations
Feel free to customize these breadsticks to suit your taste and dietary preferences!
- Herb-Infused: Add fresh herbs like rosemary or thyme to the dough for a fragrant twist. The aroma while baking is heavenly!
- Cheesy Delight: Incorporate grated Parmesan or mozzarella cheese into the dough for a cheesy flavor boost. These will be a hit with kids and adults alike!
- Dairy-Free: Substitute with plant-based butter and non-dairy milk to enjoy these breadsticks without dairy. Don’t compromise on flavor; they’ll still be irresistibly delicious.
- Spicy Garlic: Mix in a pinch of red pepper flakes to your garlic butter for a kick of heat. It’s a perfect pairing with marinara sauce for an extra zing!
- Pesto Topping: Brush the baked breadsticks with basil pesto instead of garlic butter for an Italian-inspired flavor twist. It’s a delightful change that elevates your breadsticks!
- Sweet Variation: Add a sprinkle of cinnamon and sugar on top before baking for a sweet, dessert-like twist. These can be paired beautifully with coffee!
- Stuffed Breadsticks: Roll a piece of dough around cheese sticks or pepperoni for a fun stuffed version. These are great for parties or game nights.
- Gluten-Free Option: Use a gluten-free all-purpose flour blend for a gluten-free variation that everyone can enjoy. Just ensure you follow the package directions for the best results.
For more delicious dish inspiration, why not try these breadsticks alongside some Olive Garden Five cheese ziti? It makes for a delightful Italian dinner experience!
What to Serve with Homemade Olive Garden Breadsticks?
As you take that first warm, buttery bite of these irresistible breadsticks, you’ll want to elevate your meal with delightful pairings that complement their rich, garlicky flavor.
- Creamy Tomato Soup: The smooth, tangy soup pairs perfectly, allowing you to dip and savor each bite alongside crispy breadsticks, enhancing both flavors.
- Caesar Salad: Fresh romaine, crisp croutons, and a creamy dressing provide a refreshing crunch that balances the soft texture of the breadsticks beautifully.
- Fettuccine Alfredo: This rich, cheesy pasta dish creates a decadent dining experience, where the breadsticks become your go-to tool to scoop up that creamy sauce.
- Marinara Sauce: A classic pairing! Warm marinara offers a zesty dip, combining the soft breadstick’s fluffiness with a vibrant burst of Italian flavor.
- Roasted Vegetables: Tossed in olive oil and herbs, these caramelized veggies add a delightful crunch, adding depth and texture to your meal.
- Garlic Butter Shrimp: The succulent shrimp infused with garlic and butter echoes the flavors of the breadsticks, creating an appealing synergy on your dinner plate.
- Sparkling Water with Lime: A refreshing drink that cleanses the palate after every bite, this combination enhances the entire meal experience while beautifully balancing the garlic notes.
Make Ahead Options
These Olive Garden Breadsticks are perfect for meal prep enthusiasts! You can prepare the dough up to 24 hours in advance by following the first rise, then wrapping it tightly in plastic wrap and refrigerating. When you’re ready to bake, simply let the dough sit at room temperature for 30 minutes before shaping and proceeding with the second rise. Alternatively, you can shape the breadsticks and place them on a parchment-lined baking sheet, cover, and refrigerate for up to 3 days. Just allow them to rise at room temperature for about 30 minutes before baking. This ensures your homemade Olive Garden Breadsticks remain just as delicious and fluffy, saving you precious time on busy weeknights!
Olive Garden Breadsticks Recipe FAQs
How do I choose the right ripeness for my yeast?
Absolutely! For the best results, make sure your active dry yeast is fresh and stored in a cool, dry place. If it has been sitting in your pantry for a while, it’s wise to check its activity by dissolving it in warm water with a pinch of sugar. If it becomes frothy within 5-10 minutes, it’s good to go!
What are the best storage methods for leftover breadsticks?
To keep your homemade Olive Garden breadsticks fresh, store them in an airtight container at room temperature for up to 2 days. If you’re looking to keep them longer, wrap them in plastic wrap and place them in the refrigerator for up to 5 days. Just be sure to warm them before serving for the best experience!
Can I freeze leftover breadsticks? How do I do it?
Yes, you can absolutely freeze your breadsticks! Start by wrapping each one tightly in plastic wrap to prevent freezer burn, and then place them in a freezer bag. They can be stored for up to 2 months. To enjoy, simply thaw them overnight in the fridge, then warm them in a 350°F oven for 5-7 minutes or microwave for about 15-20 seconds for that fresh-baked feel!
What should I do if my dough isn’t rising properly?
Very often, a lack of rise can be due to a few factors. First, make sure your water temperature is right—too hot (over 120°F) can kill the yeast while too cold won’t activate it. If your yeast is old, it may not be as effective. Ensure you’re allowing enough time for both rises— skipping the second rise can lead to dense breadsticks!
Are these breadsticks safe for guests with allergies?
When making your Olive Garden breadsticks, keep in mind potential allergies to gluten or dairy. Since the recipe contains all-purpose flour and unsalted butter, those with gluten intolerance or dairy allergies should consider alternatives, like gluten-free flour blends or dairy-free butter, to ensure everyone can safely enjoy this delicious treat!
Deliciously Soft Olive Garden Breadsticks Made at Home
Ingredients
Equipment
Method
- In a large mixing bowl, combine 1 ½ cups of warm water at 110°F with 2 ¼ teaspoons of active dry yeast and 2 tablespoons of granulated sugar. Stir gently and allow the mixture to sit for 5–10 minutes, until it becomes frothy.
- Once the yeast is activated, add 4 cups of all-purpose flour, 2 tablespoons of melted unsalted butter, and 1 ½ teaspoons of salt into the bowl. Mix until the dough begins to come together.
- Transfer the dough to a floured surface and knead it for about 8–10 minutes, until it becomes smooth and elastic.
- Place the kneaded dough in a greased bowl, turning it to coat all sides. Cover the bowl and let it rise in a warm area for approximately 1 hour, or until it doubles in size.
- Preheat your oven to 400°F (200°C) and prepare a baking sheet by lining it with parchment paper.
- Once the dough has risen, punch it down and divide it into 12 equal pieces, rolling each piece into a rope about 7 inches long. Place them onto the prepared baking sheet.
- Cover the baking sheet with a kitchen towel and allow the breadsticks to rise for another 30 minutes.
- After the second rise, bake the breadsticks for 12–15 minutes, or until they are golden brown.
- While the breadsticks are baking, mix together 3 tablespoons of melted unsalted butter, ½ teaspoon of garlic powder, and ½ teaspoon of salt in a small bowl.
- Once out of the oven, immediately brush the breadsticks with the garlic butter topping and serve warm.
Leave a Reply