
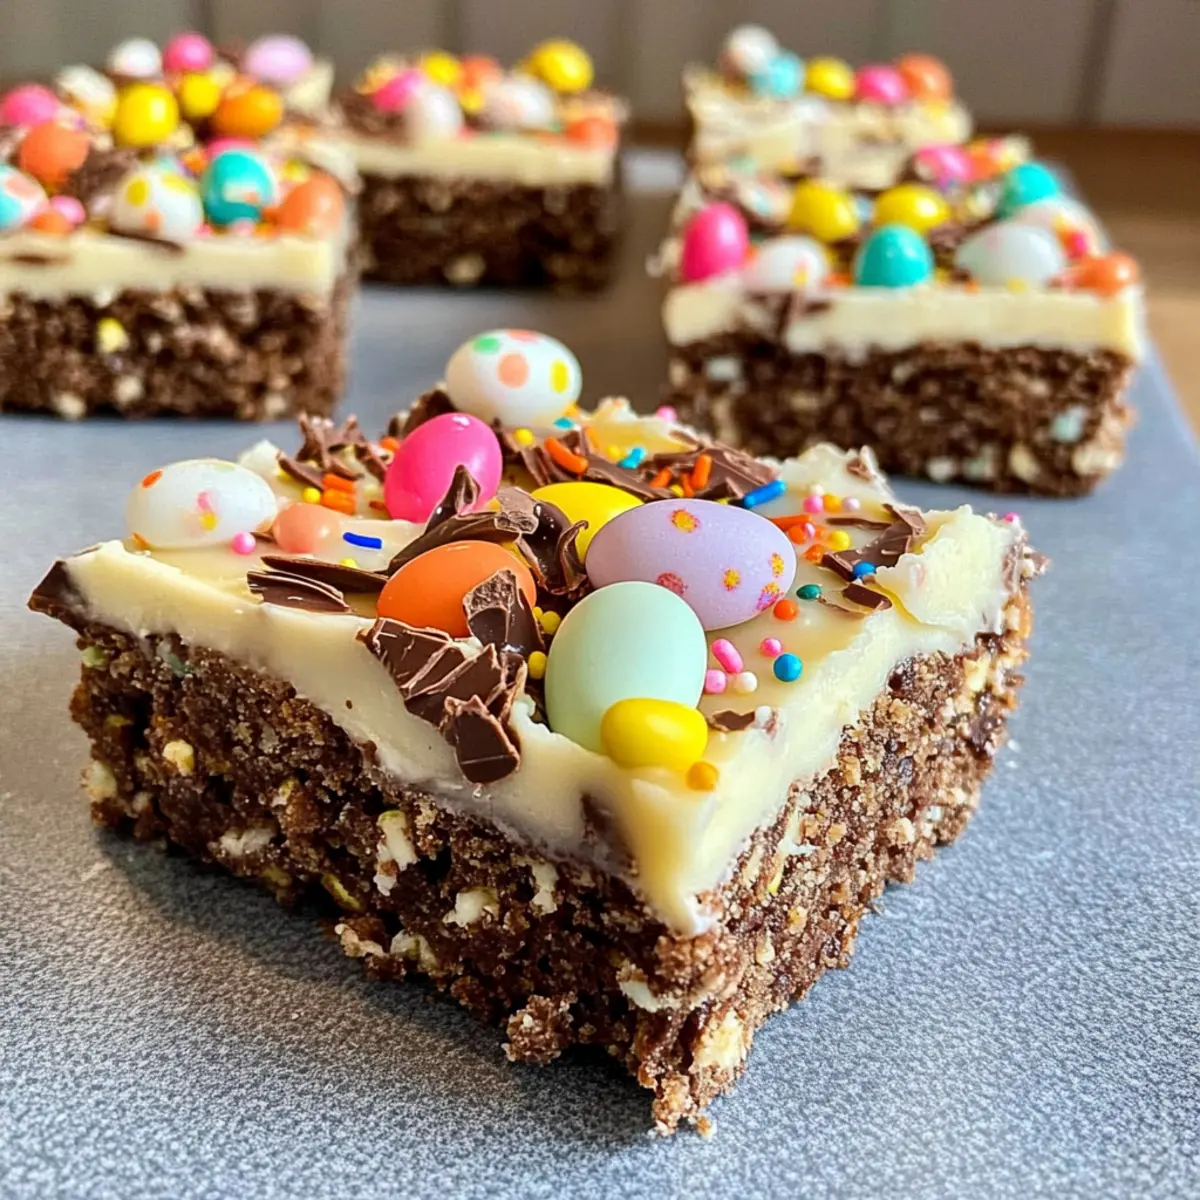
“Springtime delights are not just for gardens; they can grace our kitchens too! The No-Bake Chocolate Easter Egg Slice is an irresistible and festive treat that brings a splash of joy to your dessert table. This recipe is a dream for busy home-chefs like me—no oven, no fuss, just simple, quick preparation to suit your family’s sweet cravings. With its crunchy base and creamy topping adorned with colorful Easter decorations, it’s not just delicious but visually captivating as well. Plus, you can customize the base with cornflakes or rice bubbles, and swap the toppings with your favorite candies for a personal touch. Ready to satisfy those sweet tooth cravings and have a little fun in the process? Let’s dive into this delightful recipe!”

Why is this recipe a family favorite?
Simplicity: This No-Bake Chocolate Easter Egg Slice requires minimal effort, making it perfect for those busy days when you want to whip up something delightful without turning on the oven.
Customizable: With options to swap the base ingredients like cornflakes or rice bubbles and to choose your favorite Easter chocolates for decoration, your creativity knows no bounds!
Crowd-Pleasing: Its vibrant colors and delicious combination of textures make it an instant hit for family gatherings, ensuring that both kids and adults will be reaching for seconds.
Time-Saving: Chill it ahead of time, and you’ll have a stunning dessert ready to impress without the last-minute rush. Pair it with Pumpkin Chocolate Chip for a sweet combo!
Visual Appeal: The colorful toppings and festive sprinkles create a visually stunning treat that’s just as fun to make as it is to eat.
Enjoy this slice as a perfect centerpiece for any holiday gathering, and embrace those sweet moments with your loved ones!
No-Bake Chocolate Easter Egg Slice Ingredients
For the Base
• Dark Chocolate – Provides rich flavor and forms the base of the slice; semi-sweet chocolate is a great alternative.
• Condensed Milk – Adds sweetness and binds the ingredients together; try a dairy-free option for a vegan alternative.
• Butter – Contributes creaminess and texture; use margarine or vegan butter as a substitute if needed.
• Milk Arrowroot Biscuits – Creates the structure of the base layer; any plain biscuit like digestive biscuits can work well.
• Cornflakes or Rice Bubbles – Adds a delightful crunch; choose cornflakes for a sturdier base texture.
For the Topping
• White Chocolate – Enhances sweetness and adds a glossy finish; feel free to switch it up with dark or milk chocolate based on your taste preferences.
• Vegetable Oil – Used to thin the white chocolate for easier pouring; this is optional but helps achieve a smooth texture.
For the Decorations
• Mini Caramello Eggs/Creme Eggs – Perfect for decorative flair; substitute with your favorite chocolate Easter eggs for a personal touch.
• Mini Eggs – Adds a pop of color and candy-like texture; any type of chocolate candy will do.
• Smarties – Brings a burst of sweetness and color; can be swapped with M&Ms if you prefer.
• Sprinkles – Adds a festive touch; choose any colorful sprinkles to celebrate the occasion.
Now you have all the essential ingredients to create this delightful No-Bake Chocolate Easter Egg Slice! Get ready to impress your family with a dessert that’s as fun to make as it is to enjoy!
Step‑by‑Step Instructions for No-Bake Chocolate Easter Egg Slice
Step 1: Prepare the Tin
Begin by lining a 19 x 29 cm slice tin with baking paper, ensuring that the paper overhangs the edges for easy removal later. This step is essential to prevent sticking and allows for a clean slice once the No-Bake Chocolate Easter Egg Slice is set. Smooth out any wrinkles to create a flat base.
Step 2: Melt the Chocolate Mixture
In a microwave-safe bowl, combine dark chocolate, condensed milk, and butter. Heat in the microwave in 30-second bursts, stirring in between, until the mixture is melted and smooth, taking about 1-2 minutes. Aim for a glossy, fully combined texture that will be the foundation of your slice.
Step 3: Mix in Dry Ingredients
Once melted, remove the bowl from the microwave and stir in the crushed Milk Arrowroot biscuits along with the cornflakes or rice bubbles. Mix until fully incorporated, ensuring all dry ingredients are coated with the chocolate mixture. This will create a solid base that holds the No-Bake Chocolate Easter Egg Slice together.
Step 4: Press the Mixture into the Tin
Transfer the mixture into the prepared tin and use the back of a spoon or your fingers to press it firmly into the corners and edges. Make sure it’s packed tightly for structural integrity, and level off the top with a spatula for an even slice. This step is crucial for a well-formed dessert.
Step 5: Prepare the White Chocolate Topping
In another bowl, melt the white chocolate with a teaspoon of vegetable oil in the microwave, stirring until smooth for about 1 minute. This thin consistency will help the white chocolate spread easily over the base. Once fully melted, pour it evenly over the pressed chocolate base.
Step 6: Decorate the Slice
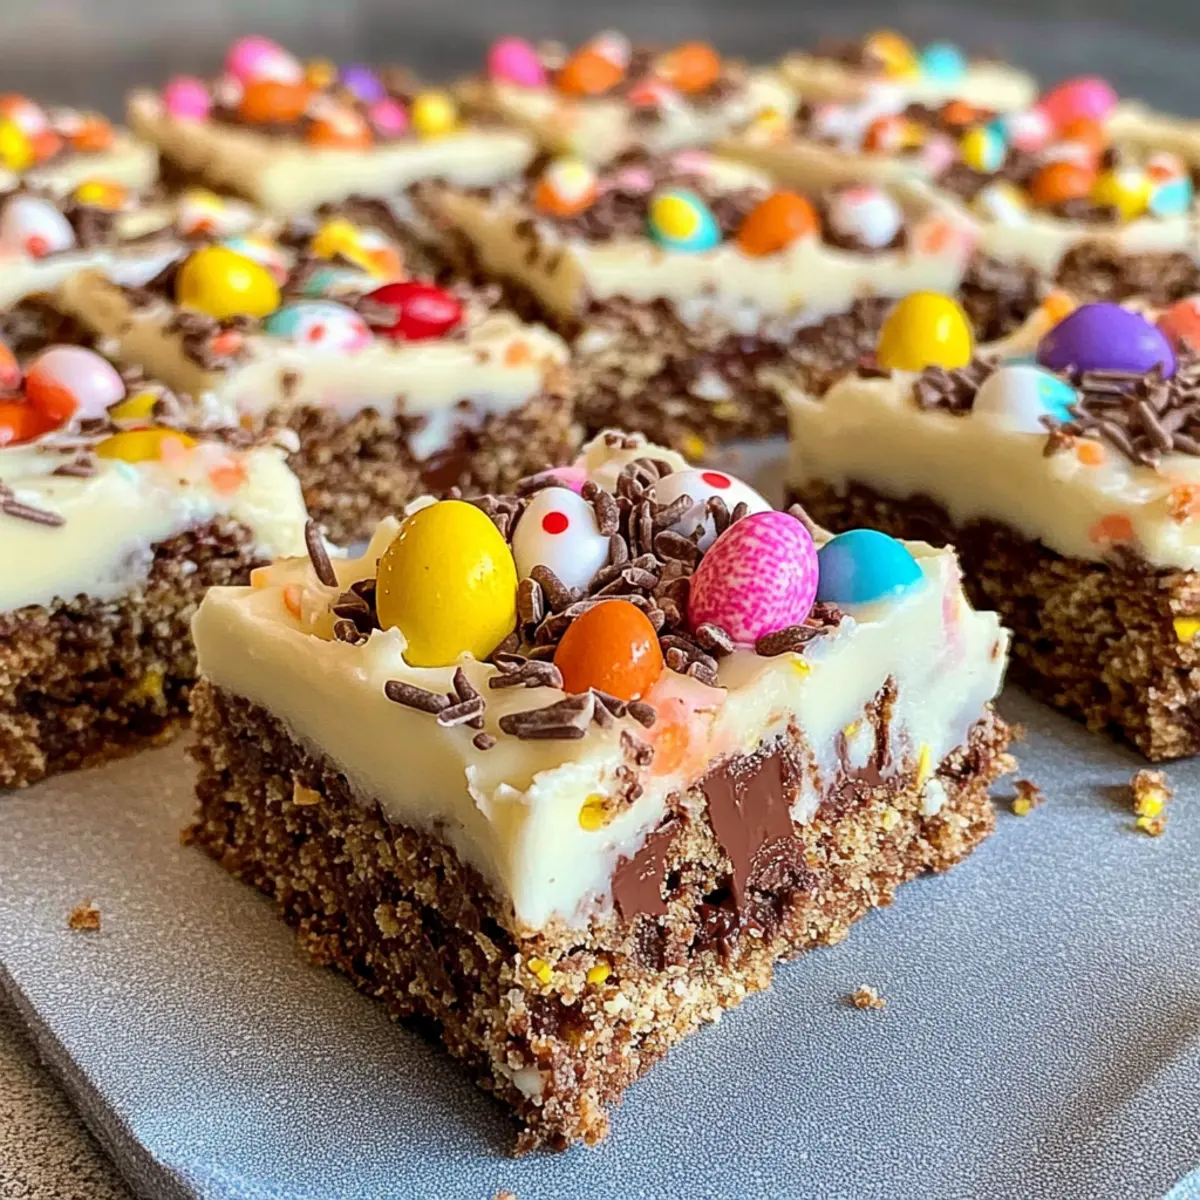
Before the white chocolate sets, start decorating your No-Bake Chocolate Easter Egg Slice! Halve the Mini Caramello Eggs and arrange them on top, then add mini eggs, Smarties, and colorful sprinkles. Get creative with your arrangements for that festive appeal, making it vibrant and fun for Easter gatherings.
Step 7: Chill Until Set
Place the tin in the refrigerator and chill for at least 4 hours or until set. This cooling process allows the filling to firm up and makes slicing easier later. For best results, avoid the temptation to cut into it too early—a complete chill will yield a firmer slice.
Step 8: Slice and Serve
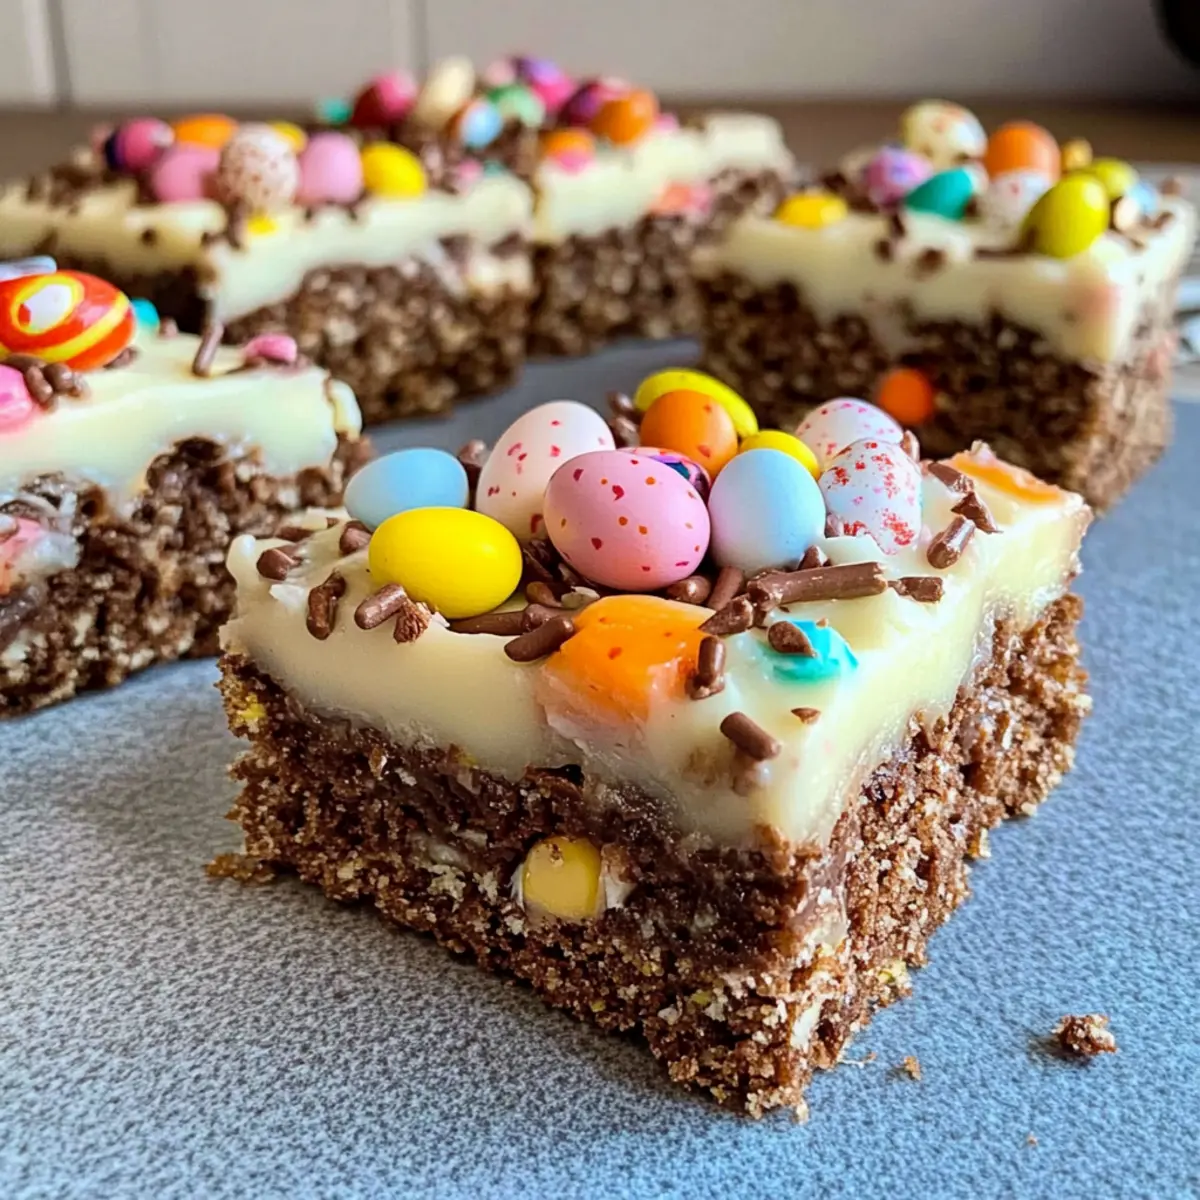
Remove the No-Bake Chocolate Easter Egg Slice from the fridge about 20 minutes before you plan to serve it. Use the overhanging paper to lift it out of the tin and place it on a cutting board. With a sharp knife, slice it into squares for serving, showcasing the colorful decorations on top.
How to Store and Freeze No-Bake Chocolate Easter Egg Slice
Fridge: Store in an airtight container in the fridge for up to one week to keep it fresh and delicious.
Freezer: If you wish to keep it longer, this No-Bake Chocolate Easter Egg Slice can be frozen for up to 2 months. Wrap it tightly to prevent freezer burn.
Thawing: To enjoy, simply transfer it to the fridge the night before serving and let it thaw slowly for the best texture.
Reheating: This dessert is best served chilled and doesn’t require reheating; just slice and serve for a delightful treat!
No-Bake Chocolate Easter Egg Slice Variations
Customize this recipe to your heart’s delight and let your creativity shine through every sweet bite!
-
Different Chocolate Types: Use milk or dark chocolate instead of dark chocolate for a sweeter or richer flavor.
Delve into varying chocolate profiles; think of how dark chocolate’s robust flavor contrasts with smooth, creamy milk chocolate. -
Seasonal Candy Decorations: Swap the Easter-themed decorations with seasonal candies like Halloween or Christmas treats.
Imagine how your No-Bake Chocolate Easter Egg Slice can become a year-round favorite with the right decorations, tailored to each festive occasion! -
Gluten-Free Version: Replace the standard biscuits with gluten-free alternatives such as almond flour or gluten-free digestive biscuits.
This way, everyone can indulge without worries—celebrate delicious treats together! -
Cereal Variation: Experiment with different cereals like Cheerios or Granola for a unique crunch and flavor twist.
Each cereal brings its own texture and taste; it’s a fun way to discover new favorites while keeping the base fresh! -
Nutty Crunch: Add crushed nuts, like almonds or walnuts, to the base for an extra crunch and flavor dimension.
Nuts not only enhance the textural variety but also complement the overall chocolate flavor, creating something truly delightful. -
Spicy Kick: Incorporate a pinch of cayenne or chili powder to the chocolate for a surprising, spicy undertone.
The unexpected heat can elevate your dessert experience, making it an intriguing treat that excites the senses. -
Dairy-Free Alternative: Use dairy-free chocolate and a plant-based butter substitute to create a vegan-friendly version.
Don’t compromise on flavor; there are robust vegan options available that will still satisfy the sweet cravings! -
Fruit Infusion: Fold in mini chocolate-covered fruits, like raisins or cherries, for added sweetness and chewiness.
This twist brings a fruity flavor to each bite, creating a unique balance of chocolate and fruit that’s refreshingly delicious!
Feel free to explore these variations to make each iteration of the No-Bake Chocolate Easter Egg Slice a memorable treat, and pair it with Chewy Pumpkin Chocolate for a family-friendly dessert spread!
Expert Tips for No-Bake Chocolate Easter Egg Slice
-
Mix Thoroughly: Ensure the chocolate mixture is well combined before adding the dry ingredients; this will maintain a uniform texture throughout your No-Bake Chocolate Easter Egg Slice.
-
Right Cereal Choice: Avoid crushing cornflakes too finely to prevent sogginess in the base; a coarser texture adds the ideal crunch!
-
Slicing Tip: Use a sharp knife to slice the chilled slab, making clean edges and a more professional presentation for your delicious dessert.
-
Storage Smart: Keep any leftovers in an airtight container in the fridge for up to one week to maintain freshness and flavor.
-
Chill Completely: Allow the slice to chill for at least 4 hours, ensuring it sets properly—patience leads to a perfectly firm slice that’s easy to cut!
Make Ahead Options
These delightful No-Bake Chocolate Easter Egg Slices are perfect for meal prep enthusiasts! You can prepare the base up to 3 days in advance by following the initial steps up to pressing the mixture into the tin. Simply cover tightly with plastic wrap and refrigerate. The white chocolate topping can also be melted and stored in an airtight container for up to 48 hours. When you’re ready to serve, simply spread the cooled melted white chocolate over the base, decorate with your chosen candies and sprinkles, and chill for an additional 4 hours. This strategy not only saves you time but guarantees that your treat will be just as delicious when it’s time to enjoy.
What to Serve with No-Bake Chocolate Easter Egg Slice
Springtime gatherings call for delightful dishes that excite the senses and complement sweet treats.
-
Fresh Fruit Salad: A vibrant mix of seasonal fruits adds a refreshing contrast, balancing the sweetness of the slice beautifully. Juicy berries and tangy citrus brighten your table and palate.
-
Vanilla Ice Cream: A scoop of creamy vanilla ice cream enriches the dessert experience. The cold creaminess pairs spectacularly with the richness of chocolate, making every bite heavenly.
-
Chocolate Sauce Drizzle: Enhance the chocolate goodness with a warm drizzle of chocolate sauce. This melt-in-your-mouth addition creates depth and indulgence, perfect for chocolate lovers.
-
Minty Green Salad: A light, herbaceous salad with fresh mint and a lemon vinaigrette brings a refreshing pop to the table. The zesty dressing contrasts beautifully with the rich chocolate slice.
-
Sparkling Lemonade: Refreshing and bubbly, a glass of sparkling lemonade is a fun drink that pairs perfectly with chocolate. Its tartness balances the sweetness, making it a crowd-pleaser.
-
Coffee or Tea: A fragrant cup of coffee or tea enhances the flavors of the dessert, bringing warmth and a comforting feeling. This pairing is perfect for a cozy gathering where conversation flows.
-
Mini Chocolate Tartlets: For a sweet spread, add rich mini chocolate tartlets to your dessert table. These bite-sized indulgences share the spotlight and provide a variety of textures and flavors.
No-Bake Chocolate Easter Egg Slice Recipe FAQs
How do I choose the right chocolate for this recipe?
Absolutely! The quality of your chocolate can greatly affect the taste. I recommend using a good quality dark chocolate with at least 60% cocoa for a rich flavor. If you prefer a sweeter slice, semi-sweet chocolate works beautifully too! Just check the packaging for freshness—it should be shiny and free from dark spots.
What’s the best way to store leftovers?
For sure! You can store your No-Bake Chocolate Easter Egg Slice in an airtight container in the fridge for up to one week. Make sure it’s sealed well to prevent it from absorbing any other fridge odors or flavors. Before serving, let it sit at room temperature for a few minutes for easier slicing!
Can I freeze the No-Bake Chocolate Easter Egg Slice?
Yes, you can! To freeze, wrap the slice tightly in plastic wrap or aluminum foil after cutting it into portions. It can last in the freezer for up to two months. When you’re ready to enjoy, remove it from the freezer and let it thaw in the fridge overnight for the best texture.
What should I do if my chocolate mixture is too thick?
If you find the chocolate mixture too thick to combine with the dry ingredients, don’t worry! Just place it back in the microwave for 10-15 seconds to soften it slightly, stirring until it becomes smooth again. This will ensure that the dry ingredients incorporate well without making the base too dense.
Are there any allergy considerations I should be aware of?
Great question! This No-Bake Chocolate Easter Egg Slice contains common allergens like dairy and gluten. If you’re making it for someone with allergies, you can substitute condensed milk with a dairy-free alternative and use gluten-free biscuits. Always check for allergy-friendly chocolate options to ensure it’s safe for everyone.
How can I customize this recipe for different dietary needs?
Very easily! To make it vegan, use dairy-free chocolate, a plant-based butter alternative, and non-dairy condensed milk. You can also swap white chocolate for a vegan version to keep that glossy topping. For gluten-free versions, opt for gluten-free biscuits and cereals, making it flexible for everyone at the table!
Joyful No-Bake Chocolate Easter Egg Slice for Family Fun
Ingredients
Equipment
Method
- Prepare the tin by lining a 19 x 29 cm slice tin with baking paper, allowing overhang for easy removal.
- Melt the chocolate mixture by combining dark chocolate, condensed milk, and butter in a microwave-safe bowl. Heat in 30-second bursts until smooth.
- Mix in dry ingredients by stirring in crushed Milk Arrowroot biscuits and cornflakes or rice bubbles until fully incorporated.
- Press the mixture into the tin, using a spoon or fingers to pack it tightly and level off the top.
- Prepare the white chocolate topping by melting white chocolate with vegetable oil until smooth, then pour over the pressed base.
- Decorate the slice with halved Mini Caramello Eggs, mini eggs, Smarties, and sprinkles before the chocolate sets.
- Chill until set in the refrigerator for at least 4 hours.
- Slice and serve the slice after removing it from the tin and allowing it to sit at room temperature for 20 minutes.
Leave a Reply