
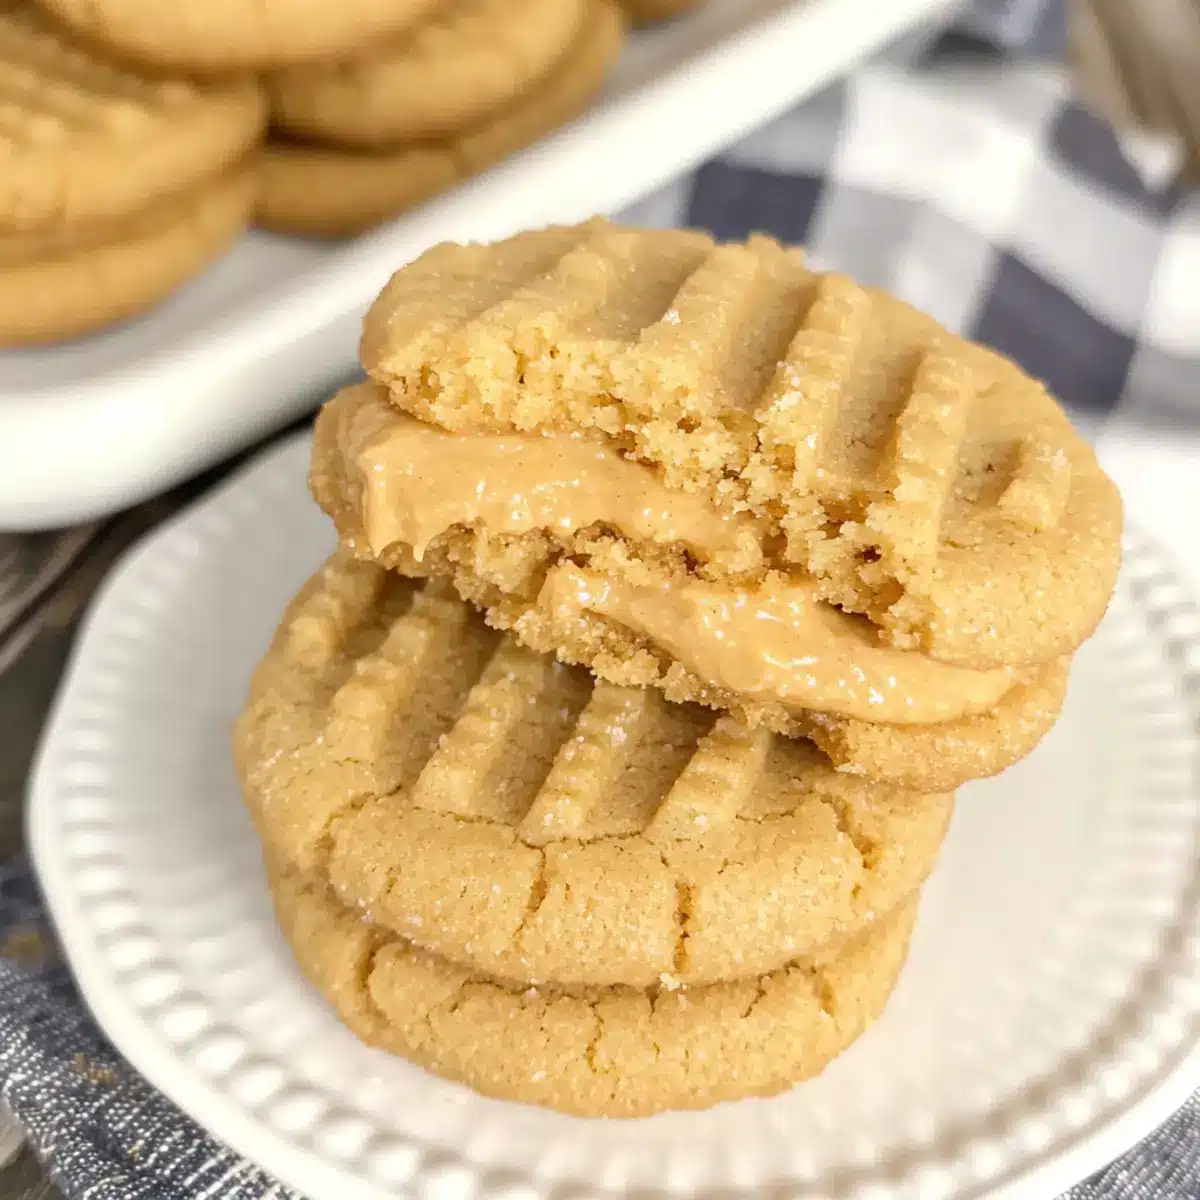
“Peanut butter lovers, rejoice!” That’s what I whispered to myself as the delightful scent of baking cookies wafted through my kitchen. Today, I’m thrilled to share my favorite recipe for Homemade Nutter Butters, those irresistible peanut butter sandwich cookies that rival any store-bought version. Imagine soft-baked cookie perfection nestled around a creamy peanut butter filling—what’s not to love? The best part? They’re easy to whip up even on a busy afternoon, making them a go-to treat for any occasion. With each bite, you’ll experience the nostalgic joy of childhood favorites wrapped in the warm embrace of homemade goodness. Ready to indulge? Let’s dive into this creamy adventure and unlock the secrets of making these scrumptious cookies together!
Why Are Homemade Nutter Butters Better?
Irresistible Flavor: The deep, rich peanut butter flavor shines through in every bite, making these cookies a satisfying treat that outdoes any store-bought variety.
Simple Steps: With only a handful of ingredients and easy-to-follow steps, these cookies are perfect for even novice bakers looking to impress.
Crowd-Pleasing Goodness: These soft, chewy cookies are ideal for sharing at gatherings, making them a beloved choice for family and friends.
Customization: Feeling adventurous? Add chocolate chips or swap in crunchy peanut butter for a delicious twist on the classic flavor.
Storage-Friendly: Easily store these cookies at room temperature or freeze them for later enjoyment, ensuring your sweet tooth is always satisfied. For more delightful treat ideas, try my Homemade Pumpkin Bagels or Chicken Mein for a well-rounded culinary experience!
Homemade Nutter Butters Ingredients
For the Cookies
• All-Purpose Flour – Provides structure and stability; substitute with gluten-free flour for a gluten-free option.
• Baking Soda – Acts as a leavening agent, ensuring a soft texture in your cookies.
• Kosher Salt – Enhances the flavors, making the cookies taste even richer.
• Unsalted Butter – Adds richness and moisture; feel free to use salted butter if you prefer.
• Light Brown Sugar – Contributes moisture and a caramel-like flavor; swap with dark brown sugar for added depth.
• Creamy Peanut Butter – The star ingredient, delivering a fantastic peanut butter flavor; natural peanut butter can create a more rustic taste.
• Large Egg – Binds everything together while adding moisture.
• Pure Vanilla Extract – Adds depth and complexity to the flavor.
• Sugar (for rolling) – Coats the dough logs, creating a sweet crust.
For the Peanut Butter Filling
• Unsalted Butter – Ensures the filling is creamy and smooth.
• Creamy Peanut Butter – Keeps that peanut butter flavor front and center in the filling.
• Powdered Sugar – Sweetens up and thickens the filling for a perfect texture.
• Milk – Adjusts the consistency for easy spreading.
• Vanilla Extract – Enhances the overall flavor, making it even more delightful.
These homemade Nutter Butters are not just cookies; they’re a nostalgic treat that takes you back to simpler times! Whether enjoyed with friends or all to yourself, you’ll savor every creamy, peanutty bite. Ready to get baking?
Step‑by‑Step Instructions for Homemade Nutter Butters
Step 1: Preheat the Oven
Begin by preheating your oven to 350°F (175°C). While the oven warms up, prepare your baking sheets by lining them with parchment paper, ensuring that your surface is ready for the delicious Homemade Nutter Butters to come.
Step 2: Combine Dry Ingredients
In a mixing bowl, whisk together 1 ½ cups of all-purpose flour, 1 tsp of baking soda, and ½ tsp of kosher salt. This step is crucial for building the right structure in your cookies, so take your time and ensure everything is evenly incorporated. Once mixed, set this bowl aside.
Step 3: Cream Together the Butters and Sugars
In a separate bowl, use an electric mixer to cream together ½ cup of unsalted butter, ¾ cup of light brown sugar, and ½ cup of creamy peanut butter. Mix on medium speed until the mixture is fluffy and light in color, which should take about 2-3 minutes. This step adds air into the batter, giving your cookies a lovely texture.
Step 4: Add Wet Ingredients
Next, add in 1 large egg and 1 tsp of pure vanilla extract to the creamy mixture. Continue mixing on low speed until fully combined, scraping down the sides of the bowl to incorporate any ingredients that may have stuck. This should take about 1-2 minutes to achieve a smooth consistency.
Step 5: Mix Dry Ingredients with Wet Mixture
Gradually add the dry flour mixture to the wet ingredients, mixing on low speed just until combined. Be careful not to overmix; you want a soft dough that holds together without being tough. This is where your Homemade Nutter Butters begin to take shape.
Step 6: Shape the Dough
Divide your cookie dough into two equal portions and shape each into a log about 1 inch in diameter. Roll each log in sugar for a sweet coating, ensuring it’s fully covered. Place the logs on the prepared baking sheets, leaving space between them to allow for spreading.
Step 7: Flatten the Logs
Using a fork, gently flatten each dough log to create a distinct peanut shape. Press down lightly for the design to form, making sure not to flatten them completely. This step is key for the classic Nutter Butter look and helps with even baking.
Step 8: Bake the Cookies
Place the baking sheets in the preheated oven and bake for 10-12 minutes, or until the edges are lightly browned. Remember that the centers should remain soft and slightly puffed; they will firm up as they cool, creating the perfect chewy texture.
Step 9: Cool on Baking Sheets
Once baked, remove the sheets from the oven and let the cookies cool for about 5 minutes on the sheet. This resting time allows them to set before transferring them to a wire rack, which will keep them from becoming too fragile.
Step 10: Prepare the Peanut Butter Filling
While the cookies are cooling, whip up your filling by beating together ½ cup of unsalted butter, 1 cup of creamy peanut butter, 2 cups of powdered sugar, 2 tbsp of milk, and 1 tsp of vanilla extract. Blend until you achieve a smooth, creamy filling perfect for sandwiching between the cookies.
Step 11: Assemble the Sandwich Cookies
Pair the cooled cookies and spread a generous dollop of the peanut butter filling onto the flat side of one cookie. Top it with another cookie to form a delightful sandwich. Press down gently until the filling oozes slightly—it’ll be hard to resist sampling along the way!
Step 12: Serve or Store
Your Homemade Nutter Butters are now ready to enjoy! Serve them immediately with a glass of milk or store them in an airtight container at room temperature for up to 3-4 days. Alternatively, freeze them for longer storage and have cookies at your fingertips whenever the craving strikes.
What to Serve with Ultimate Homemade Nutter Butters
The rich and creamy flavors of these delightful cookies open up a world of delicious pairings that will elevate your snack time.
-
Cold Glass of Milk: A classic pairing, the coolness of milk balances the sweetness of the cookies perfectly.
-
Hot Cup of Coffee: The bold flavors of coffee contrast beautifully with the cookies’ creamy filling, making for a comforting treat.
Perfect for a cozy afternoon or late-night indulgence, this duo is a match made in flavor heaven.
-
Chocolate Ice Cream: The creaminess of chocolate ice cream pairs wonderfully with peanut butter, making for a satisfying dessert experience.
-
Fresh Berries: Juicy strawberries or raspberries add a fresh burst and acidity, enhancing the richness of the cookies.
This dynamic combination brightens up the palate, making each bite feel balanced and refreshing.
-
Peanut Butter Hot Chocolate: For true peanut butter lovers, a cozy cup of hot chocolate infused with peanut butter will take your indulgence to the next level.
-
Soft Serve Vanilla Ice Cream: The creamy sweetness of vanilla ice cream makes a delightful contrast, allowing the peanut butter to shine.
Let your imagination run wild with these pairing suggestions as you dive into the irresistible world of homemade nutter butters!
Make Ahead Options
These Homemade Nutter Butters are perfect for meal prep, allowing you to enjoy this delightful treat any time! You can prepare the cookie dough up to 24 hours in advance. Simply shape it into logs, roll them in sugar, and wrap tightly in plastic wrap, then refrigerate. The peanut butter filling can also be made up to 3 days ahead; store it in an airtight container in the fridge to maintain its creamy texture. When you’re ready to bake, simply slice the chilled dough, flatten, and bake as directed. These time-saving steps ensure your cookies remain just as delicious, perfect for busy weeknights or unexpected guests!
How to Store and Freeze Homemade Nutter Butters
Room Temperature: Keep your cookies in an airtight container at room temperature for up to 3-4 days. This will ensure they stay fresh and delicious for everyday snacking.
Freezer: For longer storage, freeze the filled cookies by wrapping them individually in plastic wrap and placing them in a freezer-safe bag. They can last up to 3 months in the freezer.
Thawing: To enjoy your frozen Homemade Nutter Butters, simply remove them from the freezer and let them thaw at room temperature for about 30-60 minutes, or microwave for a few seconds to warm.
Reheating: If you’d like a warm treat, pop them in the microwave for 10-15 seconds. This will soften the cookies and refresh the peanut butter filling perfectly!
Expert Tips for Homemade Nutter Butters
-
Creamy Peanut Butter: Use a smooth variety for filling to achieve the perfect texture; avoid natural options with oil separation, which can lead to a grainy filling.
-
Don’t Overbake: Keep a close eye on your cookies, as they should remain soft in the center. Overbaking will result in crunchy cookies rather than chewy Homemade Nutter Butters.
-
Sugar Coating: Roll the logs in sugar thoroughly to ensure a sweet crust that enhances the cookie’s flavor. This step is often overlooked but makes a big difference.
-
Cooling Time: Allow your cookies to cool on the baking sheet for just 5 minutes before transferring them to a wire rack. This helps them set without becoming too fragile.
-
Filling Consistency: If your peanut butter filling is too thick, add a touch more milk to make spreading easier. It should be thick but spreadable for optimal sandwich assembly.
Homemade Nutter Butters Variations
Feel free to make these indulgent cookies your own with some delightful twists!
-
Crunchy Peanut Butter: Swap creamy peanut butter for crunchy to add a delightful texture contrast and enjoy that extra crunch in every bite.
-
Chocolate Chips: Fold in a handful of chocolate chips to the dough for a mouthwatering chocolate-peanut butter combination that’s simply irresistible.
-
Nut Butter Swap: Experiment with other nut butters like almond or cashew for an exciting and unique filling. You’ll discover new flavors that surprise and delight!
-
Add a Dash of Spice: Sprinkle a pinch of cinnamon or nutmeg into the dough to bring warmth and depth to the flavor; this subtle hint can elevate your cookies beyond expectations!
-
Stuffed Cookies: Layer the filling with some crushed cookies or graham crackers for extra texture; it’s like finding little treasure bites in a peanut buttery dream!
-
Fruity Twist: Toss in some dried cranberries or chopped nuts into the dough for added flavor bursts and crunch. This adds not just taste, but also interesting textures.
-
Vegan Delight: Substitute the butter and egg with coconut oil and flaxseed meal mixed with water to make these cookies vegan without losing any deliciousness!
-
Dunking Delight: Create mini versions of the cookies for easy dunking in milk or coffee! Perfect for those who love a little extra fun in their treats.
Remember, no matter how you choose to switch it up, these Homemade Nutter Butters will still be a beloved treat. And if you’re looking for more delicious ideas, don’t miss out on my delightful Homemade Pumpkin Bagels or try a savory option with Chicken Mein! Enjoy your baking journey!
Homemade Nutter Butters Recipe FAQs
What kind of peanut butter should I use?
Absolutely use creamy peanut butter for the best filling texture! I recommend avoiding natural varieties that can lead to a grainy filling due to oil separation. Jif or Skippy are fantastic choices for a smooth and indulgent experience.
How do I store Homemade Nutter Butters?
Store your cookies in an airtight container at room temperature for up to 3-4 days. For longer-lasting goodness, you can freeze them! Just wrap each filled cookie in plastic wrap, place them in a freezer-safe bag, and they’ll be good for up to 3 months.
Can I freeze these cookies? How do I do it properly?
Yes, you can! To freeze your Homemade Nutter Butters, wrap each cookie individually in plastic wrap and then place them in a labeled freezer-safe bag. They will keep well for about 3 months. When you’re ready to enjoy them, let them thaw at room temperature for 30-60 minutes.
I baked my cookies, and they turned out crunchy. What went wrong?
Very often, crunchy cookies result from overbaking. Ensure to keep an eye on them near the end of the baking time—10-12 minutes should do! They should remain slightly puffed in the center and only lightly browned at the edges.
Are there any dietary considerations to keep in mind?
Yes! If anyone has peanut allergies, these cookies are not suitable unless you switch the peanut butter out for a different nut or seed butter, like sunflower seed butter. Always check ingredient labels for allergens, especially in pre-made products like peanut butter.
What should I do if my filling is too thick?
If your peanut butter filling seems too thick to spread, no worries! Just add a teaspoon of milk at a time, mixing well until it reaches your desired consistency. It should be thick but easily spreadable, making sandwich assembly a breeze.
Decadent Homemade Nutter Butters That Beat Store-Bought!
Ingredients
Equipment
Method
- Preheat your oven to 350°F (175°C) and line baking sheets with parchment paper.
- In a mixing bowl, whisk together flour, baking soda, and salt. Set aside.
- Cream together butter, brown sugar, and peanut butter with an electric mixer until fluffy.
- Add egg and vanilla extract, then mix until fully combined.
- Gradually mix in the dry ingredients until just combined.
- Divide dough into logs, roll in sugar, and place on baking sheets.
- Flatten each log slightly with a fork to create a peanut shape.
- Bake for 10-12 minutes, until edges are lightly browned.
- Cool cookies for about 5 minutes on the baking sheet.
- Beat together the filling ingredients until smooth.
- Spread filling between two cookies to make sandwich cookies.
- Enjoy immediately or store in an airtight container.
Leave a Reply