
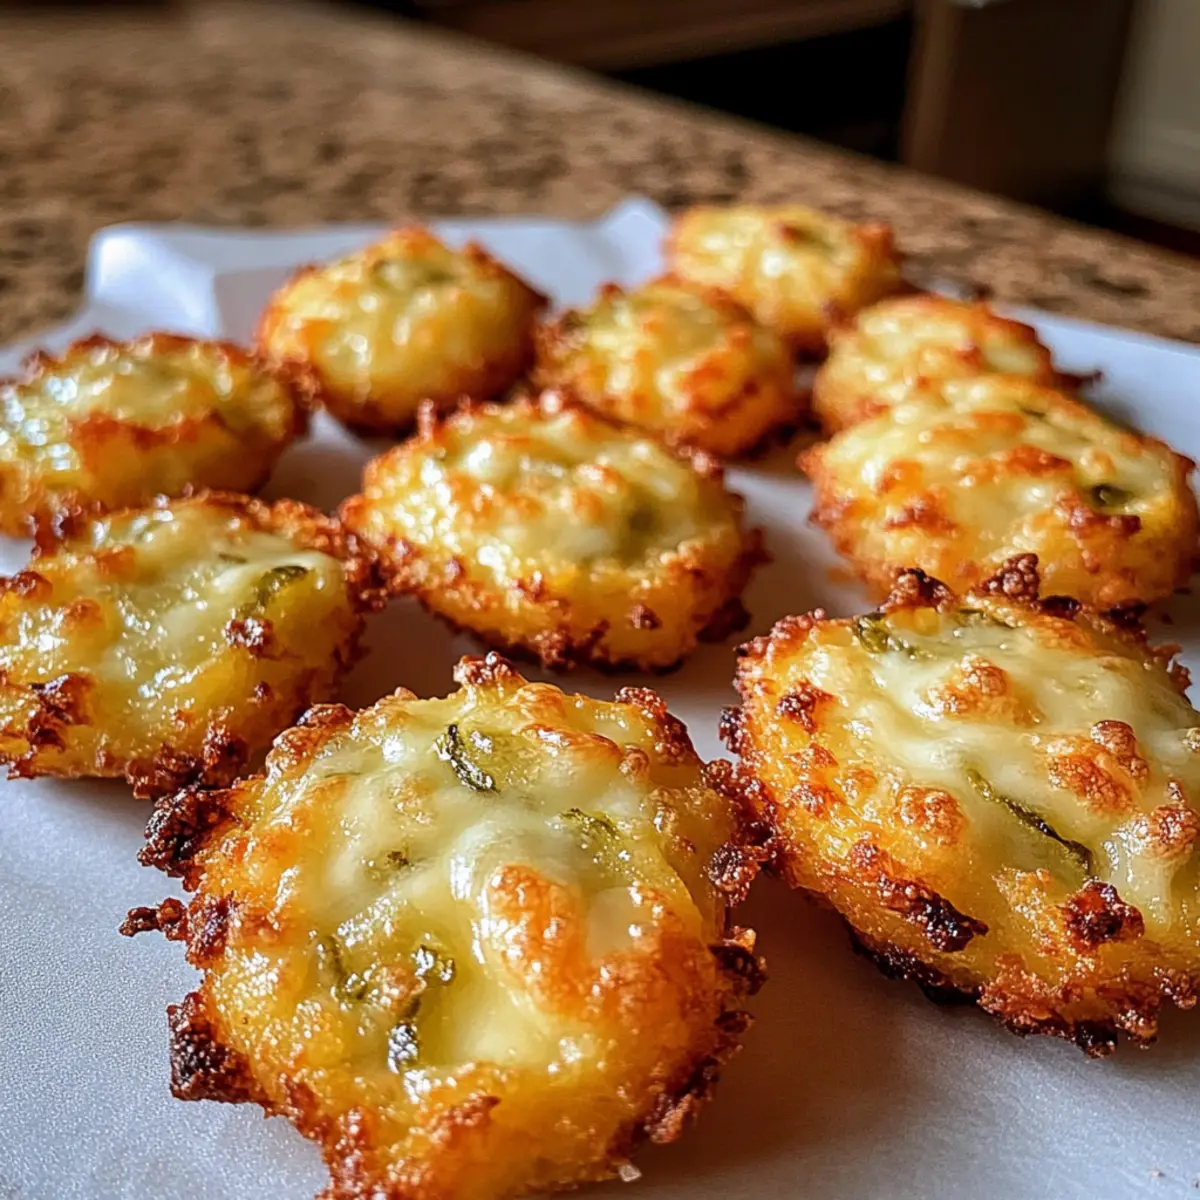
As I rummaged through my pantry, a lightbulb moment struck: what if I took a classic flavor combo and turned it into the ultimate snack? Enter Crispy Pickle Cheese Bites, where gooey cheese meets the zesty crunch of dill pickles. With minimal ingredients and just a quick bake, these bites are a game-changer for easy entertaining or satisfying those unexpected cravings. Not only are they a fantastic crowd-pleaser, but they also offer a delightful twist on everyday snacking without the need for takeout. Whether you’re gearing up for a game night or just in the mood for a cheesy treat, these crispy delights will keep you reaching for more. So, are you ready to discover your new favorite snack?
Why Are These Pickle Cheese Bites Unforgettable?
Crispy Delight: With a perfectly golden crust, each bite delivers an irresistible crunch that complements the gooey, melted cheese.
Flavor Explosion: The tangy dill pickles add a zesty twist, making every mouthful a joyous experience.
Easy Prep: Requiring just a handful of ingredients, you can whip these up in no time, ideal for busy weekdays or last-minute gatherings.
Versatile Snacking: Enjoy them on their own or dip into your favorite sauce, like ranch or sriracha mayo, for an even more engaging flavor adventure.
Gluten-Free Option: Easily switch to gluten-free breadcrumbs to cater to dietary needs without sacrificing taste.
These Crispy Pickle Cheese Bites will surely become a go-to recipe in your kitchen, just like my beloved Bacon Egg Cheese Breakfast Burrito or Jalapeno Popper Bites!
Crispy Pickle Cheese Bites Ingredients
For the Cheese Mixture
- Shredded Cheddar Cheese – Offers a rich flavor that pairs perfectly with the pickles; substitute with Monterey Jack for a milder taste.
- Shredded Mozzarella Cheese – Provides that beloved stretchiness; for a bolder flavor, try substituting with Gouda.
- Finely Chopped Dill Pickles – Delivers tangy crunch, the star of these crispy pickle cheese bites; remember to blot to reduce moisture!
- Garlic Powder – Boosts the flavor profile, making it more savory; it’s optional if you prefer a milder kick.
For Added Crunch
- Breadcrumbs – Adds delightful texture; for a gluten-free option, simply use gluten-free breadcrumbs.
- Nonstick Spray or Parchment Paper – Ensures that your crispy bites won’t stick during baking; indispensable for easy cleanup!
Step‑by‑Step Instructions for Crispy Pickle Cheese Bites
Step 1: Preheat the Oven
Begin by preheating your oven to 375°F (190°C). While it’s warming up, grab a baking sheet and line it with parchment paper or spray it with nonstick spray. This will help prevent your Crispy Pickle Cheese Bites from sticking and ensure they come out perfectly golden.
Step 2: Prepare the Cheese Mixture
In a large mixing bowl, combine the shredded cheddar cheese, shredded mozzarella cheese, and finely chopped dill pickles. Sprinkle in the garlic powder for an extra flavor kick, and add breadcrumbs if using. Mix everything together until well combined, creating a delightful cheese filling that gives these bites their signature tang.
Step 3: Form the Bites
Now it’s time to shape your mixture! With clean hands, take small portions and roll them into balls—about the size of a tablespoon. Place each ball on the prepared baking sheet, leaving some space between them for baking. This step ensures your Crispy Pickle Cheese Bites will puff up and crisp nicely in the oven.
Step 4: Bake the Bites
Once all your bites are formed, pop the baking sheet into the preheated oven. Bake for about 10 minutes, monitoring them closely. You’re looking for a beautiful golden-brown color that indicates they’re crispy on the outside and melting on the inside, achieving that perfect balance of texture.
Step 5: Cool and Serve
After baking, carefully remove the baking sheet from the oven and allow the Crispy Pickle Cheese Bites to cool for a few minutes. This slight cooling time is essential, as the cheese will be extremely hot. Once they’re cool enough to handle, serve them warm with your favorite dipping sauces for an irresistible snack experience.
How to Store and Freeze Crispy Pickle Cheese Bites
Fridge: Store leftover Crispy Pickle Cheese Bites in an airtight container for up to 2 days to maintain their deliciousness and avoid spoilage.
Freezer: For longer storage, freeze individual bites on a baking sheet until solid, then transfer to a freezer-safe bag. They’ll keep well for up to 3 months.
Reheating: When ready to enjoy, reheat frozen bites directly from the freezer in a preheated oven at 375°F (190°C) for about 10-12 minutes, or until heated through and crispy again.
Preparation Tip: Consider portioning out your bites before freezing for quick and easy snacking on demand; they’re perfect for those last-minute cravings!
Make Ahead Options
These Crispy Pickle Cheese Bites are perfect for meal prep aficionados! You can prepare the cheese mixture up to 24 hours in advance by combining the shredded cheeses, dill pickles, and seasonings, then storing it in an airtight container in the fridge. When you’re ready to bake, simply form the chilled mixture into balls and arrange them on a baking sheet. This not only saves time but also allows the flavors to meld beautifully. For best results, avoid pre-baking, as this can affect the texture. Reheat any leftovers in the oven at 350°F (175°C) for 5-7 minutes to restore their delightful crispiness before serving!
Crispy Pickle Cheese Bites Variations & Substitutions
Feel free to make these crispy pickle cheese bites your own with exciting variations that spark your culinary creativity!
-
Spicy Twist: Substitute dill pickles with pickled jalapeños for an extra kick. The heat will elevate these bites into something unforgettable!
-
Cheese Medley: Mix in a variety of cheeses, such as gouda or pepper jack, for deeper flavor layers. Each cheese offers a unique taste and texture that’ll have your taste buds dancing.
-
Herb Infusion: Add fresh herbs like dill or chives to the mix for an aromatic boost. These herbs pair beautifully with the pickle flavor, creating a garden-fresh experience.
-
Bacon Boost: Toss in crispy bacon bits for an irresistible savory punch. The combination of bacon and cheese is always a crowd-pleaser at any gathering!
-
Gluten-Free Delight: Use gluten-free breadcrumbs for a dietary-friendly option. You won’t even miss the traditional breadcrumbs with all that crispy goodness!
-
Veggie Crunch: Incorporate finely chopped bell peppers or green onions for added color and nutrition. This extra crunch adds to the texture, making each bite even more satisfying.
-
Cheesy Dip: Serve these bites with a gooey cheese sauce or ranch dressing on the side. Elevating the dipping experience takes snacking to a whole new level!
-
Sweet and Sour: Swap out dill pickles for sweet bread-and-butter pickles to create a delightful contrast of flavors. This twist will surprise your guests and keep them coming back for more!
These adaptations are just the beginning! Your imagination can transform these crispy pickle cheese bites into something spectacular. While you’re enjoying these bites, consider also trying my delicious Greek Yogurt Cookie Dough Bites for a sweet treat after your savory snacking!
What to Serve with Crispy Pickle Cheese Bites?
Elevate your snack experience with delightful pairings that perfectly complement the crispy, cheesy goodness of these bites.
-
Creamy Ranch Dip: This classic dip adds a refreshing and herby flavor that perfectly balances the richness of the cheese, making every bite irresistible. Serve it alongside for dipping, and watch it disappear!
-
Zesty Sriracha Mayo: A spicy twist to enhance each crunchy bite. The creaminess of the mayo combined with sriracha brings a lively kick that will keep your taste buds dancing.
-
Fresh Veggie Platter: Crisp carrots, celery, and cucumber sticks provide a refreshing crunch and a splash of color that nicely contrasts the savory bites. Pair them for a fun, healthful crunch with every bite.
-
Garlic Breadsticks: Complement the cheese flavor with warm, buttery garlic breadsticks. Their crispy exterior and soft interior create the perfect texture contrast, ideal for dipping in marinara sauce.
-
Sweet & Tangy Coleslaw: A crunchy side filled with tangy flavors that cuts through the richness of the bites. The vibrant veggies provide a fresh element that makes each mouthful exciting.
-
Ice-cold Lemonade: The tart sweetness of a cold lemonade harmonizes beautifully with the cheesy bites. It serves as a refreshing palate cleanser between rich and savory flavors.
-
Beer Pairing: A light lager or a crisp pilsner enhances the snack experience with its carbonation and mild, bitter notes. Enjoying these bites with a drink brings out their savory depth.
-
Chocolate Chip Cookies: For a sweet ending, serve warm cookies. The gooey chocolate beautifully balances the tangy cheese bites, making for an unforgettable flavor adventure.
Expert Tips for Crispy Pickle Cheese Bites
-
Cool Down: Allowing the bites to cool for a few minutes is crucial to avoid burns from the hot cheese inside.
-
Chill Before Shaping: If the mixture feels sticky, refrigerate it for about 10 minutes to make shaping easier and achieve a better texture in your Crispy Pickle Cheese Bites.
-
Moisture Control: Blotting the chopped pickles with paper towels helps reduce excess moisture, enhancing the overall crispiness of the bites.
-
Flavor Boost: Don’t hesitate to customize your mix! Adding smoked paprika or onion powder can elevate the flavor profile of your Crispy Pickle Cheese Bites.
-
Reheating Secrets: To restore the crispy texture, always reheat leftovers in the oven instead of the microwave; it makes a world of difference!
-
Experiment: Try mixing in different cheeses or spices to discover your favorite flavor combo; the possibilities are endless!
Crispy Pickle Cheese Bites Recipe FAQs
How do I choose the best pickles for my Crispy Pickle Cheese Bites?
Absolutely! Look for dill pickles that are firm and not overly soft. They should be crunchy with minimal dark spots or blemishes. If you’re in the mood for a sweeter flavor, bread-and-butter pickles can be used as an alternative. Just remember to blot them well, as excess moisture can make the bites soggy.
What is the best way to store leftover Crispy Pickle Cheese Bites?
You can store your leftover bites in an airtight container in the refrigerator for up to 2 days. This method keeps them fresh and ready to be enjoyed again. Just remember that they might lose a bit of crispiness, so you’ll want to reheat them in the oven for 5-7 minutes at 350°F (175°C) to regain that delightful crunch.
Can I freeze Crispy Pickle Cheese Bites?
Definitely! To freeze, lay the formed bites on a baking sheet and place them in the freezer until solid. Once frozen, transfer them to a freezer-safe bag or container. They’ll last for up to 3 months. When you’re ready to enjoy them, you can bake them straight from the freezer at 375°F (190°C) for about 10-12 minutes.
What should I do if my mixture feels too sticky while making the bites?
Very! If you find that the cheese mixture is too sticky to shape into balls, simply chill it in the refrigerator for about 10-15 minutes. This will firm it up and make it easier to form into those perfect little bites. It’s a handy trick to ensure wonderful texture and easy handling.
Are these Crispy Pickle Cheese Bites safe for pets or individuals with cheese allergies?
Unfortunately, if you have pets, it’s best to keep these bites away from them. The high-fat content and spices might not sit well with their digestive system. For individuals with cheese allergies, you might consider experimenting with dairy-free cheese alternatives, ensuring they melt well and retain the texture you love in these snacks. Always check with your doctor or allergist for personalized advice.
Crispy Pickle Cheese Bites: Irresistibly Cheesy Snack Bliss
Ingredients
Equipment
Method
- Preheat your oven to 375°F (190°C) and line a baking sheet with parchment paper or spray it with nonstick spray.
- In a large mixing bowl, combine shredded cheddar cheese, shredded mozzarella cheese, and finely chopped dill pickles. Add garlic powder and breadcrumbs, mixing until well combined.
- Shape the mixture into balls about the size of a tablespoon and place them on the prepared baking sheet.
- Bake in the preheated oven for about 10 minutes until golden brown.
- Remove from the oven and cool for a few minutes before serving warm with your favorite sauces.
Leave a Reply