
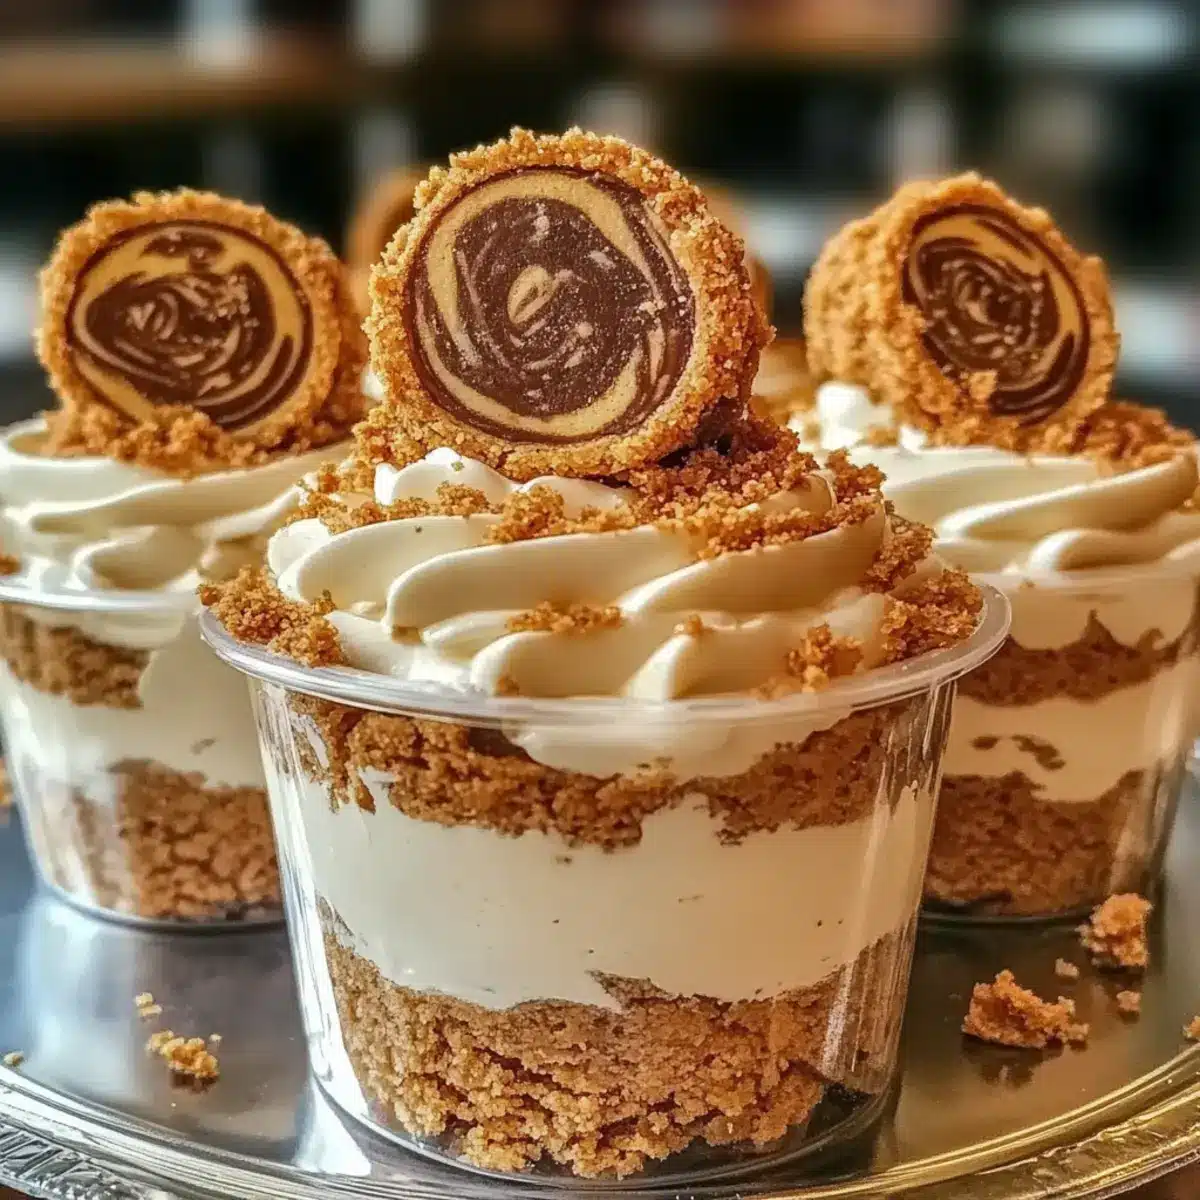
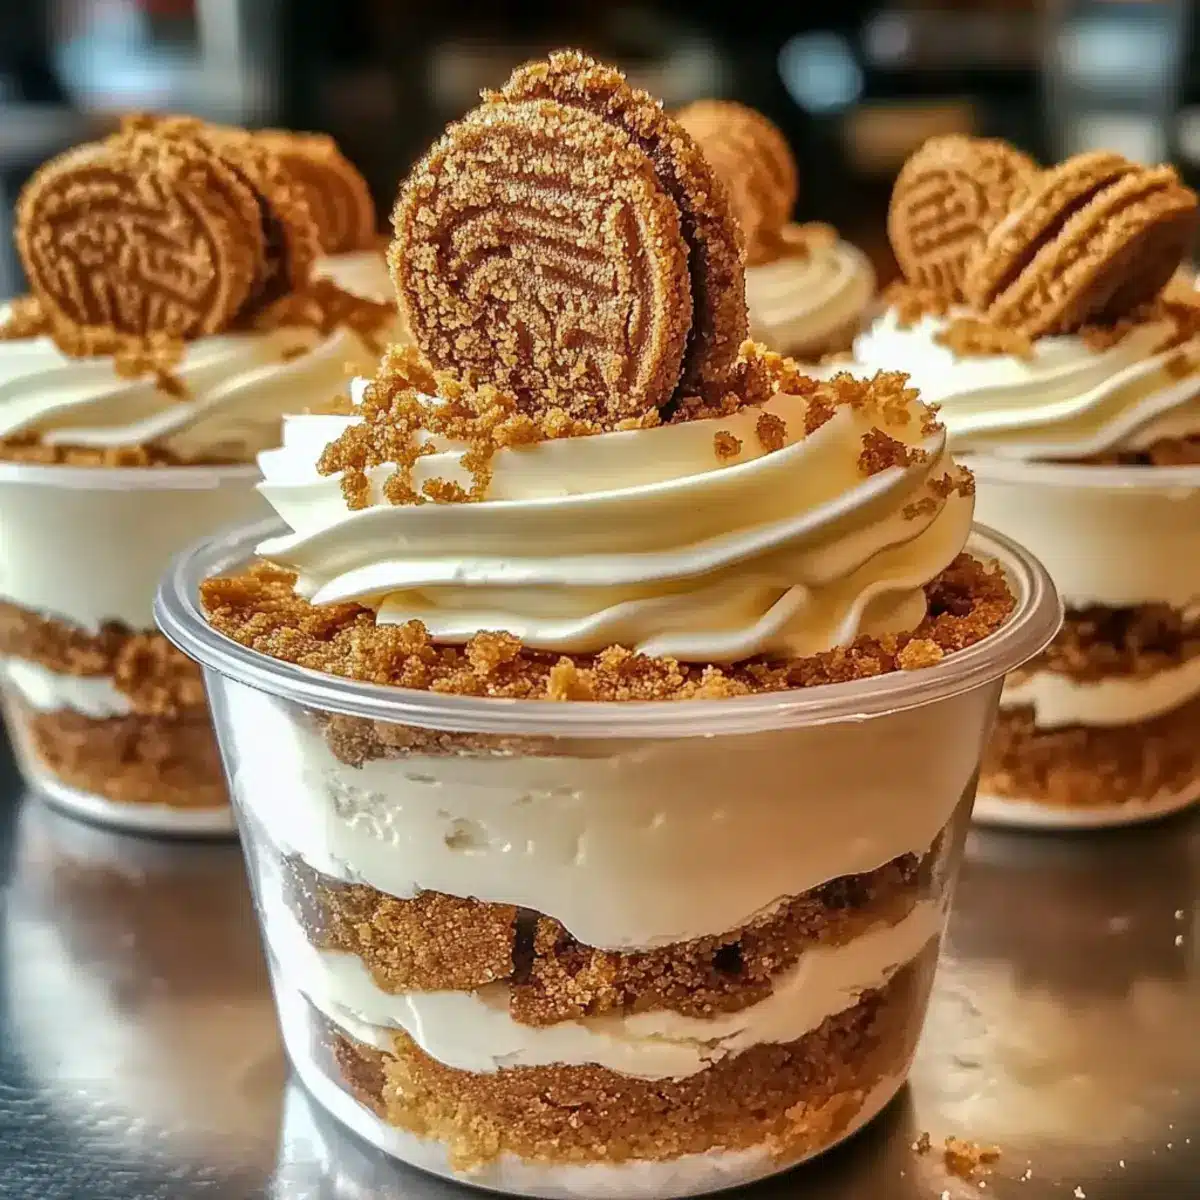
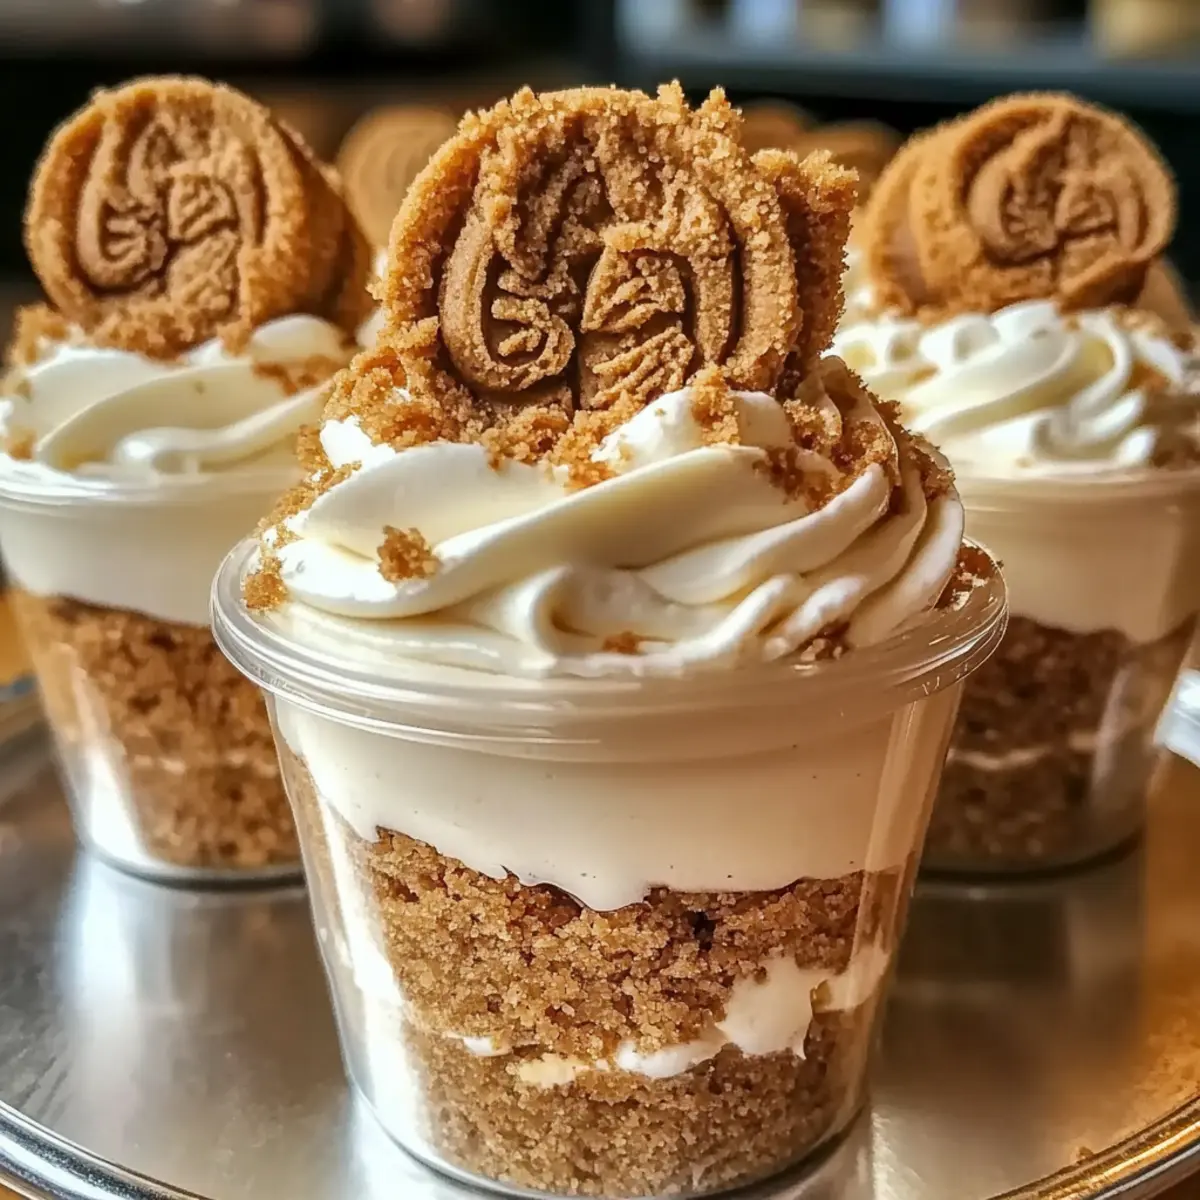
As I took a bite of my latest creation, the richness of creamy cheesecake danced on my tongue, complemented by the delightful crunch of cookie crumbs. These Cookie Butter Cheesecake Cups are not just another dessert; they’re a no-bake miracle that promises to make your life a whole lot sweeter. With minimal prep time and no baking required, they’re perfect for gatherings, spontaneous celebrations, or when you simply need a comforting treat after a long day. Imagine indulging in velvety layers infused with the warmth of cookie butter—there’s something truly magical about this combination. Ready to impress your friends or family? Let’s dive into this easy, delicious recipe that’s sure to leave everyone asking for seconds!
Why Are These Cheesecake Cups So Irresistible?
Decadent layers: Each cup is a heavenly mix of creamy cheesecake and crunchy cookie crumbs that’ll have you swooning. No-bake simplicity: With no oven needed, you can whip these up quickly, making them ideal for last-minute gatherings. Crowd-pleaser: Perfectly sized for parties, these cups are a sweet treat everyone will love. Versatile variations: Feel free to customize with gingersnap crumbs or peanut butter for a twist! And if you’re looking for another delightful dessert, check out my Crockpot Butter Chicken or dive into the layers of Cheesy Garlic Butter for dinner!
Cookie Butter Cheesecake Cups Ingredients
• Each ingredient plays a crucial role in creating these delightful treats, so let’s gather everything you need!
For the Crust
- Biscoff or Speculoos Cookie Crumbs – Adds a sweet, crunchy crust; substitute with crushed gingersnap cookies if needed.
- Melted Butter – Binds cookie crumbs together to form the crust, ensuring a firm base for the cheesecake cups.
For the Filling
- Cream Cheese – Provides rich, creamy texture and flavor; make sure it’s softened for easy mixing.
- Powdered Sugar – Sweetens the cheesecake filling without a gritty texture, keeping it smooth and luscious.
- Cookie Butter – Infuses the filling with spiced sweetness, making it divine; can be swapped with peanut butter for variation, but cookie butter yields the best flavor.
- Vanilla Extract – Enhances the overall flavor profile beautifully, bringing balance to the sweetness.
- Heavy Whipping Cream – Creates a light, airy mousse texture when whipped, making the cheesecake filling irresistible.
For Garnish (Optional)
- Extra Cookies – Just for garnish, adds both texture and visual appeal; consider using whole cookies or additional cookie crumbs for extra flair.
Gather these ingredients, and you’ll be on your way to creating delightful Cookie Butter Cheesecake Cups that everyone will adore!
Step‑by‑Step Instructions for Cookie Butter Cheesecake Cups
Step 1: Prepare the Crust
In a mixing bowl, combine the Biscoff cookie crumbs with the melted butter until the mixture resembles damp sand. This will be the base for your Cookie Butter Cheesecake Cups. Press the crust mixture firmly into the bottom of each serving cup using the back of a spoon or your fingers. Chill the cups in the refrigerator for about 10 minutes to help the crust set.
Step 2: Whip the Cream
Using an electric mixer, whip the heavy cream on medium-high speed until soft peaks begin to form, which should take roughly 2-3 minutes. Once you see those peaks, set the whipped cream aside in a large mixing bowl. This fluffy texture will be key in achieving the light and airy filling of your cheesecake cups.
Step 3: Mix the Filling
In a separate bowl, beat the softened cream cheese, powdered sugar, cookie butter, and vanilla extract together with the mixer on medium speed. Continue mixing until the mixture is completely smooth and creamy, taking about 2-3 minutes. This delicious mixture will serve as the base for the luscious filling of your Cookie Butter Cheesecake Cups.
Step 4: Combine Mixtures
Gently fold the whipped cream into the cookie butter mixture using a spatula. Be careful to maintain the airiness of the whipped cream as you blend. This step gives you that dreamy mousse-like quality, making your Cookie Butter Cheesecake Cups truly decadent. Continue folding until fully combined and no streaks of whipped cream remain.
Step 5: Layer the Filling
Spoon or pipe a layer of the cheesecake filling over the chilled crust in each cup, smoothing it out with a spatula. For added indulgence, drizzle a thin layer of melted cookie butter between the crust and filling for an extra layer of flavor. This step is crucial for packing in the cookie butter goodness.
Step 6: Repeat the Layers
Add another layer of cheesecake filling on top of the first layer, ensuring you’ve filled each cup to the brim. For a lovely finishing touch, drizzle a bit more melted cookie butter over the top before smoothing out the final layer. Make sure the cups are filled evenly to showcase those delightful layers.
Step 7: Add Optional Garnishes
If desired, sprinkle additional cookie crumbs or place a whole cookie on top of each cheesecake cup for visual appeal and texture. This is a great way to elevate your presentation and make your Cookie Butter Cheesecake Cups look irresistible. The garnish provides a lovely crunch to complement the creamy filling.
Step 8: Chill and Serve
Cover the cheesecake cups with plastic wrap and refrigerate for at least one hour, allowing the flavors to meld and the filling to set. Before serving, remove them from the fridge and enjoy the smooth, creamy, and decadent Cookie Butter Cheesecake Cups you’ve created.
Make Ahead Options
These Cookie Butter Cheesecake Cups are perfect for busy home cooks looking to save time while still serving a delightful dessert! You can prepare the crust and the cheesecake filling up to 24 hours in advance. Simply combine the cookie crumbs and melted butter for the crust, then store it in the cups. For the filling, mix the cream cheese, powdered sugar, cookie butter, and vanilla, and keep it tightly covered in the fridge. When you’re ready to serve, layer the prepared filling over the chilled crusts, drizzle with melted cookie butter, and garnish as desired. This method ensures the flavors stay vibrant and delicious, making your dessert just as satisfying as if freshly made!
What to Serve with Cookie Butter Cheesecake Cups?
These delightful dessert cups are perfect for complementing a variety of meal experiences and sweet endings.
-
Fresh Berries: Bright, juicy berries provide a refreshing contrast to the creamy cups, adding a burst of flavor and color to your dessert spread.
-
Whipped Cream: A dollop of freshly whipped cream enhances the richness of your cheesecake cups, while adding an airy texture that melts in your mouth.
-
Coffee or Espresso: The bold flavors of coffee or espresso create a perfect pairing with the sweetness of the cheesecake, offering a delightful balance that keeps you coming back for more.
-
Chocolate Drizzle: A warm chocolate drizzle over the cups elevates the dessert, introducing a rich, velvety element that harmonizes beautifully with the cookie butter.
-
Ice Cream: Serving these cheesecake cups alongside a scoop of vanilla or caramel ice cream creates a delightful temperature contrast, making each bite a unique experience.
-
Gingersnap Cookies: Showcase a crunchy texture by adding some gingersnap cookies on the side, which playfully aligns with the warm spices of the cookie butter.
-
Spiced Tea: A cup of chai or spiced tea can enhance the cozy, warm flavors of your dessert, inviting a comforting atmosphere for after-dinner conversations.
-
Nutty Granola: A sprinkle of toasted granola adds a nice crunch that perfectly contrasts the smoothness of the cheesecake cups, creating a well-rounded texture.
Indulging in these desserts is about more than just flavor; it’s about creating joyful moments shared with loved ones.
Cookie Butter Cheesecake Cups Variations
Feel free to get creative and make these delightful cups your own with these fun twists!
- Gingersnap Crust: Swap Biscoff crumbs for gingersnap cookies for a spicy kick that complements the cheesecake beautifully.
- Peanut Butter Alternative: Use peanut butter instead of cookie butter for a different, nutty flavor. Just know it will change the dessert’s personality!
- Chocolate Drizzle: Add a rich chocolate drizzle on top for an exquisite sweet contrast. It’s a fantastic way to elevate your presentation!
- Adding Spices: Sprinkle a pinch of cinnamon or nutmeg into the cheesecake filling for extra warmth and depth. This small tweak can take your flavor profile to new heights.
- Top with Fruit: Add fresh fruit like raspberries or sliced strawberries on top for a refreshing, tart contrast to the rich cheesecake.
- Vegan Version: Substitute cream cheese with coconut cream and use dairy-free cookies for a vegan-friendly treat that everyone can enjoy.
When you mix things up a bit, every scoop of these cups remains exciting. Plus, if you end up loving these ideas, don’t miss out on giving my Cowboy Butter Chicken a try, or check out the delightful flavors in my Greek Yogurt Cookie recipe for more mouthwatering inspiration!
Expert Tips for Cookie Butter Cheesecake Cups
-
Choose Creamy Cheese: Ensure your cream cheese is well-softened; this prevents lumps in your filling and guarantees a smooth texture in your Cookie Butter Cheesecake Cups.
-
Gentle Folding: When incorporating the whipped cream into the cookie butter mixture, fold gently to maintain that airy volume. This will make your cheesecake cups light and fluffy.
-
Layer Wisely: Take your time with layering the filling and melted cookie butter between crusts; even layers create a visually appealing dessert that’s just as delightful to look at as it is to eat.
-
Make Ahead: To save time, these cups can be prepared up to 24 hours in advance, making them an easy dessert option for any gathering.
-
Don’t Skip Chilling: Refrigerate your Cookie Butter Cheesecake Cups for at least an hour before serving. This chilling time is essential for the filling to set and develop its creamy consistency.
How to Store and Freeze Cookie Butter Cheesecake Cups
Fridge: Store uneaten Cookie Butter Cheesecake Cups in an airtight container for up to 3 days. This allows the flavors to meld and keeps them fresh and creamy.
Freezer: For longer storage, freeze the cups without toppings in a single layer for up to 1 month. When ready to enjoy, thaw in the fridge overnight before serving.
Reheating: These cheesecake cups are best served cold, so there’s no need for reheating. Just let them chill in the fridge after freezing for a refreshing treat.

Cookie Butter Cheesecake Cups Recipe FAQs
How do I choose the right cookie crumbs for the crust?
Absolutely! For the crust, I recommend using Biscoff or Speculoos cookie crumbs for a delightful sweetness and crunch. If those aren’t available, crushed gingersnap cookies can work wonderfully, offering a spicy kick that complements the cookie butter filling.
What’s the best way to store Cookie Butter Cheesecake Cups?
These cups can be stored in an airtight container in the fridge for up to 3 days, allowing the flavors to meld beautifully. If you want to keep them longer, consider freezing them without toppings. They can last up to 1 month in the freezer, just be sure to let them thaw in the fridge overnight before serving.
How do I freeze Cookie Butter Cheesecake Cups?
Freezing is a great option! Start by preparing the cups as directed, but avoid adding any toppings. Place the cups in a single layer on a baking sheet to freeze initially for about 1-2 hours. Once they’re solid, transfer them to a resealable plastic bag or airtight container, separating layers with parchment paper to prevent sticking. Enjoy them within a month for the best taste!
What should I do if my mixture is lumpy?
If your filling ends up lumpy, don’t worry—this can happen with cream cheese. Make sure your cream cheese is softened at room temperature before mixing, as this helps it blend more smoothly. If lumps persist, you can try beating it with a hand mixer until the mixture is completely smooth. Another tip is to strain the mix through a fine mesh sieve to achieve that silky texture!
Can I adjust the recipe for dietary restrictions?
Very! If you have dietary restrictions, consider using dairy-free cream cheese and whipped cream to make these cups vegan. For a nut-free version, ensure that your cookie butter doesn’t contain nut ingredients, or swap it with a nut-free spread. Always check labels to be safe for allergies, as some brands may contain traces of allergens.
Can I make these ahead of time?
Certainly! Cookie Butter Cheesecake Cups can be prepared up to 24 hours in advance, which makes them ideal for hosting! Just make sure to cover them tightly in the fridge before your gathering—this will keep them fresh and delicious, ready to impress your guests when it’s time to serve!
Irresistible Cookie Butter Cheesecake Cups You’ll Love
Ingredients
Equipment
Method
- In a mixing bowl, combine the Biscoff cookie crumbs with the melted butter until the mixture resembles damp sand. Press the crust mixture firmly into the bottom of each serving cup and chill in the refrigerator for about 10 minutes.
- Using an electric mixer, whip the heavy cream on medium-high speed until soft peaks begin to form, around 2-3 minutes. Set aside.
- In a separate bowl, beat the softened cream cheese, powdered sugar, cookie butter, and vanilla extract until the mixture is smooth and creamy, about 2-3 minutes.
- Gently fold the whipped cream into the cookie butter mixture using a spatula until fully combined.
- Spoon or pipe a layer of the cheesecake filling over the chilled crust in each cup. Optionally drizzle a thin layer of melted cookie butter in between layers.
- Add another layer of cheesecake filling on top and drizzle more melted cookie butter before smoothing out the final layer.
- If desired, sprinkle additional cookie crumbs or place a whole cookie on top of each cheesecake cup for garnish.
- Cover the cheesecake cups with plastic wrap and refrigerate for at least one hour before serving.
Leave a Reply