
As I stood in my kitchen, the familiar aroma of melting chocolate made my heart race with nostalgia. Classic Chewy Chocolate Chip Cookies have always been my go-to indulgence, effortlessly merging crisp edges with a soft, chewy center. These delightful cookies are not just a treat; they’re a quick fix for your sweet cravings that take mere minutes to whip up. With incredibly simple ingredients, you can easily customize them, whether you prefer a nutty crunch or a burst of dried fruit. They’re perfect for sharing with friends, impressing guests, or simply enjoying as a midday pick-me-up. Are you ready to bake a batch of love? Let’s dive into this simple yet satisfying recipe!
Why Are These Cookies So Special?
Irresistible Comfort: Classic Chewy Chocolate Chip Cookies are a nostalgic favorite that never fail to uplift your spirits.
Quick and Easy: With a straightforward method, you can bake these cookies in less than an hour, making them a perfect choice for a spontaneous treat.
Endless Customization: Whether you crave a nutty crunch with walnuts or a fruity twist with cranberries, the options for personalization are limitless.
Perfect for Sharing: Bake a batch for gatherings, or simply enjoy them yourself—either way, they’re bound to impress!
Consistent Delight: The lovely blend of crisp edges and chewy centers ensures a burst of deliciousness in every bite. Pair these with a glass of milk to elevate the experience!
Try them as a delightful companion to our Garlic Parmesan Chicken for a hearty meal after your cookie indulgence!
Chocolate Chip Cookie Ingredients
For the Cookie Dough
• All-Purpose Flour – Provides structure; can substitute with a gluten-free flour blend for those with dietary restrictions.
• Granulated Sugar – Adds sweetness; brown sugar can enhance chewiness for a more tender cookie.
• Brown Sugar – Contributes moisture and a deeper flavor; both light and dark brown sugar work beautifully.
• Unsalted Butter – Enriches flavor and helps achieve a soft texture; use margarine as a non-dairy option if desired.
• Eggs – Binds ingredients together and aids in leavening; flax eggs are a great vegan substitute.
• Vanilla Extract – Elevates the cookies’ flavor profile; opt for pure vanilla for the best taste.
• Baking Soda – Serves as a leavening agent; baking powder can be used but may alter texture slightly.
• Salt – Balances sweetness and enhances flavors; sea salt offers a delightful twist.
• Chocolate Chips – The star ingredient, providing richness; feel free to swap with chopped chocolate or even white chocolate chips for variety.
These Classic Chewy Chocolate Chip Cookies are sure to be a hit at any occasion!
Step‑by‑Step Instructions for Classic Chewy Chocolate Chip Cookies
Step 1: Preheat the Oven
Begin by preheating your oven to 350°F (175°C). This ensures that by the time you finish preparing your cookie dough, the oven is hot and ready to bake. Preheating is key for achieving that perfect golden-brown finish on your Classic Chewy Chocolate Chip Cookies.
Step 2: Cream the Butters and Sugars
In a large mixing bowl, cream together 1 cup of unsalted butter, ¾ cup of granulated sugar, and ¾ cup of brown sugar until the mixture is smooth and creamy, approximately 2-3 minutes. Use a hand mixer or stand mixer on medium speed for the best results. The mixture should appear light and fluffy, which helps create chewy cookies.
Step 3: Add Eggs and Vanilla
Next, add in 2 large eggs, one at a time, mixing well after each addition. Incorporate 1 teaspoon of pure vanilla extract after the eggs. Continue mixing until well combined, ensuring that you scrape the sides of the bowl to catch any unmixed ingredients. This step is essential for achieving that rich flavor in your Classic Chewy Chocolate Chip Cookies.
Step 4: Combine Dry Ingredients
In a separate bowl, whisk together 2 cups of all-purpose flour, 1 teaspoon of baking soda, and ½ teaspoon of salt. Make sure the ingredients are thoroughly mixed, as this will evenly distribute the leavening agent and enhance the cookie’s texture. The flour mixture should feel light and powdery, ready to be folded into the wet ingredients.
Step 5: Mix Wet and Dry Ingredients
Gradually add the dry mixture to the wet ingredients, gently mixing with a spatula or wooden spoon until just combined. Avoid overmixing, as this can make your cookies tough. You want your Classic Chewy Chocolate Chip Cookies to retain that soft, tender bite, so stop mixing as soon as you see no dry flour.
Step 6: Fold in Chocolate Chips
Now, fold in 1 to 2 cups of chocolate chips into your cookie dough, distributing them evenly. Feel free to mix in a combination of semisweet, dark, or even white chocolate chips for added flavor. The dough should be thick and hold together, with chocolate pieces peeking through.
Step 7: Scoop Dough onto Baking Sheet
Using a cookie scoop or tablespoon, drop rounded balls of dough onto a baking sheet lined with parchment paper, spacing them about 2 inches apart. This distance allows the cookies to spread comfortably while baking. You should have about 12 cookies per batch to ensure even baking.
Step 8: Bake Until Golden
Place the baking sheet in your preheated oven and bake for 10-12 minutes. Keep an eye on the cookies; once the edges turn golden brown and the centers look set but slightly soft, it’s time to remove them. This visual cue is crucial for maintaining that chewy center in your Classic Chewy Chocolate Chip Cookies.
Step 9: Cool on the Baking Sheet
Once baked, allow the cookies to cool on the baking sheet for about 5 minutes. They will continue to firm up during this time. After a short wait, transfer the cookies onto a wire rack to cool completely. This process is essential for enjoying the full flavor and texture of your freshly baked cookies.
What to Serve with Classic Chewy Chocolate Chip Cookies
Indulging in warm chocolate chip cookies creates a delightful moment, and enhancing it with the perfect pairings makes it even sweeter.
- Cold Milk: A classic companion to cookies, milk balances sweetness and enriches that comforting flavor.
- Coffee: The rich, aromatic notes of coffee create a delightful contrast with the sweetness, perfect for a cozy snack.
- Vanilla Ice Cream: Sinking a warm cookie into creamy vanilla ice cream is pure bliss, creating a heavenly dessert experience.
- Fresh Berries: The bright, juicy flavor of strawberries or raspberries adds a refreshing touch to the rich chocolatey goodness.
- Peanut Butter Spread: A smear of peanut butter brings a deliciously nutty contrast to the sweet cookie, making each bite even more indulgent.
- Chocolate Sauce Drizzle: Elevate the experience with a drizzle of warm chocolate sauce for an extravagant treat that no one can resist.
- Nutty Granola Parfait: Layer warm cookie pieces with yogurt and granola for a unique twist on dessert, blending textures and flavors beautifully.
- Whipped Cream Topping: Light, airy whipped cream is the perfect addition to cookies, offering a fluffy contrast to their chewy goodness.
- Herbal Tea: A soothing cup of herbal tea offers a gentle balance to the sweetness, making it a delightful pairing for afternoon snacks.
Storage Tips for Classic Chewy Chocolate Chip Cookies
Room Temperature: Store your cookies in an airtight container at room temperature for up to 1 week to maintain freshness and flavor.
Fridge: For extended freshness, you can refrigerate the cookies in a sealed container for up to 10 days, although this may slightly alter their texture.
Freezer: Freeze your cookies in a single layer on a baking sheet, then transfer them to a zip-top bag for up to 3 months. They can be enjoyed later without any loss of flavor.
Reheating: To enjoy warm cookies, simply reheat in the microwave for 10-15 seconds or in a preheated oven at 350°F (175°C) for 5 minutes, bringing back that freshly baked taste!
Expert Tips for Classic Chewy Chocolate Chip Cookies
Room Temperature Butter: Ensure your butter is at room temperature for easy creaming; this helps incorporate air for a lighter texture.
Avoid Overmixing: Once you add the flour, mix just until combined. Overmixing can lead to tough cookies instead of the desired soft and chewy ones.
Chill the Dough: For extra flavor and less spreading, chill your dough for 30-60 minutes before baking; this step is essential for achieving stunning Classic Chewy Chocolate Chip Cookies.
Watch Baking Time: Keep a close eye while baking; slightly underbaking will result in soft centers that maintain a chewy texture.
Customize Wisely: Feel free to add nuts or dried fruits, but keep in mind that adding too many ingredients may alter the cookie’s texture and chewiness.
Storage Tips: Store cooled cookies in an airtight container to maintain freshness; they stay delightful for up to a week!
Chocolate Chip Cookie Variations
Feel free to get creative and make these cookies uniquely yours with these delightful twists and substitutions!
- Gluten-Free: Use a gluten-free flour blend in place of all-purpose flour for a deliciously chewy cookie that everyone can enjoy.
- Nutty Addition: Incorporate chopped walnuts or pecans for a satisfying crunch that complements the sweetness of the chocolate.
- Fruity Twist: Add dried cranberries or cherries for a fruity burst that pairs beautifully with chocolate—such a fun flavor surprise!
- Oatmeal Surprise: Mix in 1 cup of rolled oats for a heartier cookie that adds texture and a wholesome taste.
- White Chocolate Delight: Swap regular chocolate chips for white chocolate chips or even a mix of both for a sweeter experience.
- Cinnamon Infusion: Sprinkle in a teaspoon of cinnamon to introduce a warm spice that wonderfully complements the chocolate.
- Chili Chocolate: For a hint of heat, add a pinch of cayenne pepper to your dough, creating a spicy-sweet combination that excites the palate.
- Chilled Dough: Try chilling the cookie dough for 30 minutes before baking for an extra chewy bite and enhanced flavors, reminiscent of those fresh-baked bakery treats!
Don’t forget to enjoy these cookies alongside our Garlic Parmesan Chicken for an exciting twist on your meal!
Make Ahead Options
These Classic Chewy Chocolate Chip Cookies are perfect for meal prep enthusiasts! You can prepare the dough up to 3 days in advance by scooping it into rounded balls and placing them on a baking sheet. Then, simply cover the sheet with plastic wrap and refrigerate. For longer storage, freeze the dough for up to 1 month. When you’re ready to bake, there’s no need to thaw; just add a couple of extra minutes to the baking time for frozen dough. This way, you’ll always have fresh cookies at your fingertips, ready to satisfy any sweet craving without the usual wait!
Classic Chewy Chocolate Chip Cookies Recipe FAQs
How do I choose the best chocolate chips?
Absolutely! For the best flavor, I recommend using high-quality semisweet chocolate chips, as they provide a nice balance of sweetness and richness. If you love darker notes, opt for dark chocolate chips. Alternatively, feel free to mix and match with white chocolate or even chopped chocolate bars for a more gourmet touch!
What’s the best way to store my cookies?
Very! After your delicious cookies have cooled, store them in an airtight container at room temperature for up to 1 week. For even longer freshness, consider refrigerating them in a sealed container for up to 10 days, though be aware that this might slightly change their texture.
Can I freeze the cookie dough?
Absolutely! Freezing the dough is a great option. Just scoop rounded balls of dough onto a baking sheet lined with parchment paper and freeze until solid, about 1-2 hours. Then, transfer the frozen dough balls to a zip-top bag and label it. They can last up to 3 months in the freezer. When ready to bake, you can simply add a minute or two to the baking time straight from frozen.
What should I do if my cookies spread too much while baking?
Very common! If your cookies spread too much, there could be a few reasons. First, ensure your butter is at the correct temperature—room temperature is best—so it creams well but isn’t too melted. Additionally, chilling your dough for 30-60 minutes before baking can help. This step prevents excessive spreading while also enhancing flavor. Finally, if your dough seems too soft after mixing, you can add a bit more flour, about a tablespoon at a time, until it reaches the right consistency.
Are there any dietary considerations I should be aware of?
Definitely! For those with dietary restrictions, you can use gluten-free flour blends to make these cookies gluten-free. Additionally, substitute dairy products like butter with vegan margarine and replace eggs with flax eggs (1 tablespoon of ground flaxseed mixed with 2.5 tablespoons of water for each egg) for a vegan version. Always double-check your chocolate chip brand for any hidden allergens if you’re accommodating food sensitivities!
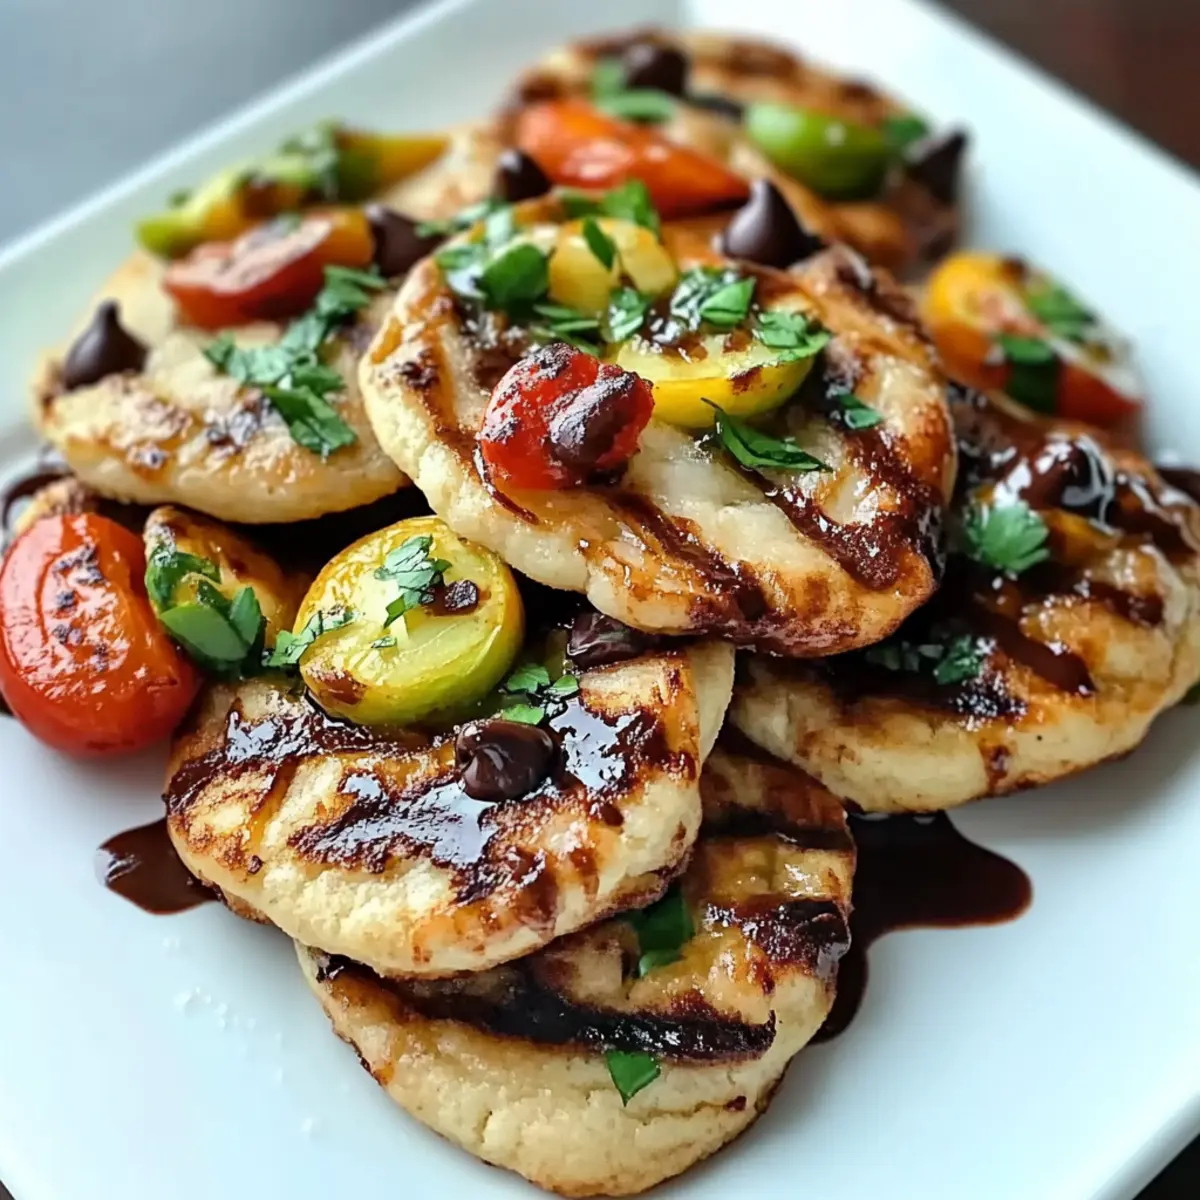
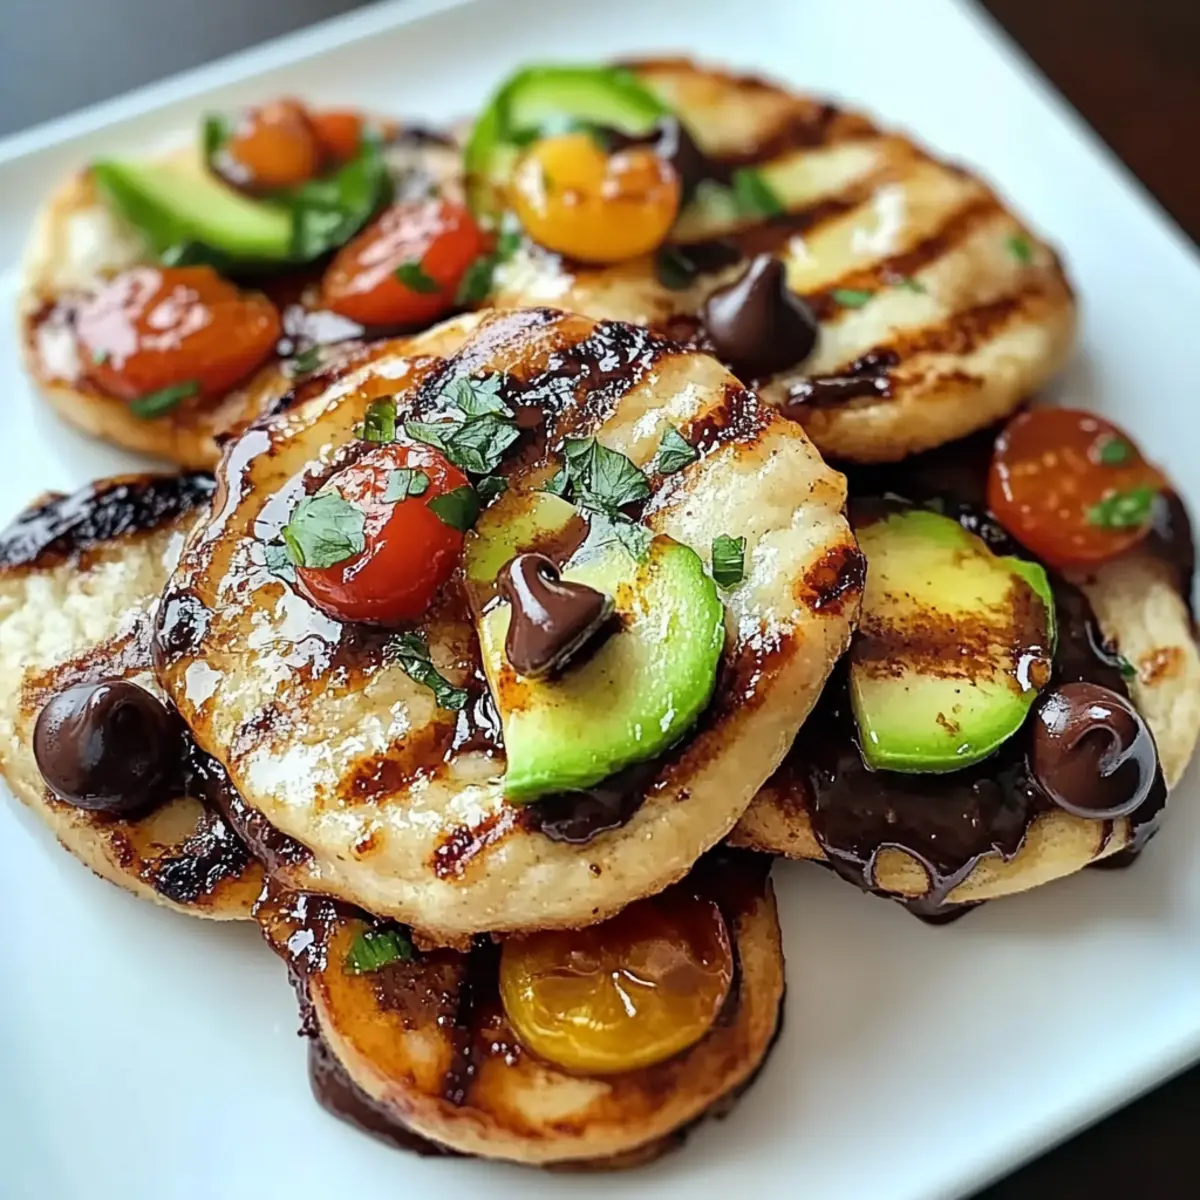
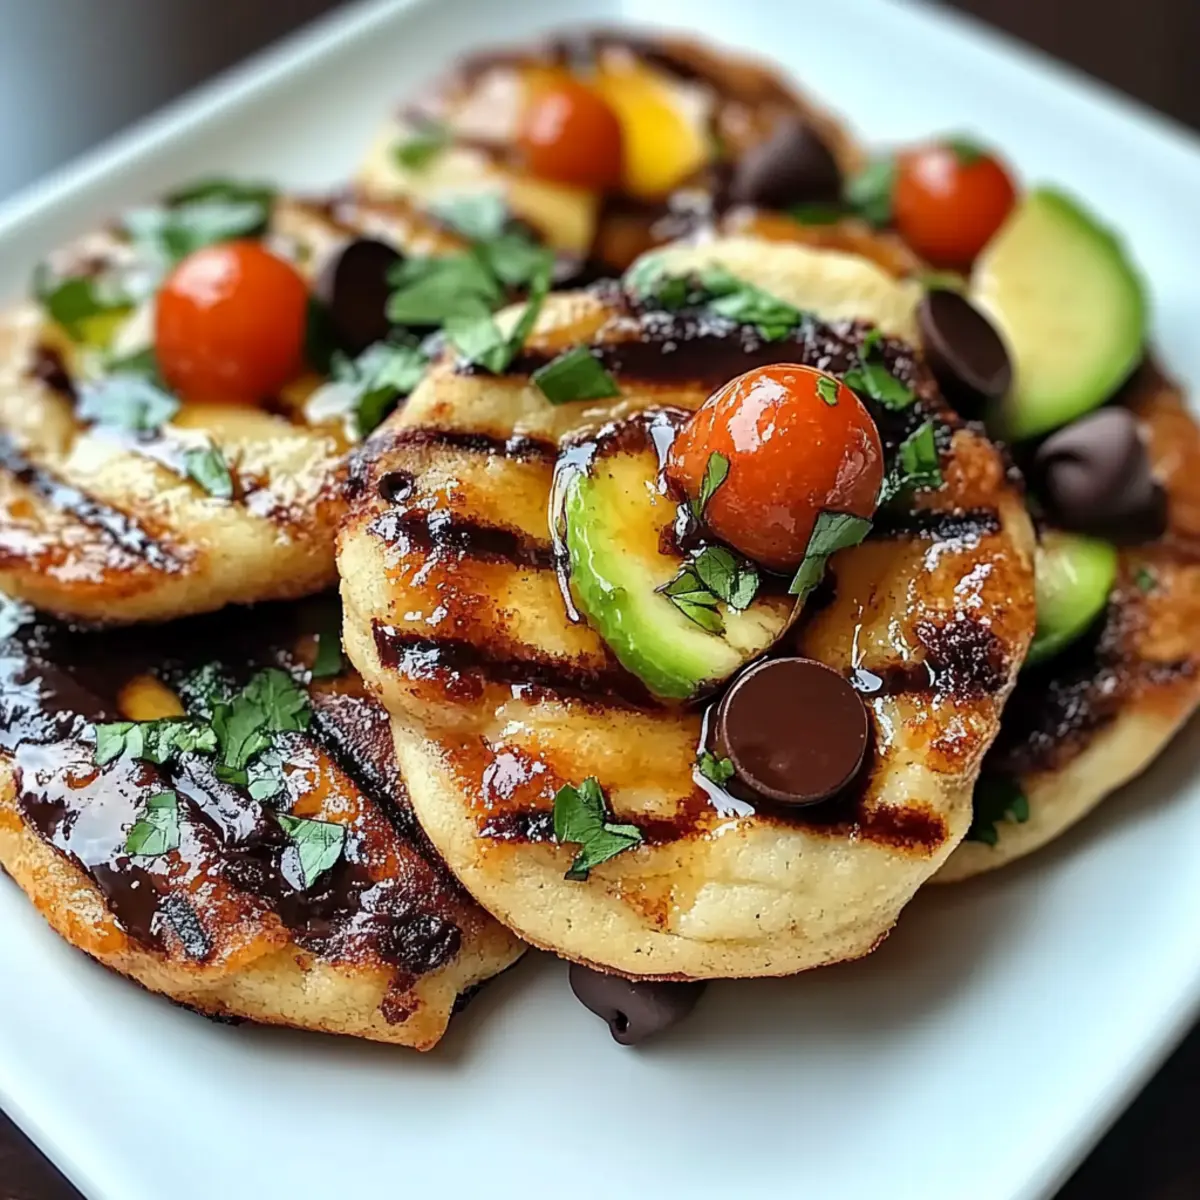
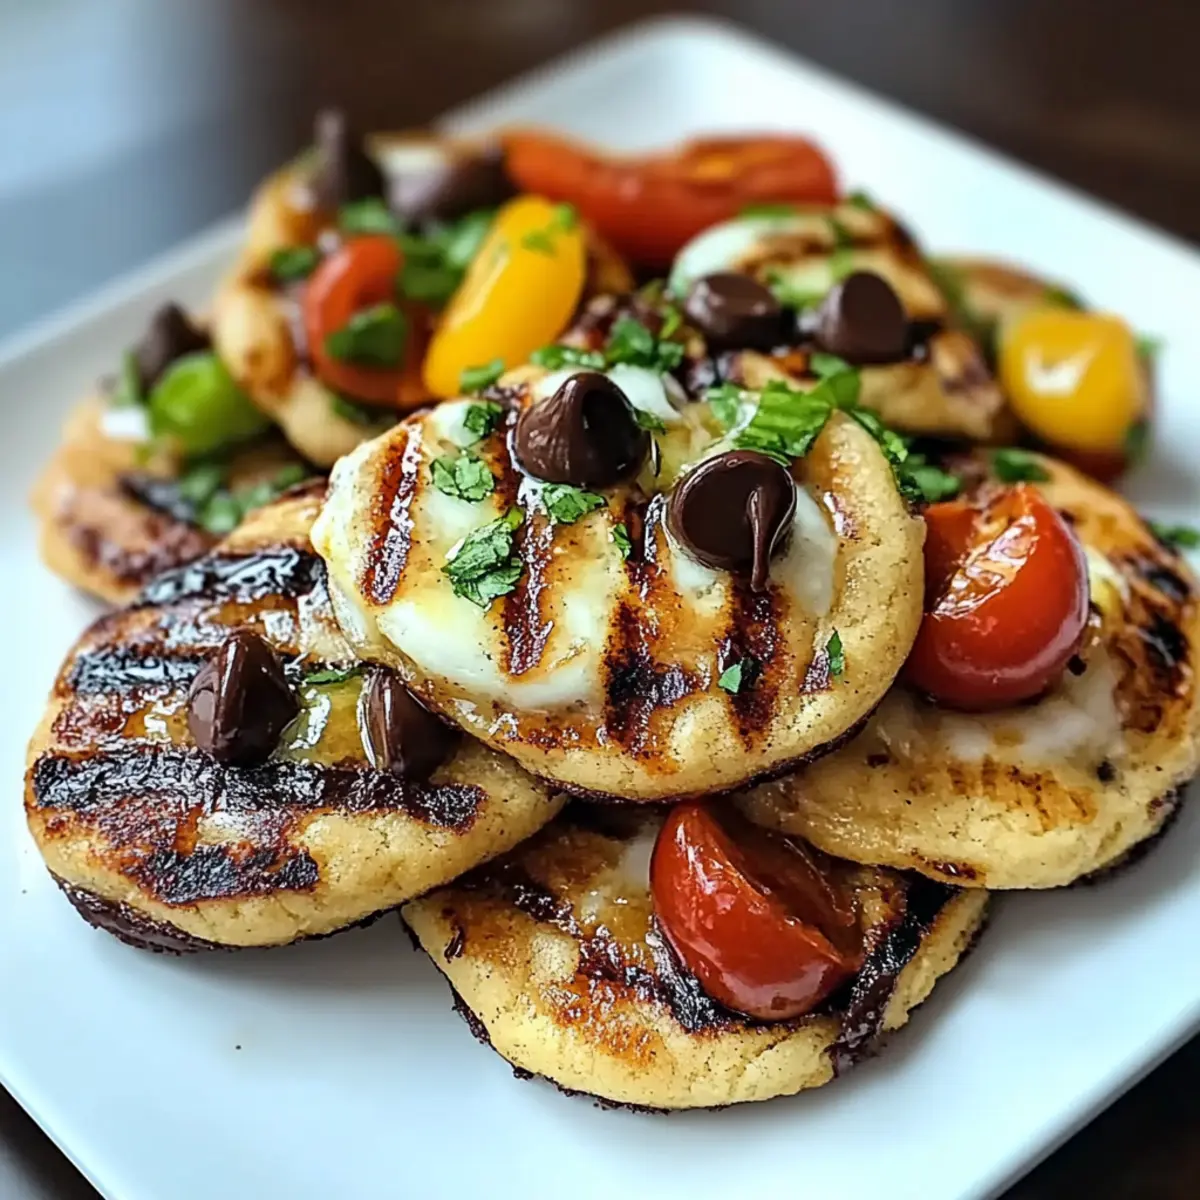
Grilled California Avocado Chicken for a Zesty Summer Feast
Ingredients
Equipment
Method
- In a mixing bowl, combine olive oil, lemon juice, garlic, cumin, paprika, salt, and black pepper. Add the chicken breasts and coat well. Cover and marinate in the refrigerator for at least 30 minutes.
- Preheat the grill to medium-high heat. Remove the chicken from the marinade and discard the marinade.
- Place the chicken on the grill and cook for 6-8 minutes per side or until the internal temperature reaches 165°F (75°C).
- While the chicken is grilling, prepare the avocados. Once cooked, remove the chicken from the grill and let it rest for a few minutes.
- Slice the grilled chicken and serve topped with sliced avocados, chopped cilantro, and lime wedges. Add a dollop of sour cream on the side.
Leave a Reply