
As I stood in my kitchen, the sweet scent of melting chocolate and invigorating peppermint wafted through the air, instantly lifting my spirits. The holidays are the perfect time for baking, and these Quick & Simple Christmas Peppermint Oreo Cookies are my go-to crowd-pleaser that never fails to impress. With just a handful of ingredients, you can whip up these festive treats in under 30 minutes, making them ideal for impromptu gatherings or cozy family nights. Not only do they beautifully showcase the classic flavors of the season, but their ease of preparation means you’ll have more time to savor those precious moments with loved ones. Are you ready to dive into the holiday spirit and fill your home with the joy of baking?

Why Make Christmas Peppermint Oreo Cookies?
Quick and Easy: With a prep time of just 30 minutes, these cookies are perfect for even the busiest holiday schedules.
Festive Flavors: The delightful fusion of peppermint and chocolate creates a seasonal treat that will surely impress your guests.
Flexible Ingredients: You can easily swap out components like using mint Oreos or different types of chocolate chips to customize your batch!
Crowd-Pleasing: These cookies are sure to be a hit at any gathering, complementing your holiday cookie platter alongside treats like Peppermint Kiss Cookies and Chocolate Chip Cookies.
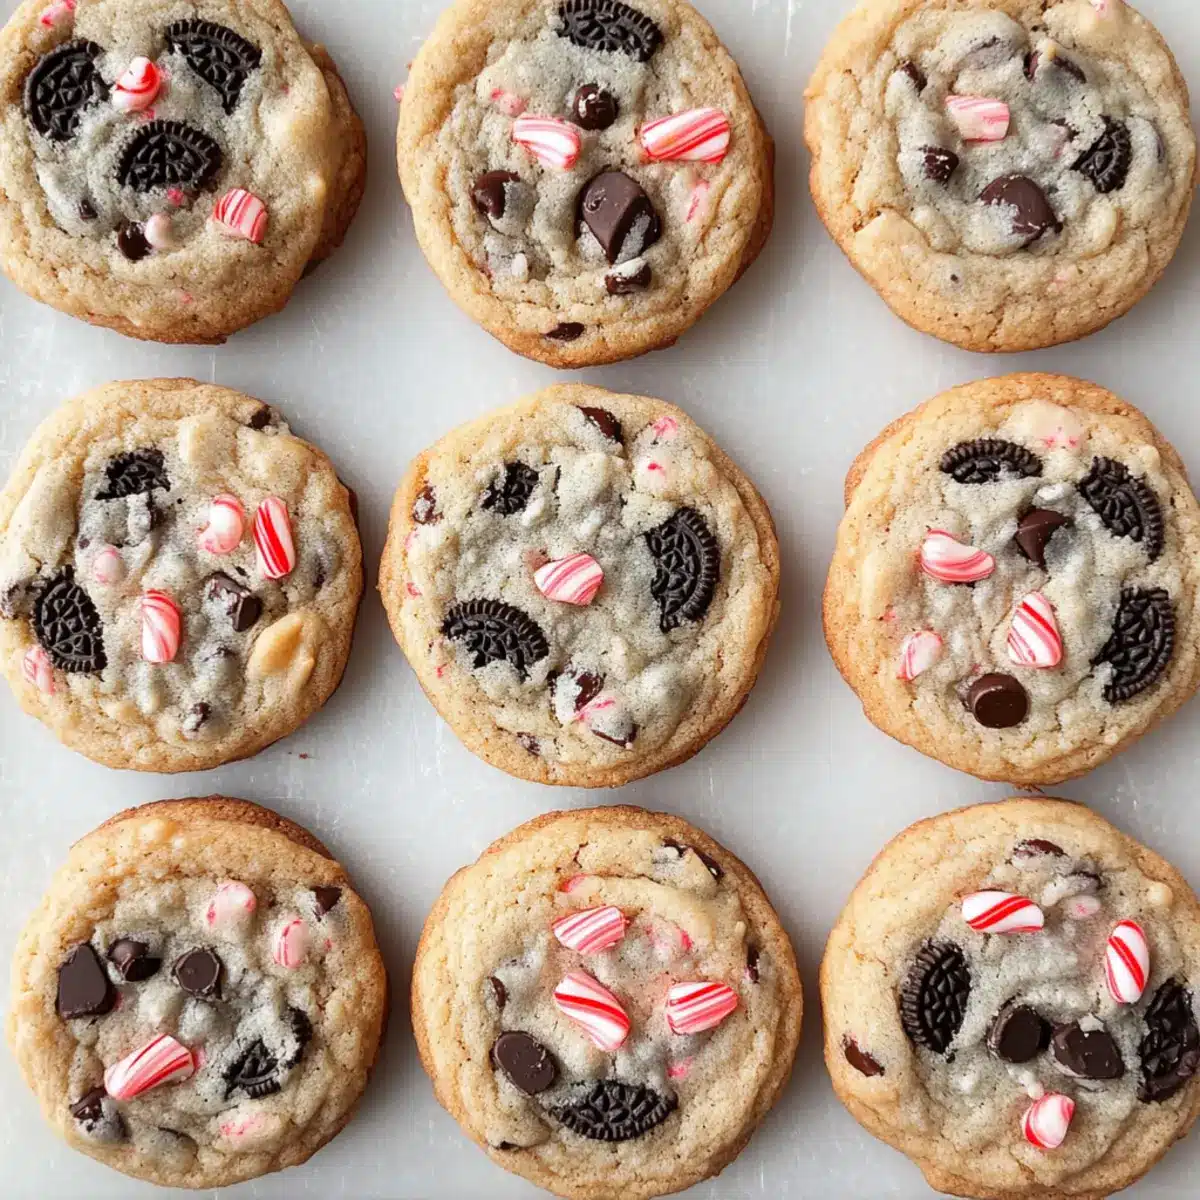
Visual Appeal: Their chunky, colorful appearance makes them a stunning centerpiece for any festive dessert table, instantly brightening up the atmosphere.
Christmas Peppermint Oreo Cookies Ingredients
• Get ready to bring a festive touch to your kitchen with these delightful cookies!
For the Cookie Dough
- Unsalted Butter – Adds richness and helps create a tender texture; substitute with salted butter and reduce added salt.
- Light Brown Sugar – Provides sweetness and moisture; opt for dark brown sugar for a richer flavor.
- Granulated Sugar – Contributes sweetness and aids in cookie structure; no direct substitutes indicated.
- Eggs – Binds everything together and adds moisture; use room-temperature eggs for better mixing.
- Vanilla Extract – Enhances the overall flavor profile; no substitutes suggested.
- All-Purpose Flour – Forms the bulk of the dough; can be replaced with cornstarch for a softer cookie texture.
- Cornstarch – Creates a softer texture; can be substituted with equal flour or omitted for denser results.
- Baking Soda – Acts as a leavening agent; essential for rising the cookies.
- Salt – Balances the flavors; add more if using unsalted butter.
For Festive Flavor
- Andes Peppermint Baking Bits (or Candy Canes) – Adds a cheerful peppermint flavor; substitute with crushed candy canes for added texture.
- Oreo Cookies – Provides a delicious chocolate flavor and chewy texture; consider using mint Oreos for an extra minty kick.
- Semisweet Chocolate Chips – Gives rich chocolatey bites; feel free to swap for white or dark chocolate chips.
These Christmas Peppermint Oreo Cookies are not just easy to make, but they also encapsulate the holiday spirit in every bite!
Step‑by‑Step Instructions for Christmas Peppermint Oreo Cookies
Step 1: Preheat and Prepare Baking Sheet
Begin by preheating your oven to 400°F (200°C). While the oven is heating, line two baking sheets with parchment paper to prevent the cookies from sticking. This will ensure that your Christmas Peppermint Oreo Cookies come out perfectly golden and easy to transfer later.
Step 2: Cream the Butter and Sugars
In a large mixing bowl, combine the unsalted butter, light brown sugar, and granulated sugar. Using an electric mixer on medium-high speed, cream the mixture for about 3-4 minutes until it becomes light and fluffy. This step is crucial for achieving the desired texture in your cookies.
Step 3: Add Eggs and Vanilla
Next, crack in the room-temperature eggs one at a time, followed by the vanilla extract. Beat the mixture on medium speed until all ingredients are fully incorporated, and the batter looks smooth. This will create a rich base that enhances the overall flavor of your Christmas Peppermint Oreo Cookies.
Step 4: Mix the Dry Ingredients
Gradually add in the all-purpose flour, cornstarch, baking soda, and salt to the wet mixture. Mix on low speed until just combined, being careful not to overmix, as this could lead to tough cookies. You want the dough to be soft and slightly sticky at this stage.
Step 5: Fold in Festive Add-ins
With a spatula, gently fold in the Andes peppermint baking bits, crushed Oreo cookies, and semisweet chocolate chips by hand. This step adds delightful bursts of flavor and texture to your Christmas Peppermint Oreo Cookies, making them both festive and irresistible.
Step 6: Portion the Dough
Using a 1/4 cup measure or a cookie scoop, portion out the dough onto the prepared baking sheets. Make sure to space the mounds about 2 inches apart to allow for spreading. This will help your cookies bake evenly and develop that lovely chewy texture.
Step 7: Bake the Cookies
Place the baking sheets in the preheated oven and bake for 10-12 minutes. Keep an eye on them; the edges should be set, while the centers might look slightly underbaked. This will ensure a perfectly chewy bite in your Christmas Peppermint Oreo Cookies once cooled.
Step 8: Cool and Transfer
After baking, allow the cookies to cool on the baking sheets for about 5 minutes. Once slightly firm, transfer them to a wire rack to cool completely. This step is essential for maintaining the delicious chewy texture and letting the flavors meld beautifully in your festive treats.

What to Serve with Quick & Simple Christmas Peppermint Oreo Cookies
As the aroma of freshly baked cookies fills your home, it’s time to create a festive feast with delightful pairings!
-
Hot Cocoa: A warm cup of rich hot cocoa perfectly complements the minty flavors, making it an ideal companion for your cookies. Add a sprinkle of whipped cream for extra holiday cheer!
-
Vanilla Ice Cream: The creaminess of vanilla ice cream contrasts beautifully with the chewy cookie texture, creating a luscious dessert experience. Serve it on the side for a delightful treat!
-
Peppermint Tea: A soothing cup of peppermint tea enhances the refreshing mint notes in the cookies, adding a warm, comforting element to your holiday gathering.
-
Holiday Fruit Salad: A colorful mix of seasonal fruits like pomegranate, citrus, and berries adds a refreshing brightness to the dessert table. The natural sweetness pairs well with the rich chocolateiness.
-
Spiced Apple Cider: Enjoy a cup of warm, spiced apple cider that infuses your space with festive aromas. Its slight acidity balances the cookies’ sweetness, making each bite feel special.
-
Chocolate Fondue: Invite guests to dip chunks of the cookies into silky chocolate fondue. It’s an interactive treat that will brighten any holiday party, adding fun and decadence to your spread!
-
Caramel Sauce: Drizzling warm caramel sauce over your cookie or ice cream lets you indulge in a delightful sweet-salty combo. The added richness complements the peppermint and chocolate beautifully.
-
Bourbon or Peppermint Martini: For adults, pair these cookies with a smooth bourbon or a festive peppermint martini to elevate your holiday spirit. The flavors will dance together in perfect harmony!
-
Christmas Cookie Platter: Showcase your holiday spirit further by creating a cookie platter with assorted treats like gingerbread or sugar cookies. The variety adds visual appeal and new flavors for guests to enjoy!
Christmas Peppermint Oreo Cookies Variations
Feel free to adapt this recipe to suit your taste and dietary preferences; your cookie adventure starts here!
- Minty Twist: Use mint-flavored Oreos instead of classic ones for an extra burst of peppermint flavor.
- Chocolate Lovers: Substitute semisweet chocolate chips with dark chocolate chips or even white chocolate for different taste profiles. A rich chocolate flavor pairs beautifully with the peppermint!
- Nutty Addition: For added texture, fold in chopped walnuts or pecans with the other mix-ins. The nuttiness offers a delightful contrast to the sweetness.
- More Festivity: Swap the Andes peppermint bits for crushed candy canes for an even crunchier cookie. The added texture can elevate each delightful bite.
- Crunchy Texture: Use gluten-free flour in place of all-purpose for a gluten-free version that’s just as delicious. Who says gluten-free can’t be festive?
- Less Sweet: Opt for a sugar substitute if you’re looking to cut down on sugar. You’ll still enjoy a chewy delight without compromising flavor.
- Spicy Kick: Add a pinch of cayenne pepper or chili powder to the dough for those who enjoy a heat that cuts the sweetness. It’s surprisingly delightful!
- Holiday Sprinkles: Incorporate festive sprinkles into the dough for an extra pop of color and celebration, especially delightful for the kids!
These variations will not only cater to different palates but can also bring your personal touch to the holiday cookie tray, perhaps alongside treats like Pumpkin Oat Cookies or Thick Chewy Cookies. Enjoy your baking adventure!
Expert Tips for Christmas Peppermint Oreo Cookies
-
Chill the Dough: Refrigerate your dough for at least 2 hours before baking to enhance flavors and prevent spreading.
-
Proper Butter Temp: Use cold, cubed unsalted butter for the best texture; warm butter can result in flat cookies.
-
Avoid Overmixing: Once you add the flour, mix just until combined to ensure your Christmas Peppermint Oreo Cookies remain soft and chewy.
-
Watch the Bake Time: Pull cookies from the oven while they still appear slightly underbaked—this keeps them perfectly chewy as they cool.
-
Chunky Pieces: Hand crush Oreo cookies instead of using a food processor for chunkier, delightful bites in every cookie!
Make Ahead Options
These Quick & Simple Christmas Peppermint Oreo Cookies are a fantastic choice for meal prep during the bustling holiday season! You can prepare the cookie dough up to 24 hours in advance—just mix and cover it tightly in the refrigerator. Alternatively, for longer storage, you can freeze the dough for up to 3 months. When you’re ready to bake, simply scoop out the desired amount, let it sit at room temperature for about 10-15 minutes, and bake as instructed, adding a couple of minutes to the baking time if using frozen dough. This way, the cookies maintain their delicious chewy texture while saving you time and effort for those festive gatherings!
How to Store and Freeze Christmas Peppermint Oreo Cookies
Room Temperature: Store your cookies in an airtight container at room temperature for up to 5 days to maintain their delicious chewiness.
Freezer: For longer storage, freeze the cookies in a single layer on a baking sheet, then transfer them to a freezer-safe bag or container for up to 3 months.
Dough Freezing: If you want to prepare ahead, freeze the cookie dough by wrapping it tightly in plastic wrap for up to 3 months. Just add a few extra minutes to the baking time when using frozen dough.
Reheating: To enjoy your cookies warm, simply reheat them in the oven at 350°F (175°C) for 5-7 minutes, making those Christmas Peppermint Oreo Cookies taste freshly baked!

Christmas Peppermint Oreo Cookies Recipe FAQs
What’s the best way to select ripe ingredients for this recipe?
Absolutely! For the best butter, choose unsalted and ensure it’s cold and cubed to achieve a tender texture. When selecting eggs, opt for those at room temperature for easier mixing. Look for light brown sugar that feels soft and moist; if it’s hard, give it a gentle squeeze to check!
How should I store my Christmas Peppermint Oreo Cookies?
You should store these cookies in an airtight container at room temperature for up to 5 days. Keeping them covered ensures that they maintain their delightful chewiness. If you have leftovers, I recommend placing parchment paper between layers to prevent sticking!
Can I freeze these cookies, and what’s the process?
Yes, you can freeze your Christmas Peppermint Oreo Cookies! First, let them cool completely and then arrange them in a single layer on a baking sheet. Freeze them for a couple of hours, then transfer to a freezer-safe bag or container for up to 3 months. To enjoy, simply reheat in the oven at 350°F (175°C) for 5-7 minutes for that freshly-baked taste!
What should I do if my cookie dough is too sticky?
If your dough feels excessively sticky, chill it in the refrigerator for about 30 minutes. This will help firm it up. If the dough remains sticky post-chilling, consider dusting your hands with a little bit of flour while shaping the cookies. That will make it easier to scoop and place them onto the baking sheet!
Are there any dietary considerations I should be aware of?
Yes, if you’re baking for someone with allergies, be mindful of the ingredients. This recipe contains common allergens like gluten (in the flour), dairy (in the butter), and eggs. For a dairy-free version, substitute with a vegan butter alternative and use an egg replacer. Always check the packaging of your chocolate and Oreo cookies as well!
How can I adjust the flavor of these cookies?
The flavor can be easily adjusted to match your preferences! For a more robust chocolate flavor, you could substitute semisweet chocolate chips with dark chocolate. If you prefer extra mintiness, crushed peppermint candies can replace the Andes peppermint baking bits. Feel free to get creative—these delightful Christmas Peppermint Oreo Cookies are flexible!
Irresistible Christmas Peppermint Oreo Cookies in 30 Minutes
Ingredients
Equipment
Method
- Preheat your oven to 400°F (200°C) and line two baking sheets with parchment paper.
- Combine the unsalted butter, light brown sugar, and granulated sugar in a large bowl. Cream together for 3-4 minutes until fluffy.
- Add the eggs one at a time followed by vanilla extract; mix until smooth.
- Gradually incorporate all-purpose flour, cornstarch, baking soda, and salt; mix until just combined.
- Fold in the Andes peppermint baking bits, crushed Oreo cookies, and semisweet chocolate chips.
- Portion dough onto prepared baking sheets, spacing them 2 inches apart.
- Bake for 10-12 minutes until edges are set. They may look slightly underbaked in the center.
- Allow cookies to cool on baking sheets for 5 minutes before transferring to a wire rack.
Leave a Reply