
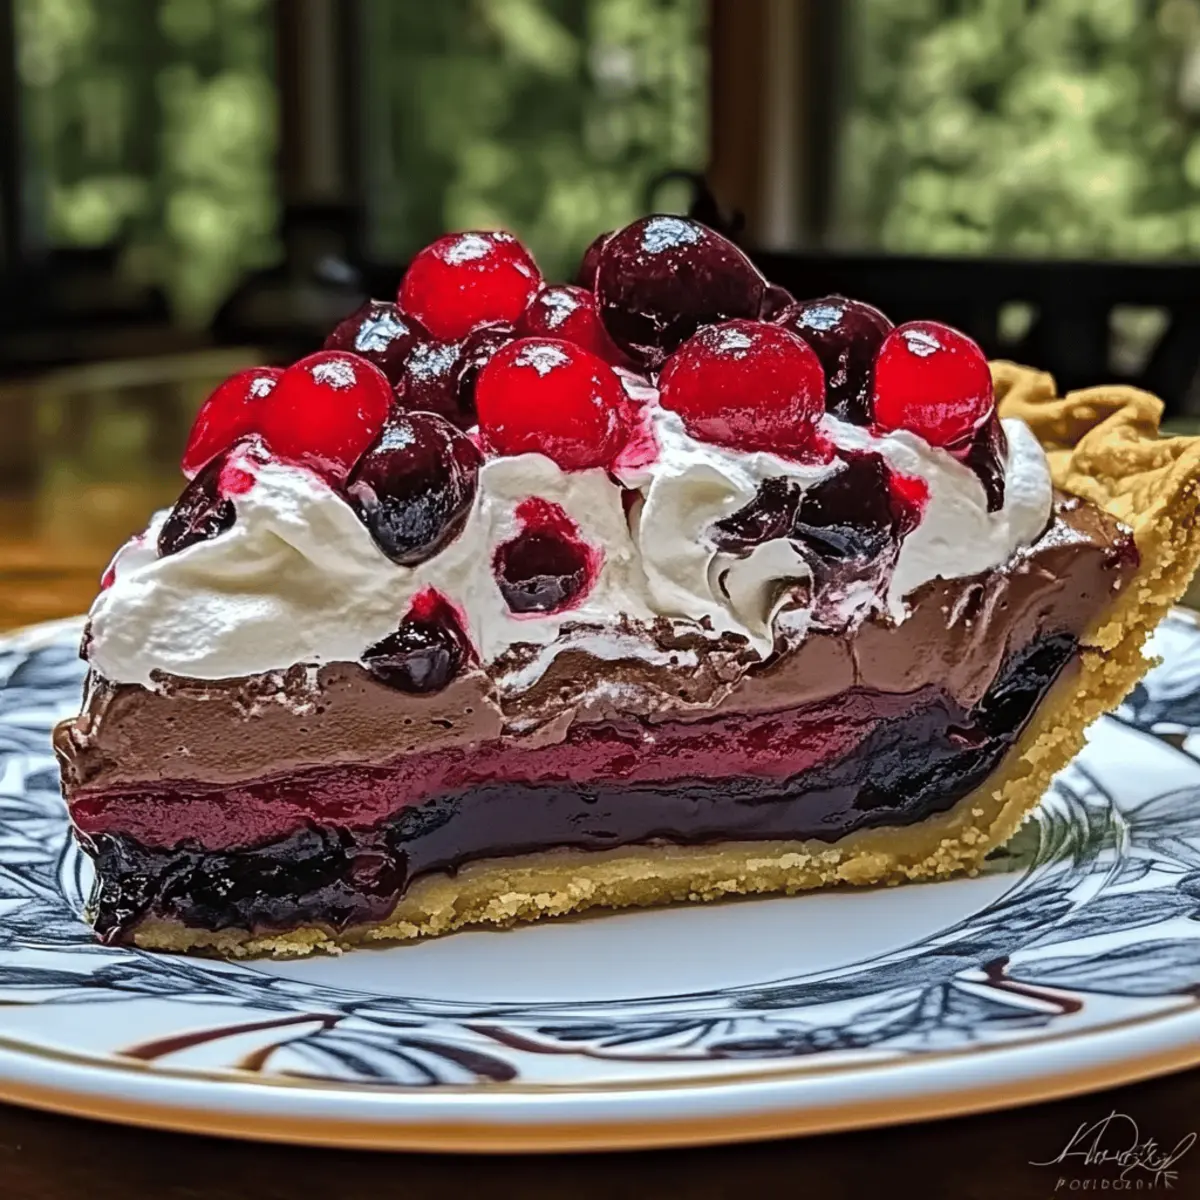
With the first slice, you’re bound to uncover a delightful surprise of flavors within this Chocolate Cherry Cream Pie. The moment you cut into its buttery crust, revealing layers of luscious chocolate and tart cherries, is like opening a treasure chest of comfort. This dessert isn’t just easy to make—it’s a stunning centerpiece for your table, making it a true crowd-pleaser at gatherings or a special treat for cozy nights in. Trust me, the rich chocolate combined with the juicy cherries creates a harmony that’s hard to resist. Plus, it’s perfect for anyone seeking a homemade indulgence that’s both visually impressive and simple to whip together. Are you ready to dive into a slice of happiness?
Why is this pie a must-try?
Indulgent Flavors: The luscious combination of rich chocolate and tart cherries creates a symphony of taste that will leave your taste buds singing.
Easy to Make: Even novice bakers can master this recipe, making it a great option for those new to dessert making.
Impressive Presentation: With its beautiful layers and garnishes, this pie will wow guests at any gathering or celebration.
Versatile Options: Feel free to swap the cherry filling with blueberries or raspberries, or try different chocolate types for a unique twist.
Chocolate Cherry Cream Pie Ingredients
For the Crust
• Butter – Adds richness and helps form the pie crust; substitute with margarine for a dairy-free option.
• Graham Cracker Crumbs – Provides a crunchy base and delightful flavor; use crushed digestive biscuits if needed.
For the Cherry Layer
• Cherry Pie Filling – Offers sweetness and fruity flavor; fresh cherries can be cooked with sugar and cornstarch as a substitute.
For the Chocolate Layer
• Instant Pudding Mix – This forms the chocolate cream layer and provides convenience; a homemade chocolate pudding can be used for a from-scratch option.
• Milk – Needed to prepare the instant pudding; use almond or soy milk for a dairy-free version.
For the Topping
• Whipped Cream – Adds lightness and texture; homemade whipped cream is preferable for better flavor.
• Chocolate Chips – A garnish that adds a burst of chocolate flavor and visual appeal; dark or milk chocolate can be used based on preference.
Step‑by‑Step Instructions for Chocolate Cherry Cream Pie
Step 1: Prepare the Pie Crust
Preheat your oven to 375°F (190°C). Roll out your dough or crumb mixture to fit a pie dish, then gently press it into the base and up the sides. Prick the bottom with a fork to prevent bubbling, and bake for 12-15 minutes until golden brown. Once it’s done, let the crust cool completely before moving on to the next layer.
Step 2: Add the Cherry Layer
Once your pie crust is cool, spread the cherry pie filling evenly over the bottom. Use a spatula to ensure an even layer that encompasses all corners, making every bite delightful. The sweetness of the cherries will create a beautiful contrast with the upcoming layers of your Chocolate Cherry Cream Pie, so aim for an equal coating.
Step 3: Make the Chocolate Layer
In a mixing bowl, prepare your instant pudding mix according to the package instructions, adding milk to create a thick, creamy consistency. If you’re opting for homemade, cook your chocolate pudding until thickened, then cool slightly. Carefully spread this luscious chocolate layer over the cherry filling, ensuring an even distribution that covers all the cherries.
Step 4: Top with Whipped Cream
Using a spatula, dollop generous amounts of whipped cream on top of the chocolate layer, spreading it out smoothly to create a thick, fluffy top. Aim for a light, airy finish that complements the richness of the Chocolate Cherry Cream Pie beneath. This layer adds a delightful texture and visual appeal, making it even more irresistible.
Step 5: Garnish the Pie
Sprinkle chocolate chips over the whipped cream layer for an added touch of decadence. You can also add some fresh cherry halves around the edges for a pop of color and freshness. This not only enhances the flavor but also makes your Chocolate Cherry Cream Pie visually stunning, perfect for impressing guests.
Step 6: Chill and Set
Refrigerate your assembled pie for a minimum of 2 hours, allowing the layers to set beautifully. This chilling time is crucial for achieving the ideal texture and ensuring that each slice holds its shape. When done, your Chocolate Cherry Cream Pie will be ready to slice and serve, revealing its delicious layers.
Expert Tips for Chocolate Cherry Cream Pie
-
Slice with Care: Use a sharp knife to cut clean slices, and wipe the knife between cuts to maintain neat edges for your Chocolate Cherry Cream Pie.
-
Chill Thoroughly: Ensure the pie is fully chilled for at least 2 hours to achieve the best texture before serving; this makes a noticeable difference in your dessert.
-
Make Ahead: Prepare the pie a day in advance for deeper flavors and easier serving on the day of your gathering—just remember to store it properly!
-
Mix It Up: Don’t hesitate to experiment with different fruits for the filling or types of chocolate to customize your Chocolate Cherry Cream Pie to suit your taste.
-
Homemade Whipped Cream: Consider using homemade whipped cream for better flavor and texture; it elevates the entire dessert experience.
What to Serve with Chocolate Cherry Cream Pie
Indulging in a slice of this rich and creamy pie opens up a delightful world of flavors, but pairing it wisely can elevate your dessert experience even further.
-
Fresh Berries: A handful of fresh strawberries or raspberries adds a vibrant, tangy contrast that refreshes the palate after each bite of the creamy pie.
-
Chocolate Sauce: Drizzling a rich, warm chocolate sauce over your slice creates a symphony of chocolatey goodness, enhancing the already decadent experience.
-
Vanilla Ice Cream: The creamy ice cream melts beautifully against the chilled pie, creating a delightful temperature contrast that’s pure bliss.
-
Espresso or Coffee: A strong cup of coffee complements the chocolate and cherry flavors beautifully, enhancing their depth while providing a warm balance.
-
Mint Leaves: A few fresh mint leaves sprinkled on top not only brightens the presentation but also offers a refreshing finish, cutting through the creaminess.
-
Nutty Crumble: A handful of toasted walnuts or pecans gives an unexpected crunch! This adds a rich, earthy flavor that plays against the sweetness of the pie.
-
Coconut Whipped Cream: To switch it up, try topping your pie with a light coconut whipped cream for a tropical twist; it blends beautifully with the chocolate-cherry combination.
-
Sparkling Water or Lemonade: Pairing with a citrusy drink like lemonade adds a refreshing zing that can cut through the pie’s richness, making it a wonderful option for warmer days.
Make Ahead Options
These Chocolate Cherry Cream Pies are perfect for meal prep enthusiasts! You can prepare the crust and cherry layer up to 24 hours in advance, which saves valuable time on the day of serving. Simply bake the crust and let it cool completely before spreading the cherry pie filling evenly. For the chocolate layer, mix the pudding and refrigerate it for up to 3 days in an airtight container. When it’s time to serve, layer the chocolate pudding over the cherries, top with whipped cream, and garnish with chocolate chips. This ensures that your pie remains just as delicious and visually stunning while providing an impressive and hassle-free dessert for your guests!
Storage Tips for Chocolate Cherry Cream Pie
-
Fridge: Keep your pie stored in an airtight container for up to 3 days. This helps maintain freshness and prevents the crust from getting soggy.
-
Freezer: If you’re looking to store it longer, freeze slices wrapped individually in plastic wrap and then in foil for up to 2 months. Thaw in the fridge before serving for best results.
-
Reheating: Though best served chilled, you can refresh the whipped cream by adding a bit more just before serving for an inviting texture.
-
Make-Ahead: For optimal flavor, consider preparing your Chocolate Cherry Cream Pie the day before your event.
Chocolate Cherry Cream Pie Variations
Feel free to explore these delightful twists on your Chocolate Cherry Cream Pie for a personal touch.
-
Berry Bliss: Swap cherry pie filling for blueberry or raspberry for a fresh, fruity spin. Each berry brings its own unique flavor, so don’t hesitate to experiment!
-
Almond Flavor: Add a splash of almond extract to the whipped cream for a surprising layer of warmth that complements both chocolate and cherries beautifully.
-
Chocolate Choice: Use dark chocolate pudding for a richer taste, or opt for white chocolate to create a creamy, sweet contrast that pairs well with cherries.
-
Nutty Crunch: Mix in crushed nuts, such as almonds or pecans, to the crust for an extra crunch that will elevate the texture of your pie.
-
Spicy Kick: Dust some cinnamon or cayenne pepper on top of the whipped cream for a surprising hint of heat that cuts through the sweetness, adding depth to every bite.
-
Coconut Dream: Fold shredded coconut into the whipped cream before topping the pie. This tropical twist will transport your dessert to a sunny paradise.
-
Caramel Drizzle: Drizzle caramel sauce over the whipped cream for an indulgent touch that blends seamlessly with the flavors of chocolate and cherries.
-
Choco-Mint: Add a few drops of peppermint extract to the chocolate pudding for a refreshing minty twist that will awaken your taste buds and add a festive flair.
Explore these variations to surprise and delight your family—after all, the joy of cooking lies in creating personalized tastes! And if you’re in the mood for more delicious recipes, consider trying my Cheddar Sweet Corn Pie or indulging in a slice of Creamy White Chocolate Cheesecake.
Chocolate Cherry Cream Pie Recipe FAQs
What type of cherries should I use for the filling?
Absolutely! You can use cherry pie filling for convenience, but fresh cherries are also a fantastic option. If you choose fresh, pit and halve them, then simmer with a bit of sugar and cornstarch on the stove until the mixture thickens—this usually takes about 5-7 minutes. It creates a delightful homemade flavor that elevates your Chocolate Cherry Cream Pie!
How should I store leftovers?
To keep your Chocolate Cherry Cream Pie fresh, store it in an airtight container in the refrigerator for up to 3 days. This helps maintain the integrity of both the crust and the creamy layers. Be sure to cover the pie with plastic wrap if it’s not in a container to prevent it from drying out.
Can I freeze Chocolate Cherry Cream Pie?
Yes, you can! To freeze individual slices of your pie, wrap them tightly in plastic wrap, followed by aluminum foil to prevent freezer burn. It can be frozen for up to 2 months. When you’re ready to enjoy it, place the slices in the refrigerator overnight to thaw, allowing the flavors to meld nicely again.
What if my pie crust is soggy?
If your crust turns out soggy, it could be from not baking it long enough or filling it while still warm. To prevent this in the future, ensure that you bake the crust until it’s golden brown and let it cool completely before adding the cherry filling. A pre-baked crust should be crisp and withstand the moisture from the filling well!
Is there a way to make this recipe gluten-free?
Absolutely! You can substitute the graham cracker crumbs with a gluten-free cookie crumb or use ground almonds along with melted butter for the crust. For the fillings, check the labels on your pudding mix and cherry filling to ensure they are gluten-free. This way, everyone can enjoy your delectable Chocolate Cherry Cream Pie!
Can pets have chocolate?
No, chocolate is toxic to dogs and some other pets, so be sure to keep any leftovers stored safely away from them. However, if you want a pet-friendly dessert to share, consider making a separate batch with carob powder instead of chocolate, as it offers a sweet flavor without the harmful effects of chocolate!
Irresistible Chocolate Cherry Cream Pie for Your Next Celebration
Ingredients
Equipment
Method
- Preheat your oven to 375°F (190°C). Roll out your dough or crumb mixture to fit a pie dish, then gently press it into the base and up the sides. Prick the bottom with a fork to prevent bubbling, and bake for 12-15 minutes until golden brown. Let the crust cool completely.
- Spread the cherry pie filling evenly over the bottom of the cool pie crust, ensuring an even layer that encompasses all corners.
- Prepare your instant pudding mix according to the package instructions, adding milk to create a thick, creamy consistency. Spread this chocolate layer over the cherry filling, ensuring an even distribution.
- Dollop generous amounts of whipped cream on top of the chocolate layer, spreading it out smoothly to create a thick, fluffy top.
- Sprinkle chocolate chips over the whipped cream layer and optionally add fresh cherry halves around the edges.
- Refrigerate your assembled pie for a minimum of 2 hours to set beautifully.
Leave a Reply