
As the aroma of crispy chicken fills the kitchen, I can’t help but smile; it’s like a warm hug on a plate. Today, I’m excited to share my favorite recipe for Chicken Romano, a delightful dish that combines a crunchy, cheesy coating with tender chicken for a truly satisfying meal. This recipe is not only simple to prepare, but it also adapts beautifully to suit your dietary needs—whether you’re looking for a lighter option or a creamy, dairy-free twist. Perfect for cozy weeknight dinners or impressing guests at special gatherings, Chicken Romano elevates everyday cooking without breaking the bank. What will you serve alongside this cheesy masterpiece: pasta, salad, or perhaps something unexpected? Let’s dive in!
Why is Chicken Romano a Must-Try?
Irresistible crunch: The golden, crispy coating contrasts beautifully with the succulent chicken, delivering a delightful texture in every bite.
Customizable: Whether you’re seeking a lighter meal by baking or a dairy-free option, this recipe is versatile to suit any palate.
Perfect for any occasion: Chicken Romano shines as a weeknight favorite or a show-stopping dish for guests, making it effortlessly impressive.
Quick and easy: With minimal prep time, you can have dinner on the table in under an hour, just like my favorite Garlic Parmesan Chicken.
Flavor-packed: The sharp Romano cheese and aromatic seasonings create a rich flavor profile that’s sure to please the whole family.
Delicious pairings: Serve it alongside spaghetti aglio e olio or a fresh salad for a complete meal that’s sure to satisfy.
Chicken Romano Ingredients
For the Chicken
- Boneless, skinless chicken breasts – Ensure they are pounded to an even thickness for uniform cooking.
- Salt – Enhances the flavor of the chicken and helps to draw out moisture.
- Black pepper – Adds a hint of heat that complements the chicken beautifully.
For the Coating
- All-purpose flour – Acts as a coating layer, making the chicken crispy and helping the egg adhere. Can substitute with almond flour for gluten-free.
- Large eggs – This binding agent helps to create a perfect crust. A flax egg can be used for a vegan alternative.
- Milk – Enhances the egg mixture for a richer coating; non-dairy milk works well for a dairy-free version.
- Grated Romano cheese – Provides that sharp, tangy flavor; can be swapped with Parmesan for a milder taste.
- Italian-style breadcrumbs – Adds crunchy texture and flavor; panko breadcrumbs make it even crunchier.
- Garlic powder – Packs a punch of flavor that deepens the savory notes of the dish.
- Paprika – Gives a warm color and enhances the coating’s flavor profile.
For Frying
- Olive oil – Used for frying to achieve that perfect golden-brown crust; should be heated to about 350°F for best results.
- Unsalted butter – Adds richness and depth of flavor to the frying process, enhancing the overall taste.
For Serving
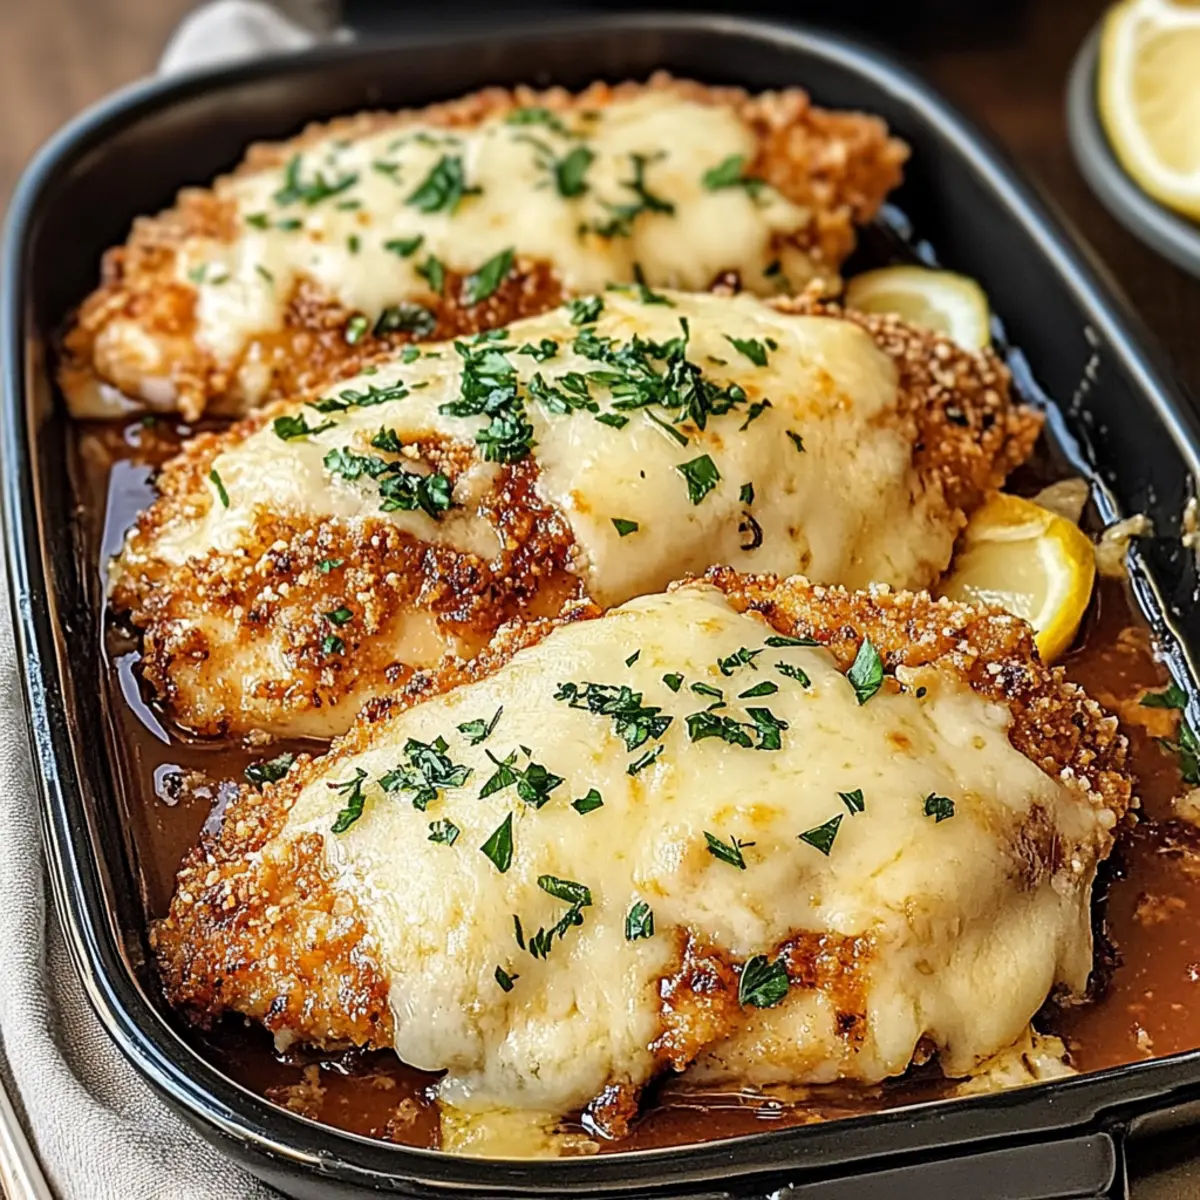
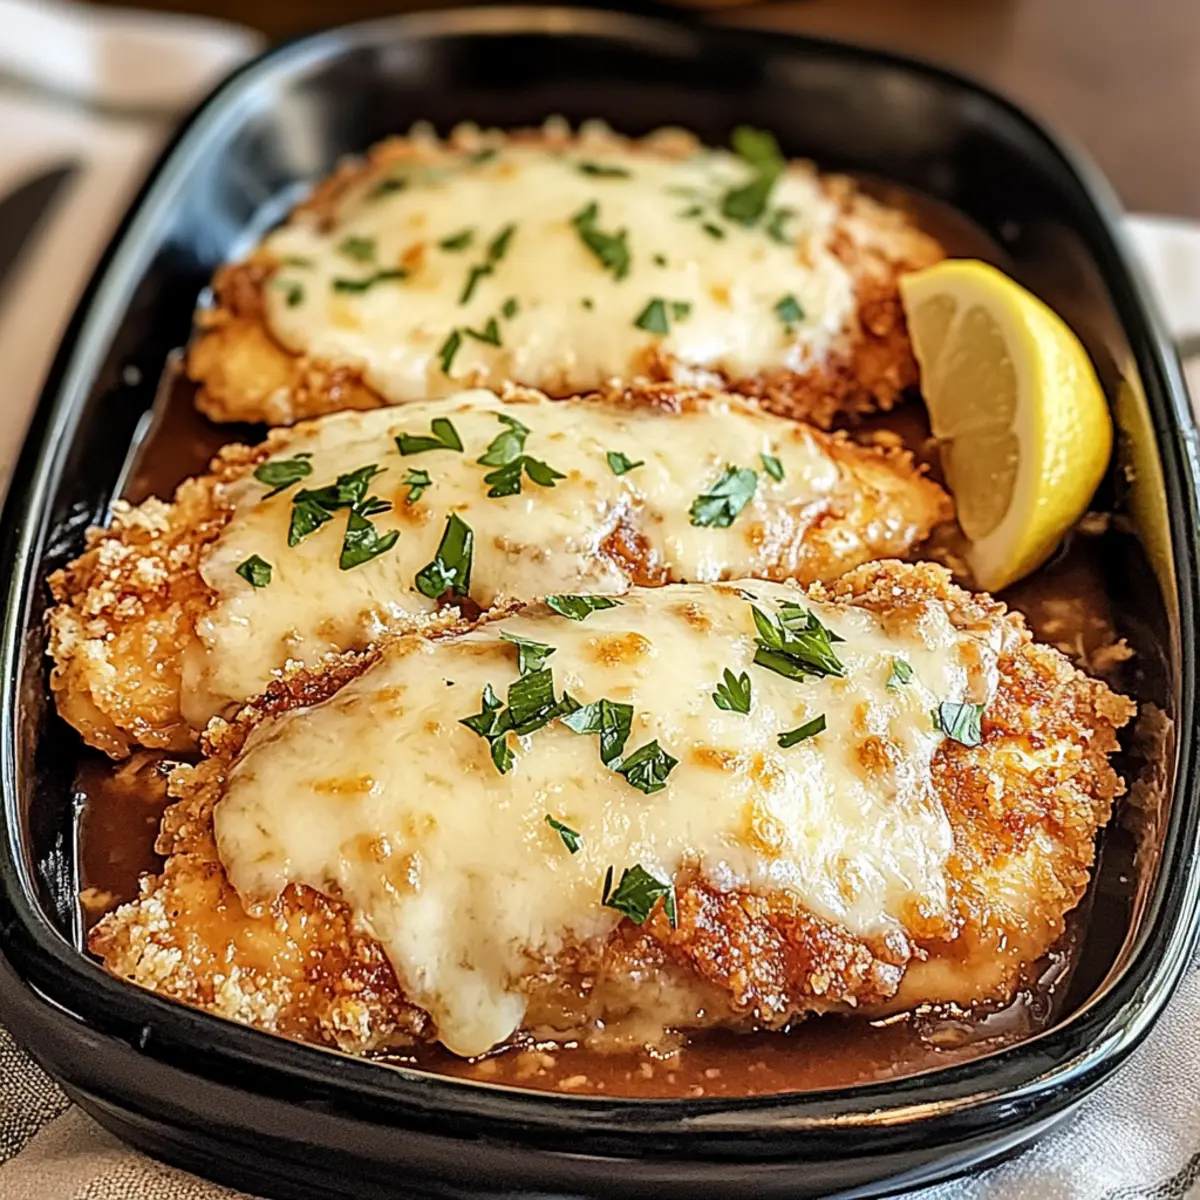
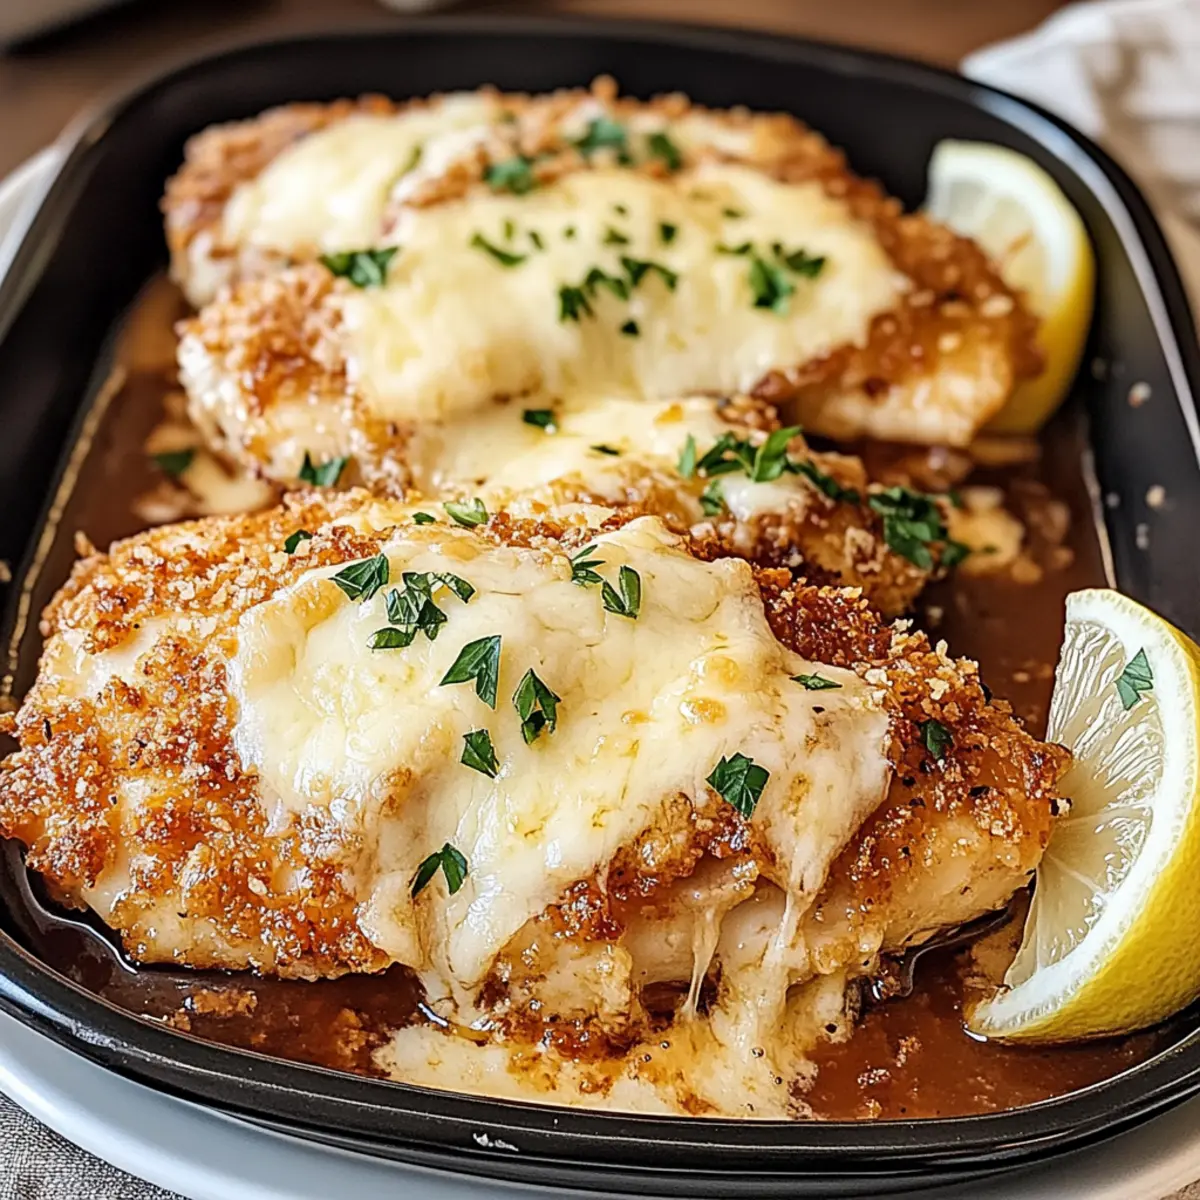
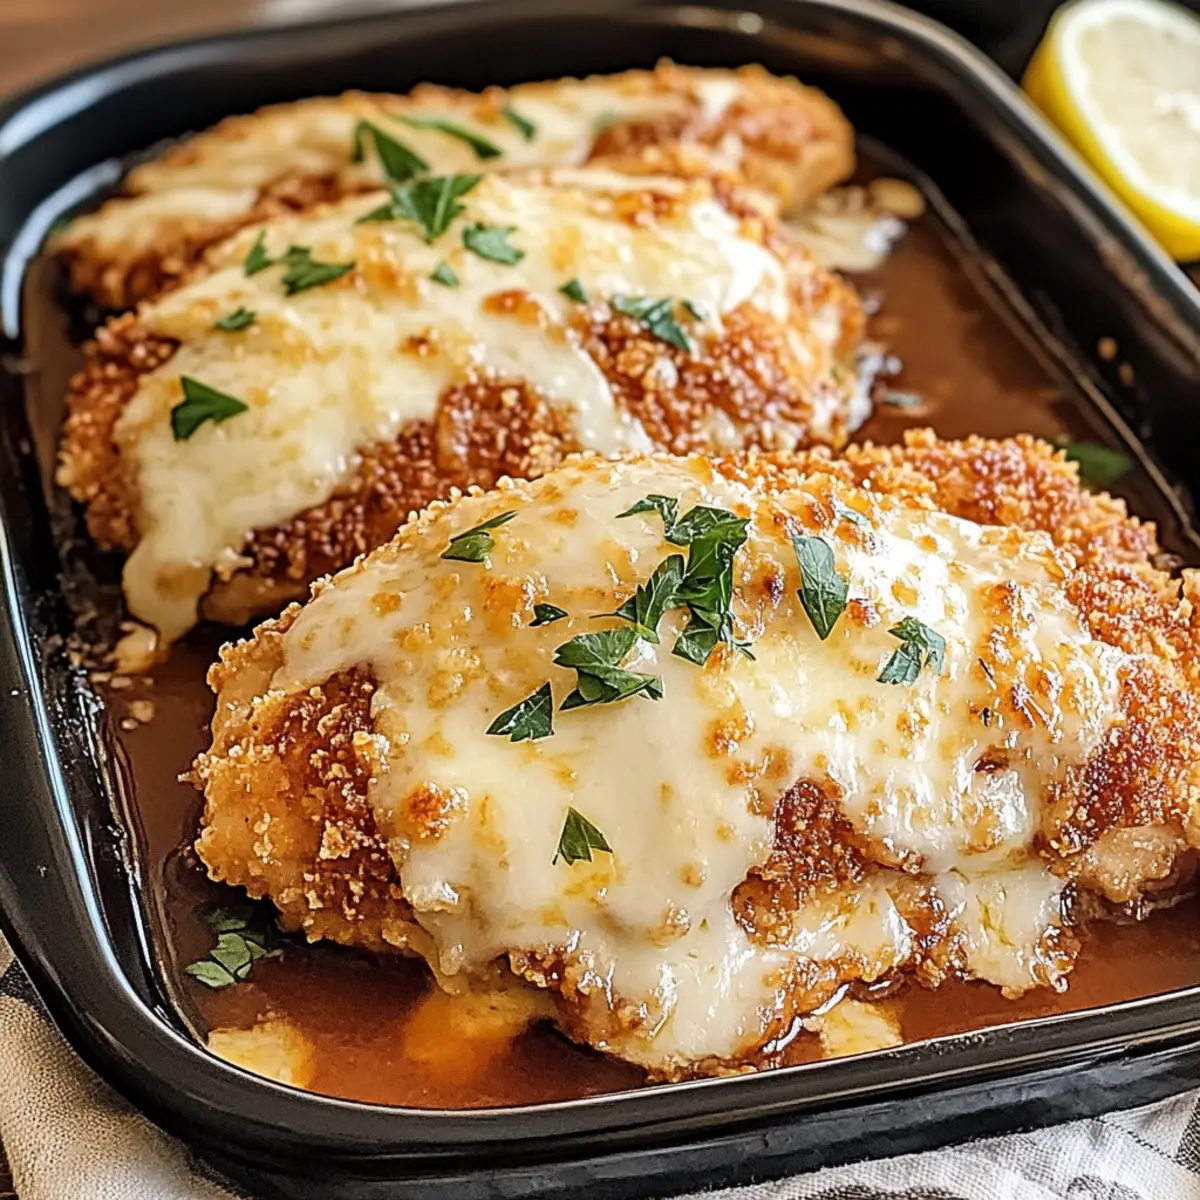
- Fresh parsley (garnish) – Adds a pop of color and freshness when sprinkled on top before serving.
- Lemon wedges – Brightens the dish with acidity and enhances the overall flavor, especially when squeezed over the chicken.
Feel free to explore the delightful world of Chicken Romano and discover its versatility! Whether you enjoy the traditional crispy coating or try a lighter, baked version, this dish promises to be a family favorite.
Step‑by‑Step Instructions for Chicken Romano
Step 1: Prepare the Chicken
Start by placing your boneless, skinless chicken breasts onto a cutting board. If the breasts are thick, slice them horizontally to create even halves, ensuring they’re about ½-inch thick for uniform cooking. Use a meat mallet to gently pound any thicker parts to achieve that perfect thickness, which will help the Chicken Romano cook evenly and become juicy.
Step 2: Set Up Dredging Stations
Arrange three shallow bowls for dredging the chicken. In the first bowl, add all-purpose flour, seasoning it with salt and black pepper. In the second bowl, whisk together large eggs and a splash of milk until frothy. Finally, combine grated Romano cheese, Italian breadcrumbs, garlic powder, and paprika in the third bowl to create a flavorful coating. This process will make coating the Chicken Romano a breeze.
Step 3: Dredge the Chicken
Take one chicken breast from the preparation station and dip it into the flour, ensuring it’s fully coated. Shake off any excess flour and dip it into the egg mixture, allowing the excess to drip back into the bowl. Finally, coat the chicken in the cheesy breadcrumb mixture, pressing firmly to adhere the crumbs. Repeat this process with each piece of chicken to prepare them for frying.
Step 4: Pan-Fry the Chicken
In a large skillet, pour in a healthy amount of olive oil and heat it over medium heat until shimmering, about 5 minutes. Once the oil is hot—test by dropping a breadcrumb in; it should sizzle—carefully place the coated chicken pieces in the skillet. Fry for 3–4 minutes on each side, or until golden brown and crispy, being mindful not to overcrowd the pan to maintain the temperature.
Step 5: Oven Finish the Chicken
Preheat your oven to 375°F (190°C). Once the Chicken Romano is perfectly golden from the skillet, transfer the chicken pieces to a baking sheet lined with parchment paper. Bake the chicken for approximately 10 minutes or until the internal temperature reaches 165°F (74°C) to ensure it’s fully cooked and juicy, while keeping that delightful crunch intact.
Step 6: Rest and Garnish
After baking, remove the Chicken Romano from the oven, and let it rest for a couple of minutes on the baking sheet. This resting time allows the juices to redistribute, keeping the chicken succulent. Once rested, sprinkle fresh parsley on top for a vibrant touch and serve with lemon wedges for an extra pop of brightness that enhances the flavors.
What to Serve with Crispy Chicken Romano?
The delightful crunch and savory explosion of flavors in this dish create a perfect canvas for delicious side dishes and pairings.
- Creamy Mashed Potatoes: The velvety texture of mashed potatoes complements the crispy chicken, making each bite a comforting treat.
- Garlicky Green Beans: Fresh, tender green beans sautéed in garlic add a vibrant crunch that balances the rich flavors of theChicken Romano.
- Lemon Arugula Salad: This peppery salad with a fresh lemon vinaigrette brightens the meal and offers a refreshing contrast to the cheesy chicken.
- Pasta Aglio e Olio: The light, garlic-infused spaghetti serves as a perfect backdrop, allowing the chicken’s rich flavors to shine through.
- Herbed Quinoa: Nutty, fluffy quinoa enhances the meal’s health quotient while providing a lovely texture that complements the tender chicken.
- Roasted Seasonal Vegetables: Caramelized veggies like zucchini and bell peppers add sweetness and color to the plate, creating a harmonious and hearty dish.
- Chilled White Wine: A crisp Sauvignon Blanc or Pinot Grigio beautifully enhances the savory notes of the chicken while refreshing your palate.
- Lemon Sorbet: For dessert, this light and tart option perfectly captures the meal’s bright flavors, leaving you with a refreshing finish.
Expert Tips for Chicken Romano
Hot Oil Test: Ensure the oil is hot enough (about 350°F) by testing with a breadcrumb; it should sizzle immediately upon contact, preventing sogginess.
Avoid Overcrowding: Fry chicken in batches to maintain oil temperature and ensure a crispy, golden-brown coating—overcrowding leads to steam instead of fry.
Let it Rest: Allow the coated chicken to rest for a few minutes before frying; this helps the breading adhere better and improves texture in your Chicken Romano.
Use a Meat Thermometer: Always check that the internal temperature reaches 165°F to guarantee chicken doneness while keeping it juicy.
Customize the Coating: Feel free to mix in different herbs or spices into your breadcrumb mixture—experiment to find the perfect twist for your Chicken Romano!
Make Ahead Options
These Crispy Chicken Romano preparations are perfect for busy weeknights! You can dredge the coated chicken and refrigerate it up to 24 hours in advance, making it simple to whip up this delicious meal. Just follow the dredging process and place the breaded chicken in a single layer on a parchment-lined baking sheet; this prevents sticking and maintains that perfect crunch. When you’re ready to serve, heat your skillet and pan-fry the chicken as directed, then finish in the oven to ensure it’s cooked through. By prepping ahead, you’ll save valuable time while still delivering a delightful, restaurant-quality dinner!
How to Store and Freeze Chicken Romano
Fridge: Refrigerate leftover Chicken Romano in an airtight container for up to 3 days. This keeps it fresh while preserving its crispy texture.
Freezer: Freeze cooked Chicken Romano by letting it cool completely, then store in a freezer-safe container for up to 3 months. Reheat directly from frozen for convenience.
Reheating: For the best results, reheat Chicken Romano in a preheated oven at 350°F for about 10-15 minutes. This restores its crispy coating and warms it through perfectly.
Wrapping: If storing individual pieces, wrap them tightly in plastic wrap before placing them in a container. This prevents freezer burn and keeps flavor intact.
Chicken Romano Variations & Substitutions
Feel free to unleash your creativity and adapt this recipe to suit your taste buds!
- Lighter Version: Use whole wheat flour and bake instead of frying to cut down on fat while preserving flavor.
- Gluten-Free Delight: Swap all-purpose flour with almond flour and use gluten-free breadcrumbs for a completely gluten-free Chicken Romano.
- Dairy-Free Twist: Replace Romano cheese with nutritional yeast and use non-dairy milk for a creamy coating without the dairy.
- Extra Crunch: Opt for panko breadcrumbs in place of Italian-style breadcrumbs for an even crunchier coating that enhances texture.
- Herb Infusion: Add fresh or dried herbs like basil, oregano, or thyme to the breadcrumb mixture for a fragrant flavor boost.
- Zesty Kick: Incorporate red pepper flakes into the breadcrumb mix, providing a subtle heat that will tantalize your taste buds.
- Gourmet Sandwich: Turn the chicken into a sumptuous sandwich on toasted ciabatta, pairing it with fresh toppings like arugula and roasted peppers.
- Charcuterie Style: Slice the cooked chicken and serve it cold on a platter, alongside cheeses, olives, and a drizzle of olive oil for a delightful appetizer.
Whether you savor the classic taste of Chicken Romano or prefer one of these exciting variations, you’re guaranteed a satisfying meal that brings joy to every bite. If you’re in the mood for even more flavors, why not try serving it with Chicken Etouffee Savory or enjoy a side of pasta with Parmesan Crusted Chicken? Happy cooking!
Chicken Romano Recipe FAQs
How do I select the best chicken breasts for Chicken Romano?
Absolutely! Look for boneless, skinless chicken breasts that are uniform in thickness. This will ensure even cooking and prevent dry spots. If possible, choose breasts that feel firm and free from dark spots. Fresh chicken should smell neutral and not have any off-odors.
How should I store leftover Chicken Romano?
You can refrigerate leftover Chicken Romano in an airtight container for up to 3 days. This helps maintain its crunchy texture. Just ensure it’s completely cooled before storing, as this prevents moisture buildup that can make it soggy.
Can I freeze Chicken Romano?
Yes, you can freeze cooked Chicken Romano! First, let it cool completely. Then, wrap each piece tightly in plastic wrap and place them in a freezer-safe container or freezer bag. It’s best used within 3 months for optimal flavor. To reheat, simply bake it in a preheated oven at 350°F for about 15-20 minutes until heated through.
What should I do if my breading falls off during frying?
Very commonly, if the breading is falling off, it might be due to not enough egg mixture or the oil not being hot enough. Ensure that after dredging in flour, you coat the chicken well in the egg mixture and press the breadcrumb mixture firmly into the chicken. Also, make sure your oil is around 350°F; you can test it with a breadcrumb which should sizzle upon contact.
Is Chicken Romano safe for those with dairy allergies?
For anyone with dairy allergies, a dairy-free version is definitely possible! Substitute the Romano cheese with nutritional yeast for a cheesy flavor while keeping it dairy-free. You can also use unsweetened, non-dairy milk in your egg mixture, making it a safe and delicious option.
How can I make Chicken Romano lighter in calories?
If you’re looking for a lighter Chicken Romano, I recommend baking instead of frying. Simply skip the frying step and place the coated chicken directly onto a greased baking sheet. Bake at 375°F for about 20 minutes, or until cooked through, for a deliciously crispy and healthier version!
Crispy Chicken Romano for an Irresistibly Cheesy Dinner
Ingredients
Equipment
Method
- Prepare the Chicken by placing chicken breasts on a cutting board. Pound to ½-inch thickness for even cooking.
- Set Up Dredging Stations with three shallow bowls: flour with salt and pepper, egg mixture with milk, and breadcrumb mixture.
- Dredge the Chicken by coating each piece in flour, then egg, then pressing into the breadcrumb mixture.
- Pan-Fry the Chicken in olive oil over medium heat until golden brown, about 3–4 minutes per side.
- Oven Finish the Chicken by transferring fried pieces to a baking sheet and baking at 375°F for about 10 minutes.
- Rest and Garnish letting chicken rest for a couple of minutes before serving, topped with parsley and lemon wedges.
Leave a Reply