
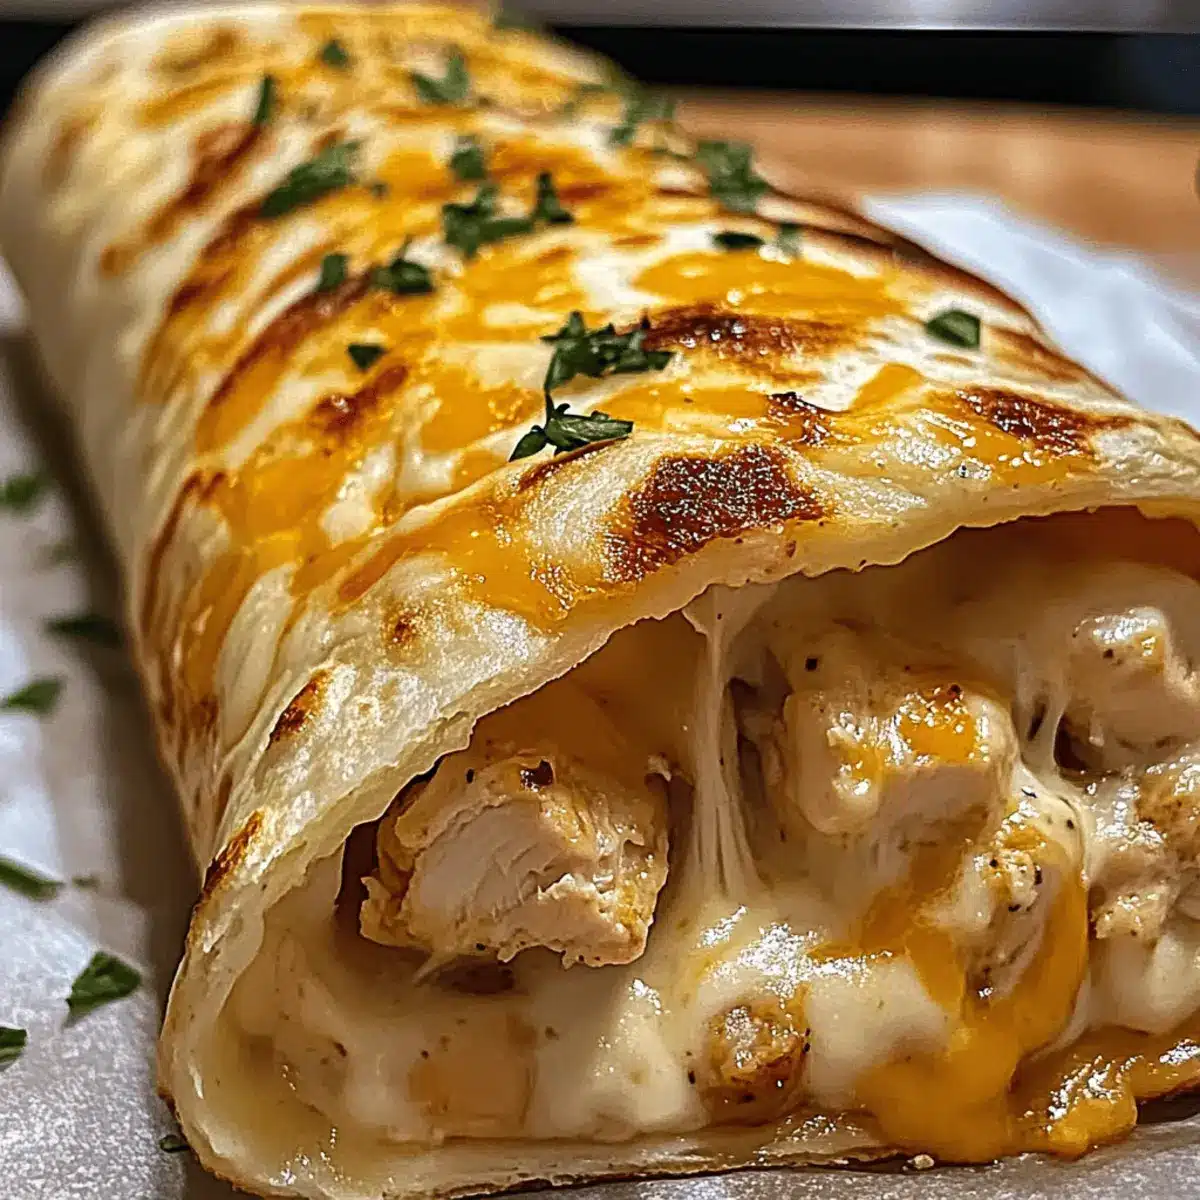
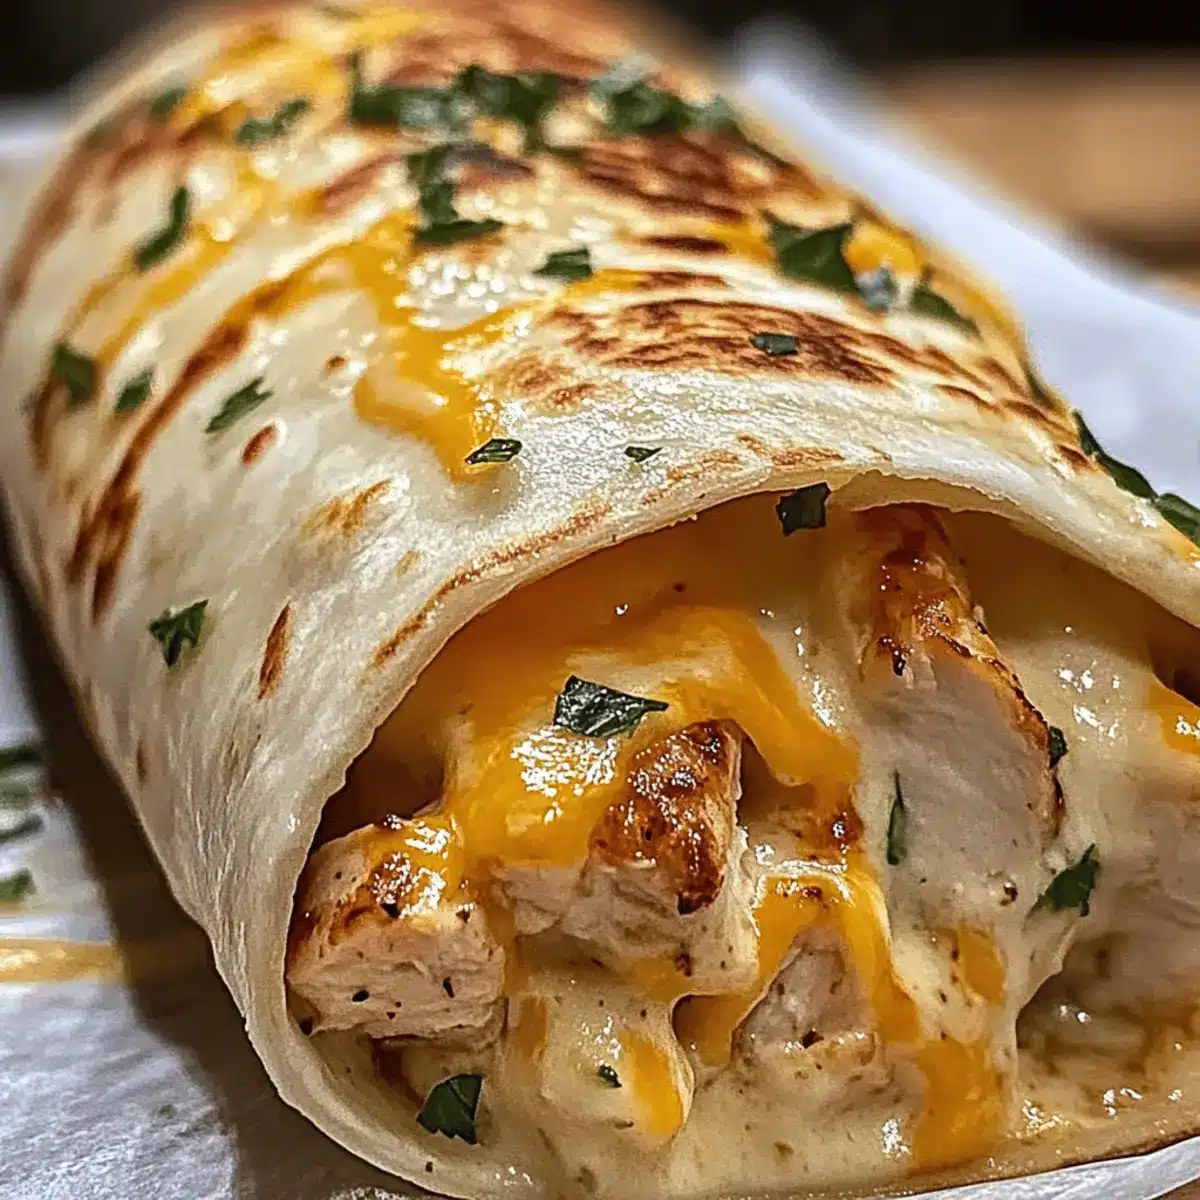
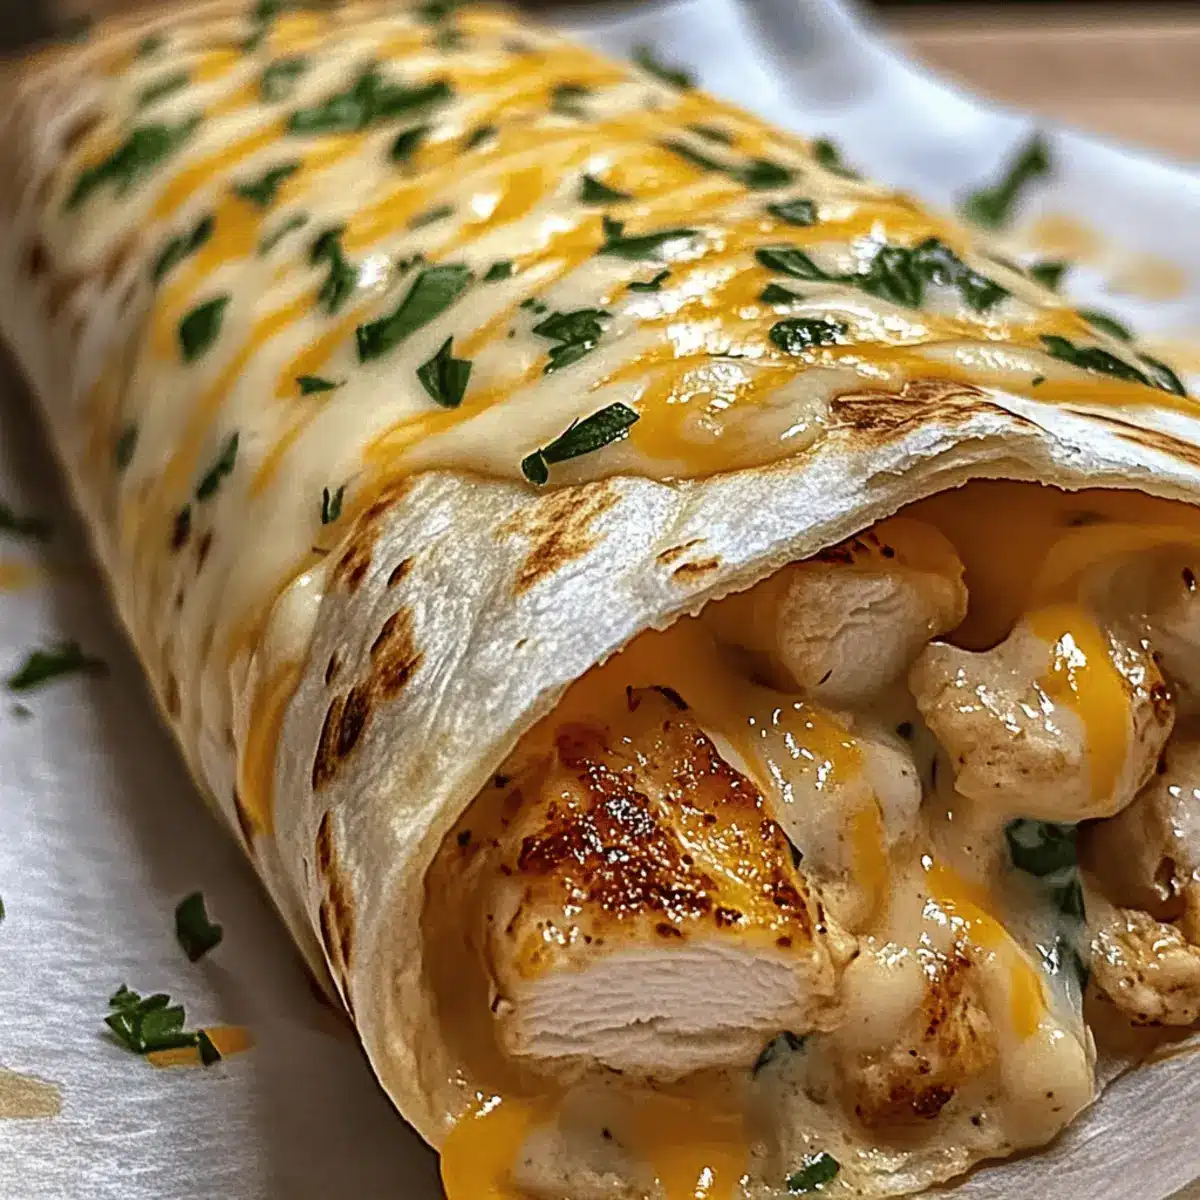
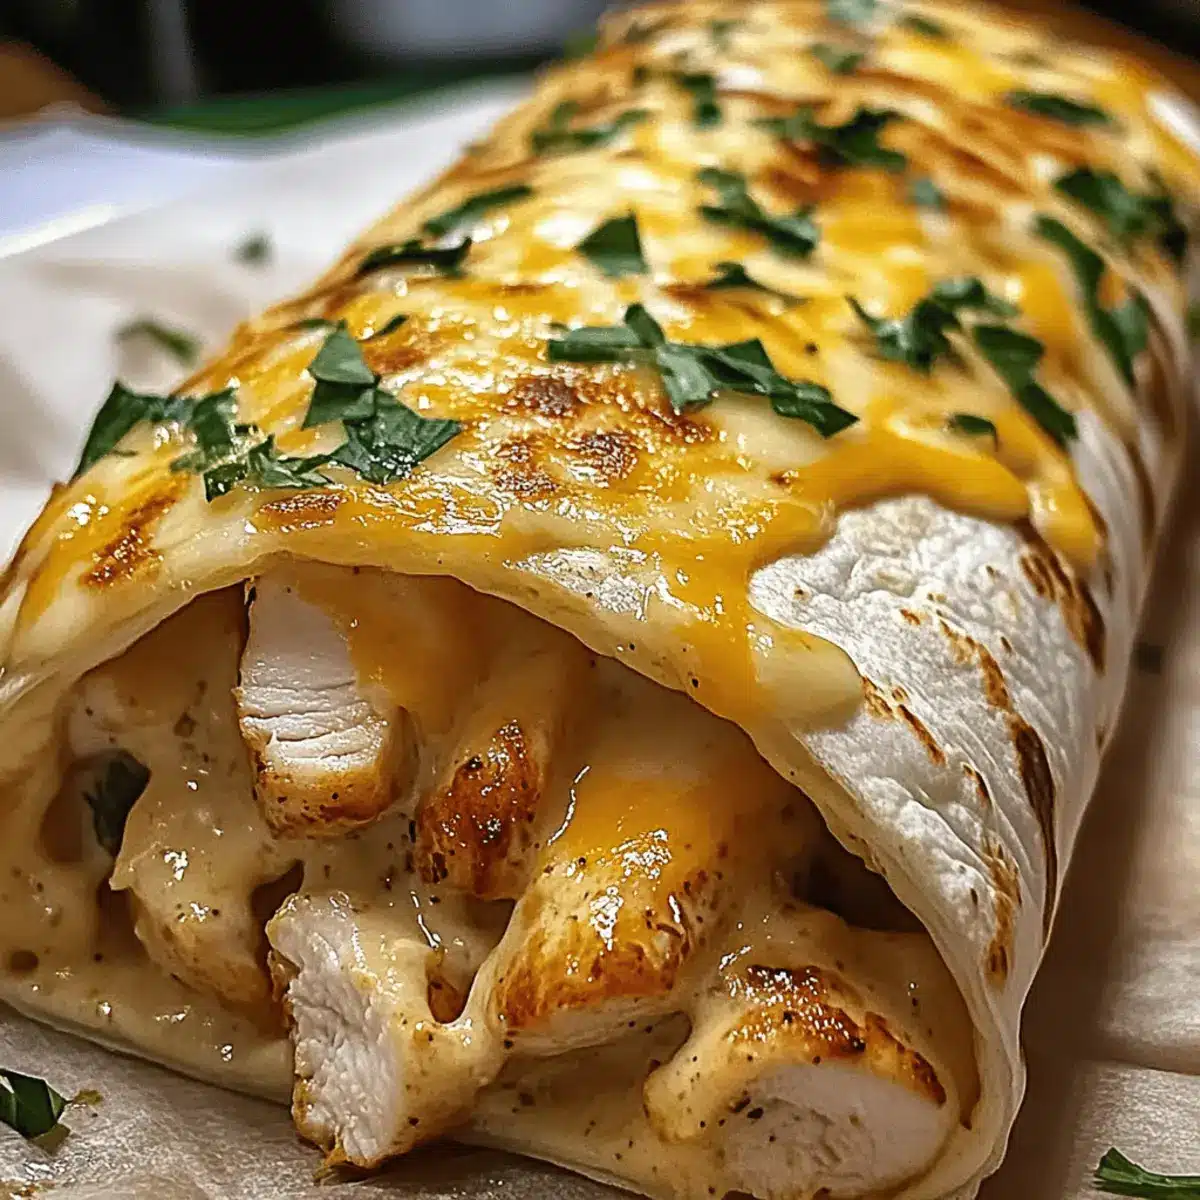
As I flipped through my notebook of family favorites one hectic weeknight, a memory of cheesy, savory wraps sparked joy. These Cheesy Garlic Chicken Wraps quickly became my go-to comfort meal, transforming even the busiest nights into savory gatherings. In just 25 minutes, you can whip up these easy dinner recipes that are not only satisfying but also light on calories, making them perfect for anyone looking to indulge without the guilt. The ooey-gooey filling, paired with a crisp tortilla, creates a delightful balance that feels like a true treat. Are you ready to elevate your dinner game with a simple recipe that everyone will love?
Why Are These Wraps So Irresistible?
Quick Preparation: In just 25 minutes, these wraps are ready to transform your night!
Flavor Explosion: Enjoy an ooey-gooey filling of cheesy garlic chicken mixed with tangy cream cheese.
Versatility: Customize with your favorite veggies or spices, making these wraps adaptable for any palate!
Crowd-Pleasing: Perfect for family dinners or casual entertaining—everyone will rave about them.
Low Calorie Delight: Each wrap is only around 350 calories, so you can enjoy without the guilt!
Crispy Perfection: The golden-brown exterior adds a satisfying crunch, making every bite delightful.
Cheesy Garlic Chicken Wraps Ingredients
For the Filling
• Shredded Chicken – Provides protein and substance; using leftover rotisserie chicken can save time.
• Mozzarella Cheese – Adds creamy flavor; feel free to substitute with cheddar for a different taste.
• Cream Cheese – Contributes to a rich texture; low-fat cream cheese is an option for a lighter wrap.
• Minced Garlic – Elevates the flavor; fresh garlic is best for an authentic taste.
• Chopped Parsley – Adds freshness and color; you can also use fresh basil or cilantro for a unique twist.
For the Wraps
• Tortillas – The base that holds everything together; whole wheat or gluten-free tortillas can also work beautifully.
• Olive Oil – Used for frying to achieve a crispy texture; avocado oil or butter can be good substitutes.
These Cheesy Garlic Chicken Wraps are your go-to for an easy, delicious, low-calorie dinner that satisfies the heart and soul!
Step‑by‑Step Instructions for Cheesy Garlic Chicken Wraps
Step 1: Mix Ingredients
In a large mixing bowl, combine shredded chicken, mozzarella cheese, cream cheese, minced garlic, and chopped parsley. Using a spatula, mix until the ingredients form a creamy, cohesive filling. The texture should be smooth and slightly stretchy, which is a sign that your Cheesy Garlic Chicken Wrap filling is ready for the next step.
Step 2: Season Mixture
Add salt and pepper to taste, adjusting as needed to enhance the flavors of your mixture. This step is crucial to ensure your Cheesy Garlic Chicken Wraps are bursting with flavor! Take a quick taste to ensure the seasoning is just right, making any adjustments before proceeding.
Step 3: Prepare Tortillas
Lay out each tortilla on a clean, flat surface, ensuring they’re easily accessible. Spoon a generous amount of the chicken filling onto the center of each tortilla, making sure to leave space around the edges. This will help you roll them up tightly without any filling spilling out during cooking.
Step 4: Roll Wraps
Starting from one end, tightly roll each tortilla around the chicken mixture, tucking in the sides as you go to secure the filling. Aim for a snug fit, as this will help keep the ingredients inside while cooking. Once rolled, set each wrap seam-side down on a plate to keep them secure.
Step 5: Cook Wraps
Heat a drizzle of olive oil in a large skillet over medium heat. Once the oil shimmers, carefully add the wraps seam-side down. Pan-sear the wraps for about 3-4 minutes until golden brown and crispy. Flip them gently with tongs and cook for an additional 3-4 minutes on the other side, achieving that irresistible crispy texture.
Step 6: Serve
Once the wraps are a beautiful golden color, remove them from the skillet and let them cool for a minute. Slice each wrap in half diagonally for easy serving. Pair your Cheesy Garlic Chicken Wraps with dipping sauces like ranch, salsa, or spicy aioli for a delicious finish that will delight your family!
Storage Tips for Cheesy Garlic Chicken Wraps
Fridge: Store leftover wraps in an airtight container for up to 3 days to maintain freshness. Reheat gently in a skillet to restore that crispy exterior.
Freezer: These Cheesy Garlic Chicken Wraps freeze beautifully! Wrap them tightly in plastic wrap, then place in an airtight container for up to 3 months. Thaw in the fridge overnight before reheating.
Reheating: For the best results, reheat in a skillet over medium heat for about 5 minutes, flipping halfway through until heated through. This will keep the wraps crispy and delicious.
Room Temperature: It’s best to not leave wraps out at room temperature for more than 2 hours to prevent spoilage. Enjoy them fresh or store for later!
Cheesy Garlic Chicken Wraps Variations
Feel free to get creative and customize these wraps to suit your taste buds!
- Veggie-Packed: Add sautéed spinach, bell peppers, or mushrooms for a nutritious crunch and vibrant color. These additions not only boost flavor but also make your wraps more satisfying.
- Cheese Blend: Swap mozzarella for a mix of cheddar and Monterey Jack for a unique twist on flavor and creaminess that will leave you wanting more.
- Spicy Kick: Incorporate diced jalapeños or a pinch of red pepper flakes into the filling for a delightful heat that elevates each bite.
- Herb Garden: Experiment with fresh herbs like dill, oregano, or cilantro instead of parsley for different flavor profiles that can brighten your wraps.
- Creamy Alternatives: For a lighter version, replace cream cheese with Greek yogurt; it adds tanginess while keeping the wraps creamy without the extra calories.
- Gluten-Free Option: Use corn tortillas to make these wraps gluten-free, ensuring everyone can enjoy them without dietary restrictions.
- Protein Punch: Switch out chicken for shredded beef, or even a plant-based protein like tofu, for a fun, customizable meal that caters to various dietary preferences.
- Mini Wraps: Cut tortillas into smaller sizes and create bite-sized versions for game day or festive gatherings; they’ll disappear faster than you can make them!
For more cheesy goodness, check out these delicious options: Cheesy Cajun Garlic, Cheesy Garlic Butter, or dive into the flavors of Southern Cheesy Chicken!
Expert Tips for Cheesy Garlic Chicken Wraps
-
Well-Seasoned Chicken: To enhance flavor, ensure your shredded chicken is seasoned thoroughly before mixing it with other ingredients.
-
Don’t Overstuff: Avoid the common mistake of overfilling the tortillas. This can lead to messy wraps that spill when rolled.
-
Batch Cooking: For a perfect crispy texture, pan-cook the wraps in batches. Overcrowding the skillet can cause them to steam instead of crisping up.
-
Use Fresh Ingredients: Fresh garlic and herbs result in a more vibrant flavor profile, making your Cheesy Garlic Chicken Wraps unforgettable.
-
Warm Tortillas: Warm tortillas for a few seconds before filling them. This makes them more pliable and easier to roll without cracking.
-
Let Them Rest: Allow the wraps to cool for a minute after cooking. This helps the filling set slightly and prevents burning when you take that first delicious bite.
What to Serve with Cheesy Garlic Chicken Wraps
There’s nothing like a warm, savory meal to bring the family together, and these wraps pair beautifully with sides that enhance their cheesy goodness.
-
Crispy Side Salad: A fresh salad with mixed greens, cherry tomatoes, and a zesty vinaigrette adds brightness and crunch, balancing the creamy wraps perfectly.
-
Roasted Vegetables: Seasonal vegetables like zucchini, bell peppers, and asparagus drizzled with olive oil bring a sweet and smoky element that complements the wraps’ savory flavors.
-
Garlic Breadsticks: For the ultimate indulgence, serve buttery garlic breadsticks on the side, creating that perfect cheesy garlic theme and satisfying any carb cravings.
-
Creamy Coleslaw: A light and creamy coleslaw adds a wonderful crunch and tang, providing a refreshing contrast to the warm, gooey wraps. It’s always a family favorite!
-
French Fries or Sweet Potato Fries: Crispy, salty fries are an irresistible pairing that turns dinner into a fun, casual meal, perfect for those busy nights!
-
Tzatziki Sauce: A refreshing dip made with yogurt, cucumber, and garlic serves as a cool complement to the warm wraps, enhancing the overall dining experience.
-
Chilled Lemonade or Iced Tea: Pair the meal with a glass of refreshing lemonade or iced tea to cleanse the palate after each delicious bite of the wraps, keeping things light and enjoyable.
Make Ahead Options
These Cheesy Garlic Chicken Wraps are perfect for busy home cooks looking to save time during hectic weeknights! You can prepare the filling (shredded chicken, cheeses, garlic, and parsley) up to 24 hours in advance; simply mix everything and refrigerate it in an airtight container to maintain freshness. Additionally, have your tortillas ready to go by laying them out for easy assembly when you’re ready to cook. When it’s time to serve, just roll the wraps and pan-sear them as directed—no one will know you prepped ahead! This way, you’ll enjoy delicious homemade wraps with minimal effort, perfect for a last-minute dinner fix!
Cheesy Garlic Chicken Wraps Recipe FAQs
How do I select the right chicken for this recipe?
Absolutely! For the best results, choose cooked shredded chicken that has been well-seasoned. I often use leftover rotisserie chicken as it saves time and adds extra flavor. If you’re cooking from scratch, poach or roast your chicken with a bit of garlic and salt for an aromatic touch!
What’s the best way to store leftover wraps?
To keep your Cheesy Garlic Chicken Wraps fresh, wrap any leftovers in plastic wrap and store them in an airtight container in the refrigerator for up to 3 days. When you’re ready to enjoy them again, reheat them in a skillet over medium heat for about 5 minutes, ensuring that crispy exterior returns!
Can I freeze these wraps? If so, how?
Yes, they freeze wonderfully! Wrap your prepared but uncooked Cheesy Garlic Chicken Wraps tightly in plastic wrap. Then, place them in an airtight container or freezer bag and store in the freezer for up to 3 months. To reheat, simply thaw them in the refrigerator overnight and then cook them in a skillet until golden and crispy.
What if my wraps are falling apart while rolling?
Very! If your tortillas are too stiff, they may crack when rolling. Try warming them in the microwave for about 10-15 seconds before filling. This makes them more pliable. Also, avoid overstuffing; leaving space around the edges helps secure the filling and prevents spills.
Are these wraps suitable for dietary restrictions?
Absolutely! This recipe can easily cater to various dietary needs. If you’re looking for a lower-calorie option, simply use low-fat cream cheese and whole wheat tortillas. You can also substitute the cheese with dairy-free alternatives. Just remember to check for any allergies regarding ingredients like cream cheese or chicken seasoning.
Can I add vegetables to my wraps?
Absolutely! Adding vegetables such as spinach, bell peppers, or mushrooms not only boosts nutrition but also enhances the flavor and texture. Sauté or steam them lightly before mixing them into your cheesy filling for extra crunch and taste.
Delicious Cheesy Garlic Chicken Wraps for Easy Weeknight Dinners
Ingredients
Equipment
Method
- In a large mixing bowl, combine shredded chicken, mozzarella cheese, cream cheese, minced garlic, and chopped parsley. Using a spatula, mix until the ingredients form a creamy, cohesive filling.
- Add salt and pepper to taste, adjusting as needed to enhance the flavors of your mixture.
- Lay out each tortilla on a clean, flat surface and spoon a generous amount of the chicken filling onto the center of each tortilla.
- Starting from one end, tightly roll each tortilla around the chicken mixture, tucking in the sides as you go.
- Heat a drizzle of olive oil in a large skillet over medium heat and add the wraps seam-side down.
- Once the wraps are a beautiful golden color, remove them from the skillet and let them cool for a minute. Slice each wrap in half diagonally for easy serving.
Leave a Reply