
The aroma of peppermint wafting through my kitchen is a sure sign that the holiday season is upon us. With family gatherings and festive parties on the horizon, what better treat to share than Candy Cane Cookies? These delightful cookies not only boast a stunning red and white swirl but also offer a tender, buttery texture that melts in your mouth. What’s more, they are a breeze to whip up, making them a perfect choice for both seasoned bakers and those just starting their culinary adventures. Imagine bringing a tray of these beautiful cookies to your next celebration—it’s guaranteed to spread joy and put a smile on everyone’s face. Curious to learn how to make this festive favorite?

Why are Candy Cane Cookies so special?
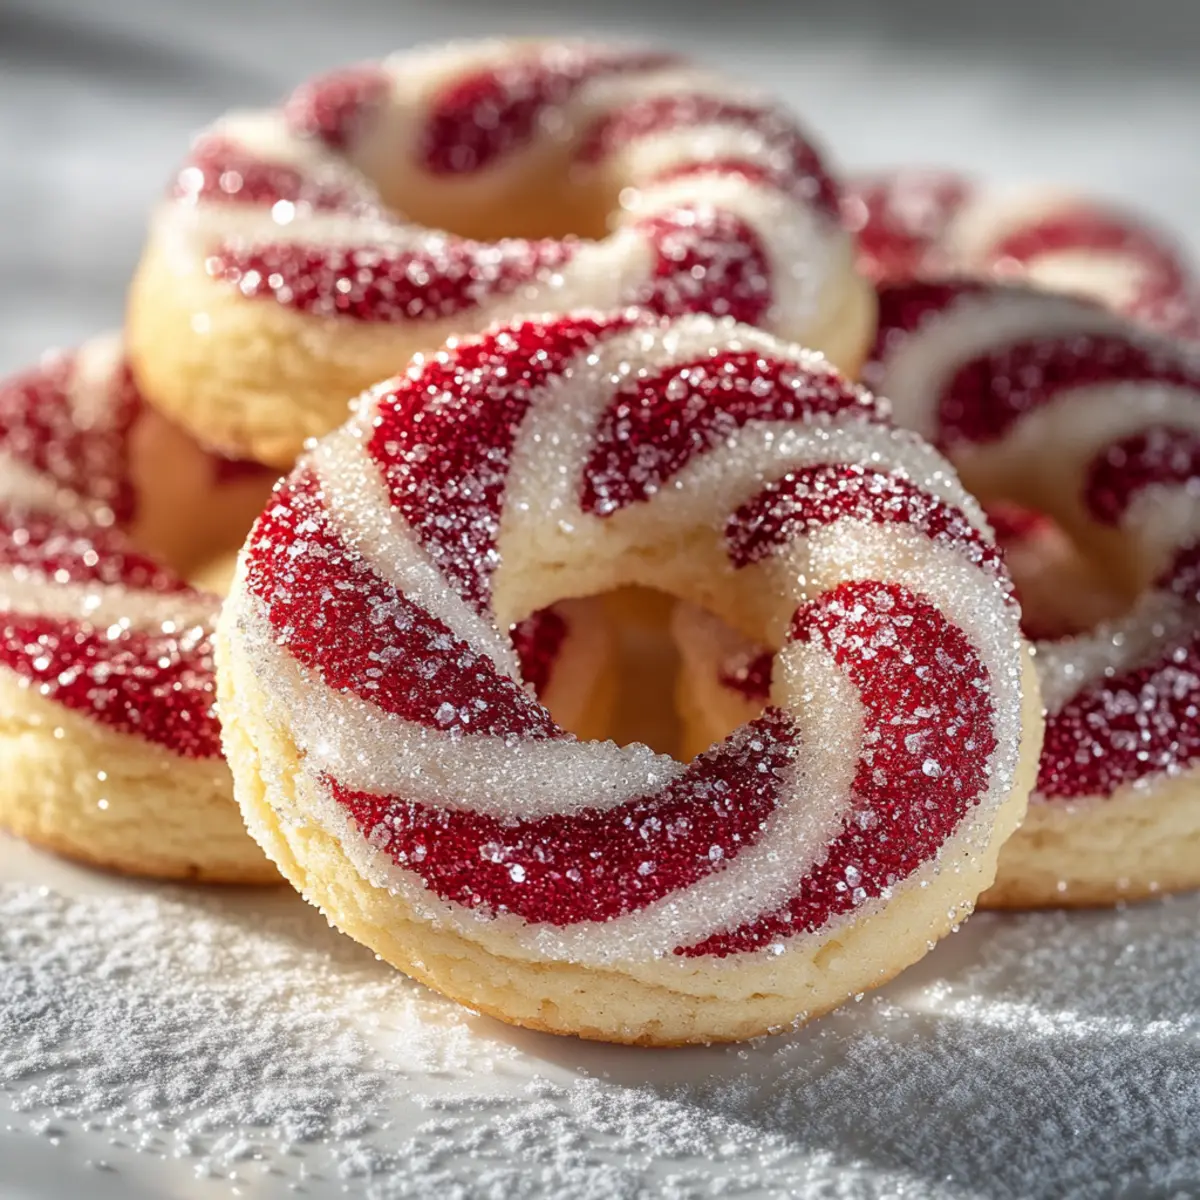
Festive Appearance: These cookies bring a vibrant pop of color to your holiday dessert table with their eye-catching red and white swirls.
Irresistible Flavor: The enchanting blend of peppermint and vanilla offers a delightful taste that perfectly embodies the holiday spirit.
Easy to Make: With straightforward steps and simple ingredients, even novice bakers can impress guests with these treats!
Versatile Options: Feel free to explore different shapes or dip them in chocolate for an extra decadent twist. Looking for more? Check out these delicious Pumpkin Oat Cookies or perhaps some Chocolate Chip Cookies for a festive variety.
Crowd-Pleaser: Whether for a family gathering or a holiday party, Candy Cane Cookies are sure to win over hearts and appetites alike!
Candy Cane Cookie Ingredients
Here’s what you’ll need to make these festive delights:
-
For the Dough
-
Butter – Adds richness and helps to create a tender texture; opt for unsalted for better control over salt levels.
-
Powdered Sugar – Provides sweetness and a light texture; no substitutions needed for the best results.
-
Egg – Acts as a binder for moisture and structure; can substitute with a flax egg for a vegan option.
-
Peppermint Extract – Imparts the signature minty flavor; use pure extract for best results and feel free to increase to 2 teaspoons for a stronger flavor.
-
Vanilla Extract – Enhances the overall flavor profile; almond extract can be a delightful alternative.
-
All-Purpose Flour – The main structure ingredient; for gluten-free options, substitute with adjustments in liquid.
-
Salt – Balances sweetness and enhances flavor; essential and should not be substituted.
-
Red Gel Food Coloring – Provides vibrant swirls without altering the dough consistency; avoid liquid food coloring for best results.
-
For Decoration
-
Red and White Sanding Sugar – Adds visual appeal and texture; these are optional but highly recommended for festive flair.
With these ingredients in hand, you’re one step closer to creating the perfect Candy Cane Cookies that embody the warmth and joy of the holiday season!
Step‑by‑Step Instructions for Candy Cane Cookies
Step 1: Cream Butter and Sugar
In a large mixing bowl, beat 1 cup of softened unsalted butter with 1 ½ cups of powdered sugar using an electric mixer on medium speed for about 3 minutes. The mixture should become light and fluffy, turning a pale color that signifies it’s ready for the next ingredients.
Step 2: Add Egg and Extracts
Next, add 1 egg and 1 teaspoon each of peppermint and vanilla extract to the creamed mixture. Beat on low speed just until all the ingredients are combined, ensuring a smooth and uniform consistency. The peppermint aroma should be inviting and hint at the festive flavor ahead.
Step 3: Mix Dry Ingredients
In a separate bowl, whisk together 3 ½ cups of all-purpose flour and ½ teaspoon of salt. Gradually add this dry mixture to the wet ingredients, mixing on low speed until just combined. The dough will start to form; be careful not to overmix, as you want your Candy Cane Cookies to remain tender.
Step 4: Divide and Color Dough
Once the dough is well mixed, divide it in half. To one half, add red gel food coloring and mix until you achieve a vibrant red color, ensuring it’s evenly distributed throughout the dough. The contrast of the colors will create the beautiful swirls later!
Step 5: Chill Dough
Wrap both portions of dough separately in plastic wrap and refrigerate for at least 30 minutes. This chilling time is crucial as it helps firm up the dough, making it easier to handle when shaping your Candy Cane Cookies. Once chilled, the dough should feel slightly firmer to the touch.
Step 6: Shape Cookies
Preheat your oven to 350°F (175°C) and line baking sheets with parchment paper. Take about a tablespoon of the red and white dough, roll each into ropes about 6 inches long, and twist them together to form candy cane shapes. The twirls should be visible, resembling classic candy canes.
Step 7: Prepare Baking Sheets
Arrange the shaped cookies on the prepared baking sheets, spacing them about 2 inches apart. If desired, sprinkle the tops with red and white sanding sugar for an extra festive touch. This will not only enhance their appearance but add a delightful crunch to each bite.
Step 8: Bake
Carefully place the baking sheets in the preheated oven and bake for 9–11 minutes. Keep an eye on them; you want the edges to be set while the centers remain slightly soft. The delightful smell of peppermint will fill your kitchen as they bake!
Step 9: Cool
Once baked, remove the cookies from the oven and let them cool on the baking sheet for about 5 minutes. This allows them to set up before transferring them to a wire rack. After a brief cooldown, you’ll have beautifully festive Candy Cane Cookies ready for sharing or enjoying!
How to Store and Freeze Candy Cane Cookies
Room Temperature: Store cookies in an airtight container at room temperature for up to 1 week to maintain their freshness and flavor.
Fridge: If you prefer, you can keep them in the fridge for up to 2 weeks; just ensure they are tightly wrapped to prevent drying out.
Freezer: Freeze Candy Cane Cookies for up to 3 months in a freezer-safe container; layer them with parchment paper between layers to prevent sticking.
Reheating: To enjoy them warm, thaw frozen cookies at room temperature and reheat in a preheated oven at 350°F (175°C) for about 5 minutes.
Expert Tips for Candy Cane Cookies
-
Use Quality Extracts: Choosing pure peppermint extract vastly improves the flavor of your cookies. Artificial flavorings can taste less authentic and muddled.
-
Chill the Dough: Properly chilling the dough is crucial. If it’s too warm, the shapes will lose definition, resulting in flatter cookies.
-
Watch the Bake Time: Keep an eye on your cookies; they should look slightly underdone in the center when you take them out. Overbaking can lead to a tough texture.
-
Maintain Dough Thickness: When rolling and shaping, don’t stretch the dough too thin. This helps maintain the beautiful candy cane appearance and ensures a tender bite.
-
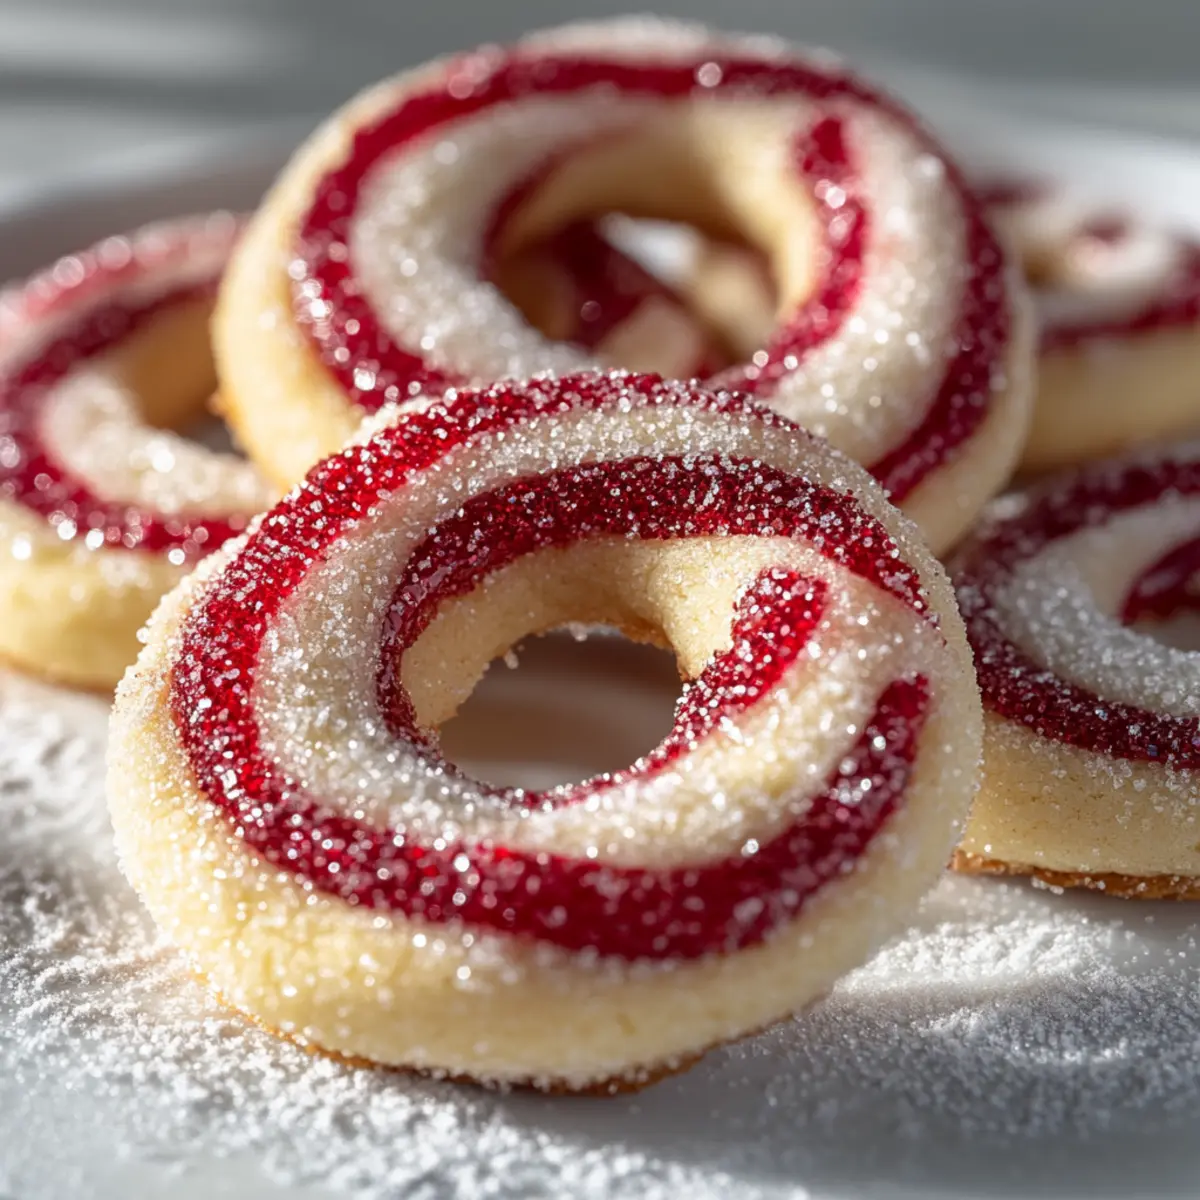
Experiment with Shapes: While the traditional candy cane shape is delightful, feel free to explore other designs, like spirals or twisted logs, for a fun twist on the classic Candy Cane Cookies.
Candy Cane Cookies Variations & Substitutions
Embrace your creativity and personalize these delightful Candy Cane Cookies with twists that will tantalize your taste buds!
-
Vegan: Substitute the egg with a flax egg (1 tablespoon ground flaxseed mixed with 2.5 tablespoons water) for a plant-based version. This will keep them tender and flavorful.
-
Nutty Flavor: Try adding ½ teaspoon of almond extract along with the peppermint for a unique, nutty depth that complements the festive vibe beautifully.
-
Chocolate-Dipped: After cooling, dip the cookies in melted chocolate and sprinkle with crushed candy canes. This adds a deliciously indulgent touch that chocolate lovers will adore!
-
Mini Treats: Roll smaller ropes to create bite-sized versions of these cookies, perfect for parties or gift-giving. Their petite size makes them ideal for little hands or festive platters.
-
Gluten-Free: Replace all-purpose flour with a gluten-free blend. Adjust the liquid content slightly to maintain the right consistency for optimal texture.
-
Frosted Delight: Decorate with a simple glaze made from powdered sugar and a splash of milk, allowing you to drizzle over the top and add fun designs.
-
Spicy Kick: Add a pinch of cayenne or ginger to the dough for a surprising touch of warmth that dances on the palate and contrasts beautifully with the sweetness.
Feel free to explore these fun variations! And if you’re in the mood for more delightful treats, check out our irresistible Thick Chewy Cookies or the refreshing taste of Peppermint Kiss Cookies for even more holiday inspiration!
What to Serve with Candy Cane Cookies?
The warmth of the holidays calls for delicious pairings to complement the vibrant sweetness of these festive treats.
- Hot Chocolate: The rich, creamy texture balances perfectly with the minty freshness of the cookies—an irresistible combo that feels like a cozy hug.
- Peppermint Tea: A refreshing, herbal option, this tea enhances the peppermint flavor of the cookies while providing a light and soothing finish to your dessert experience.
- Vanilla Ice Cream: The creaminess of vanilla ice cream pairs wonderfully with the peppermint taste, creating an indulgent contrast that’s simply delightful.
- Fruit Salad: Fresh and fruity bites serve as a refreshing counterpoint to the sweetness of the cookies, bringing brightness and color to your holiday plate.
- Cheese Platter: A selection of mild cheeses can balance the sweetness, offering a savory note that adds complexity to your dessert spread.
- Cinnamon Hot Cider: This warm drink’s spice plays beautifully against the mint, creating a delightful harmony that celebrates the season.
Enjoy these pairings with your Candy Cane Cookies and create lasting memories of holiday cheer!
Make Ahead Options
These Candy Cane Cookies are a dream for busy home cooks looking to streamline their holiday baking! You can prepare the dough in advance and refrigerate it for up to 3 days—simply wrap it tightly in plastic wrap to keep it fresh. If you prefer, once shaped, the unbaked cookies can be frozen for up to 1 month; just arrange them on a baking sheet and freeze until firm, then transfer to a freezer-safe container. When you’re ready to enjoy your festive treats, bake from frozen, adding an extra minute or two to the baking time. This way, you’ll have delicious, fresh Candy Cane Cookies that are just as delightful as if they were made the same day!
Candy Cane Cookies Recipe FAQs
What kind of peppermint extract should I use?
Absolutely! For the best flavor, I recommend using pure peppermint extract rather than artificial flavorings. Pure extract will give your Candy Cane Cookies a vibrant and authentic peppermint taste that truly embodies the holiday spirit.
How should I store the Candy Cane Cookies?
Store your cookies in an airtight container at room temperature for up to 1 week. If you want to keep them fresh for an even longer period, you can refrigerate them for up to 2 weeks, just ensure they are well-wrapped to prevent them from drying out.
Can I freeze Candy Cane Cookies, and if so, how?
Definitely! You can freeze Candy Cane Cookies for up to 3 months. To do this, allow the cookies to cool completely, then place them in a single layer in a freezer-safe container, making sure to layer parchment paper between cookies to prevent them from sticking. When you’re ready to enjoy, simply thaw them at room temperature or reheat them in a preheated oven at 350°F (175°C) for about 5 minutes.
What should I do if my cookie dough is too soft?
Very much! If your dough feels overly soft and difficult to shape, it may not have chilled long enough. Wrap it back up and refrigerate for an additional 15-30 minutes. A well-chilled dough is essential for keeping the shapes defined while baking.
Can I adapt this recipe for dietary restrictions?
Absolutely! If you need a vegan option, you can substitute the egg with a flax egg (1 tablespoon ground flaxseed mixed with 2.5 tablespoons of water, allowed to sit for a few minutes). Using gluten-free flour is also possible; just be mindful to adjust the liquid ingredients slightly since gluten-free flours may absorb different amounts of moisture.
What’s the ideal consistency for my cookie dough?
The dough should be soft but slightly firm after chilling. When you roll it out, it must hold its shape without sticking excessively to your hands or the surface. If it’s too sticky, you can knead in a bit more flour. The key for your Candy Cane Cookies is to maintain tenderness while ensuring they hold their beautiful swirls!

Candy Cane Cookies: A Festive Peppermint Delight for the Holidays
Ingredients
Equipment
Method
- In a large mixing bowl, beat the softened unsalted butter with powdered sugar using an electric mixer on medium speed for about 3 minutes until light and fluffy.
- Add the egg, peppermint extract, and vanilla extract to the creamed mixture and beat on low speed until combined.
- In a separate bowl, whisk together the all-purpose flour and salt. Gradually add this to the wet ingredients, mixing on low speed until just combined.
- Divide the dough in half. Add red gel food coloring to one half and mix until evenly distributed.
- Wrap both portions of dough separately in plastic wrap and refrigerate for at least 30 minutes.
- Preheat oven to 350°F (175°C) and line baking sheets with parchment paper. Take a tablespoon of red and white dough, roll into ropes, and twist them together.
- Arrange the shaped cookies on the baking sheets, spacing them about 2 inches apart and sprinkle with sanding sugar if desired.
- Bake for 9-11 minutes, keeping an eye on the cookies to ensure edges are set while centers remain slightly soft.
- Let the cookies cool on the baking sheet for about 5 minutes before transferring them to a wire rack.
Leave a Reply