
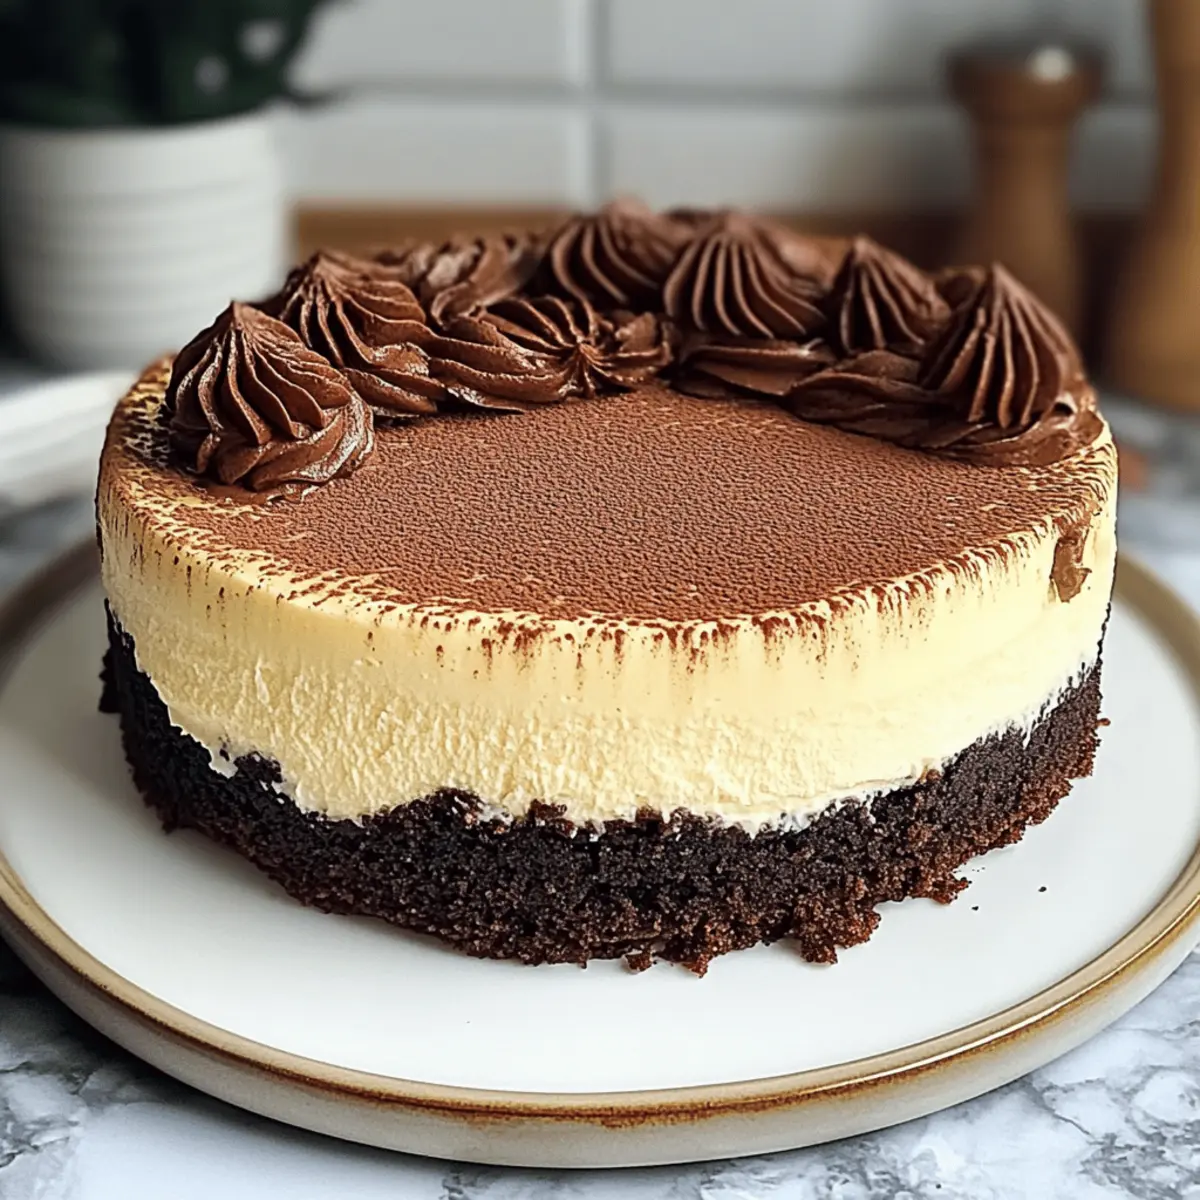
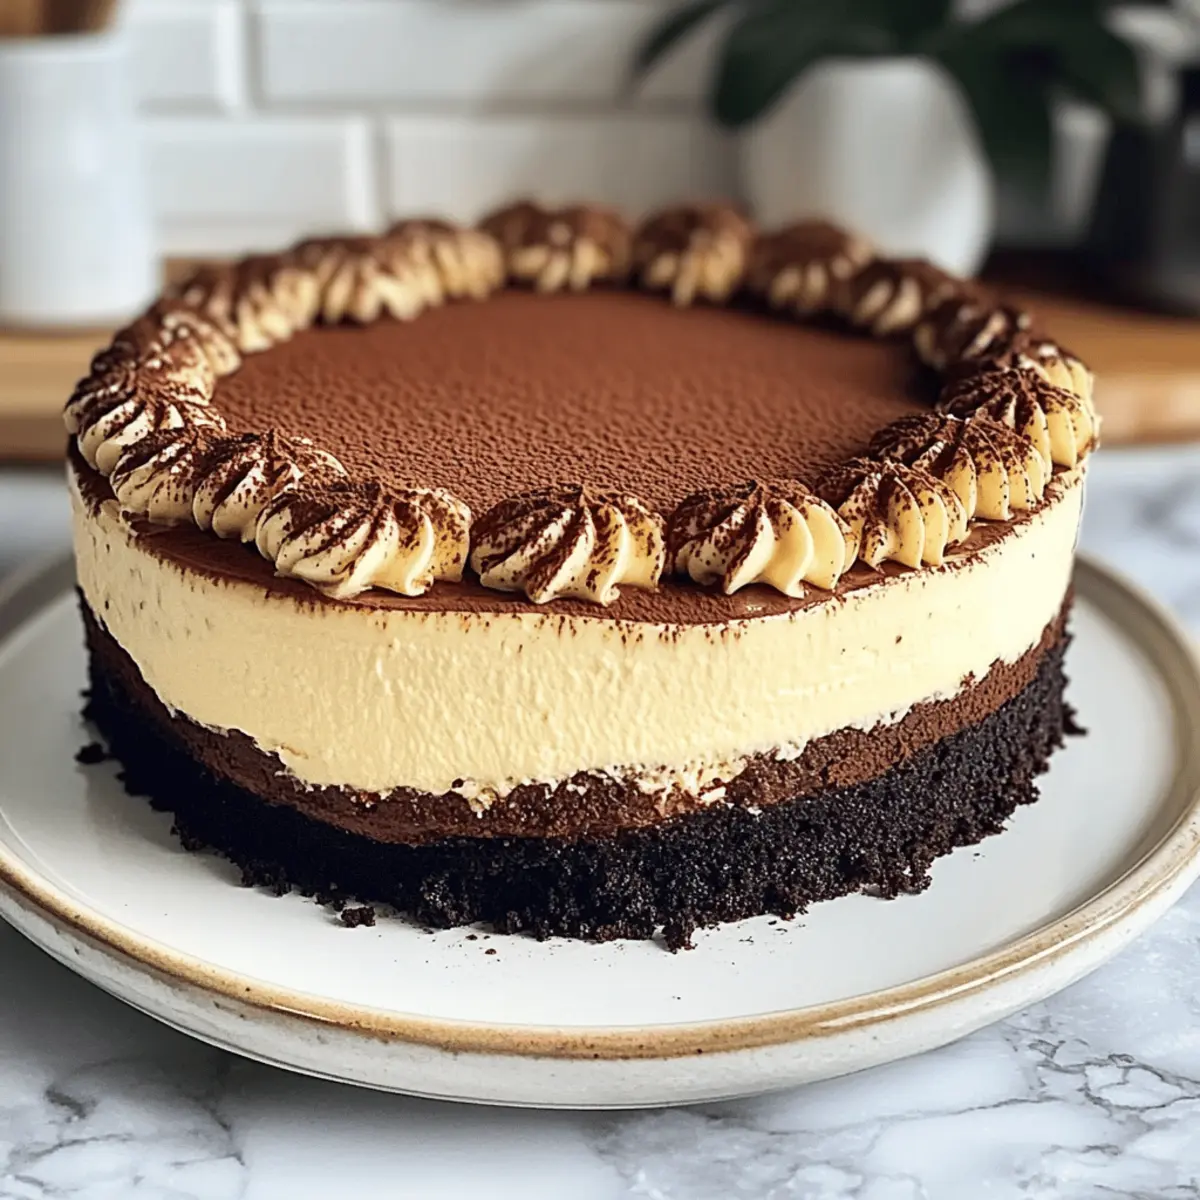
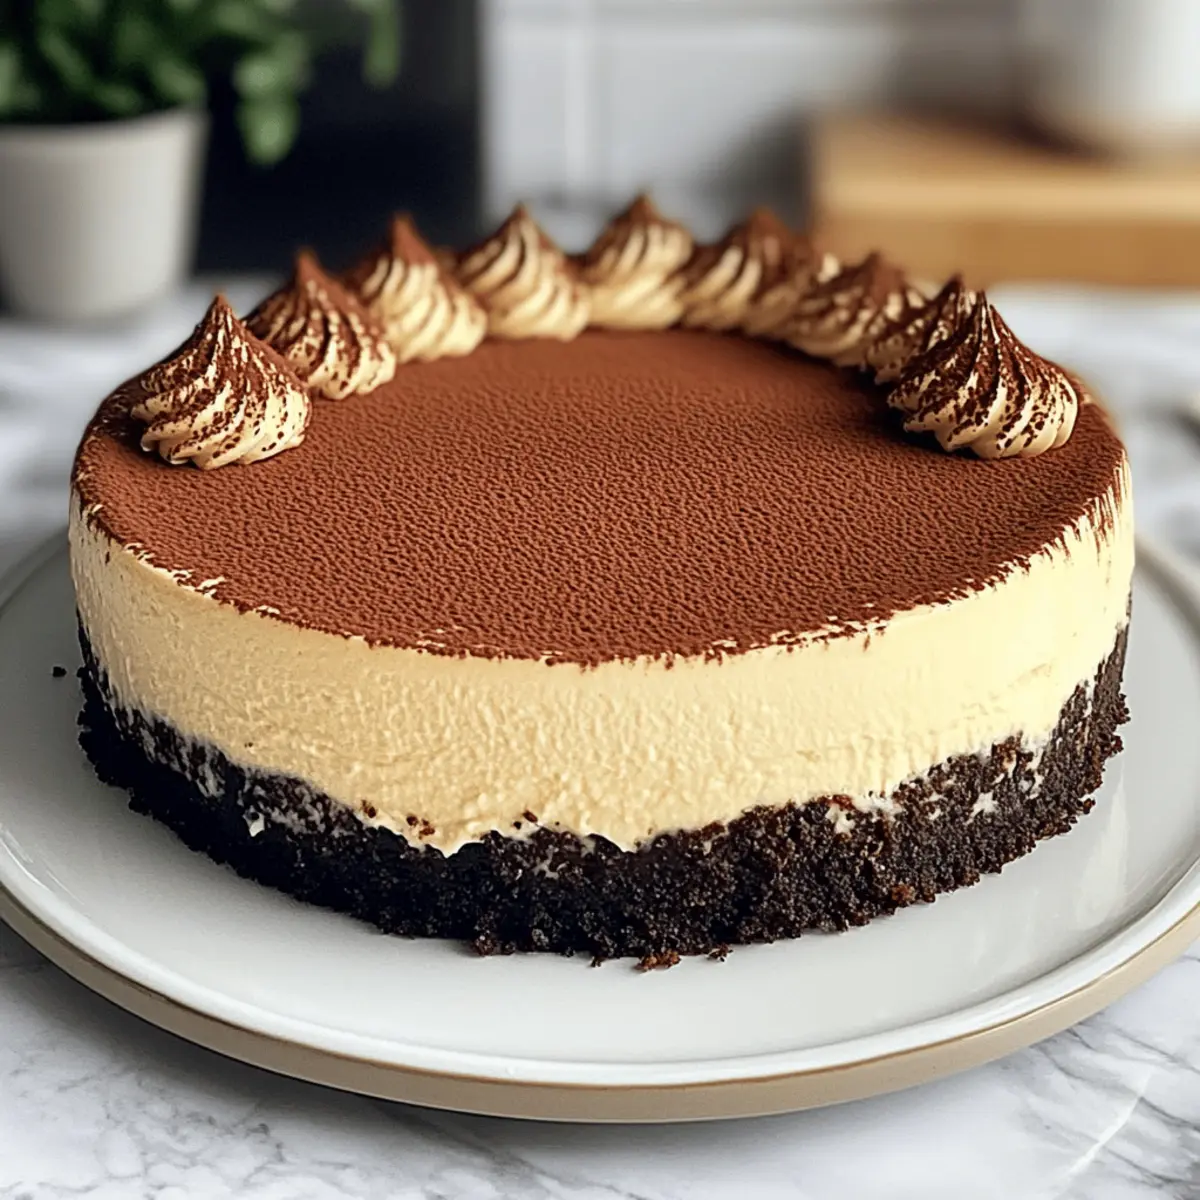
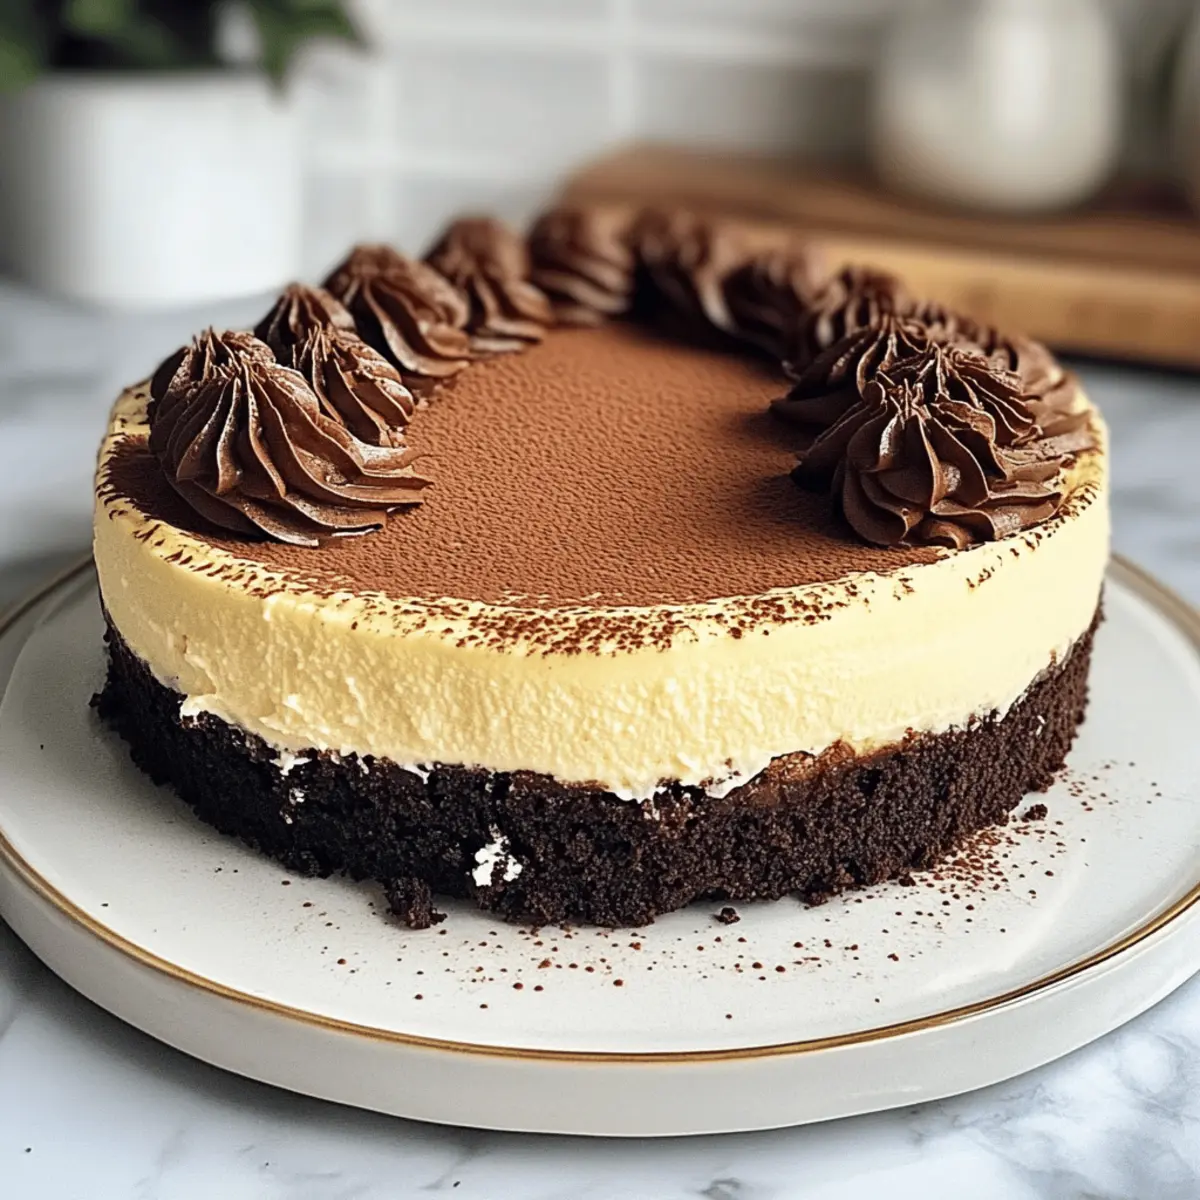
In my quest for the perfect dessert, I stumbled upon a delightful fusion that had me daydreaming of sunlit Italian cafés—the Baked Tiramisu Cheesecake. You can almost hear the gentle hum of conversation and the clinking of coffee cups as this dessert combines the creamy indulgence of New York cheesecake with the rich, aromatic flavors of traditional Tiramisu. Not only is it a stunning finishing touch to any meal, but it’s also a make-ahead marvel, ensuring you can whip it up the day before your gathering. Let’s discover how to create this luscious masterpiece that your loved ones will rave about! Are you ready to bring a slice of Italy into your kitchen?
Why is this cheesecake unforgettable?
Simplicity: With straightforward steps, this Baked Tiramisu Cheesecake is easy enough for novice bakers, yet impressive enough to wow seasoned chefs.
Rich, Creamy Texture: The combination of cream cheese and mascarpone creates a velvety filling, reminiscent of the finest Italian desserts.
Coffee Lovers’ Dream: Infused with strong espresso, each bite delivers a delightful coffee kick, elevating your dessert experience.
Make-Ahead Marvel: Perfect for busy hosts, you can prepare this cheesecake a day in advance and let the flavors meld, making entertaining a breeze.
Versatile Customization: Whether you add a dash of coffee liqueur or top it with fresh berries, you can tailor this dessert to your taste.
Crowd-Pleasing Delight: Impress friends and family with a dessert that beautifully combines two beloved favorites—cheesecake and Tiramisu. Dive into this creation and consider pairing it with a rich espresso or even enjoying slices with some fresh berries for that extra touch!
Baked Tiramisu Cheesecake Ingredients
• Let’s gather what you’ll need!
For the Crust
- Crushed Chocolate Cookies – Forms the base; use high-quality chocolate cookies without filling for the best flavor.
- Unsalted Butter – Binds the crust together; ensure it’s melted before mixing.
For the Cheesecake Filling
- Cream Cheese – Provides the creamy base; make sure to soften for a smooth consistency.
- Mascarpone Cheese – Adds richness and authentic Tiramisu flavor; check for freshness to avoid lumps.
- Granulated Sugar – Sweetens the filling; feel free to substitute with a sugar alternative if desired.
- Large Eggs – Adds structure and creaminess; use at room temperature for better mixing.
- Fresh Espresso or Strong Brewed Coffee – Provides the signature coffee flavor; substitute with strong coffee if necessary.
For Layering
- Ladyfingers – Create the coffee-soaked layer; dip quickly in coffee to maintain texture.
For the Topping
- Heavy Whipping Cream – Adds a light, airy finish; a non-dairy whipped topping can work as a substitute.
- Confectioner’s Sugar – Sweetens the whipped cream; dust lightly to enhance, not overpowering, dessert flavor.
- Cocoa Powder – For dusting on top; ties back to the Tiramisu inspiration.
Now you’re all set to create this Baked Tiramisu Cheesecake and impress your loved ones with its rich, decadent flavors!
Step‑by‑Step Instructions for Baked Tiramisu Cheesecake
Step 1: Prepare the Crust
Preheat your oven to 350°F (175°C). In a bowl, combine crushed chocolate cookies with melted unsalted butter until well mixed. Firmly press this mixture into the bottom of a 10-inch springform pan, ensuring an even layer. Bake for 10 minutes, then remove from the oven and let the crust cool completely while you prepare the filling.
Step 2: Make the Filling
In a large mixing bowl, beat softened cream cheese and mascarpone cheese together until smooth and creamy, about 2-3 minutes. Gradually add granulated sugar to the mixture, blending well after each addition. Incorporate eggs one at a time, mixing thoroughly after each. Finally, fold in the fresh espresso or strong brewed coffee until just combined to create a rich filling for your Baked Tiramisu Cheesecake.
Step 3: Layer Ladyfingers
Quickly dip half of the ladyfingers into the brewed coffee, making sure they soak just enough to become moist without falling apart. Arrange these soaked ladyfingers in a single layer over the cooled crust, covering it completely. This layer will add that signature Tiramisu flavor and texture, setting the stage for your delicious cheesecake.
Step 4: Pour Cheesecake Mixture
Spread half of the cheesecake filling over the layer of ladyfingers, smoothing it evenly with a spatula. Add another layer of quickly dipped ladyfingers on top of the filling, followed by the remaining cheesecake mixture. This two-layer filling ensures every slice of your Baked Tiramisu Cheesecake is decadent and creamy, embodying the spirit of both cheesecake and Tiramisu.
Step 5: Bake
Place the filled springform pan into a larger baking dish and carefully pour hot water into the outer dish to create a water bath. Bake in the preheated oven at 320°F (160°C) for 75-85 minutes. You’ll know it’s done when the edges are set, but the center remains slightly jiggly. This gentle baking will help maintain a creamy texture.
Step 6: Cool and Chill
Once baked, turn off the oven and leave the cheesecake inside with the door ajar for 30 minutes. This gradual cooling helps prevent cracks. Afterward, remove it from the oven and chill in the refrigerator for several hours or overnight—this allows all the flavors of your Baked Tiramisu Cheesecake to meld beautifully.
Step 7: Prepare Topping
When ready to serve, whip heavy cream in a bowl until soft peaks form. Gradually add confectioner’s sugar and continue beating until fully incorporated. Spread the sweetened whipped cream over the cooled cheesecake, creating a lovely, airy layer. Finally, dust with cocoa powder for that quintessential Tiramisu finish—your dessert is now ready to steal the show!
Expert Tips for Baked Tiramisu Cheesecake
-
Perfectly Soak Ladyfingers: Quickly dip the ladyfingers in coffee for just a second to ensure they absorb flavor without becoming soggy.
-
Monitor Baking Time: Keep an eye on the oven; the cheesecake should be slightly jiggly in the center when done to avoid dryness.
-
Chill Overnight: For the best flavor, make your Baked Tiramisu Cheesecake a day in advance, allowing the tastes to meld beautifully.
-
Use Room Temperature Ingredients: Ensure cream cheese and eggs are at room temperature for a smoother, creamier filling that mixes effortlessly.
-
Water Bath Technique: Always use a water bath while baking to provide gentle heat, which helps prevent cracks and maintain a creamy texture.
What to Serve with Baked Tiramisu Cheesecake
Indulging in a sumptuous slice of Baked Tiramisu Cheesecake can create a delightful aftertaste, but pairing it with the right accompaniments elevates the experience even further.
- Espresso: This classic Italian coffee complements the cheesecake’s rich coffee flavor and enhances your dessert experience with a warm, inviting touch.
- Fresh Berries: A mix of raspberries and strawberries adds a vibrant burst of freshness, balancing the cheesecake’s creaminess with their natural tartness.
- Chocolate Ganache: Drizzle a silky chocolate ganache to enhance the chocolate crust and add an extravagant touch to each bite. The combination is pure decadence!
- Whipped Cream: A dollop of lightly sweetened whipped cream on the side introduces a light, airy texture that beautifully contrasts the dense cheesecake.
- Savory Biscotti: Serve with a side of almond or chocolate biscotti for a delightful crunch that echoes the flavors of Italy, perfect for dipping in coffee.
- Nutty Amaretti Cookies: These crisp cookies offer almond notes that harmonize beautifully with the espresso, creating a cohesive Italian dessert experience. Enjoy alongside your cheesecake for a unique culinary journey!
Baked Tiramisu Cheesecake Variations
Feel free to let your creativity shine as you customize this delicious cheesecake to suit your taste and dietary needs!
-
Dairy-Free: Substitute cream cheese and mascarpone with dairy-free alternatives for a delicious vegan version without sacrificing creaminess.
-
Gluten-Free: Use gluten-free chocolate cookies in the crust and ensure your ladyfingers are also gluten-free to cater to your guests’ dietary needs.
-
Decadent Layer: Add a layer of chocolate ganache on top of the whipped cream for an extra touch of richness and a beautiful finish.
-
Add Liqueur: Incorporate a splash of coffee liqueur in the filling for a delightful adult version that enhances the coffee notes beautifully.
-
Nutty Crust: Replace chocolate cookies with crushed hazelnuts for the crust, adding a delightful crunch and a subtle nutty flavor reflective of traditional Tiramisu.
-
Fruit Twist: Top the cheesecake with fresh raspberries or strawberries for a refreshing contrast to the rich flavors. It not only adds a pop of color but also a burst of fruity goodness.
-
Extra Coffee Boost: Stir in some instant coffee granules into the filling for those who want an even bolder coffee flavor, elevating the experience.
-
Irresistible Swirls: Before baking, swirl in some melted chocolate or caramel sauce through the filling for a stunning marbled effect and extra sweetness.
For additional inspiration, consider incorporating elements from other crowd favorites like a stunning White Chocolate Cheesecake or give brunch a twist with your own take on Baked Eggs Napoleon. Enjoy diving into these variations and creating your perfect Baked Tiramisu Cheesecake!
How to Store and Freeze Baked Tiramisu Cheesecake
Fridge: Store your Baked Tiramisu Cheesecake covered in plastic wrap or in an airtight container for up to 5 days without losing its luscious creaminess.
Freezer: If you want to keep it longer, wrap the cheesecake tightly in plastic wrap followed by aluminum foil, and freeze for up to 2 months. This preserves its rich texture and flavor.
Thawing: To enjoy your frozen cheesecake, transfer it to the fridge and let it thaw overnight before serving. This slow thaw ensures it retains its heavenly taste and creamy consistency.
Reheating: There’s no need to reheat—this classic dessert is best served chilled, allowing the flavors to shine through!
Make Ahead Options
These Baked Tiramisu Cheesecake are perfect for busy home cooks looking to save time! You can prepare the crust and filling up to 24 hours in advance; simply refrigerate them separately, tightly covered. The crust can be made ahead and kept in the refrigerator, while the filling should be blended right before layering to ensure freshness. As an option, you can assemble the cheesecake entirely and chill it overnight for a more convenient serving time. Just remember to top it with whipped cream and cocoa powder just before serving to maintain its delightful presentation and taste. Your loved ones will enjoy a just as delicious dessert with minimal effort!
Baked Tiramisu Cheesecake Recipe FAQs
What type of chocolate cookies should I use for the crust?
I recommend using high-quality crushed chocolate cookies without filling for the crust. Look for brands that are rich and dark—these will add depth to the flavor of your Baked Tiramisu Cheesecake.
How long can I store the cheesecake in the fridge?
Absolutely! You can store your Baked Tiramisu Cheesecake in the fridge for up to 5 days. Make sure to cover it tightly with plastic wrap or keep it in an airtight container to maintain its creamy texture and prevent it from absorbing other odors.
Can I freeze the cheesecake, and if so, how?
Yes, you can freeze the Baked Tiramisu Cheesecake! To do this, wrap it tightly with plastic wrap, then cover it with aluminum foil to prevent freezer burn. It will keep well in the freezer for up to 2 months. When you’re ready to enjoy, simply transfer it to the fridge the night before to thaw.
What should I do if my cheesecake cracks during baking?
If your cheesecake shows a crack, don’t worry—this can sometimes happen. To avoid this in the future, ensure you bake it in a water bath to maintain a moist environment, which helps prevent cracking. Additionally, be careful not to overbake it; the center should be slightly jiggly when you remove it from the oven—the residual heat will do its magic as it cools.
Are there any dietary considerations I need to keep in mind?
Definitely! For those with gluten sensitivities, you can easily substitute gluten-free chocolate cookies for the crust. Also, make sure to check for dairy alternatives for cream cheese and mascarpone if you’re making it for someone with lactose intolerance. Always read labels to ensure all ingredients meet dietary restrictions.
How can I enhance the coffee flavor in the cheesecake?
If you’re a coffee lover looking for an extra kick, consider adding a splash of coffee liqueur to the filling. Just swap out a tablespoon of the espresso or coffee with liqueur, and integrate it while mixing. This little tweak will deepen the coffee flavor and elevate your dessert experience!
Decadent Baked Tiramisu Cheesecake for Coffee Lovers
Ingredients
Equipment
Method
- Preheat your oven to 350°F (175°C). In a bowl, combine crushed chocolate cookies with melted unsalted butter until well mixed. Firmly press this mixture into the bottom of a 10-inch springform pan, ensuring an even layer. Bake for 10 minutes, then remove from the oven and let the crust cool completely while you prepare the filling.
- In a large mixing bowl, beat softened cream cheese and mascarpone cheese together until smooth and creamy, about 2-3 minutes. Gradually add granulated sugar to the mixture, blending well after each addition. Incorporate eggs one at a time, mixing thoroughly after each. Finally, fold in the fresh espresso or strong brewed coffee until just combined.
- Quickly dip half of the ladyfingers into the brewed coffee, making sure they soak just enough to become moist without falling apart. Arrange these soaked ladyfingers in a single layer over the cooled crust.
- Spread half of the cheesecake filling over the layer of ladyfingers, smoothing it evenly with a spatula. Add another layer of quickly dipped ladyfingers on top of the filling, followed by the remaining cheesecake mixture.
- Place the filled springform pan into a larger baking dish and carefully pour hot water into the outer dish. Bake in the preheated oven at 320°F (160°C) for 75-85 minutes.
- Once baked, turn off the oven and leave the cheesecake inside with the door ajar for 30 minutes. Afterward, remove it from the oven and chill in the refrigerator for several hours or overnight.
- When ready to serve, whip heavy cream in a bowl until soft peaks form. Gradually add confectioner's sugar and continue beating until incorporated. Spread over the cooled cheesecake and dust with cocoa powder.
Leave a Reply