
As I rummaged through my pantry one afternoon, my eyes landed on a neglected bag of chocolate chips. It hit me then: why not create something irresistible? That’s how these delightful Brownie Truffles came to life—a treat that’s a perfect fusion of gooey brownie and smooth truffle. Not only are they a quick and fun indulgence that can be whipped up in under 30 minutes, but they also serve as an impressive dessert for any gathering. These little bites of bliss are sure to impress guests or satisfy that sweet craving without the fuss of lengthy baking. Are you ready to embark on a sweet journey where chocolate dreams become a reality?
Why are Brownie Truffles so irresistible?
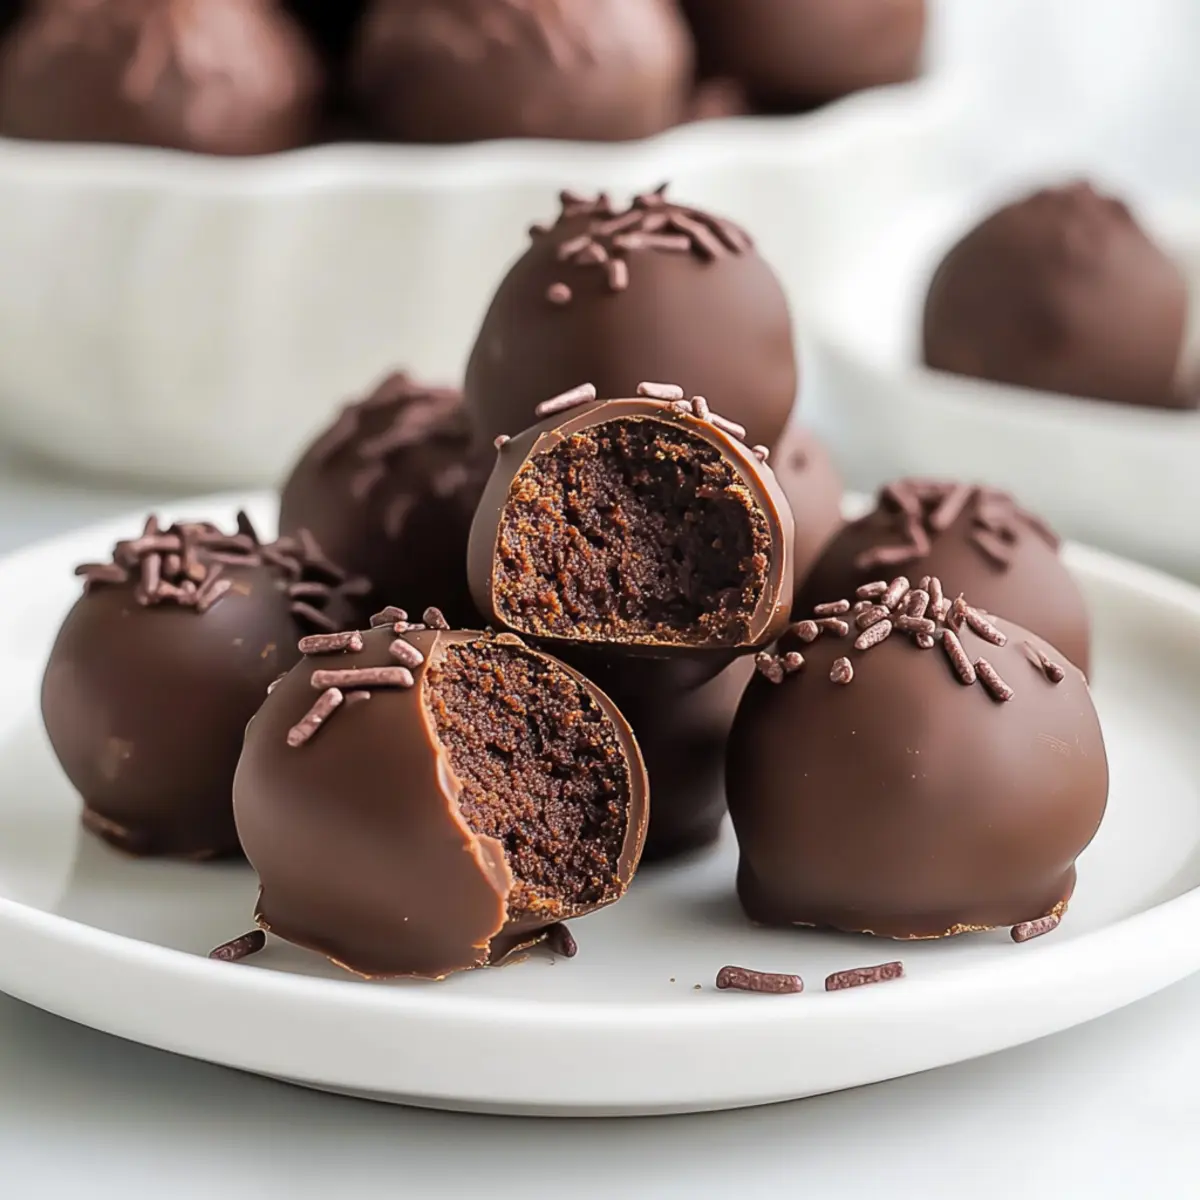
Decadence at Its Finest: Each bite delivers a rich chocolate experience that melts in your mouth, leaving you craving more.
Quick and Easy: Whip them up in just 30 minutes—perfect for when you need a speedy sweet fix!
Impressive Presentation: Serve these truffles at parties or cozy get-togethers, and watch your guests’ faces light up.
Versatile Delight: Feel free to customize with toppings like nuts or sprinkles, making each truffle uniquely yours.
Crowd-Pleaser: They appeal to both chocolate lovers and casual dessert fans alike, ensuring that everyone walks away happy!
For another delightful chocolate treat, take a peek at our Salt Caramel Brownies that are equally satisfying!
Brownie Truffles Ingredients
• Get ready to create these mouthwatering morsels!
For the Brownie Base
- Dark chocolate – Rich and melty, it’s the heart of the brownie truffles; look for high-quality for the best flavor.
- Unsalted butter – Provides moisture and richness; feel free to substitute coconut oil for a dairy-free alternative.
- Granulated sugar – Sweetness is essential here; you can replace it with brown sugar for extra depth.
- Eggs – These help bind everything together; if you’re vegan, use flax eggs instead.
- All-purpose flour – Gives structure to the truffles; for a gluten-free option, try almond or oat flour.
For the Coating
- Chocolate chips – Perfect for melting; any variety will do, whether semi-sweet or milk chocolate.
- Toppings (optional) – Think crushed nuts, sprinkles, or shredded coconut to add extras; customize freely!
Embrace the magic of Brownie Truffles as you gather your ingredients and prepare for a sweet adventure in your kitchen!
Step‑by‑Step Instructions for Easy Brownie Truffles
Step 1: Prepare the Brownie Base
Start by preparing an 18-ounce box of your favorite brownie mix according to the package instructions. Bake it in a greased 9×13 inch pan at the temperature specified, usually around 350°F (175°C), until a toothpick inserted comes out with a few moist crumbs—this typically takes 25-30 minutes. Once done, allow the brownies to cool completely before moving on to the next step.
Step 2: Mix the Truffle Filling
Once the brownies have cooled, scoop the brownie mixture into a large mixing bowl, discarding the firmer edges. Add a generous portion of room temperature cream cheese into the bowl. Using a hand mixer or spatula, blend the mixture until it’s smooth and creamy—this should take about 2-3 minutes. The resulting mixture will be thick and fudgy, perfect for your Easy Brownie Truffles.
Step 3: Shape the Truffles
With the brownie-cream cheese mixture ready, scoop out about 1 tablespoon of the mixture and roll it into a ball between your hands. Place the formed truffles on a parchment-lined baking sheet as you go, ensuring they’re spaced apart. Once all the mixture is shaped into truffles, transfer the baking sheet to your freezer for about 30 minutes, allowing the bites to firm up.
Step 4: Melt the Chocolate Coating
While the truffles chill, melt the chocolate melting wafers in a microwave-safe bowl. Heat them in the microwave, stirring every 20 seconds until completely smooth and glossy—a process that usually takes 1-2 minutes. It’s essential to monitor closely to avoid overheating, which could ruin the texture.
Step 5: Coat the Truffles
Once the truffles have frozen solid, it’s time to dip them. Take each truffle and carefully immerse it into the melted chocolate coating, ensuring it’s completely covered. Gently tap the truffle against the bowl’s edge to remove excess chocolate, then place it back on the parchment-lined sheet. Continue until all truffles are coated, adding decorative sprinkles immediately while the chocolate is still wet.
Step 6: Set the Chocolate Coating
Finally, transfer the coated truffles to the refrigerator for 15-20 minutes. This will allow the chocolate coating to set firmly, giving the Easy Brownie Truffles that smooth, firm finish. Once set, you can store them in an airtight container and enjoy this delightful treat for up to a week.
Make Ahead Options
These Easy Brownie Truffles are perfect for meal prep, allowing you to indulge in a sweet treat without the last-minute rush! You can prepare the truffle mixture and roll them into balls up to 24 hours in advance. Simply freeze the shaped truffles on a parchment-lined baking sheet before transferring them to an airtight container to prevent sticking. When you’re ready to serve, just dip the frozen truffles in melted chocolate and set them in the refrigerator for 15-20 minutes to firm up. This way, you’ll have delicious, homemade Brownie Truffles ready for any occasion with minimal effort!
How to Store and Freeze Brownie Truffles
Fridge: Store your Brownie Truffles in an airtight container for up to 1 week. This keeps them fresh and prevents them from absorbing any unwanted odors.
Freezer: For longer storage, freeze the truffles in a single layer in a freezer-safe container. They’ll hold up well for up to 2 months, ensuring you have a sweet treat on hand!
Thawing: When you’re ready to enjoy, simply transfer the desired number of truffles to the fridge for a few hours to thaw gently, allowing the texture to return to its creamy delight.
Reheating: There’s no need to reheat Brownie Truffles; they are best enjoyed straight from the fridge after thawing!
What to Serve with Easy Brownie Truffles
Elevate your dessert experience by pairing these rich, creamy bites with delightful accompaniments that perfectly enhance their chocolaty richness.
- Fresh Berries: The tartness of strawberries or raspberries provides a refreshing contrast to the sweetness of the truffles.
- Vanilla Ice Cream: A scoop of creamy vanilla ice cream melts beautifully against the brownie truffles, creating a delightful combination.
- Coffee or Espresso: A warm cup of coffee or espresso complements the chocolate flavors and offers a cozy vibe for dessert.
- Whipped Cream: Fluffy whipped cream adds a light, airy texture to the richness of the truffles, making each bite even more indulgent.
- Chocolate Sauce: Drizzle some warm chocolate sauce over the truffles for an extra chocolatey experience that chocolate lovers will adore.
- Caramel Sauce: A drizzle of decadent caramel sauce on top creates a luscious contrast that’s both sweet and slightly salty.
- Nutty Sprinkles: Top with crushed nuts for added crunch and flavor that elevates the truffle’s smooth, fudgy texture.
- Mint Tea: A refreshing cup of mint tea acts as a palate cleanser and adds a soothing element to balance the dessert’s richness.
Helpful Tricks for Brownie Truffles
Room Temperature Cream Cheese: Ensure your cream cheese is at room temperature for a smoother mixture. This prevents lumps and helps achieve a velvety filling.
Chill Before Coating: If the mixture is too soft to shape, refrigerate the truffle balls briefly. This will make them easier to handle and coat with chocolate.
Quality Chocolate Matters: Use good quality chocolate for the coating. It enhances the flavor and gives a professional finish to your brownie truffles.
Decorating Tips: Add sprinkles or crushed nuts immediately after dipping the truffles in chocolate. This ensures they stick well and look extra inviting.
Storage Solutions: Keep your brownie truffles in an airtight container in the refrigerator for up to one week. They also freeze well for up to two months!
Brownie Truffles Substitutions & Variations
Feel free to get creative with your truffles—there’s no limit to what you can do to make them your own!
- Frosting Swap: Replace cream cheese with chocolate frosting for a richer, sweeter flavor. It adds a luscious twist that chocolate lovers will adore!
- Mocha Infusion: Add 1-2 teaspoons of instant espresso powder to the brownie mix for a delightful mocha flavor. The coffee enhances the chocolate and adds depth, turning your truffles into an upscale dessert.
- Minty Fresh: Incorporate peppermint extract into the chocolate coating for a festive mint chocolate flavor—perfect for holiday celebrations! The fresh, cooling mint will elevate the traditional chocolate taste.
- Nutty Crunch: Mix in finely chopped nuts, like walnuts or pecans, directly into the truffle filling for added crunch and texture. This not only gives a delightful bite but also adds a touch of sophistication to your truffles.
- Flavor Boost: Experiment with flavored extracts like almond or orange for a unique taste. These subtle changes can transform your truffles into something completely different—deliciously unexpected!
- Seasonal Spice: Add a pinch of cinnamon or nutmeg to the mixture for a warm, spiced flavor that sings of comfort. This is a great option for cozy fall or winter gatherings.
- Healthier Coating: For a lighter option, use yogurt-covered raisins as a topping instead of chocolate coating. It adds a fruity contrast while keeping your truffles a bit lighter in flavor and texture.
If you’re looking for more desserts to wow your guests, try our Salt Caramel Brownies next! Each variation is sure to inspire your creativity and satisfy every sweet tooth.
Brownie Truffles Recipe FAQs
How do I choose the right brownie mix for my truffles?
Absolutely! You can use any brand of brownie mix you prefer. I highly recommend selecting a mix that you know you enjoy, as it sets the flavor foundation for the truffles. Look for ones that have fewer additives to get a rich chocolate flavor and a fudgy texture.
What’s the best way to store leftover brownie truffles?
To keep your Brownie Truffles fresh, place them in an airtight container in the fridge for up to one week. This method prevents them from absorbing any unwanted odors from your refrigerator. Layer parchment paper between each layer of truffles for extra protection, especially if they’re coated in sprinkles!
Can I freeze brownie truffles, and how do I do it?
Very! Freezing your brownie truffles is an excellent option if you want to keep them longer. First, arrange them in a single layer on a baking sheet and freeze for about 1-2 hours until firm. Once frozen, transfer them to a freezer-safe container or a zip-top bag, separating layers with parchment paper. They can be preserved this way for up to 2 months.
What if my truffle mixture is too soft to shape?
No worries! If you find that your truffle mixture is too soft, simply pop it in the refrigerator for about 15-20 minutes to firm it up. This will make it easier to roll into balls without sticking to your hands, ensuring perfectly shaped truffles ready for coating!
Can I make these truffles nut-free for allergies?
Absolutely! You can easily make these Brownie Truffles nut-free by checking the labels of your ingredients, especially the brownie mix and chocolate. Avoid any mixes that include nuts, and stick with nut-free toppings like sprinkles or coconut flakes. Always inform guests and label your treats to keep everyone safe.
Decadent Brownie Truffles That Melt in Your Mouth
Ingredients
Equipment
Method
- Prepare the Brownie Base by baking your brownie mix in a greased 9x13 inch pan at 350°F until a toothpick comes out with a few moist crumbs, about 25-30 minutes. Allow to cool completely.
- Mix the Truffle Filling by combining the brownie base and room temperature cream cheese in a bowl. Blend until smooth and creamy for 2-3 minutes.
- Shape the Truffles by rolling about 1 tablespoon of the mixture into a ball and placing on a parchment-lined baking sheet. Freeze for about 30 minutes.
- Melt the Chocolate Coating by microwaving the chocolate wafers in a bowl, stirring every 20 seconds until smooth, 1-2 minutes total.
- Coat the Truffles by immersing each one in the melted chocolate and tapping off excess. Place back on the parchment sheet with decorative sprinkles if desired.
- Set the Chocolate Coating by refrigerating the coated truffles for 15-20 minutes until set. Store in an airtight container.
Leave a Reply