
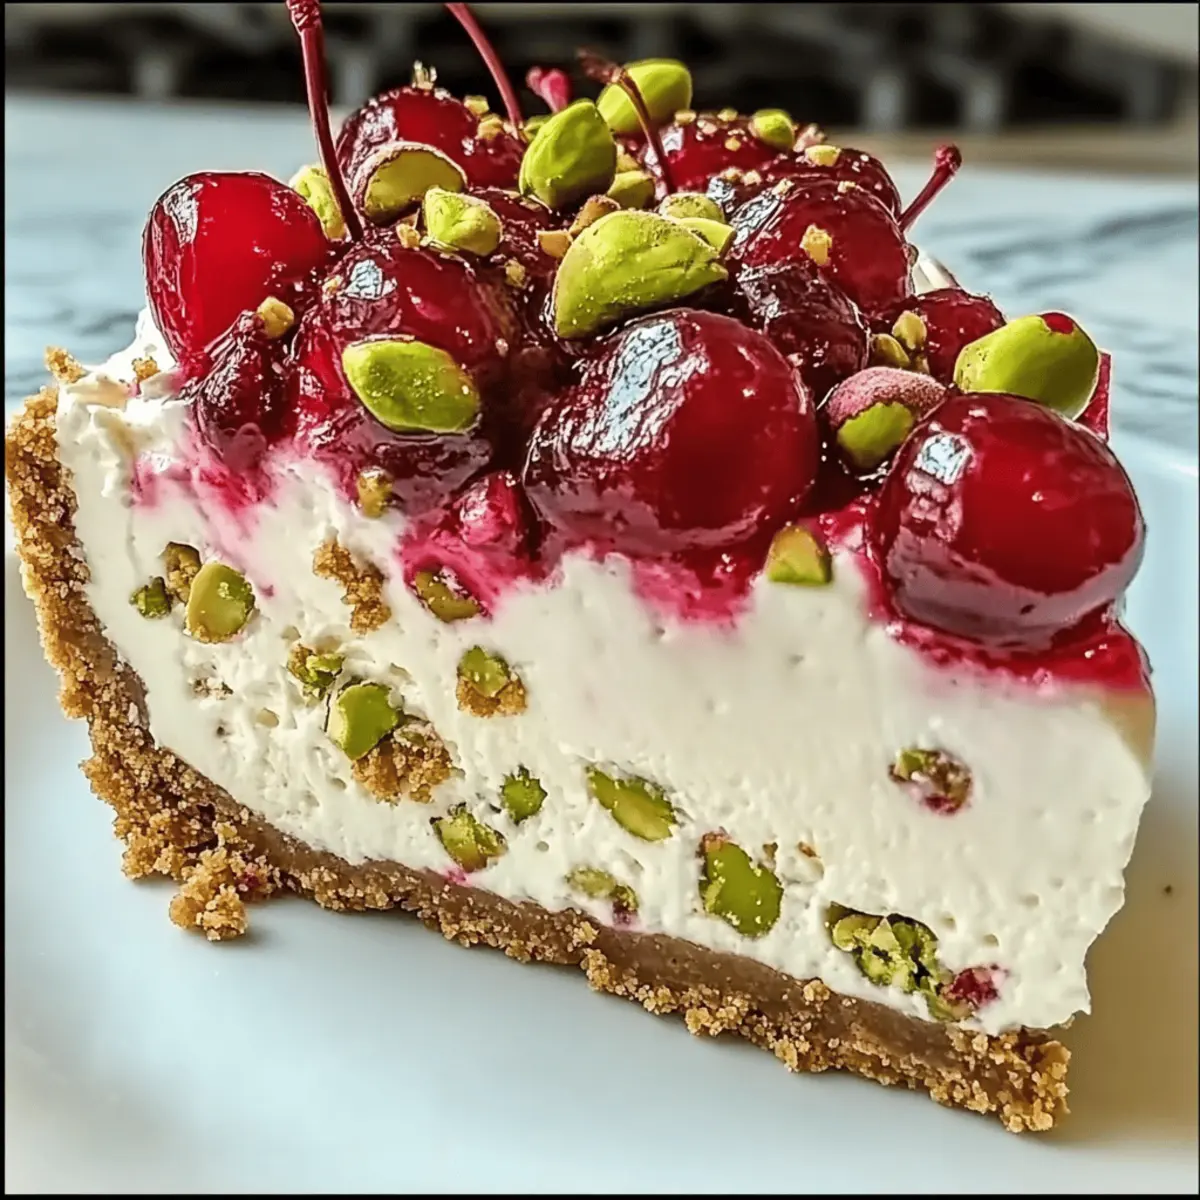
As I stood in my kitchen, the warm scent of baked goods swirling around me, a wave of nostalgia washed over me—the kind tied to festive gatherings and simple, sweet moments. This Cherry Pistachio Cheesecake is my answer to those cravings for a creamy dessert that not only looks stunning but tastes heavenly too. With its rich filling, complemented by the delightful crunch of pistachios and the burst of maraschino cherries, it swiftly elevates any occasion from ordinary to extraordinary. Plus, it’s a breeze to prepare ahead of time, making it the perfect stress-reliever for your next celebration. Curious about how to create this indulgent treat that everyone will rave about? Let’s dive in!

Why is Cherry Pistachio Cheesecake a Must-Try?
Decadent, this cheesecake delivers a luscious blend of creamy cheese and sweet cherries, making it a true crowd-pleaser. Unique textures come alive with a crunchy pistachio crust paired with a silky filling, ensuring a delightful bite every time. Time-saving, it can be made ahead, perfect for busy chefs preparing for special events. Versatile, this dessert fits seamlessly into celebrations, while also being adaptable for individual servings. Festive and colorful, the vibrant cherry topping brings a celebratory flair to your table. Don’t miss out on pairing it with a White Chocolate Cheesecake for an irresistible dessert duo!
Cherry Pistachio Cheesecake Ingredients
Unlock the deliciousness of this festive dessert!
For the Crust
- Graham cracker crumbs – Provides a sweet, buttery crust. Can substitute with digestive biscuits if unavailable.
- Pistachios (chopped) – Adds nutty flavor and texture to the crust and filling. Use roasted and unsalted for best taste.
- Butter (melted) – Binds the crust ingredients together while adding richness. Coconut oil can be used as a dairy-free alternative.
- Granulated sugar – Sweetens the crust and filling. Brown sugar can be used for a deeper flavor.
For the Filling
- Cream cheese – Forms the creamy filling base. Ensure it is at room temperature to avoid lumps.
- Eggs – Provide structure and stability to the filling. Use large eggs for best results.
- Sour cream – Adds creaminess and slight tang. Greek yogurt can be a good substitution.
- Pistachio pudding mix (dry powder) – Enhances pistachio flavor and creaminess in the filling. If unavailable, omit and slightly adjust sugar to maintain sweetness.
- Vanilla extract – Adds depth of flavor to the filling. Can be substituted with almond extract for a different twist.
- Maraschino cherries (chopped) – Provides a sweet-tart element and vibrant color. Fresh or frozen cherries can be used, but pat dry to avoid excess moisture.
For the Topping
- Cherry pie filling – Used as a topping to add a fruity layer. Fresh cherries can be used with a sugar syrup for a homemade topping.
This Cherry Pistachio Cheesecake is bound to become a cherished favorite!
Step‑by‑Step Instructions for Cherry Pistachio Cheesecake
Step 1: Preheat the Oven
Begin by preheating your oven to 325°F (165°C). Meanwhile, prepare a 9-inch springform pan by greasing it thoroughly or lining it with parchment paper to ensure easy removal later. This step is crucial for the Cherry Pistachio Cheesecake, as it sets the perfect environment for even baking.
Step 2: Make the Crust
In a medium bowl, combine the graham cracker crumbs, chopped pistachios, sugar, and melted butter. Mix them until fully blended, creating a sandy texture. Press this mixture firmly into the bottom of your prepared springform pan, forming an even layer. Bake the crust for about 8 minutes, then allow it to cool completely before adding the filling.
Step 3: Prepare the Filling
In a large mixing bowl, beat the softened cream cheese with granulated sugar using an electric mixer until smooth and creamy. Incorporate the eggs one at a time, mixing well after each addition to ensure a lump-free batter. Gently stir in the sour cream, pistachio pudding mix, and vanilla extract, just until combined. The filling for your Cherry Pistachio Cheesecake should be velvety and smooth.
Step 4: Bake the Cheesecake
Carefully pour the cheesecake filling over the cooled crust, smoothing the top with a spatula for an even surface. Place the springform pan into the preheated oven and bake for 45–50 minutes. You’ll know it’s ready when the edges are set and the center still has a slight jiggle. This will ensure a creamy, luscious filling.
Step 5: Cool Gradually
Once baked, turn off the oven and crack the door open slightly to allow cool air in. Let the cheesecake cool in the oven for about an hour; this helps prevent cracks during cooling. Afterward, remove it from the oven and allow it to come to room temperature before refrigerating.
Step 6: Chill the Cheesecake
Cover the cheesecake with plastic wrap or a lid, then refrigerate for a minimum of 4 hours, ideally overnight. Chilling enhances the flavors and yields the perfect texture for the Cherry Pistachio Cheesecake, making it slice beautifully when you’re ready to serve.
Step 7: Top and Serve
Once chilled, spread a generous layer of cherry pie filling over the top of the cheesecake for a vibrant finish. If desired, sprinkle additional chopped pistachios on top for an extra crunch and visual appeal. Slice and serve your delicious Cherry Pistachio Cheesecake to delighted guests!
What to Serve with Cherry Pistachio Cheesecake?
When delightful flavors and textures come together, you can create a memorable meal that tantalizes the senses.
-
Whipped Cream: Light and airy, a dollop of freshly whipped cream adds a rich creaminess that perfectly balances the cheesecake’s sweetness.
-
Fresh Berries: Mixed fresh berries introduce a tangy bite, enhancing the flavor and adding a burst of freshness that complements the cheesecake’s richness.
-
Chocolate Shavings: Finishing with delicate chocolate shavings creates an elegant contrast to the dessert, providing a luxurious touch that will impress your guests.
-
Sparkling Water: A glass of sparkling water with lemon or lime brings a refreshing cleanse between bites, making each taste of cheesecake feel new and inviting.
-
Coffee: Pouring a cup of freshly brewed coffee alongside the cheesecake provides a warm, caffeinated kick that brings out the nutty flavors within the filling.
-
Fruit Compote: A side of tangy fruit compote adds extra layers of flavor and texture, enhancing the sweet-tart balance and keeping the meal vibrant.
-
Almond Biscotti: Crispy almond biscotti served on the side offers a delightful crunch, making every bite a delightful contrast to the creamy cheesecake.
-
Mint Tea: For a soothing finish to your meal, serve mint tea, which enhances the flavor experience and leaves guests feeling refreshed.
-
Ice Cream: A scoop of vanilla or pistachio ice cream serves as a delightful complement, elevating your dessert experience into a sensational treat.
Make Ahead Options
This Cherry Pistachio Cheesecake is perfect for meal prep, allowing you to save time and stress during busy occasions. You can prepare the crust and filling up to 24 hours in advance; simply assemble and bake as directed, then allow it to cool. After it’s cooled to room temperature, cover it tightly and refrigerate for up to 3 days to enhance its flavor and texture. To maintain its quality, avoid adding the cherry pie filling until just before serving—this keeps your cheesecake looking fresh and vibrant. When you’re ready to impress your guests, just top the cheesecake with the filling and garnish for a festive touch!
Expert Tips for Cherry Pistachio Cheesecake
- Room Temperature Ingredients: Ensure that all your ingredients, especially cream cheese and eggs, are at room temperature before mixing. This helps create a smooth Cherry Pistachio Cheesecake without lumps.
- Prevent Cracks: To avoid cracks on the surface, remember to cool the cheesecake gradually in the oven with the door ajar. Chilling it thoroughly afterward is essential for a perfect finish.
- Clean Slices: For neat and clean slices of your cheesecake, dip your knife in warm water before each cut and wipe it dry after. This technique keeps every piece looking lovely.
- Flavor Variations: Explore flavor possibilities by substituting almond extract for vanilla or using different toppings like chocolate drizzle for a delicious twist on the traditional Cherry Pistachio Cheesecake.
- Make Ahead: This dessert can be made a day in advance, making it ideal for stress-free entertaining. Just store it properly in the fridge until you’re ready to serve!
Cherry Pistachio Cheesecake Variations
Feel free to get creative with this delightful cheesecake and personalize it to your taste!
-
Almond Extract: Swap out vanilla for almond extract to deepen the nutty flavor profile. You’ll be surprised by how this small change can enhance the overall taste.
-
Mini Cheesecakes: Divide the crust and filling into muffin tins for adorable mini cheesecakes. Just reduce the baking time to about 18-22 minutes for a perfect bite-sized treat.
-
Chocolate Drizzle: For an indulgent twist, drizzle melted chocolate over the cherry topping. The rich chocolate pairs beautifully with the pistachio and cherry layers.
-
Dairy-Free Option: Use vegan cream cheese and coconut yogurt instead of regular cream cheese and sour cream, creating a luscious vegan-friendly dessert without sacrificing creaminess.
-
Fresh Fruit Topping: Instead of cherry pie filling, top with a mix of fresh berries for a tangy touch and a pop of color. This can make every slice feel like summer on your plate.
-
Refrigerated Raw Cheesecake: Blend soaked cashews, sweetener, and coconut oil for a raw, no-bake version. This revolutionary twist still offers that unforgettable cherry and pistachio flavor.
-
Spicy Kick: Add a pinch of cayenne pepper to the crust for a surprising heat that complements the sweetness of the cherries beautifully!
-
Nutty Crust Alternative: Replace a portion of graham cracker crumbs with crushed pistachios for an extra nutty punch in your crust. It enhances the texture and flavor dramatically.
With these variations, you can keep the excitement alive while enjoying this incredible dessert! For another sweet idea, consider pairing your Cherry Pistachio Cheesecake with a creamy White Chocolate Cheesecake. The combination is sure to wow your guests!
How to Store and Freeze Cherry Pistachio Cheesecake
- Fridge: Store leftover Cherry Pistachio Cheesecake covered in plastic wrap or a sealed container for up to 5 days. This keeps it fresh and maintains its creamy texture.
- Freezer: For longer storage, wrap the cheesecake tightly in plastic wrap and then in aluminum foil to prevent freezer burn. It can be frozen for up to 2 months.
- Thawing: When ready to enjoy, transfer the cheesecake to the fridge the night before serving to thaw slowly. Wait to add toppings until after it’s fully thawed.
- Reheating: This cheesecake is best served cold, so no reheating is necessary. Just slice and serve when ready, ensuring it looks as beautiful as it tastes!
Cherry Pistachio Cheesecake Recipe FAQs
What is the best way to select ripe cherries?
Absolutely! When choosing maraschino cherries for the cheesecake, look for bright red color and a firm texture. Avoid any with dark spots or signs of mushiness, as those indicate overripeness. Fresh cherries should be shiny and plump for the best flavor.
How should I store leftover Cherry Pistachio Cheesecake?
It’s easy! Store any leftover cheesecake in the refrigerator, covered with plastic wrap or placed in an airtight container. It will remain fresh for up to 5 days. Keeping it chilled preserves the creamy texture and delicious taste!
Can I freeze Cherry Pistachio Cheesecake? How do I do that?
Of course! To freeze your cheesecake, wrap it tightly in plastic wrap, then add an outer layer of aluminum foil to prevent freezer burn. This way, you can store it for up to 2 months. When you’re ready to enjoy it, simply place it in the fridge overnight to thaw. I recommend adding any toppings after it’s fully thawed to avoid a soggy crust.
What should I do if my cheesecake cracks while baking?
Very common! If your cheesecake cracks, it can happen for several reasons, such as rapid temperature change or overbaking. To minimize cracking, make sure to cool your cheesecake gradually in the oven with the door ajar after baking. Letting it chill properly in the fridge afterward can also help achieve a smooth finish.
Are there any dietary considerations I should be aware of with this cheesecake?
Definitely! This recipe contains dairy and nuts, so if you have allergies, be cautious. For dairy-free options, try using coconut cream instead of sour cream and dairy-free cream cheese. If you’re preparing this for pets, be sure to keep any cheesecake scraps out of their reach, as ingredients like sugar and certain nuts aren’t pet-friendly.
Can I use fresh cherries instead of maraschino cherries?
Absolutely! If you prefer fresh cherries, just pit and chop them, then pat them dry to remove excess moisture. Consider tossing them with a bit of sugar beforehand to enhance their sweetness, which complements the creamy cheesecake beautifully.
Delicious Cherry Pistachio Cheesecake for Celebrations
Ingredients
Equipment
Method
- Preheat your oven to 325°F (165°C) and prepare a 9-inch springform pan by greasing it.
- In a medium bowl, mix the graham cracker crumbs, chopped pistachios, sugar, and melted butter. Press it into the bottom of the springform pan and bake for about 8 minutes.
- In a large mixing bowl, beat the softened cream cheese with granulated sugar until smooth. Incorporate the eggs one at a time, then stir in the sour cream, pistachio pudding mix, and vanilla extract.
- Pour the cheesecake filling over the cooled crust and smooth the top. Bake for 45–50 minutes until the edges are set.
- Once baked, turn off the oven and crack the door open slightly. Let the cheesecake cool in the oven for about an hour.
- Cover the cheesecake and refrigerate for a minimum of 4 hours, ideally overnight.
- Spread cherry pie filling over the cheesecake and sprinkle additional chopped pistachios on top before serving.
Leave a Reply