
As I sifted through my pantry, the rich aroma of espresso wafted through the air, and I knew I had to create something decadent and irresistible: an Espresso Cheesecake. This no-bake dessert is a dream for anyone looking to indulge without the fuss of baking—perfect for those warm evenings when you crave something sweet but want to keep it cool. With its creamy texture and the harmonious blend of coffee and chocolate flavors, this cheesecake is not just a treat; it’s a showstopper that will win over friends and family alike. Plus, it’s a great make-ahead option that allows the flavors to deepen, making it an ideal choice for gatherings. Are you ready to whip up this coffee-lover’s delight?
Why is This Cheesecake a Must-Try?
Decadent delight: The no-bake espresso chocolate cheesecake offers a rich, creamy texture that melts in your mouth, combining bold coffee with luscious chocolate.
Quick and easy: Perfect for beginners and busy cooks alike, this recipe requires no baking, saving you time and effort.
Versatile options: Add unique flavors with liqueurs or switch up the crust for a personalized touch, just like with my Mocha Cake Frosting!
Crowd-pleaser: With its gorgeous presentation and indulgent taste, this cheesecake is sure to impress at your next gathering.
Make-ahead friendly: Prepare this dessert a day in advance to allow the flavors to deepen, ensuring a showstopping treat that’s ready when you are.
Espresso Cheesecake Ingredients
For the Filling
• Cream Cheese – Provides the wonderful creamy texture; choose full-fat for the richest flavor.
• Powdered Sugar – Sweetens the filling without any grittiness; you can use granulated sugar, but it may alter the smoothness.
• Espresso Powder – Infuses deep coffee flavor into the cheesecake; instant coffee works in a pinch, but use less.
• Heavy Cream – Adds to the luxurious, velvety filling; coconut cream can be a great non-dairy substitute.
For the Crust
• Oreo Cookies – Creates a deliciously chocolatey base for the cheesecake; graham crackers can be a lighter alternative.
• Butter – Serves as the binding agent for the crust; any unsalted butter will do.
For the Ganache
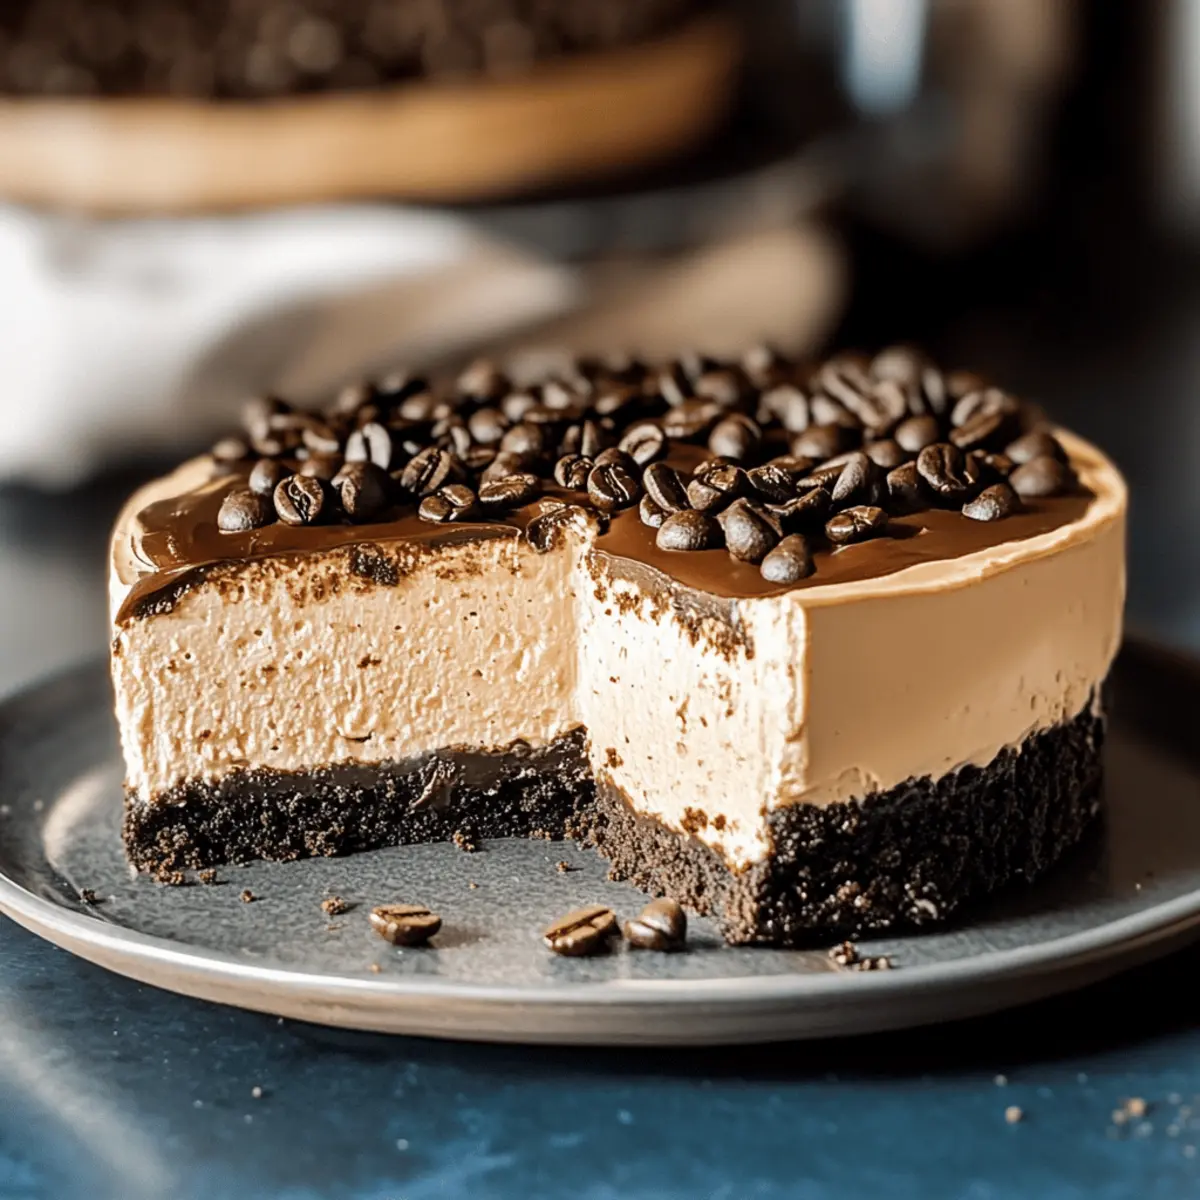
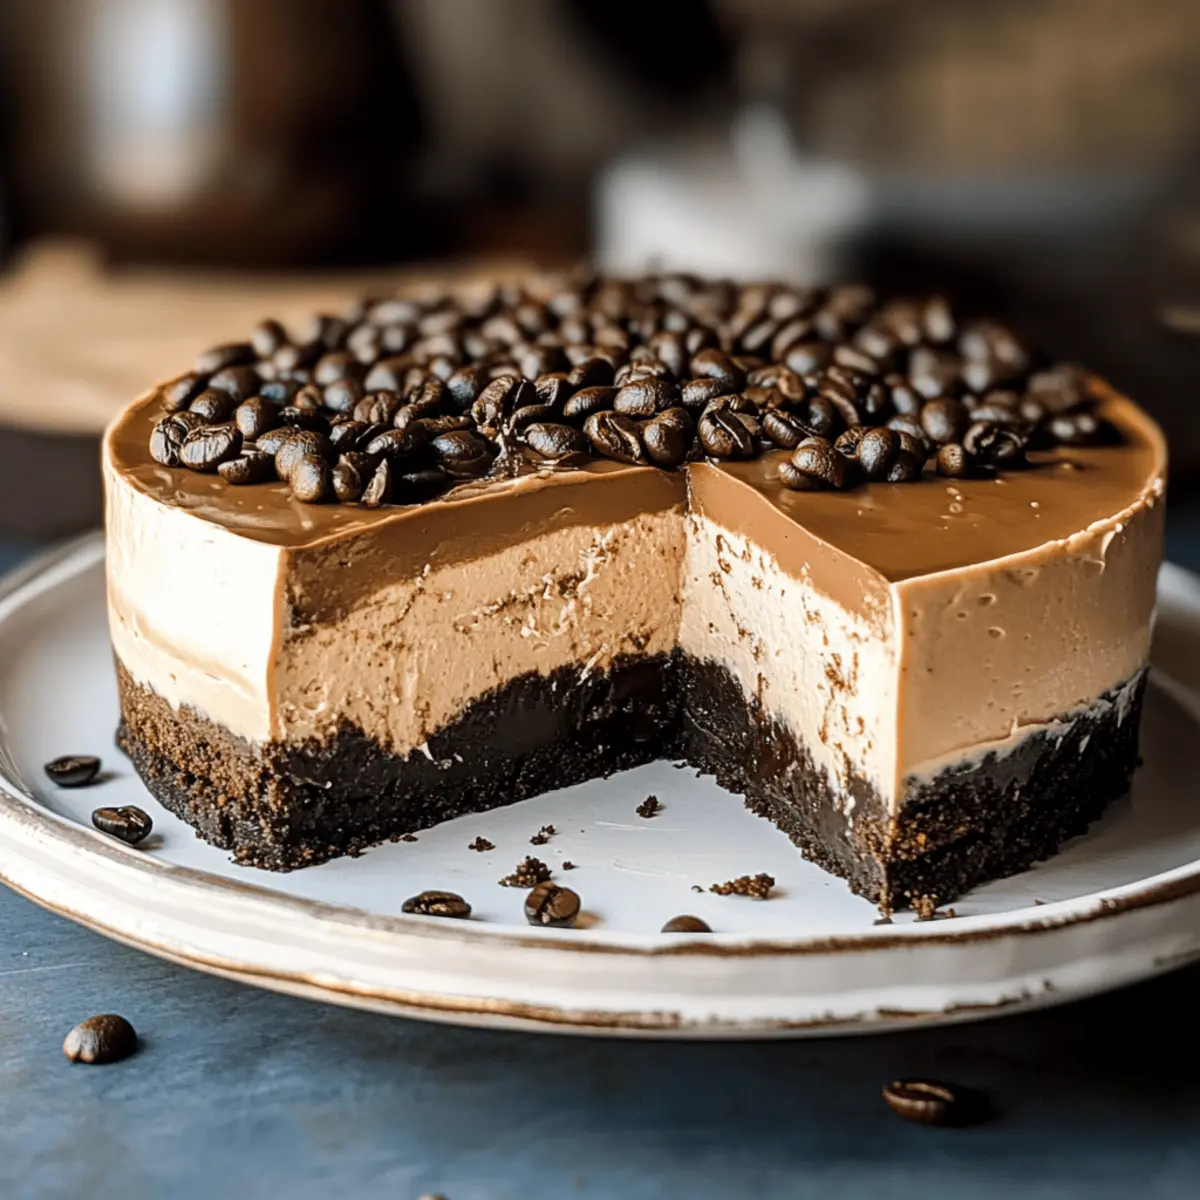
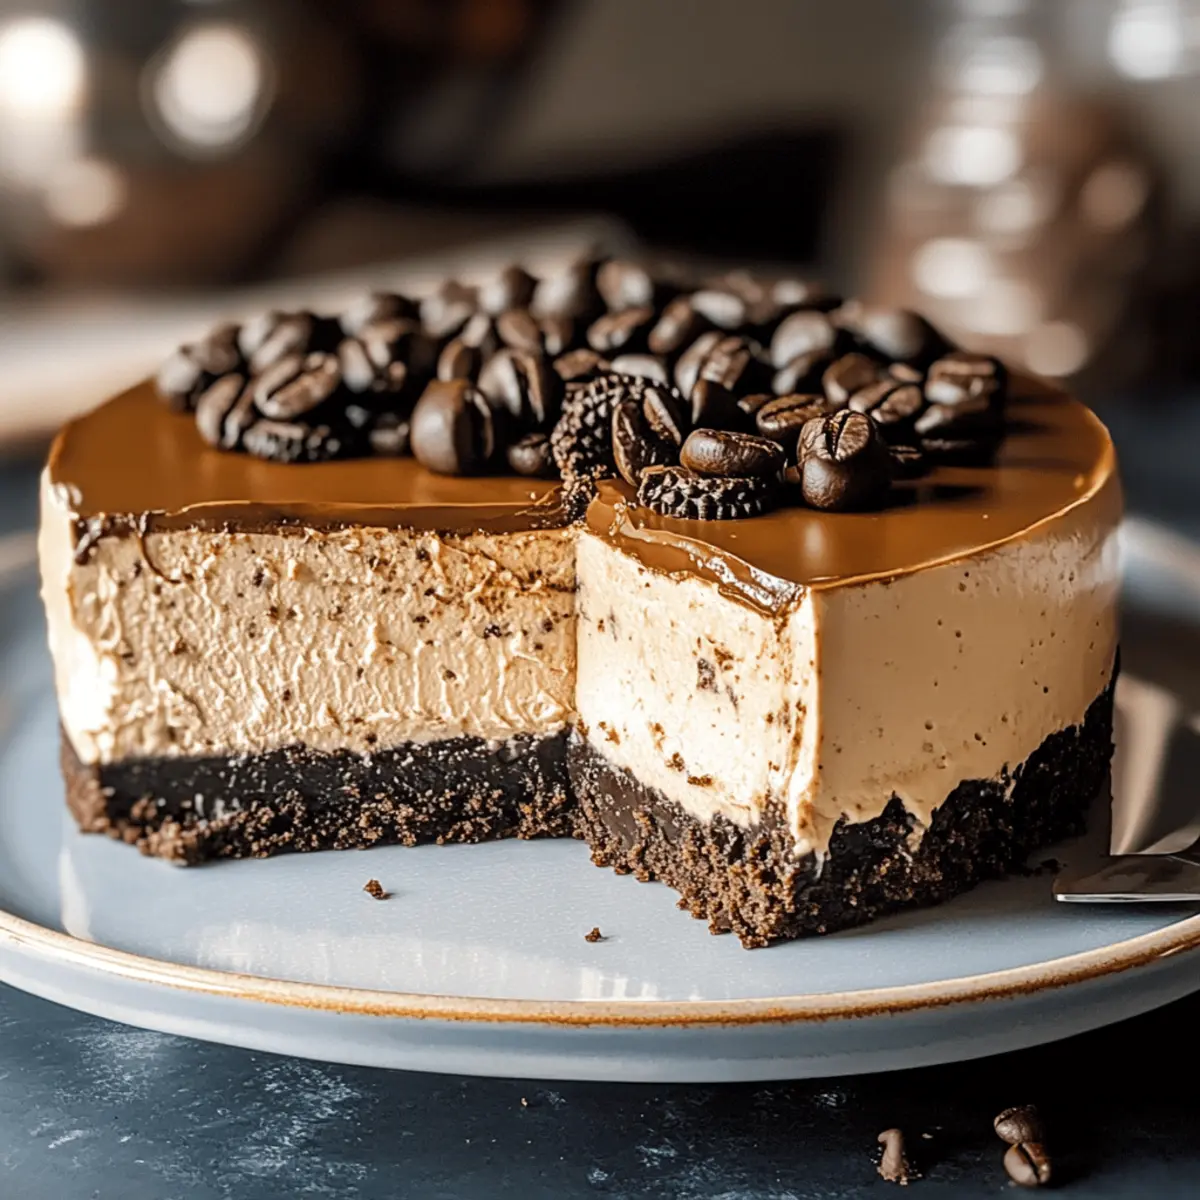
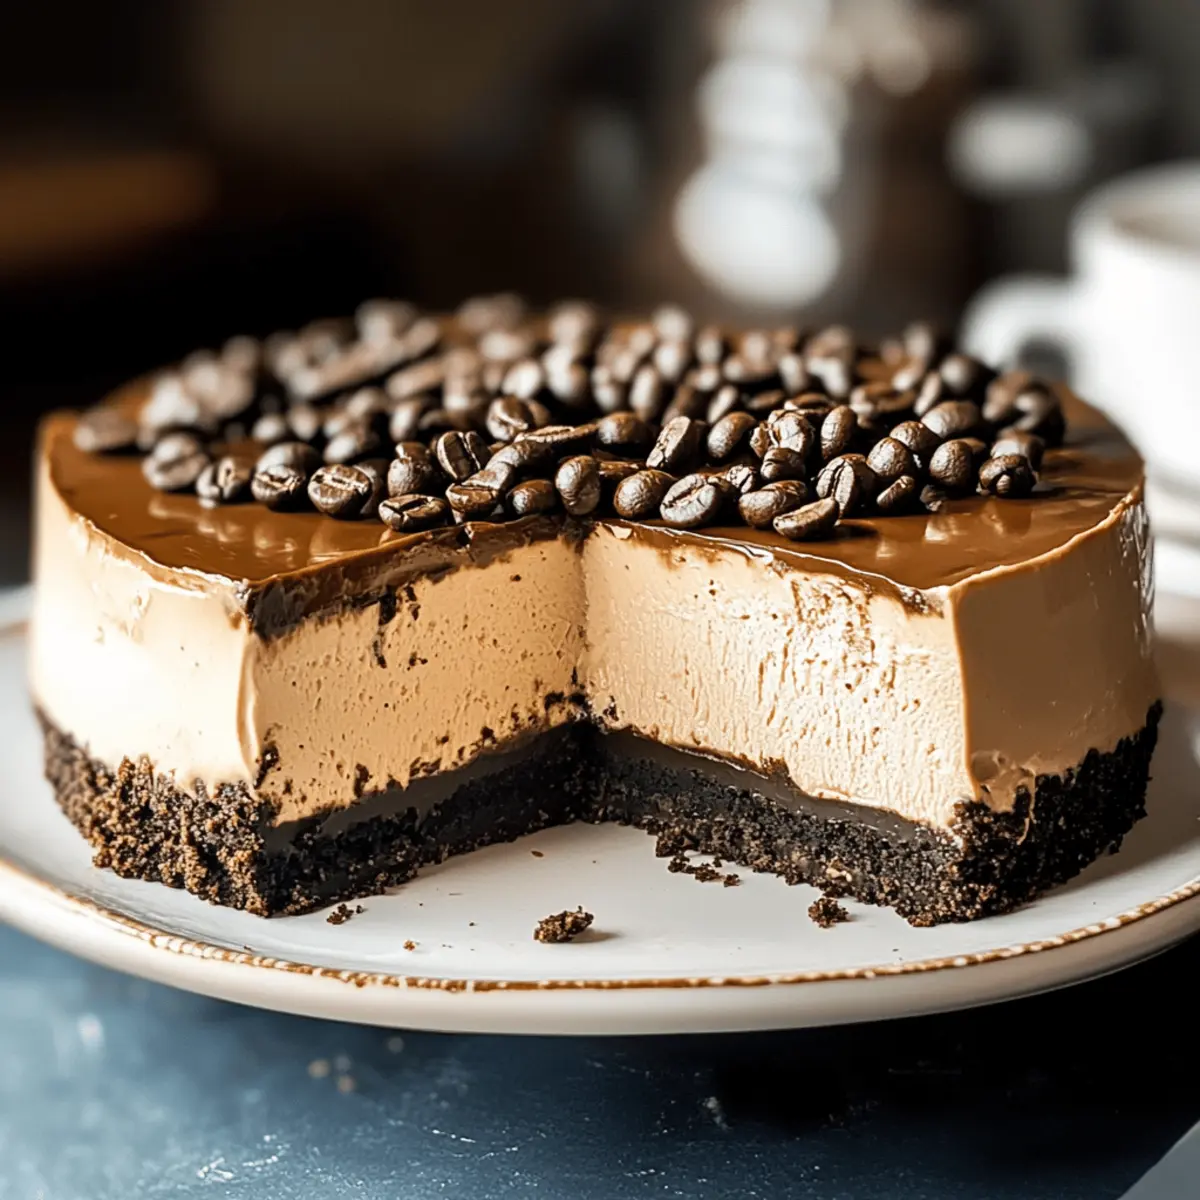
• Chocolate Ganache – The crowning glory of this dessert, adding a rich chocolate layer on top; dark chocolate heightens the flavor beautifully.
Step‑by‑Step Instructions for Espresso Cheesecake
Step 1: Prepare the Crust
Start by placing the Oreo cookies in a food processor and blend until they turn into fine crumbs. In a separate bowl, melt 4 tablespoons of unsalted butter, then combine the crumbs with the butter until fully coated. Firmly press this mixture into the bottom of a springform pan, ensuring it is evenly distributed. Set it in the fridge to chill while you prepare the filling.
Step 2: Make the Filling
In a large mixing bowl, beat 16 ounces of full-fat cream cheese with 1 cup of powdered sugar until the mixture is smooth and creamy, about 2-3 minutes. Gradually add in 1 cup of heavy cream and 2 tablespoons of espresso powder, and continue beating until the filling thickens and becomes light, approximately 3-4 minutes. This rich filling will perfectly complement your espresso cheesecake.
Step 3: Set the Cheesecake
Pour the creamy filling over your chilled crust in the springform pan, using a spatula to smooth the top for a polished finish. Cover the pan with plastic wrap and place it in the refrigerator. Chill the cheesecake for at least 5-6 hours, or preferably overnight, to allow it to set properly and develop rich flavors.
Step 4: Prepare the Ganache
While the cheesecake is chilling, create the chocolate ganache by melting 8 ounces of dark chocolate with ½ cup of heavy cream in a small saucepan over low heat. Stir continuously until the mixture is completely smooth and glossy, about 2-3 minutes. Remove it from the heat and let it cool slightly before pouring it over your chilled espresso cheesecake.
Step 5: Decorate and Serve
Once the ganache has set on the cheesecake, carefully remove the sides of the springform pan for a beautiful presentation. For an elegant touch, top with dollops of whipped cream and sprinkle crushed espresso beans on top. This stunning espresso cheesecake is now ready to be sliced and served at your next gathering!
Espresso Cheesecake Variations
Feel free to experiment and make this espresso cheesecake uniquely yours, transforming it into a delightful experience for you and your loved ones!
- No-Bake Option: Skip the chilling step by blending all ingredients into a mousse and serving in individual cups.
- Dairy-Free: Substitute cream cheese and heavy cream with vegan cream cheese and coconut cream for a luscious, non-dairy treat.
- Liqueur-Infused: Add a splash of Kahlua or Amaretto to the filling for an extra layer of flavor that will surprise your tastebuds!
- Biscuit Base: Swap the Oreo crust with crushed ginger snaps for a spicy twist that complements the coffee beautifully.
- Chocolate Ganache Twist: Use white chocolate instead of dark chocolate for a sweetened contrast to the coffee flavor.
- Nutty Variation: Add finely chopped nuts like hazelnuts or almonds to the crust for added crunch and a nutty flavor profile.
- Layered Delight: Create a layered dessert by adding a layer of chocolate mousse between the cheesecake filling and crust.
- Spicy Kick: Incorporate a pinch of cayenne pepper into the filling for a surprising hint of heat that pairs wonderfully with the rich flavors.
If you’re looking for something truly special, consider whipping up a luscious topping using chocolate ganache from my delightful Mocha Cake Frosting recipe to take your cheesecake to the next level!
Expert Tips for Espresso Cheesecake
• Chill Thoroughly: Make sure to refrigerate your cheesecake for at least 5-6 hours, ideally overnight, to achieve the perfect texture.
• Avoid Overmixing: When making the filling, mix just until combined. Overbeating can introduce air bubbles, leading to cracks in your creamy espresso cheesecake.
• Proper Ganache Technique: Stir the chocolate and cream gently after melting to maintain a smooth texture. Avoid vigorous mixing for a shiny finish.
• Flavor Variations: Feel free to experiment! Adding a splash of liqueur like Kahlua can enhance the coffee flavor even more, giving a personal touch to your espresso cheesecake.
• Crust Options: If you want a lighter crust, substitute Oreo cookies with graham crackers for a delightful twist without compromising on taste.
What to Serve with Decadent No-Bake Espresso Chocolate Cheesecake?
As you savor each creamy bite, enhance your dessert experience with delightful pairings that complement the rich flavors beautifully.
-
Fresh Berries: The bright acidity of strawberries or raspberries cuts through the cheesecake’s richness, adding a fresh, vibrant contrast.
-
Whipped Cream: A dollop of lightly sweetened whipped cream elevates the dessert’s luxuriousness, creating a luscious mouthfeel with each forkful.
-
Dark Chocolate Shavings: Sprinkle dark chocolate on top for an extra touch of decadence, adding a textural crunch and an intense cocoa lift.
-
Espresso or Coffee: Serve slices alongside a hot cup of espresso or coffee to enhance the indulgent coffee flavors in the cheesecake—it’s a match made in heaven!
-
Chocolate Sauce Drizzle: A rich chocolate sauce drizzled over the cheesecake enhances the visual appeal while offering mouthwatering additions to each bite.
-
Pistachio Crumble: The crunchy, salty flavor of crushed pistachios invites an exciting texture contrast, making every bite pop with surprise and flavor.
-
Ice Cream Scoop: A side of vanilla bean ice cream brings a creamy, cool element, creating a delightful dance of flavors that balances the rich cheesecake.
-
Mint Leaves Garnish: Fresh mint leaves add a refreshing aroma and a beautiful pop of color, brightening the decadent experience.
Storage Tips for Espresso Cheesecake
Fridge: Store your espresso cheesecake in the refrigerator for up to 5 days. Keep it covered with plastic wrap or inside an airtight container to maintain freshness.
Freezer: For longer storage, wrap the cheesecake tightly in plastic wrap and then in aluminum foil. It can be frozen for up to 2 months. Thaw in the refrigerator overnight before serving.
Reheating: This dessert is best enjoyed chilled. If you prefer to warm it slightly, place a slice in the microwave for about 10-15 seconds—just enough to take off the chill without melting the texture.
Serving Suggestion: Enhance your serving experience by garnishing with freshly whipped cream and chocolate drizzle right before serving to keep it the most delicious way to enjoy your espresso cheesecake!
Make Ahead Options
These delectable Espresso Cheesecake bites are perfect for meal prep! You can prepare the crust and filling up to 24 hours in advance, allowing the flavors to meld beautifully. To do this, simply make the crust and filling as instructed, then store them separately in airtight containers in the refrigerator. When you’re ready to serve, pour the filling over the crust and allow it to chill in the fridge for at least 5-6 hours (or ideally overnight). This ensure the cheesecake sets properly, delivering a rich and velvety texture that remains just as delicious. The ganache can also be made ahead; simply cover and refrigerate for up to 3 days before pouring it over the chilled cheesecake, achieving a show-stopping dessert that’s ready when you are!
Espresso Cheesecake Recipe FAQs
What type of cream cheese should I use for the cheesecake?
For the creamiest and richest flavor, it’s best to use full-fat cream cheese. This gives the cheesecake its delightful, smooth texture. Light or reduced-fat cream cheese can alter the flavor and consistency.
How should I store the espresso cheesecake?
You can store the cheesecake in the refrigerator for up to 5 days. Be sure to cover it with plastic wrap or keep it in an airtight container to retain its freshness and prevent it from absorbing other odors.
Can I freeze the espresso cheesecake, and how?
Absolutely! To freeze the cheesecake, first wrap it tightly in plastic wrap followed by aluminum foil to prevent freezer burn. It can be stored in the freezer for up to 2 months. When you’re ready to enjoy it, just transfer it to the refrigerator the night before to thaw slowly.
Why is my cheesecake cracking, and how can I prevent it?
Cracks in cheesecake often occur due to overmixing the filling or not letting it set properly. To avoid this, mix just until combined—don’t overbeat. Also, chilling the cheesecake thoroughly, ideally overnight, allows it to set correctly, minimizing cracks. If it does crack, don’t worry! You can cover it with ganache to hide any imperfections.
Are there any dietary considerations for the ingredients in this recipe?
Yes, this recipe includes cream cheese and heavy cream, which may not be suitable for those with lactose intolerances. If you’re looking for a non-dairy version, substitute with non-dairy cream cheese and coconut cream. Always be mindful of potential allergies; for example, avoid the use of liqueurs if someone is sensitive to alcohol.
How ripe should my espresso powder be for the best flavor?
When selecting espresso powder, look for a freshness date rather than ripeness. It should have a rich, bold flavor and a fine texture. If it has dark spots or smells stale, it’s time to replace it for optimal taste in your cheesecake.
Indulge in Creamy Espresso Cheesecake Bliss at Home
Ingredients
Equipment
Method
- Start by placing the Oreo cookies in a food processor and blend until they turn into fine crumbs. Melt 4 tablespoons of unsalted butter and combine it with the crumbs until fully coated. Press this mixture into the bottom of a springform pan and chill in the fridge.
- In a large mixing bowl, beat 16 ounces of cream cheese with 1 cup of powdered sugar until smooth, about 2-3 minutes. Gradually add in 1 cup of heavy cream and 2 tablespoons of espresso powder, beating until thickened and light, about 3-4 minutes.
- Pour the creamy filling over the chilled crust in the springform pan, smoothing the top with a spatula. Cover with plastic wrap and refrigerate for at least 5-6 hours or overnight to set.
- Create the chocolate ganache by melting 8 ounces of dark chocolate with ½ cup of heavy cream in a small saucepan over low heat, stirring until smooth and glossy, about 2-3 minutes. Let it cool slightly before pouring over the cheesecake.
- Once the ganache has set, remove the sides of the springform pan for presentation. Top with whipped cream and sprinkle crushed espresso beans before slicing and serving.
Leave a Reply