
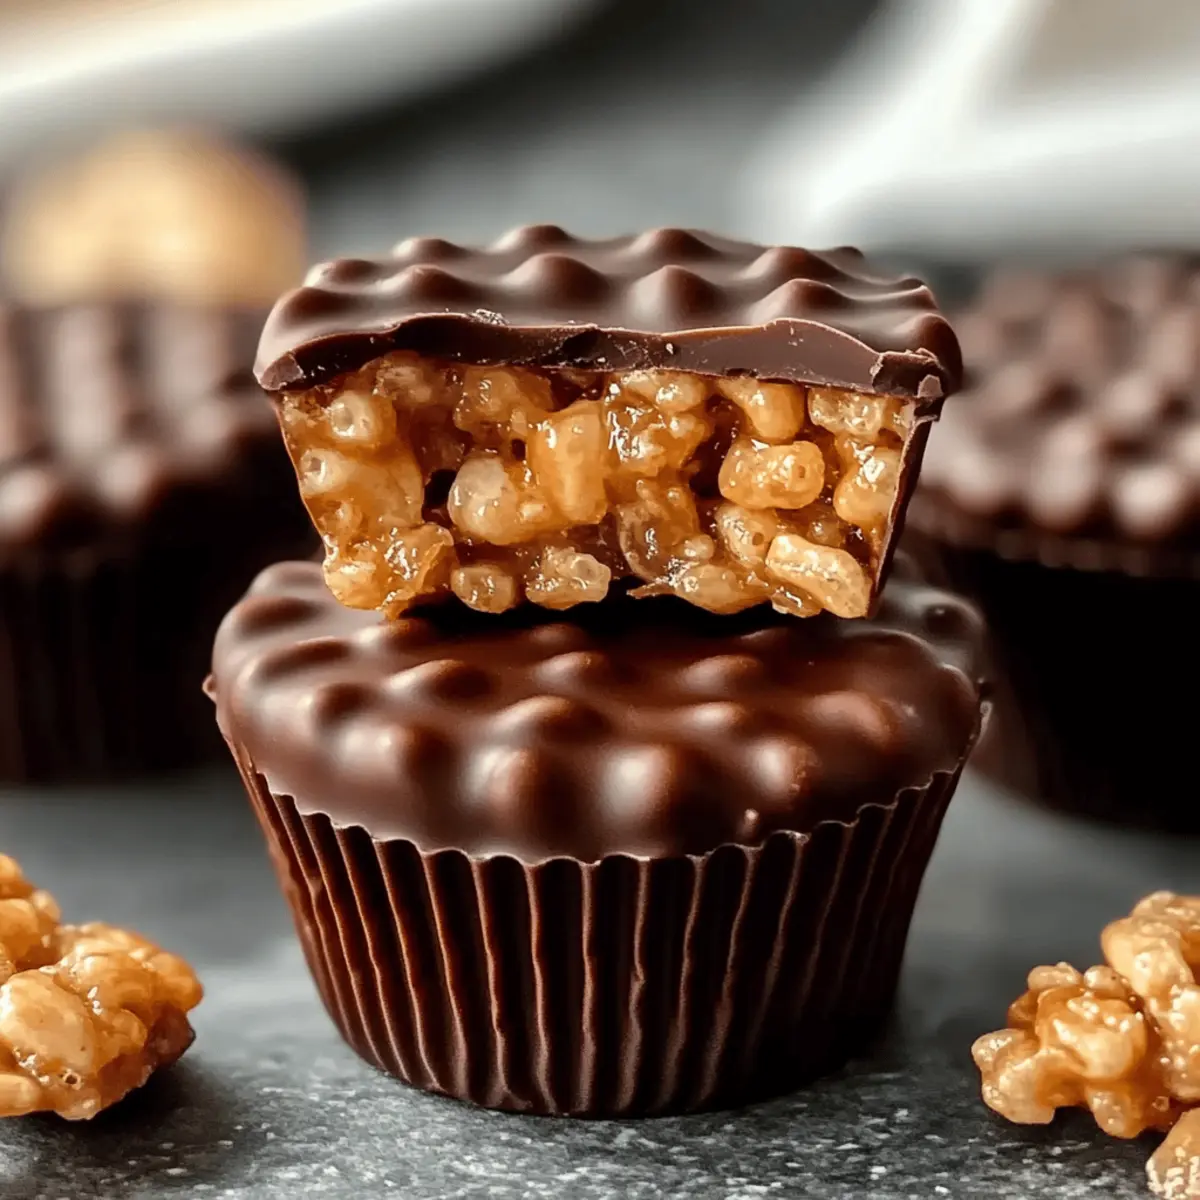
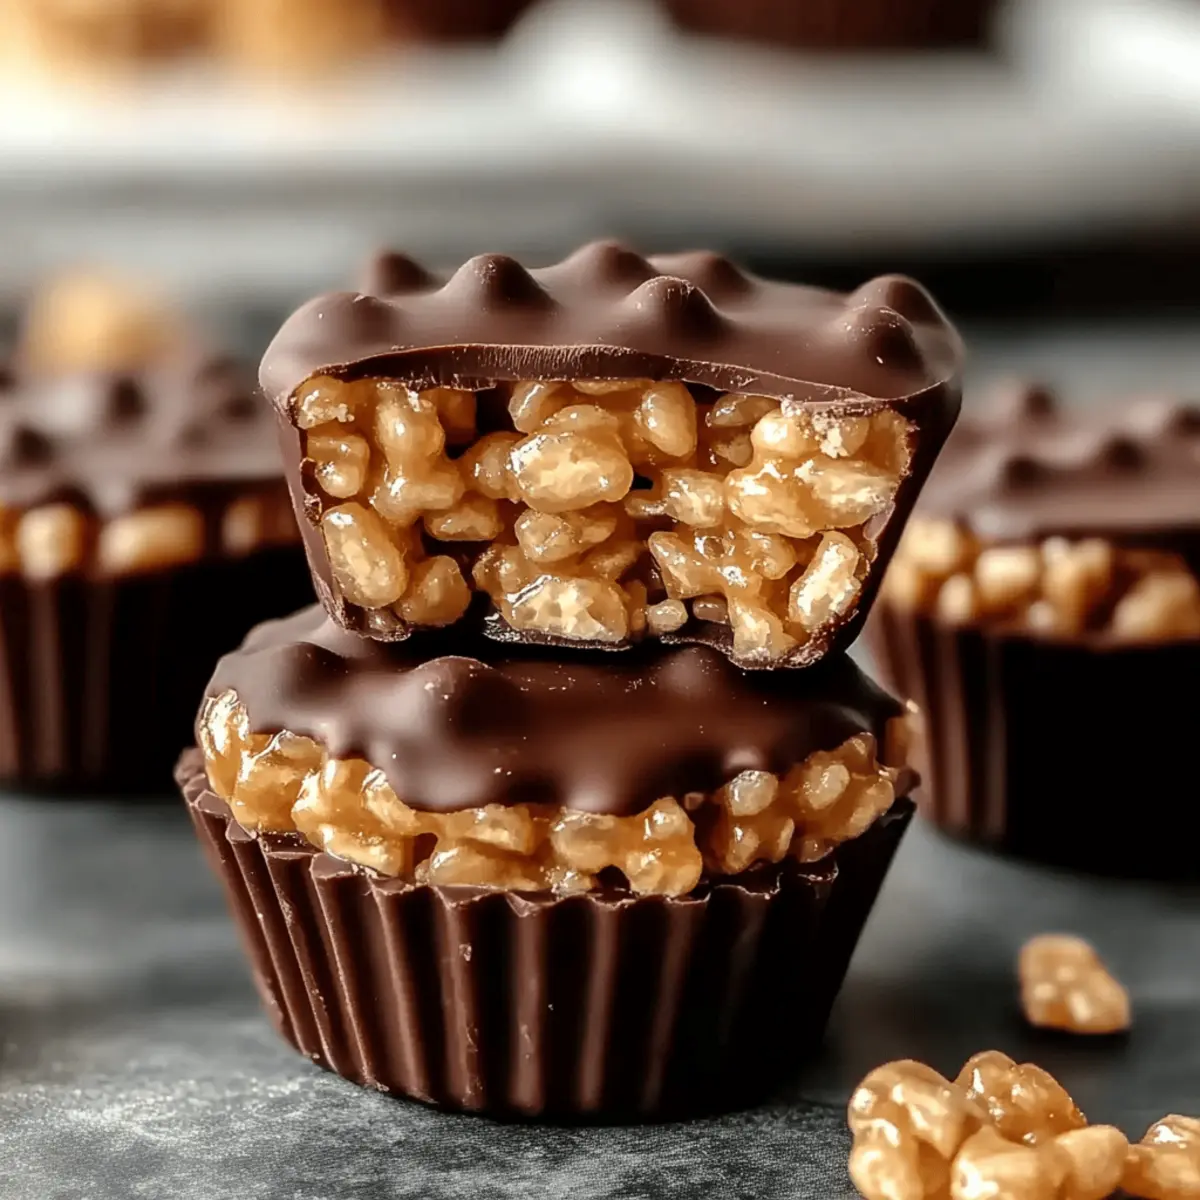
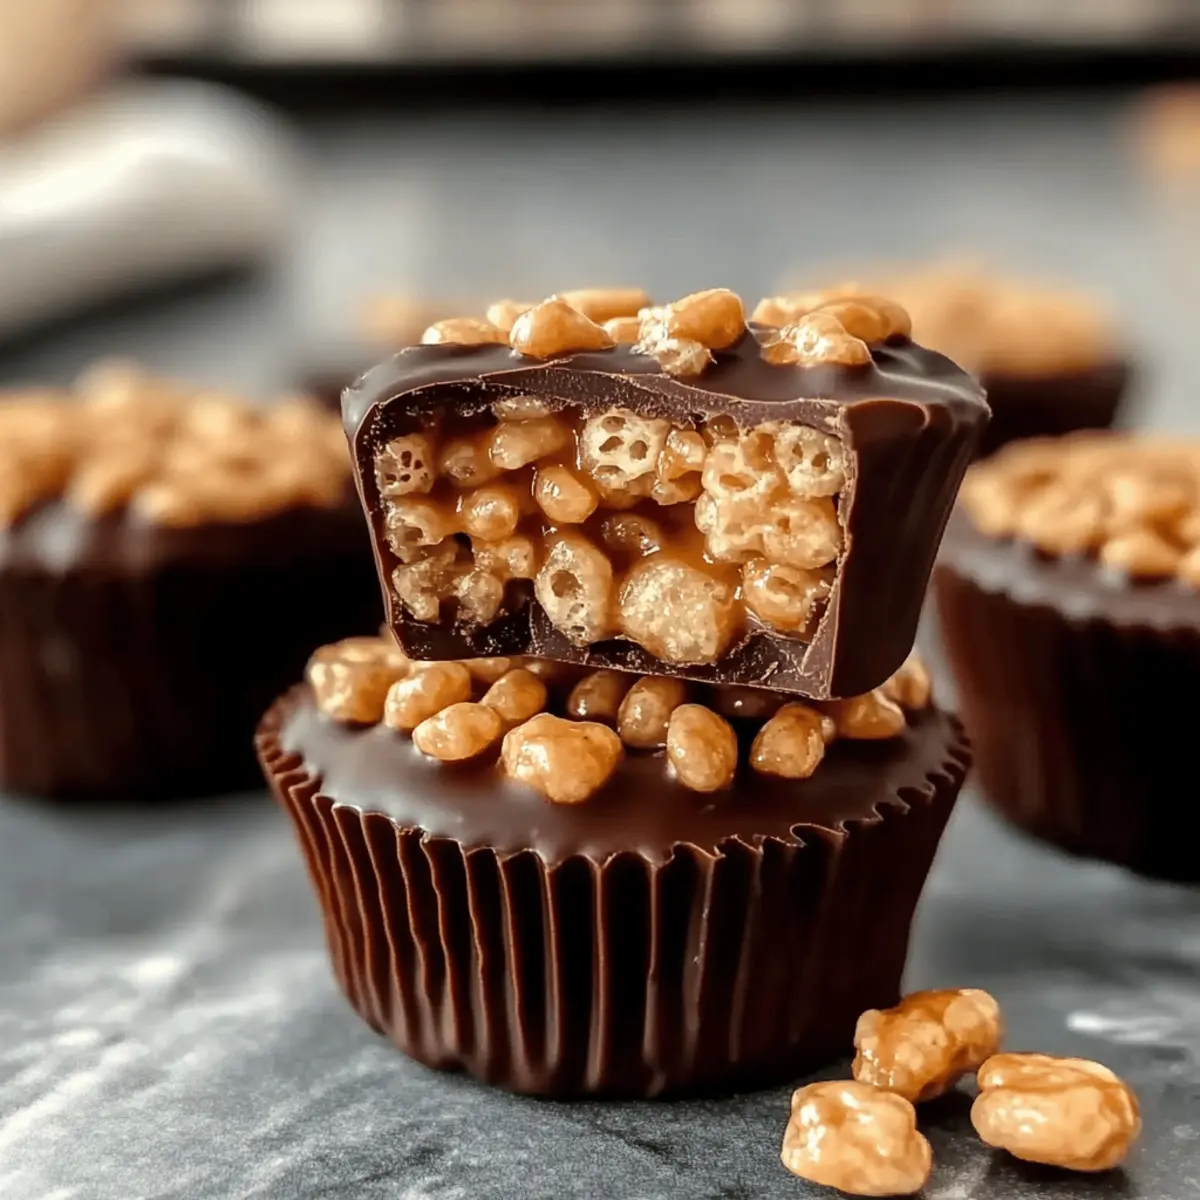
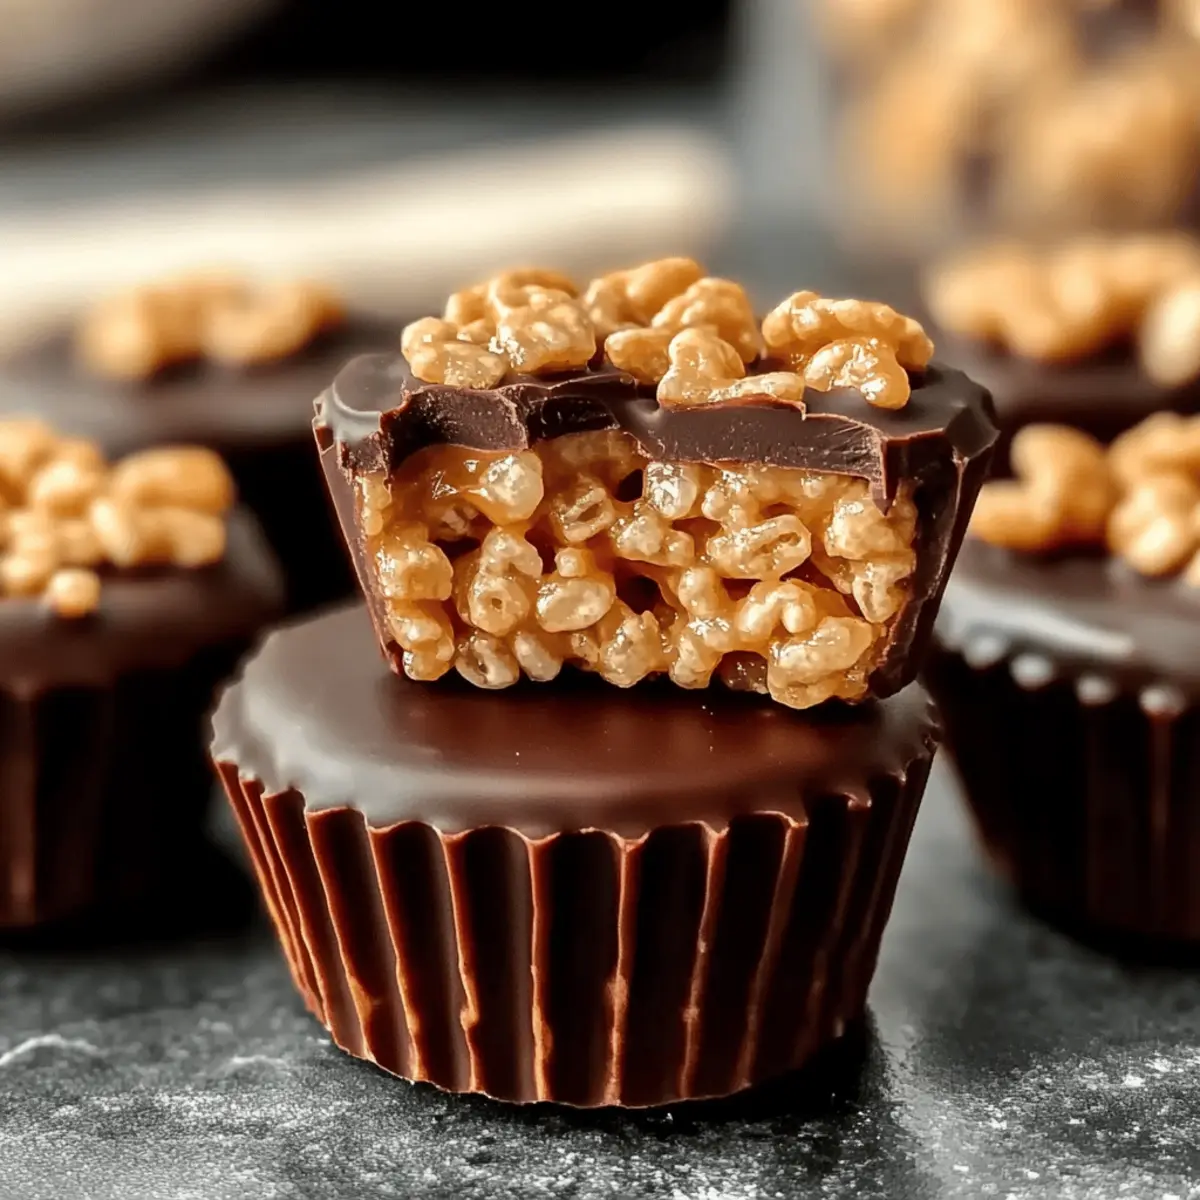
As I scoured the kitchen for a quick and satisfying pick-me-up, the aroma of melting chocolate and peanut butter instantly transported me to my childhood. These no-bake Chocolate Peanut Butter Rice Krispie Cups promise to fulfill both cravings and nostalgia in a mere matter of minutes. With only a handful of ingredients, this recipe is not just simple; it’s also incredibly versatile, allowing for fun ingredient swaps to cater to your dietary needs. Perfect for snacking on-the-go or impressing at gatherings, their delightful blend of creamy and crunchy textures will undoubtedly charm your taste buds. Are you ready to elevate your snack game with these irresistible cups that take just a whisk to whip up? Let’s dive in!
What makes these Rice Krispie Cups special?
No-Bake Convenience: This recipe requires no baking, making it perfect for busy days or last-minute cravings.
Childhood Nostalgia: The combination of chocolate, peanut butter, and crispy cereal brings back fond memories of childhood treats.
Customizable Goodness: Easily swap ingredients to create your own version, whether using vegan alternatives or different flavors, like almond butter.
Crowd-Pleasing Delight: Perfect for parties or family gatherings, these treats are sure to be the star of the show.
Quick and Easy: Whip them up in under 30 minutes, providing instant gratification without the hassle.
Your taste buds will definitely thank you, especially when you save time without sacrificing flavor—perfect for snack enthusiasts or those looking to elevate their dessert game!
Chocolate Peanut Butter Rice Krispie Cups Ingredients
Get ready to create your own sweet, nostalgic treats with this simple ingredient list!
For the Base
• Rice Krispies cereal – Adds a delightful crunch; substitute with granola for more texture if desired.
• Creamy peanut butter – Provides rich flavor; swap for almond or sunflower butter for nut allergies.
• Unsalted butter – Binds everything together with creaminess; coconut oil works for a dairy-free option.
• Mini marshmallows – Creates a sweet and chewy foundation; consider using vegan marshmallows or marshmallow fluff.
For the Topping
• Chocolate chips – Offers a rich, sweet finish; dark chocolate can reduce sweetness, while carob chips introduce a new flavor.
• Vanilla extract (optional) – Enhances the overall flavor; almond extract can be a delightful alternative.
• Pinch of sea salt (optional) – Balances the sweetness and elevates flavors; a small touch can make a big difference!
These ingredients come together beautifully to create Chocolate Peanut Butter Rice Krispie Cups that are not just delicious, but also a treat that everyone can enjoy!
Step‑by‑Step Instructions for Chocolate Peanut Butter Rice Krispie Cups
Step 1: Melt the Base
In a medium saucepan, melt ¼ cup of unsalted butter and 4 cups of mini marshmallows over low heat. Stir continuously for about 5 minutes until the mixture is fully melted and smooth, ensuring nothing burns on the bottom. Remove the pan from heat and let the buttery marshmallow mixture cool slightly while you prepare for the next step.
Step 2: Add Peanut Butter
Once the base is slightly cooled, stir in 1 cup of creamy peanut butter and 1 teaspoon of vanilla extract until fully incorporated and nicely creamy. This step should take about 1-2 minutes; look for a rich, cohesive mixture. The warmth from the marshmallows will help the peanut butter blend perfectly, forming the delicious foundation for your Chocolate Peanut Butter Rice Krispie Cups.
Step 3: Mix with Cereal
In a large mixing bowl, combine 6 cups of Rice Krispies cereal with the peanut butter mixture. Using a spatula, gently fold the cereal into the mixture for about 2-3 minutes until each Rice Krispie is well-coated. Be careful not to crush the cereal; the goal is to maintain that delightful crunch in your tasty treats.
Step 4: Shape the Cups
Line a muffin tin with paper liners or lightly grease it to prevent sticking. Spoon the Rice Krispie mixture evenly into each cup, pressing down gently with the back of a spoon to form firm, even cups. Each cup should be packed tightly but still retain a bit of texture. This process should take about 5 minutes, so ensure they are formed well to hold together.
Step 5: Add Chocolate Layer
Melt 1 cup of chocolate chips in a microwave-safe bowl in 30-second increments, stirring in between until smooth and glossy—this should take about 1-2 minutes total. Spoon a thin layer of the melted chocolate over each Rice Krispie cup, ensuring an even coating. This step adds an irresistible sweet finish to your Chocolate Peanut Butter Rice Krispie Cups.
Step 6: Set & Serve
Let your delicious creations cool to room temperature, or for a quicker set, place the muffin tin in the refrigerator for about 20-30 minutes. Once firm, carefully remove the cups from the liners. These no-bake Chocolate Peanut Butter Rice Krispie Cups are now ready to enjoy—delightful, crunchy, and absolutely irresistible!
What to Serve with Chocolate Peanut Butter Rice Krispie Cups
Indulging in the blissful flavors of chocolate and peanut butter deserves some delightful companions to create a memorable spread!
-
Fresh Fruit Salad: A medley of seasonal fruits adds vibrant color and a refreshing note to balance the rich cups. The natural sweetness brings harmony to the overall experience.
-
Creamy Vanilla Yogurt: This silky yogurt provides a luscious contrast, creating a smooth and tangy bite that perfectly complements the crunchy texture of each cup.
-
Chocolate Milkshake: A thick, creamy shake enhances the chocolate experience while quenching thirst, making it a fun treat for kids and adults alike.
-
Nutty Granola Bars: These chewy bars bring a wholesome element, providing a satisfying crunch that pairs well with the creamy cups.
-
Chilled Almond Milk: Light and subtly sweet, this plant-based milk complements the flavor profile of the rice crispy cups, creating a delightful contrast without overpowering it.
-
Mini Cupcakes: Offer a variety of mini cupcakes for an added festive touch; their fluffy texture creates a beautiful harmony with the crunchy cups.
-
Coconut Macaroons: Sweet, chewy, and slightly tropical, these delights work beautifully alongside the chocolate peanut butter theme.
-
Coffee or Espresso: A rich cup of coffee or a shot of espresso offers a sophisticated edge that balances the sweetness, making it perfect for adults.
These delightful pairings not only elevate the experience but also encourage everyone to enjoy this sweet treat’s rich flavors!
Make Ahead Options
These no-bake Chocolate Peanut Butter Rice Krispie Cups are perfect for meal prep enthusiasts! You can prepare the Rice Krispie mixture up to 24 hours in advance. Simply complete Steps 1-3, then store the mixture in an airtight container in the refrigerator to keep it fresh. On the day you plan to serve, spoon the chilled mixture into your lined muffin tin, then follow Steps 5-6 to add that delightful chocolate layer and let them set. This way, you save time and have delicious treats ready to impress at a moment’s notice—just as tasty as if made fresh!
Expert Tips for Chocolate Peanut Butter Rice Krispie Cups
-
Low Heat Matters: Keeping the heat low when melting the butter and marshmallows prevents burning, ensuring a smooth base for your Chocolate Peanut Butter Rice Krispie Cups.
-
Gentle Folding: When combining the Rice Krispies and the peanut butter mixture, fold gently to avoid crushing the cereal, preserving that iconic crunch in each bite.
-
Press Firmly: Make sure to press the mixture firmly into the muffin tin to help the cups hold their shape, but don’t overdo it to maintain texture.
-
Chill for Best Results: For a firmer chocolate topping, refrigerate the cups for at least 20 minutes before serving; this creates a delightful contrast between creamy chocolate and crisp rice.
-
Explore Customizations: Feel free to experiment with different nut butters or toppings—they can add a unique twist to your Chocolate Peanut Butter Rice Krispie Cups and cater to dietary preferences!
How to Store and Freeze Chocolate Peanut Butter Rice Krispie Cups
Room Temperature: Store your Chocolate Peanut Butter Rice Krispie Cups in an airtight container at room temperature for up to 7 days. This keeps them fresh and ready to enjoy anytime!
Fridge: If you prefer a firmer texture, you can store them in the refrigerator for up to 2 weeks. Just remember to keep them in a sealed container to prevent drying out.
Freezer: For longer storage, freeze the cups individually wrapped in plastic wrap and then in a zip-top bag for up to 1 month. Thaw overnight in the fridge before serving.
Reheating: If you want to soften them a bit, place the cups in the microwave for 5-10 seconds. Just be cautious to avoid melting the chocolate too much!
Chocolate Peanut Butter Rice Krispie Cups Variations
Feel free to get creative and personalize these delightful cups to suit your taste and dietary needs!
-
Nut-Free: Use sunflower seed butter instead of peanut butter for a delicious, nut-free alternative.
-
Vegan: Swap butter for coconut oil and use vegan chocolate chips and marshmallows to make this recipe plant-based.
With a few simple ingredient changes, you can cater to your vegan friends or simply enjoy a scrumptious treat that everyone can savor! -
Extra Crunchy: Toss in some crushed nuts or crispy granola for an added layer of texture.
Imagine that satisfying crunch alongside the creamy peanut butter and smooth chocolate—pure bliss in every bite! -
Flavor Infusion: Add a sprinkle of cinnamon or a dash of espresso powder to the peanut butter mixture for a flavor boost.
These subtle changes can truly elevate your treats, making them stand out at any gathering or family get-together. -
Dairy-Free: Use almond or oat milk chocolate chips to keep the cups fully dairy-free while still tasting delightful.
Your friends won’t believe these tasty cups can cater to their dietary preferences without sacrificing flavor! -
Indulgent Swirls: Drizzle some melted white chocolate atop the cups for an extra touch of sweetness and visual appeal.
It’s not only a treat for the taste buds but also a feast for the eyes! -
Decadent Layered Option: Create a bottom layer of crushed Oreos or graham crackers in the muffin tin before adding the Rice Krispie mixture.
This gives you an exciting surprise layer that pairs wonderfully with the otherwise classic flavors.
For an extra bite of chocolatey goodness, consider exploring delicious variations like Pumpkin Chocolate Chip or a rich twist on flavors with Cowboy Butter Chicken. Each suggestion can help you reimagine your treats in new and exciting ways!
Chocolate Peanut Butter Rice Krispie Cups Recipe FAQs
What should I look for when selecting Rice Krispies cereal?
Absolutely! When choosing Rice Krispies cereal, ensure that the package is intact and that the cereal is fresh. Look for a clear expiration date, and remember, the cereal should be crisp with no signs of moisture or clumping. If you’re looking for alternatives, crisped rice or granola can also work nicely for added texture.
How should I store Chocolate Peanut Butter Rice Krispie Cups?
The more the merrier! Store your Chocolate Peanut Butter Rice Krispie Cups in an airtight container at room temperature for up to 7 days. If you prefer a firmer texture, pop them in the fridge where they’ll stay fresh for about 2 weeks. Just make sure they are sealed well to keep moisture out.
Can I freeze these Rice Krispie Cups? How do I do it?
Yes, you can! To freeze your Chocolate Peanut Butter Rice Krispie Cups, wrap each cup tightly in plastic wrap, ensuring no air gets in. Then place them in a zip-top freezer bag; they can last for up to 1 month! When you’re ready to enjoy, just thaw them overnight in the fridge, and they’ll be just as delicious.
What if my mixture doesn’t hold together when shaping the cups?
Very often, this happens because either the mixture needed to be more tightly pressed into the muffin tin or not enough butter/marshmallows were used. If your mixture seems too dry, try melting a bit of extra butter or marshmallows and mix it back in. Press the mixture firmly but gently when shaping to keep that wonderful crunch intact!
Are there any dietary considerations for these Rice Krispie Cups?
Absolutely! If you have nut allergies, you can easily substitute the peanut butter for sunflower seed butter or a nut-free alternative of your choice. Additionally, using vegan marshmallows and coconut oil instead of butter will make these cups vegan-friendly. With a few ingredient swaps, they can cater to various dietary preferences!
Can I add different toppings or mix-ins?
Definitely! Feel free to get creative with your Chocolate Peanut Butter Rice Krispie Cups. Adding butterscotch chips, chopped nuts, or colorful sprinkles can elevate your treats. You can even experiment by drizzling caramel or using coconut flakes on top—there’s no limit to the fun you can have!
Irresistibly Creamy Chocolate Peanut Butter Rice Krispie Cups
Ingredients
Equipment
Method
- In a medium saucepan, melt ¼ cup of unsalted butter and 4 cups of mini marshmallows over low heat, stirring continuously for about 5 minutes until melted and smooth.
- Once the base is slightly cooled, stir in 1 cup of creamy peanut butter and 1 teaspoon of vanilla extract until fully incorporated.
- In a large mixing bowl, combine 6 cups of Rice Krispies cereal with the peanut butter mixture and gently fold the cereal in for about 2-3 minutes.
- Line a muffin tin with paper liners and spoon the Rice Krispie mixture into each cup, pressing down gently.
- Melt 1 cup of chocolate chips in a microwave-safe bowl, stirring every 30 seconds until smooth. Spoon a thin layer over each Rice Krispie cup.
- Let the treats cool to room temperature or refrigerate for 20-30 minutes until firm.
Leave a Reply