
As the summer sun starts to warm the world around us, my mind drifts to refreshing delights like No-Bake Key Lime Cheesecake Cups. These delightful desserts channel the zesty vibrance of tangy key limes, all while keeping the oven cold and your kitchen cool. Not only are they a breeze to put together, but their vibrant presentation makes them a stunning treat for any gathering. Perfect as a quick after-dinner dessert or a sweet finish to a backyard barbecue, these cups promise a creamy, light indulgence that will have your taste buds dancing. Plus, the beauty of this recipe lies in its flexibility—customize to your heart’s content! What flavor twist will you add to these dreamy bites?
Why You’ll Crave These Cheesecake Cups?
Effortless Elegance: Who wouldn’t love a dessert that’s both simple and sophisticated? With just a few ingredients and no baking required, these No-Bake Key Lime Cheesecake Cups are perfect for any skill level.
Refreshing Zest: Each bite bursts with vibrant key lime flavor, making it an ideal summer treat that refreshes and delights.
Customizable Creation: Feel free to get creative! Add your favorite toppings, such as fresh fruits or chocolate shavings, for a personalized touch.
Chill Factor: Simply mix, assemble, and let it chill! These cheesecake cups can be prepped ahead, saving you time and stress during gatherings.
Crowd-Pleasing Dessert: Whether it’s an afternoon barbecue or a dinner party, everyone will be reaching for seconds of these visually stunning treats. Enjoy more sweet ideas like Chickpea Peach Lime or end with a delightful sip of Iced Cinnamon Whiskey.
No-Bake Key Lime Cheesecake Cups Ingredients
• Here’s everything you’ll need for these delightful, refreshing dessert treats!
For the Crust
- Graham Crackers Crumbs – The foundation of your crust, providing a crunchy texture; substitute with gluten-free crackers for a gluten-free version.
- Granulated Sugar – Sweetens the crust, enhancing its flavor; try coconut sugar for a unique caramel twist.
- Melted Butter – Binds the crust ingredients together beautifully; coconut oil works as a great dairy-free alternative.
For the Filling
- Cream Cheese – The star ingredient that adds creaminess to your cheesecake; Neufchâtel can be used for a lighter version.
- Powdered Sugar – Sweetens the filling perfectly; for a healthier choice, opt for a sugar-free powdered substitute.
- Key Lime Juice – Brings the characteristic zesty flavor to this dessert; fresh is ideal, but bottled juice works in a pinch.
- Lime Zest – Boosts the filling with an aromatic kick; it’s optional if you prefer a smoother mix.
- Whipped Topping – Lightens the filling, creating a fluffy texture; use coconut whipped cream for a delightful dairy-free option.
Enjoy crafting your No-Bake Key Lime Cheesecake Cups and let your creativity shine with toppings!
Step‑by‑Step Instructions for No-Bake Key Lime Cheesecake Cups
Step 1: Prepare the Crust
In a medium bowl, combine graham cracker crumbs, granulated sugar, and melted butter. Stir until fully mixed, and the crumbs are moistened. Pack the mixture firmly into the bottoms of your serving cups using the back of a spoon or your fingers, creating a smooth base. Set aside as you prepare the filling.
Step 2: Make the Filling
In a large mixing bowl, beat the cream cheese with an electric mixer on medium speed until creamy and smooth, about 2 minutes. Gradually add the powdered sugar, mixing well until fully combined. Then, blend in the key lime juice and lime zest for 1-2 minutes until the filling achieves a light and fluffy consistency.
Step 3: Fold in Whipped Topping
Gently fold in the whipped topping into the cream cheese mixture until just combined. Be careful not to over-mix; you want to maintain the airy texture of the filling. Once thoroughly incorporated, your filling for the No-Bake Key Lime Cheesecake Cups should be light, creamy, and full of zesty flavor.
Step 4: Assemble the Cups
Spoon the key lime filling evenly over the prepared graham cracker crusts in each cup, smoothing the tops gently with a spatula. Make sure the filling sits just above the crust for a lovely layered effect. This should create a beautiful presentation, showcasing both layers of your delicious key lime cheesecake cups.
Step 5: Chill
Cover the filled cups with plastic wrap or a lid and place them in the refrigerator. Chill them for at least 2 hours, or until set and firm. This cooling time allows the flavors to meld together beautifully and helps the filling gain the perfect texture for serving.
Step 6: Serve
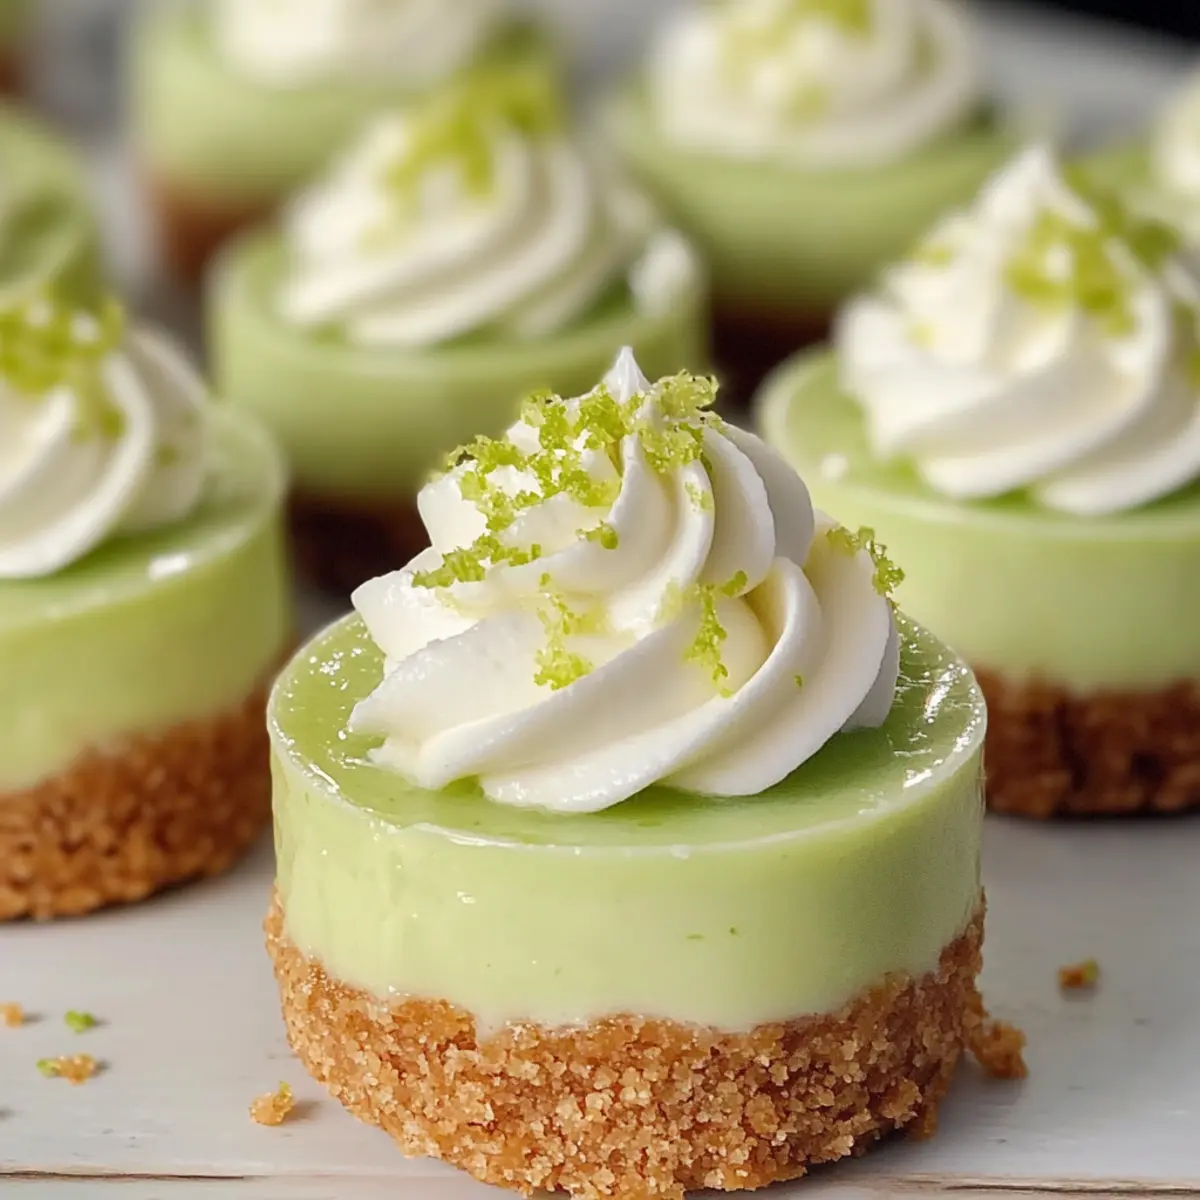
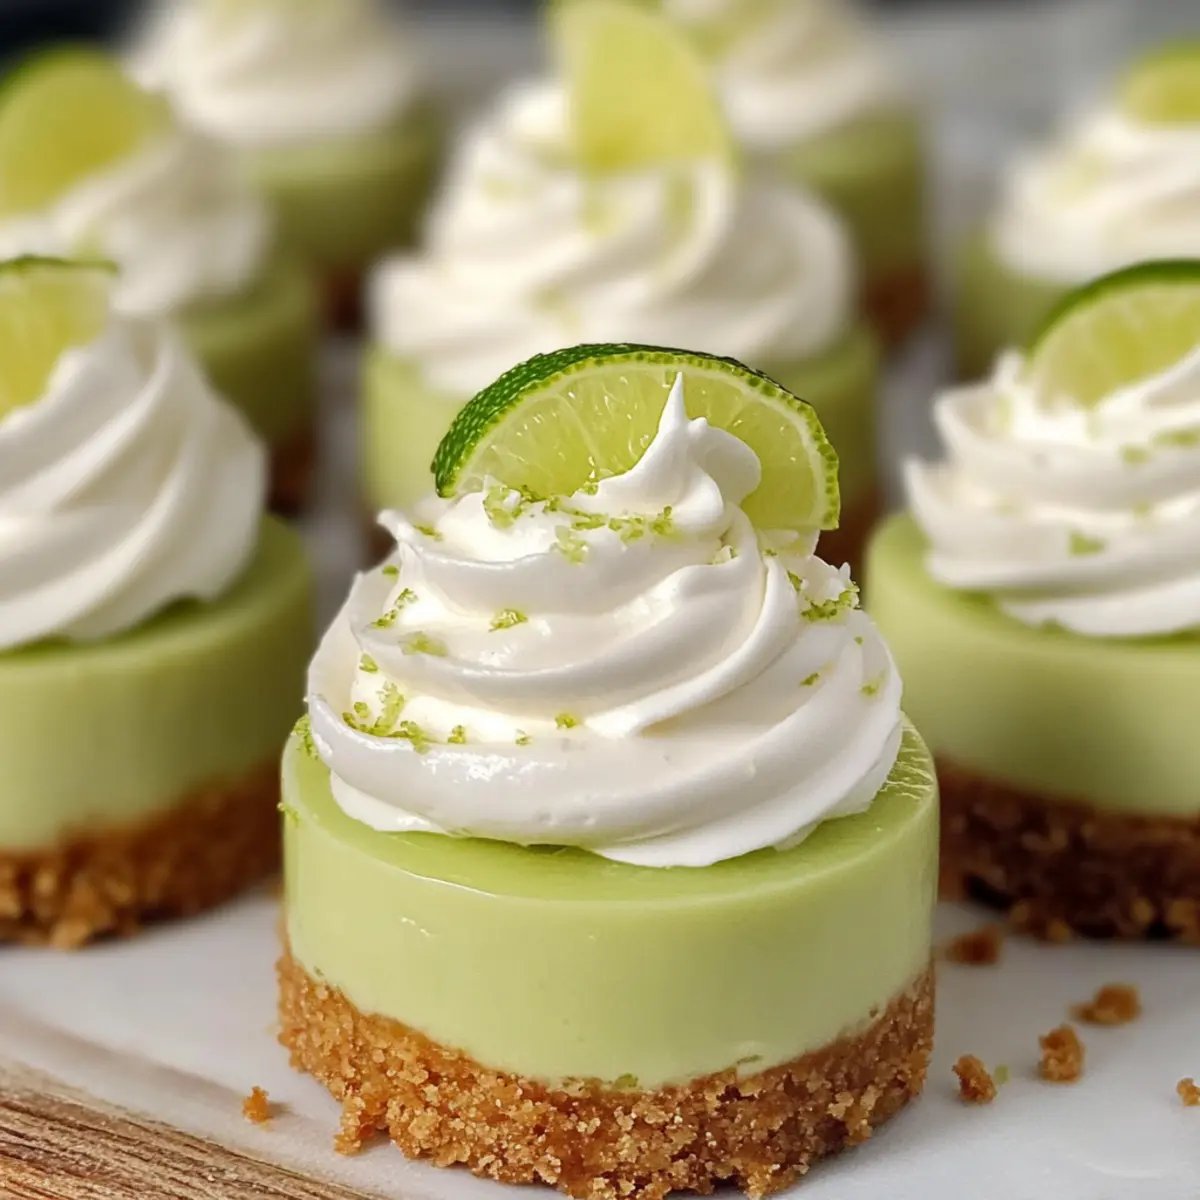
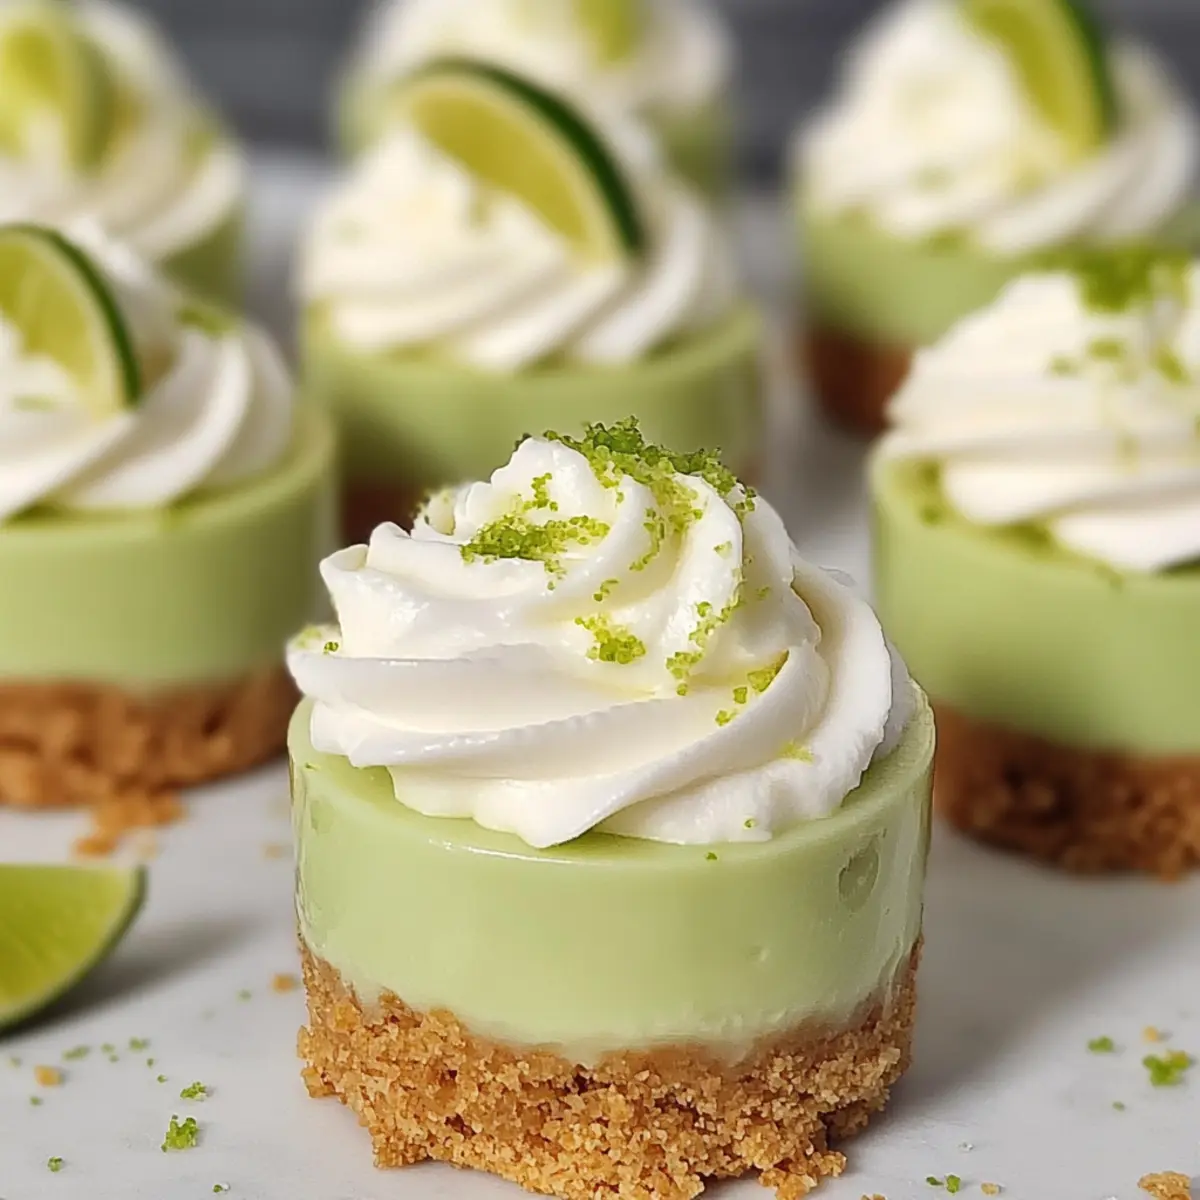
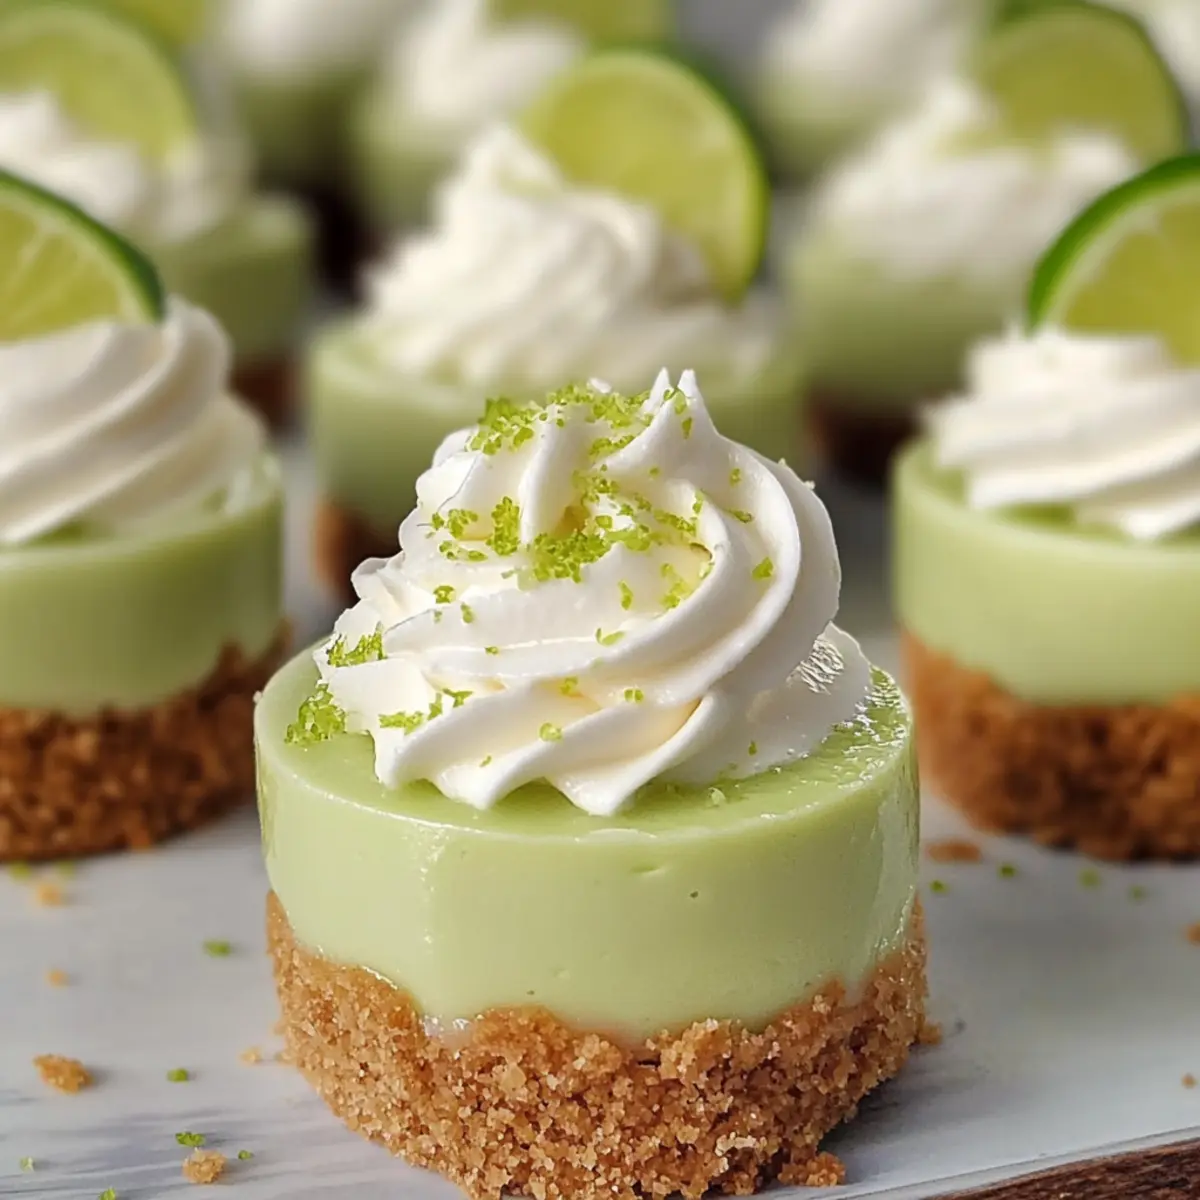
When ready to serve, remove the cups from the refrigerator and remove the covering. Garnish each cheesecake cup with additional whipped topping and a sprinkle of lime zest or a slice of lime for an inviting presentation. Now, you can enjoy your delightful No-Bake Key Lime Cheesecake Cups with family and friends!
Make Ahead Options
These No-Bake Key Lime Cheesecake Cups are perfect for meal prep, allowing you to enjoy this refreshing dessert with minimal stress! You can prepare the crust and filling up to 24 hours in advance. Simply mix the graham cracker crust and pack it into cups, then store in the refrigerator, covered. For the filling, make it the day before and keep it in a separate airtight container; this prevents excess moisture from softening your crust. When you’re ready to serve, simply spoon the filling over the crusts and chill for another 30 minutes to ensure they’re perfectly set. This makes entertaining or quick weeknight desserts a breeze, so you can savor every delicious bite!
Storage Tips for No-Bake Key Lime Cheesecake Cups
Fridge: Keep these delectable No-Bake Key Lime Cheesecake Cups in an airtight container in the refrigerator for up to 3 days for the best flavor and texture.
Freezer: For longer storage, you can freeze the cheesecake cups in an airtight container for up to 2 months. Just make sure they’re tightly covered to prevent freezer burn.
Thawing: When ready to enjoy, transfer the frozen cheesecake cups to the fridge for several hours or overnight to thaw gently. Avoid microwaving, as it may affect their texture.
Serving Notes: After thawing, consider freshening them up with a dollop of whipped topping or a sprinkle of lime zest before serving to enhance the visual appeal!
No-Bake Key Lime Cheesecake Cups Variations
Let your creativity shine while crafting these delightful cheesecake cups with a few simple tweaks and substitutions!
-
Gluten-Free: Swap graham cracker crumbs for ground almonds or gluten-free cookies to create a beautiful base that everyone can enjoy.
-
Dairy-Free: Use nut-based cream cheese and coconut whipped cream to cater to dairy-free diets without sacrificing flavor.
-
Citrus Medley: Replace key lime juice with a blend of lemon and orange for a refreshing twist that brightens each bite.
-
Chocolate Lovers: Add a layer of melted chocolate between the crust and filling for indulgent chocolatey goodness that beautifully complements the zesty key lime.
-
Fruity Toppings: Top each cup with a mix of fresh berries or sliced peaches for a burst of natural sweetness and color. It’s like summer in a cup!
-
Creamy Coconut: Fold in a bit of coconut cream into the filling for a tropical vibe, perfect for those who adore coconut’s rich flavor.
-
Spicy Kick: Add a pinch of cayenne or chili powder to the filling for a surprising, warming contrast to the tangy sweetness. Who knew a little heat could elevate dessert?
-
Whipped Cream Perfection: Consider alternating layers of whipped topping and filling for a visually stunning presentation that’s sure to impress your guests. To finish, drizzle with a bit of lime syrup for an extra dash of zest!
Each variation invites you to explore and enhance the classic No-Bake Key Lime Cheesecake Cups. Don’t forget to pair your dessert with a refreshing sip of Iced Cinnamon Whiskey for a perfect summer treat!
Expert Tips for No-Bake Key Lime Cheesecake Cups
-
Room Temperature Cream Cheese: Ensure your cream cheese is at room temperature for easier mixing, leading to a smoother filling without lumps.
-
Gentle Folding: When adding the whipped topping, gently fold it into the mixture to maintain that light, airy texture essential for your no-bake cheesecake cups.
-
Chill Time is Key: Allow your cheesecake cups to chill for the full recommended time; insufficient chilling may result in a filling that’s too soft to hold its shape.
-
Garnish Smartly: Consider garnishing with fresh lime slices or fruit for visual appeal. Just be sure to apply any toppings just before serving to keep them fresh!
-
Custom Flavor Options: Feel free to experiment! Swap out the key lime juice for lemon or orange juice, and enjoy unique, refreshing twists on these cheesecake cups.
What to Serve with No-Bake Key Lime Cheesecake Cups?
As you savor these refreshing delights, consider complementing their zesty notes with these delightful pairings.
-
Tropical Fruit Salad: The sweetness of assorted fruits like mango, pineapple, and berries contrasts beautifully with the tanginess of the cheesecake cups.
-
Minty Mojito Mocktail: This refreshing beverage, with its zesty lime and mint flavors, enhances the key lime experience and cools you down on warm days.
-
Coconut Whipped Cream: A dollop of this creamy, dairy-free topping brings an extra layer of richness while harmonizing with the dessert’s tropical essence.
-
Pecan Praline Bars: The nutty crunch and sweetness of these bars provide a delightful textural contrast, making each bite a new experience.
-
Iced Green Tea: Light and refreshing, iced green tea cleanses the palate and complements the bright flavors of the cheesecake cups effortlessly.
-
Chocolate Dipped Strawberries: These decadent treats add a touch of romance and elegance to the dessert table, balancing the cheesecake’s tartness beautifully.
-
Mini Key Lime Meringue Pies: For a thematic twist, serve these alongside for a delightful, mini-doughy treat that echoes the flavors of your cheesecake cups.
No-Bake Key Lime Cheesecake Cups Recipe FAQs
How do I choose ripe key limes?
Absolutely! When selecting key limes, look for small, smooth, and firm fruits. They should be slightly soft when gently squeezed, indicating juiciness. Avoid any that have dark spots or are overly waxy. Fresh limes typically yield the best flavor, but bottled key lime juice can be a satisfying substitute if fresh limes are unavailable.
What’s the best way to store No-Bake Key Lime Cheesecake Cups?
You can keep these delightful cheesecake cups in an airtight container in the refrigerator for up to 3 days. This helps maintain their freshness and texture, making them perfect for quick indulgences throughout the week. Just be sure to keep them well-covered to prevent them from absorbing any fridge odors!
Can I freeze No-Bake Key Lime Cheesecake Cups?
Absolutely! To freeze, place the cheesecake cups in an airtight container. They can be frozen for up to 2 months. Just ensure they’re tightly sealed to avoid freezer burn. When ready to eat, thaw them in the refrigerator for several hours or overnight, and garnish with fresh toppings before serving for an extra touch of elegance.
What should I do if my cheesecake filling is too soft?
If your cheesecake filling isn’t setting properly, ensure you’re allowing enough chill time—at least 2 hours in the fridge is crucial. Additionally, check that you’ve used the right ratios of cream cheese to whipped topping. If you desire more structure, consider adding more whipped topping or a touch of gelatin; dissolve about 1 teaspoon of gelatin in 1 tablespoon of cold water, then incorporate it into your filling.
Are there any dietary considerations for No-Bake Key Lime Cheesecake Cups?
Very! For a gluten-free option, simply swap the graham cracker crumbs with gluten-free crackers. If you’re looking for dairy-free alternatives, use coconut cream instead of heavy whipping topping and coconut oil in place of butter. Always check ingredient labels for potential allergens, especially with cream cheese and toppings, to ensure safety for those with dietary restrictions.
No-Bake Key Lime Cheesecake Cups for Effortless Summer Bliss
Ingredients
Equipment
Method
- In a medium bowl, combine graham cracker crumbs, granulated sugar, and melted butter. Stir until fully mixed and the crumbs are moistened. Pack the mixture firmly into the bottoms of your serving cups using the back of a spoon or your fingers, creating a smooth base. Set aside.
- In a large mixing bowl, beat the cream cheese with an electric mixer on medium speed until creamy and smooth, about 2 minutes. Gradually add the powdered sugar, mixing well until fully combined. Then, blend in the key lime juice and lime zest for 1-2 minutes until the filling is light and fluffy.
- Gently fold in the whipped topping into the cream cheese mixture until just combined, ensuring the airy texture of the filling is maintained.
- Spoon the key lime filling evenly over the prepared graham cracker crusts in each cup, smoothing the tops gently with a spatula.
- Cover the filled cups with plastic wrap or a lid and place them in the refrigerator. Chill for at least 2 hours, or until set.
- When ready to serve, remove the cups from the refrigerator, garnish with additional whipped topping and lime zest or a slice of lime, and enjoy.
Leave a Reply