
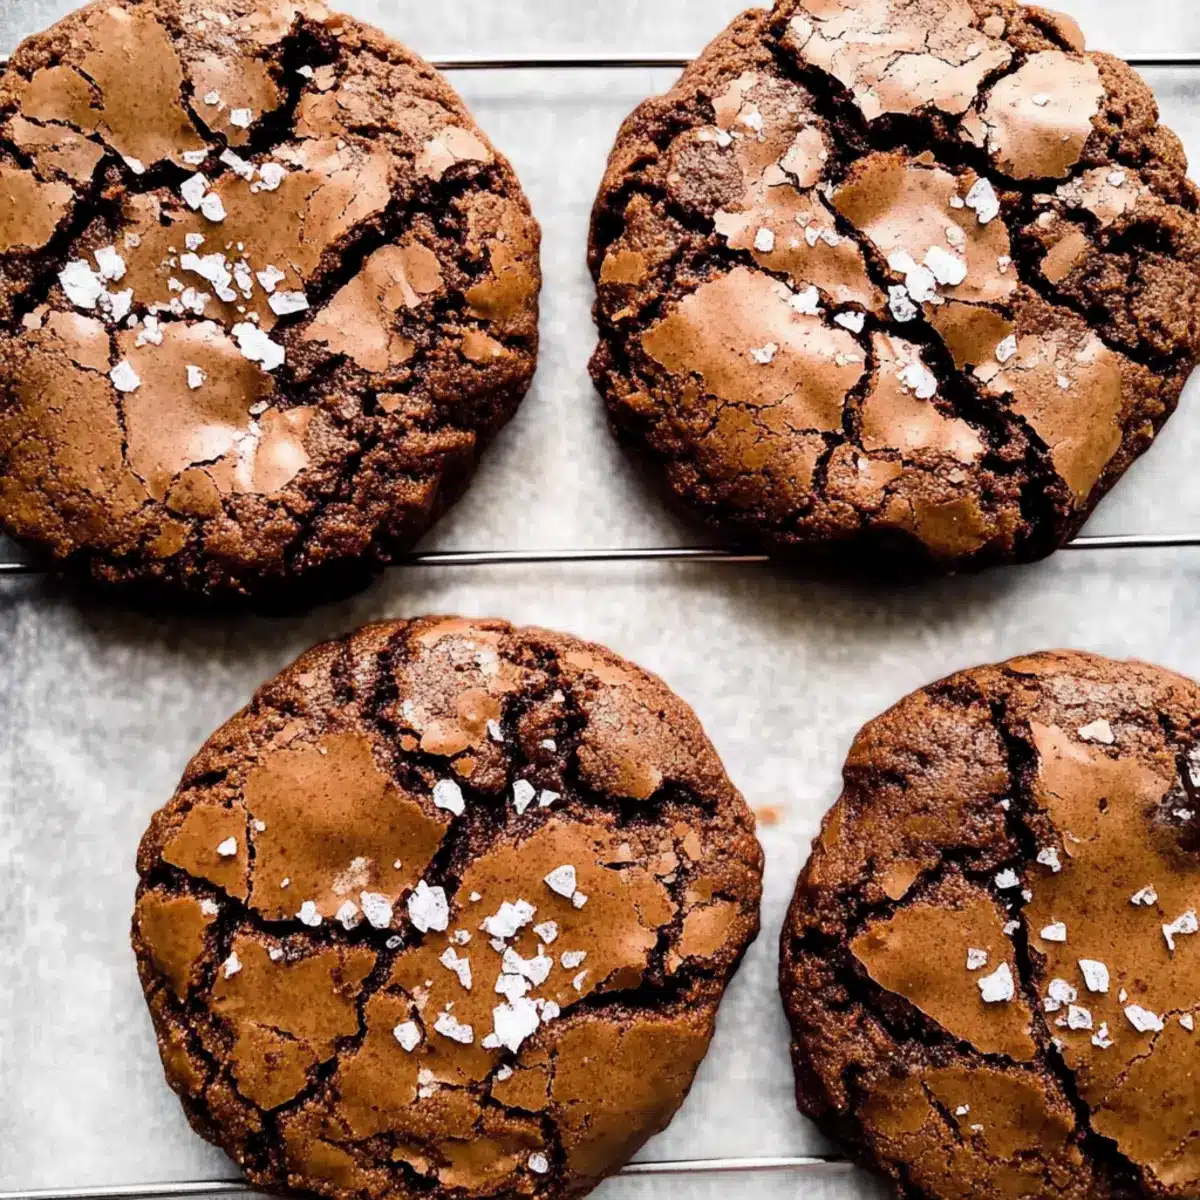
As the kitchen fills with the intoxicating scent of melting chocolate, I find myself transported to a much simpler time when desserts were simply about joy. That’s the magic of these Chocolate Brownie Cookies—a delightful hybrid that marries the hearty richness of a brownie with the classic charm of a cookie. Ready in under 30 minutes and without the hassle of chilling, these cookies are perfect for both novice bakers and seasoned pros alike. With a beautifully crinkly top sprinkled with flaked sea salt, every bite offers a fudgy interior that promises to sweeten your day. Whether you’re surprising your family or treating yourself, this recipe ticks all the boxes for a quick, crowd-pleasing delight. Ready to dive into the world of brookies?
Why Are These Cookies So Irresistible?
Fudgy Goodness: Each bite delivers a soft and rich interior that melts in your mouth, reminiscent of fudgy brownies.
Quick and Easy: Made in under 30 minutes, they require no chilling time, making them a perfect last-minute treat.
Versatile Variations: Feel free to mix in your favorite ingredients; try different chocolates or even a splash of peanut butter for an exciting twist!
Crowd-Pleasing Delight: Whether for family gatherings or cozy nights in, these cookies are a surefire hit, leaving everyone craving more.
Perfect Pairing: Serve warm with a scoop of vanilla ice cream, elevating this dessert experience. If you’d like to explore further, check out my Chocolate Chip Cookies recipe for a similar indulgence!
Chocolate Brownie Cookies Ingredients
• Dive into the deliciousness with these essential ingredients!
For the Cookie Base
- Dark Chocolate (200g) – Provides the rich chocolate flavor; use 70% solids for the best taste.
- Unsalted Butter (125g) – Adds moisture and richness; cube for easier melting.
- Caster or Granulated Sugar (125g) – Sweetens and contributes to texture; caster sugar dissolves faster for a smoother batter.
- Soft Light Brown Sugar (90g) – Enhances flavor with molasses notes while adding moisture.
- Large Eggs (2) – Binds ingredients for structure and moisture; crucial for the perfect texture—substitutes are not recommended.
- Vanilla Extract (1 teaspoon) – Adds depth to the flavor profile.
For the Dry Ingredients
- Plain Flour (130g) – Provides vital structure to the cookies.
- Unsweetened Cocoa Powder (3 tablespoons) – Intensifies the chocolate flavor; essential for rich brownie texture.
- Baking Powder (1 teaspoon) – Acts as a leavening agent for a slight rise.
- Salt (¼ teaspoon) – Balances sweetness for a well-rounded flavor.
For the Topping
- Flaked Sea Salt (1-2 teaspoons, optional) – Sprinkle on top to enhance flavors; adds a gourmet touch to your Chocolate Brownie Cookies.
Step‑by‑Step Instructions for Chocolate Brownie Cookies
Step 1: Preheat Your Oven
Begin by preheating your oven to 180°C (or 160°C for fan-forced). While it warms up, line two baking trays with baking paper, ensuring they’re ready for the delightful cookies that will soon emerge. This first step sets the stage for perfectly baked Chocolate Brownie Cookies.
Step 2: Melt the Chocolate and Butter
In a heatproof bowl, combine the dark chocolate and cubed unsalted butter. Place the bowl over a saucepan filled with simmering water, creating a double boiler. Stir occasionally until the chocolate and butter are fully melted and smooth. Set this luscious mixture aside to cool slightly—this rich foundation is essential for your brownie cookie dough.
Step 3: Beat the Eggs and Sugars
In an electric mixer, combine the large eggs, caster sugar, soft light brown sugar, and vanilla extract. Beat on medium-high speed for exactly 5 minutes until the mixture becomes pale, fluffy, and almost triples in volume. This step is crucial for achieving that glossy, crinkly surface characteristic of the best Chocolate Brownie Cookies.
Step 4: Incorporate Chocolate Mixture
Slowly pour the melted chocolate and butter mixture into the egg and sugar mixture. Mix on low speed, ensuring everything is well combined and the rich chocolate flavor is evenly distributed. The glossy batter should be thick and smooth, ready to embrace the dry ingredients that will follow.
Step 5: Sift and Mix Dry Ingredients
In a separate bowl, sift together the plain flour, unsweetened cocoa powder, baking powder, and salt. Gradually add this dry mixture to your wet ingredients, gently folding with a spatula until just combined. Be careful not to overmix; you want a fudgy texture that will define your Chocolate Brownie Cookies.
Step 6: Portion the Cookie Dough
Using a cookie scoop, portion out the dough onto the lined baking trays, leaving enough space between each dollop (about 2 inches apart) to allow for spreading. This step ensures that each cookie bakes evenly and achieves the perfect brownie-cookie hybrid shape.
Step 7: Sprinkle with Sea Salt and Bake
Before placing the trays in the oven, sprinkle a pinch of flaked sea salt over each cookie mound to enhance the chocolate flavor. Bake in the preheated oven for 12 minutes; the cookies should appear slightly underbaked in the center but firm around the edges, showcasing that delightful crinkly top.
Step 8: Cool Before Transferring
Once baked, remove the trays from the oven and let the cookies cool on them for at least 20 minutes. This cooling time allows the brownie cookies to firm up while maintaining their fudgy interior. After cooling, carefully transfer the cookies to a wire rack to cool completely and fully enjoy their rich, chocolatey goodness.

Chocolate Brownie Cookies Variations
Feel free to explore these delightful twists on your Chocolate Brownie Cookies to cater to your taste preferences and dietary needs!
-
Peanut Butter Swirl: Substitute half the butter with peanut butter for a nutty, creamy flavor. This adds a delicious richness that will spark joy in every bite!
-
Milk Chocolate Delight: Swap dark chocolate for milk chocolate for a sweeter, creamier cookie. This change results in a softer, more indulgent treat perfect for those with a sweet tooth.
-
Nutty Crunch: Fold in chopped nuts, such as walnuts or pecans, to give these cookies a satisfying crunch. The added texture complements the fudgy interior beautifully, making each bite interesting!
-
Gluten-Free Option: Use a gluten-free all-purpose flour blend instead of plain flour. This way, everyone can enjoy these dreamy cookies without compromising on taste.
-
Minty Freshness: Add a few drops of peppermint extract to the batter for a refreshing minty twist. This variation transforms your cookies into a delightful minty dessert!
-
Double Chocolate Boost: Incorporate chocolate chips into the batter for a melty surprise. This extra layer of chocolate elevates the overall experience and makes these cookies irresistible.
-
Spicy Heat: For a kick, add a pinch of cayenne pepper or chili powder to the batter. This unexpected twist creates a delightful contrast between sweet and savory!
-
Fruity Surprise: Mix in some dried fruits like cranberries or cherries for a hint of tartness. The fruity notes balance the rich chocolate flavor, creating a harmonious taste profile.
These variations all offer something special while maintaining the charm of your base recipe. If you’re interested in additional cookie ideas, check out my delicious Chocolate Chip Cookies or my rich White Chocolate Cheesecake for more sweet moments in the kitchen!
How to Store and Freeze Chocolate Brownie Cookies
Room Temperature: Keep your Chocolate Brownie Cookies in an airtight container at room temperature for up to 4 days for optimal freshness.
Freezer: For longer preservation, freeze cookies in a single layer on a baking sheet until solid, then transfer to airtight freezer bags. They can be stored for up to 3 months.
Reheating: When ready to enjoy, reheat frozen cookies in a preheated oven at 180°C for about 5-7 minutes to restore their fudgy texture.
Thawing: If you prefer thawing, let them sit at room temperature for about 15-20 minutes, and they’ll be ready to serve!
What to Serve with Chocolate Brownie Cookies
Indulging in decadent chocolate delights is always made better with a thoughtful pairing or two!
-
Vanilla Ice Cream: The creamy sweetness of vanilla ice cream contrasts perfectly with the chocolaty richness, providing a delightful temperature contrast with every bite. A scoop on the side or nestled atop a warm cookie creates a heavenly dessert experience.
-
Fresh Berries: Juicy raspberries or strawberries add a refreshing contrast to the rich chocolate flavor, brightening up the dessert plate. Their tartness cuts through the sweetness, balancing the indulgence beautifully.
-
Espresso or Coffee: A cup of freshly brewed espresso or coffee serves as the perfect companion to these cookies, amplifying their chocolate depth while offering a warm, aromatic experience that many chocolate lovers crave.
-
Milk: A classic pairing, a tall glass of cold milk provides a creamy richness that complements the fudgy texture of the cookies. It brings out the cookie’s flavors and softens its chocolatey bite beautifully.
-
Caramel Sauce: Drizzling warm caramel sauce over the cookies adds an extra layer of sweetness and a sophisticated touch. The gooey richness marries wonderfully with the cookie’s fudgy interior, creating a truly decadent moment.
-
Whipped Cream: Light and airy whipped cream adds a delightful fluffiness alongside the dense brownie cookie. A dollop not only enhances presentation but also introduces a lovely texture that makes every bite feel luxurious.
No matter which pairing you choose, these chocolate brownie cookies are destined to shine brightly as a sweet indulgence in your meal!
Expert Tips for Chocolate Brownie Cookies
-
Egg Whipping: Whip eggs and sugars for exactly 5 minutes to achieve that glossy, crinkly top for your Chocolate Brownie Cookies.
-
Watch the Bake Time: Avoid overbaking; even if they seem soft, they will continue to firm up as they cool on the tray.
-
Sifting Matters: Don’t skip sifting the dry ingredients; this helps to avoid lumps and ensures a smooth batter for your decadent cookies.
-
Chill the Dough (if needed): If your dough seems too soft, refrigerate it for about 15 minutes before scooping to help with shaping.
-
Storage Tips: Store your Chocolate Brownie Cookies in an airtight container for up to 4 days, or freeze them for up to 3 months for long-lasting enjoyment.
Make Ahead Options
These Chocolate Brownie Cookies are perfect for meal prep enthusiasts! You can prepare the cookie dough up to 24 hours in advance. Simply follow the recipe instructions up to the point of portioning the dough, then cover the mixing bowl with plastic wrap and refrigerate. This helps maintain the cookies’ fudgy texture and flavor. When you’re ready to bake, scoot the dough onto lined baking trays, sprinkle with flaked sea salt, and bake straight from the fridge. Not only will you save time on busy weeknights, but you’ll also enjoy fresh, just-baked cookies that are just as delicious as when made from scratch.
Chocolate Brownie Cookies Recipe FAQs
How do I select ripe ingredients for my cookies?
Absolutely! For the best Chocolate Brownie Cookies, make sure your dark chocolate is high-quality, around 70% cocoa solids for rich flavor. Also, use unsalted butter that’s fresh and soft, which adds moisture to your cookies. When choosing eggs, go for large, fresh ones as they’re key to binding and texture.
What’s the best way to store my cookies, and how long will they last?
Store your Chocolate Brownie Cookies in an airtight container at room temperature for up to 4 days. If you want to keep them longer, freezing is a great option! Just ensure they are completely cool, then place them in a single layer on a baking sheet in the freezer. Once solid, transfer them to airtight freezer bags for up to 3 months.
Can I freeze Chocolate Brownie Cookies? If so, how?
Certainly! Here’s how to freeze your cookies step-by-step:
- Allow the cookies to cool completely after baking.
- Lay them in a single layer on a baking sheet and place them in the freezer.
- Once frozen solid (about 1 hour), transfer them to a freezer-safe bag or container.
- Label with the date—they’ll stay fresh for up to 3 months! When you’re ready to enjoy, just reheat them at 180°C for about 5-7 minutes.
What should I do if my cookies turn out too dry or hard?
If your Chocolate Brownie Cookies are dry, you’re likely overbaking them! Keep an eye on them in the oven; they should look slightly underbaked in the center when you take them out. Remember, they continue to firm up while cooling. Additionally, be mindful of accurately measuring your dry ingredients—too much flour can lead to a drier texture.
Are there any dietary considerations I should keep in mind?
Yes! If you’re making these cookies for someone with allergies, remember that they contain eggs and gluten, as well as dairy from the butter. For a gluten-free option, consider using a gluten-free all-purpose flour blend. Additionally, if you’re including them in a treat for pets, it’s vital to keep chocolate away from animals as it is toxic to them.
Can I add extra ingredients to enhance the flavor?
Very! Feel free to get creative! You can mix in chocolate chips, nuts, or even a swirl of peanut butter for added flavor. Just remember not to overload the dough—keep it balanced to maintain that fudgy texture. Enjoy experimenting!
Chocolate Brownie Cookies: Fudgy Joy in Every Bite
Ingredients
Equipment
Method
- Preheat your oven to 180°C (or 160°C for fan-forced). Line two baking trays with baking paper.
- Melt dark chocolate and unsalted butter in a heatproof bowl over a double boiler until smooth. Let cool slightly.
- In an electric mixer, beat eggs, caster sugar, soft light brown sugar, and vanilla extract for 5 minutes until pale and fluffy.
- Slowly mix the melted chocolate and butter into the egg and sugar mixture until well combined.
- Sift together plain flour, cocoa powder, baking powder, and salt. Gradually fold this dry mixture into the wet ingredients until just combined.
- Portion the cookie dough onto lined baking trays, leaving space between each dollop.
- Sprinkle flaked sea salt over each cookie and bake for 12 minutes until slightly underbaked in the center.
- Let the cookies cool on the trays for at least 20 minutes before transferring to a wire rack.
Leave a Reply