
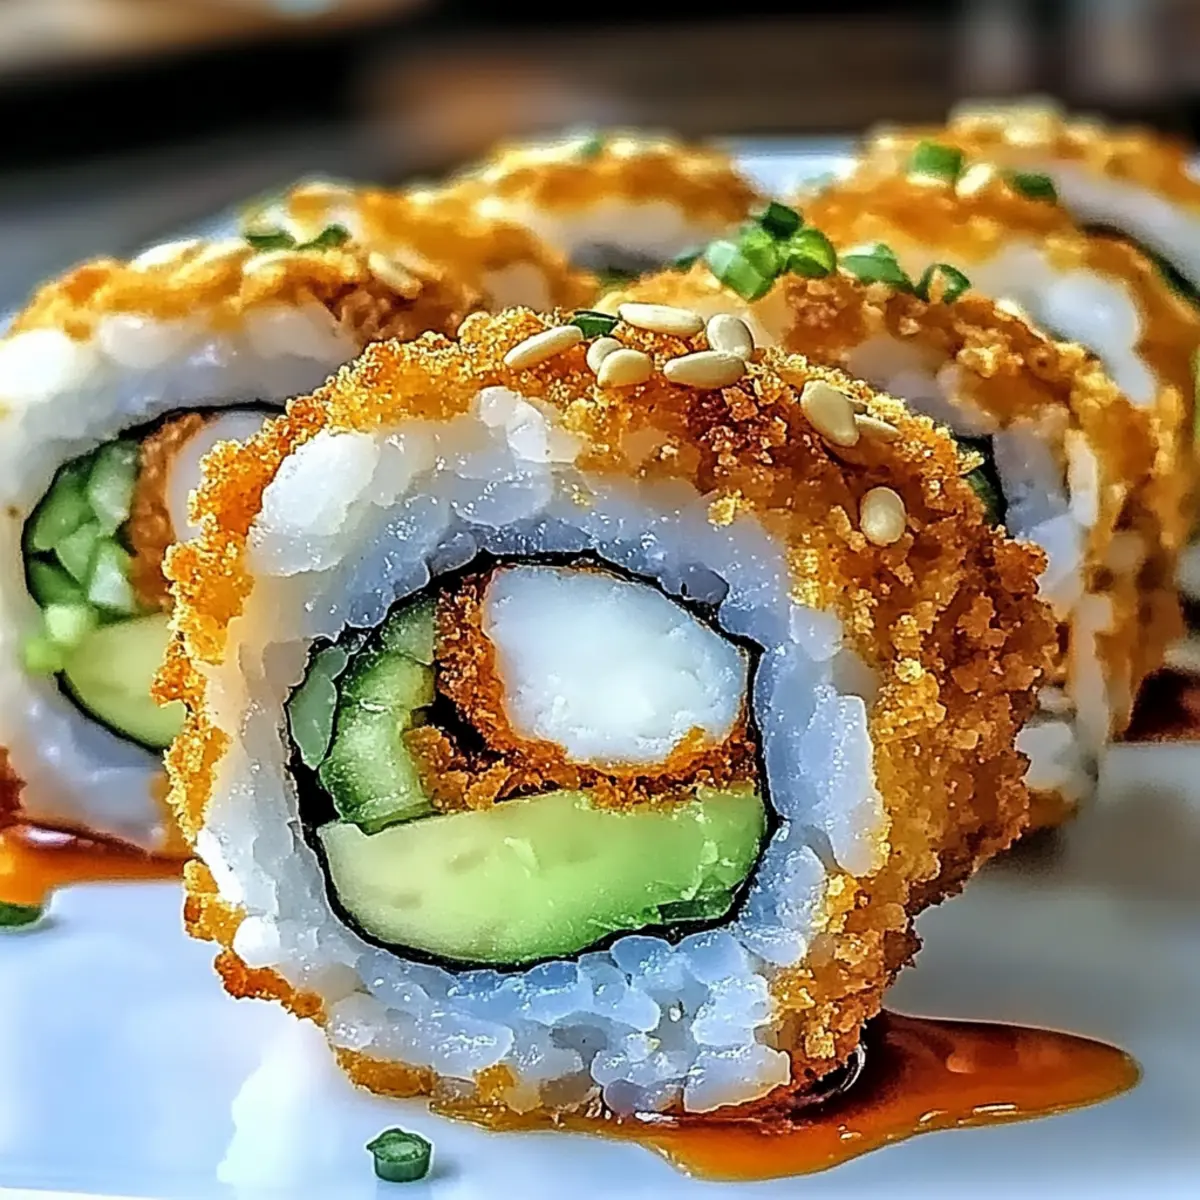
As I sat savoring the vibrant flavors of my favorite sushi, it hit me: why not bring that delightful experience home? That’s how the idea for these Crispy Chicken Tempura Rolls was born! This recipe captures the essence of sushi with golden-fried chicken nestled in tangy seasoned rice and creamy avocado, all wrapped in nori. In just 30 minutes, you can whip up a quick meal that not only satisfies your cravings but is also budget-friendly and customizable. Whether it’s a family gathering or a simple weeknight dinner, this dish is sure to impress. Are you ready to roll up some fun in the kitchen?

Why Make Crispy Chicken Tempura Rolls?
Simplicity of Preparation: The process is easy, with straightforward steps that anyone can follow. You don’t need to be a sushi master; just roll and slice!
Flavor Explosion: The combination of textures—crispy chicken, creamy avocado, and seasoned rice—creates a delightful harmony that your taste buds will adore.
Customizable Options: Enjoy flexibility by substituting proteins with shrimp or tofu, catering to various dietary preferences, making this dish inclusive for everyone.
Time-Saving: With a total cooking time of just 30 minutes, this recipe is perfect for busy weeknights when you want a home-cooked meal without the wait.
Family-Friendly Appeal: Whether you’re introducing sushi to the kids or making it a fun family activity, these rolls are sure to bring everyone together. Try serving with sides like Crockpot Chicken Nachos for an even more exciting spread!
Crispy Chicken Tempura Roll Ingredients
For the Sushi Rice
- Short-Grain Rice – Provides the sticky texture essential for sushi; substitute with Calrose or Nishiki rice for similar results.
- Cold Water – Necessary to achieve the perfect consistency when cooking the rice.
- Rice Vinegar – Adds a delightful tang to the seasoned rice; can be substituted with apple cider vinegar for a different flavor.
- Sugar – Balances the acidity in the rice dressing; avoid substitutes, but a little honey can work in a pinch.
- Salt – Enhances the overall flavor of the rice; choose kosher or sea salt based on your preference.
For the Chicken Tempura
- Chicken Breasts – The main protein that provides tenderness and juiciness; feel free to switch to shrimp or firm tofu for variations.
- Plain Flour – Used for coating the chicken; gluten-free flour can also be a suitable substitute.
- Corn Flour (Cornstarch) – Enhances the crispiness of the chicken; tapioca starch is a great gluten-free alternative.
- Neutral Cooking Oil – Ideal for frying the chicken; can be substituted with canola or vegetable oil for a different touch.
For Assembly
- Nori Sheets – Essential for wrapping the sushi; no substitutes as they’re crucial for this dish.
- Ripe Avocado – Adds creaminess and richness to the roll; can be replaced with cucumber or bell pepper for added crunch.
- Sesame Seeds – Optional garnish for a toasty flavor that elevates your rolls.
With all these vibrant ingredients, your Crispy Chicken Tempura Roll will not only be a feast for the eyes but also a delightful treat for your taste buds! Enjoy the cooking adventure!
Step‑by‑Step Instructions for Crispy Chicken Tempura Roll
Step 1: Rinse Rice
Begin by rinsing 2 cups of short-grain rice under cold water for 3-4 cycles until the water runs clear. This important step removes excess starch and helps achieve the perfect sticky texture. Drain the rice thoroughly in a fine mesh strainer to prepare it for cooking.
Step 2: Cook Rice
In a medium pot, combine the rinsed rice with 2.5 cups of cold water. Bring the mixture to a boil over medium-high heat, then reduce to low and cover. Allow it to simmer for 12 minutes, keeping the lid tightly on to trap the steam, which is crucial for cooking the rice evenly.
Step 3: Steam Rice
After cooking, remove the pot from heat and continue to keep the lid on for 10 minutes. This steaming phase allows the rice to settle and further enhances its texture. Once done, uncover and fluff the rice gently with a fork, taking care not to mash the grains.
Step 4: Season Rice
In a small bowl, mix together 1/4 cup of rice vinegar, 2 tablespoons of sugar, and 1 teaspoon of salt until dissolved. Fold this mixture into the warm rice gently, ensuring all grains get coated without breaking. The seasoning adds a delightful tang, turning your rice into the perfect base for your crispy chicken tempura roll.
Step 5: Prepare Chicken
While the rice cooks, slice 2 chicken breasts into thin strips and season them with salt and pepper to taste. This adds flavor to the meat and ensures a tasty bite in your Crispy Chicken Tempura Roll. Let it marinate while you prepare the coating.
Step 6: Mix Coating
In two separate bowls, prepare your coating: one with plain flour and the other with cornstarch. To amplify flavor, you may add seasonings or spices of your choice, such as garlic powder or paprika. This crispy coating is key to achieving that delicious crunch everyone loves in the rolls.
Step 7: Heat Oil
In a deep skillet, pour in enough neutral cooking oil to submerge the chicken strips. Begin heating the oil to 350°F (175°C), using a thermometer to ensure it’s at the right temperature for frying. Proper heat is crucial to achieving a light, crispy texture on your chicken.
Step 8: Fry Chicken
Coat each chicken strip first in the flour and then in the cornstarch. Carefully place the coated strips into the hot oil, avoiding overcrowding to maintain temperature. Fry for 3-4 minutes, or until the chicken is golden brown and crispy. Use a slotted spoon to remove them and place on paper towels to drain excess oil.
Step 9: Prepare Nori
Lay out a nori sheet on a sushi mat or a clean cutting board, shiny side facing down. Spread an even layer of the seasoned rice over the nori, leaving about an inch of space at the top. This will help seal the roll when you start to wrap it, ensuring everything stays intact.
Step 10: Add Filling
On top of the rice, layer the crispy chicken strips and slices of ripe avocado. Feel free to customize this by adding any crunchy veggies like cucumber or bell pepper. The combination of flavors and textures will elevate your Crispy Chicken Tempura Roll making it a delightful dish.
Step 11: Roll Sushi
Starting from the edge closest to you, carefully lift the sushi mat and begin rolling the nori over the filling, applying gentle pressure to form a tight roll. Once you reach the exposed edge of the nori, moisten it with a little water to seal the roll securely.
Step 12: Slice and Serve
Gently slice your rolled sushi into 8 equal pieces using a sharp, wet knife for clean cuts. Arrange on a plate and serve with your favorite dipping sauces like soy sauce or spicy mayo. Your homemade Crispy Chicken Tempura Roll is now ready to be enjoyed!
Variations & Substitutions for Crispy Chicken Tempura Roll
Feel free to personalize your Crispy Chicken Tempura Roll with these delightful twists that will elevate your sushi-making game!
-
Seafood Twist: Substitute chicken with shrimp for a delicious seafood version. Shrimp’s natural sweetness pairs wonderfully with the creamy avocado and seasoned rice.
-
Vegetarian Option: Replace chicken with marinated firm tofu for a satisfying vegetarian roll. Tofu adds a unique texture and absorbs all the delightful seasonings.
-
Spicy Addition: Incorporate Sriracha or spicy mayo for a kick of heat. This zesty touch brings a thrilling contrast to the dish’s creamy elements.
-
Fresh Crunch: Add sliced cucumber or bell pepper for a refreshing crunch. These vibrant veggies not only enhance texture but also provide a burst of color to your roll.
-
Air Fryer Method: Utilize an air fryer for a healthier preparation with less oil. Your rolls can still achieve that crispy texture with just a fraction of the fat, great for guilt-free indulgence!
-
Herb-Infused Rice: Mix chopped cilantro or mint into the sushi rice for a fresh twist. Herbaceous notes can add an unexpected and delightful flavor profile.
-
Different Dips: Serve with a variety of dipping sauces like ponzu or a sesame-ginger sauce for a flavor-packed experience. Pairing with different sauces can transform each bite into something new!
-
Sushi Roll Size Variations: Experiment with making bite-sized mini rolls or a larger sushi burrito-style roll. This makes your rolls great for any occasion, from parties to easy weekday meals.
By exploring these variations, you’re sure to find the perfect combination that suits your taste! And don’t forget, if you love the crispy goodness, you might also enjoy my take on Chicken Parmesan Air or the creamy delight of Garlic Parmesan Chicken—because who can resist a little extra flavor?
How to Store and Freeze Crispy Chicken Tempura Rolls
Fridge: Store leftover Crispy Chicken Tempura Rolls in an airtight container for up to 24 hours. This helps maintain freshness while preventing the rolls from getting soggy.
Freezer: For longer storage, wrap each roll tightly in plastic wrap and place in a freezer-safe bag. They can be frozen for up to 1 month.
Reheating: To reheat, use an air fryer or oven at 350°F (175°C) for about 10 minutes. Avoid microwaving, as it can make the rolls chewy and less crispy.
Enjoying Later: When ready to enjoy, simply thaw overnight in the fridge before reheating for the best texture!
Expert Tips for Crispy Chicken Tempura Rolls
-
Maintain Oil Temperature: Keep the oil at 350°F for the crispiest chicken tempura roll; check with a thermometer to avoid soggy results.
-
Avoid Overcrowding: Fry in batches to prevent the temperature from dropping, ensuring an even and crispy coating on each piece.
-
Use a Wet Knife: Slice the rolls with a sharp, wet knife to achieve clean cuts, making your crispy chicken tempura roll visually appealing.
-
Seasoning Matters: Don’t skip seasoning your chicken before coating; it enhances flavor and takes your rolls to the next level.
-
Be Gentle with Rice: When mixing the seasoned rice, fold gently to maintain its texture—broken grains can affect the roll’s integrity.
Make Ahead Options
These Crispy Chicken Tempura Rolls are perfect for busy home cooks looking to simplify meal prep! You can prepare the sushi rice and fry the chicken up to 24 hours in advance. Simply season and cook the rice, then allow it to cool and refrigerate in an airtight container. For the chicken, slice and coat it, frying is best done fresh, but if necessary, you can store the fried pieces (cooled) in the fridge until ready to roll. When you’re ready to enjoy your rolls, simply assemble by filling dark nori sheets with the prepped rice, chicken, and avocado. Rolling just before serving ensures that your tempura is still crisp and your rolls are delightfully fresh!
What to Serve with Crispy Chicken Tempura Roll
Transform your delightful sushi experience into a full meal with these fantastic pairings that add variety and satisfaction.
- Soy Sauce Dipping: A classic companion that enhances the savory flavors of the tempura, making every bite delectable.
- Ginger Salad: The refreshing crunch of crisp greens and a tangy dressing complements the richness of the rolls beautifully.
- Miso Soup: This warm, savory soup offers comforting umami notes, perfectly balancing the crispy texture of your chicken tempura roll.
- Edamame: Lightly salted and steamed, these vibrant green pods are a healthy, protein-packed snack that adds a fun element to your meal.
- Spicy Mayo: A drizzle of this creamy, zesty sauce will elevate your crispy chicken tempura roll with a kick of flavor.
- Pickled Ginger: Its sweet and tangy profile acts as a palate cleanser between bites, refreshing your taste buds for another delightful experience.
- Crispy Tempura Vegetables: Add more crunch by serving these alongside your rolls; the variety of flavors will keep everyone satisfied.
- Iced Green Tea: This lightly brewed tea brings a refreshing touch, balancing the richness of the rolls while offering a hint of earthiness.
Crispy Chicken Tempura Roll Recipe FAQs
How do I choose the right avocado for my rolls?
Absolutely! Look for avocados that yield slightly to gentle pressure—this indicates ripeness. Avoid any with dark spots all over the skin or that feel overly soft. A perfect avocado adds that creamy texture to your rolls!
What’s the best way to store leftover Crispy Chicken Tempura Rolls?
To keep your leftover Crispy Chicken Tempura Rolls fresh, I recommend placing them in an airtight container in the fridge. They can be stored for up to 24 hours. Make sure to avoid stacking them to prevent any squishing!
Can I freeze these rolls for later?
Yes, you can! Wrap each roll tightly in plastic wrap and place them in a freezer-safe bag. They can be frozen for up to 1 month. When ready to enjoy, thaw overnight in the fridge and reheat in an air fryer or oven at 350°F (175°C) for about 10 minutes to restore their crispiness.
What can I do if my chicken isn’t staying crispy after frying?
Very! Ensure your oil is sufficiently hot (about 350°F or 175°C) before adding chicken to maintain a crispy texture. If you overcrowd the pan, this can drop the oil temperature, leading to sogginess. Fry in smaller batches to achieve that golden crisp you crave!
Are there any allergy considerations I should be aware of?
For sure! Keep in mind that the chicken tempura rolls contain common allergens such as gluten (from flour) and sesame (if using seeds). If guests have Celiac disease or specific food allergies, consider substituting with gluten-free flour and omitting the sesame seeds or using a different garnish. Always check with your guests to ensure they’re safe to enjoy these delicious rolls!
What’s the best method for reheating Crispy Chicken Tempura Rolls?
To reheat, avoid the microwave as it can make the rolls chewy. Instead, preheat your air fryer or oven to 350°F (175°C) and heat for about 10 minutes. This will help keep that delightful crispiness intact while warming the inside, making them enjoyable once again!
Crispy Chicken Tempura Roll: Easy Homemade Sushi Delight
Ingredients
Equipment
Method
- Rinse 2 cups of short-grain rice under cold water for 3-4 cycles until the water runs clear. Drain thoroughly.
- Combine the rinsed rice with 2.5 cups of cold water in a medium pot. Bring to a boil, then reduce to low and cover. Simmer for 12 minutes.
- Remove from heat and let sit covered for 10 minutes. Fluff the rice gently with a fork.
- In a small bowl, mix together 1/4 cup of rice vinegar, 2 tablespoons of sugar, and 1 teaspoon of salt. Fold into warm rice.
- Slice 2 chicken breasts into thin strips and season with salt and pepper. Let marinate while you prepare the coating.
- Prepare your coating: one bowl with plain flour and another with cornstarch.
- Heat enough neutral cooking oil in a deep skillet to 350°F (175°C).
- Coat each chicken strip in flour and then in cornstarch. Fry for 3-4 minutes until golden brown. Drain on paper towels.
- Lay out a nori sheet, spread an even layer of seasoned rice, leaving about an inch at the top.
- Layer crispy chicken strips and slices of ripe avocado on top of the rice.
- Roll the nori over the filling, applying pressure to form a tight roll. Moisten the edge of the nori to seal.
- Slice the roll into 8 equal pieces with a sharp, wet knife. Serve with dipping sauces.
Leave a Reply