
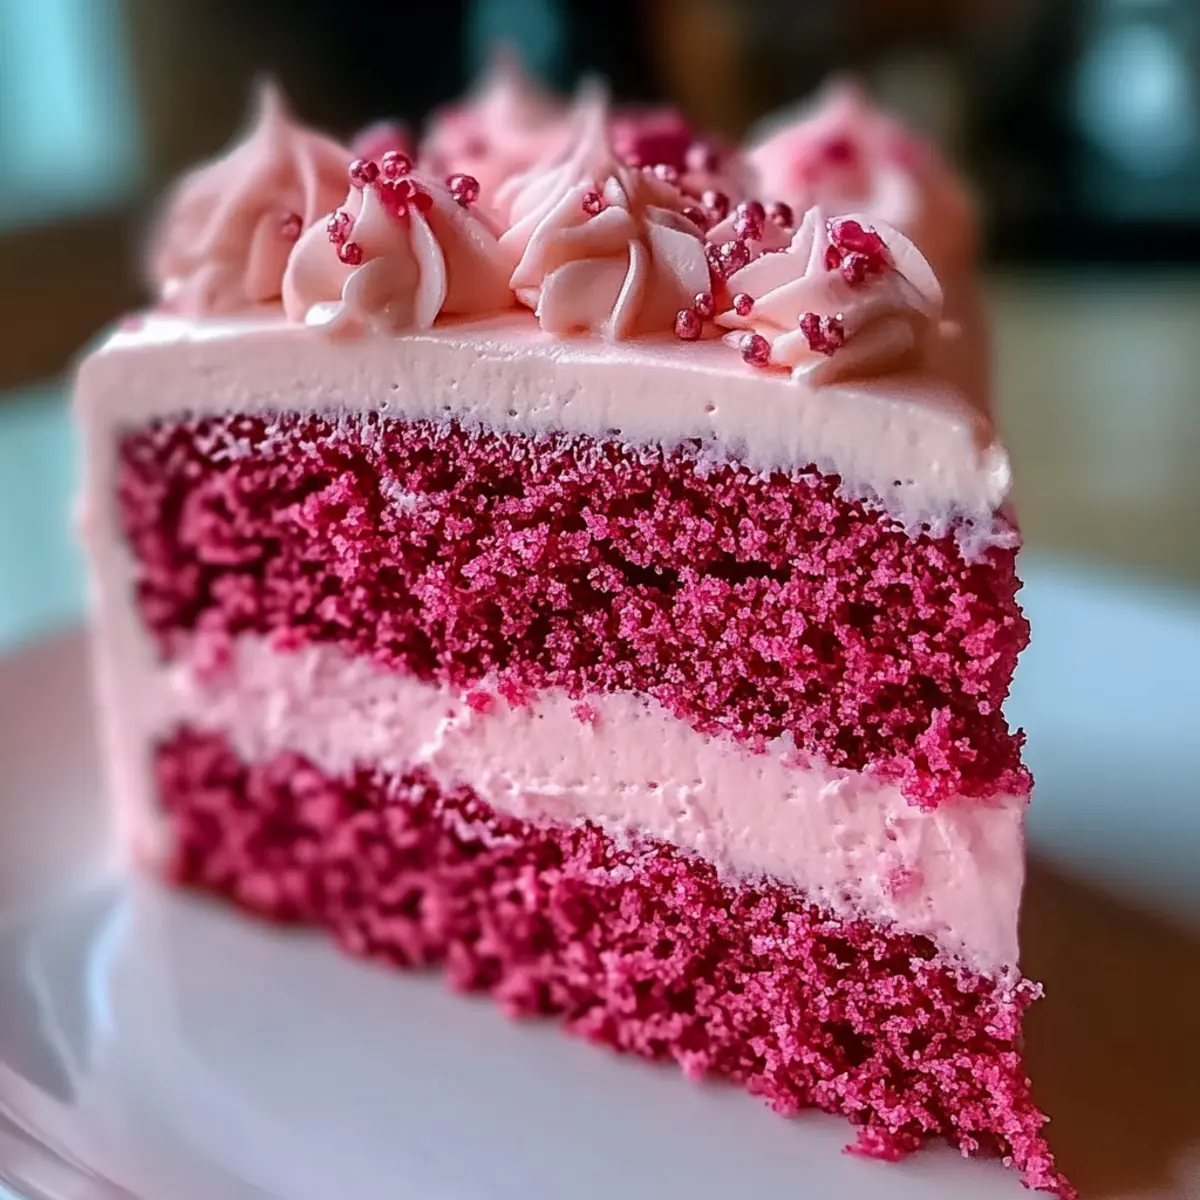
As I preheated my oven and collected the ingredients, I could hardly contain my excitement for this Pink Velvet Cake for Mother’s Day. There’s something beautifully nostalgic about that soft pink batter, reminiscent of cherished family gatherings and sweet celebrations. This cake isn’t just visually stunning; it brings a delightful texture and flavor that will undoubtedly impress your loved ones. Quick to prepare and adaptable for both gluten-free and dairy-free diets, this melt-in-your-mouth cake is perfect for busy home chefs who refuse to compromise on taste. Whether you’re honoring the amazing women in your life or treating yourself, this show-stopping dessert is bound to become a cherished recipe. What will you pair with this gorgeous cake to make the occasion even sweeter?
Why You’ll Adore This Cake Recipe
Unforgettable Flavor: The rich cream cheese frosting paired with a subtly sweet pink cake offers an irresistible taste that’s sure to leave an impression at any gathering.
Easy to Make: With just a few simple steps, even novice bakers can master this stunning dessert. You’ll have it ready in no time, making it perfect for busy days!
Versatile Options: Whether you need a gluten-free or dairy-free delight, this recipe allows for easy substitutions without sacrificing flavor. It’s a win-win for everyone at your table.
Show-Stopping Presentation: The vibrant pink hue is not just gorgeous but also adds a festive touch, making it an ideal centerpiece for any Mother’s Day celebration.
Crowd-Pleasing Dessert: Everyone loves a sweet treat that’s as beautiful as it is delicious. Pair it with some delightful Gingerbread Pancakes Cozy or a refreshing Peach Bellini Cupcakes for a delightful dessert spread.
Pink Velvet Cake for Mother’s Day Ingredients
For the Cake
- Cake Flour – Provides structure; substitute with a blend of all-purpose flour and cornstarch for a similar effect.
- Baking Powder – Acts as a leavening agent; ensure it’s fresh by testing with warm water before use.
- Salt – Enhances flavor; use fine sea salt for even distribution.
- Unsalted Butter – Adds richness and moisture; soften at room temperature for best results.
- White Sugar – Sweetens and contributes to texture; use bright, clump-free granulated sugar.
- Eggs – Provides structure and moisture; ensure they are at room temperature before use.
- Vanilla Extract – Adds flavor depth; opt for pure extract for superior taste.
- Pink Gel Food Coloring – Gives the cake its signature color; gel is preferred for vibrancy.
- Buttermilk – Contributes to moisture and tender texture; can substitute with milk mixed with vinegar.
For the Frosting
- Cream Cheese – Main ingredient for the frosting, delivering creaminess; ensure it’s well-softened for optimal mixing.
- Powdered Sugar – Sweetens and thickens the frosting; use finely powdered sugar for a smooth texture.
Invite your loved ones to savor this delectable Pink Velvet Cake for Mother’s Day—it’s sure to be a heartwarming addition to your celebration!
Step‑by‑Step Instructions for Pink Velvet Cake for Mother’s Day
Step 1: Preheat the Oven
Begin by preheating your oven to 350°F (175°C). While it warms up, grease two round 9-inch cake pans with a bit of softened butter or non-stick spray to ensure easy removal after baking. This step is crucial for achieving that perfect, moist Pink Velvet Cake you’re aiming for.
Step 2: Beat Butter and Sugar
In a large mixing bowl, combine the softened unsalted butter and white sugar. Using an electric mixer, beat them together on medium speed for about 4-5 minutes, or until the mixture becomes pale and fluffy. This creates the base for the cake, contributing to its light texture and delightful flavor.
Step 3: Incorporate the Eggs
Add the eggs to the butter and sugar mixture one at a time, allowing each egg to blend in completely before adding the next. This process helps to build a smooth, rich batter. After incorporating all the eggs, mix in the vanilla extract, ensuring it’s evenly distributed throughout the mixture.
Step 4: Mix Dry Ingredients
In a separate bowl, thoroughly whisk together the cake flour, baking powder, and salt. This important step ensures that the leavening and flavor enhancers are evenly mixed before introducing them to the batter, which helps the Pink Velvet Cake rise beautifully.
Step 5: Combine the Mixtures
Gradually mix the dry ingredient blend into the wet mixture, alternating with the buttermilk. Start by adding a third of the flour mixture followed by half of the buttermilk, stirring until just combined. Continue this process, finishing with the dry ingredients. Add the pink gel food coloring, mixing gently until the batter reaches your desired hue.
Step 6: Bake the Cakes
Evenly divide the cake batter between your prepared pans, smoothing the tops with a spatula. Place the pans in the preheated oven and bake for 25-30 minutes. Check for doneness by inserting a toothpick in the center; it should come out clean or with a few moist crumbs for the perfect moist texture.
Step 7: Cool the Cakes
After baking, remove the cakes from the oven and let them cool in the pans for about 10 minutes. Carefully run a knife around the edges to loosen them before flipping the cakes onto wire racks. Allow the cakes to cool completely, which is essential for a well-frosted Pink Velvet Cake.
Step 8: Prepare the Frosting
While your cakes cool, it’s time to whip up the cream cheese frosting. In a medium bowl, beat the softened cream cheese and powdered sugar together until smooth and creamy. This creates a delightful frosting that perfectly complements the sweet and soft flavors of your Pink Velvet Cake.
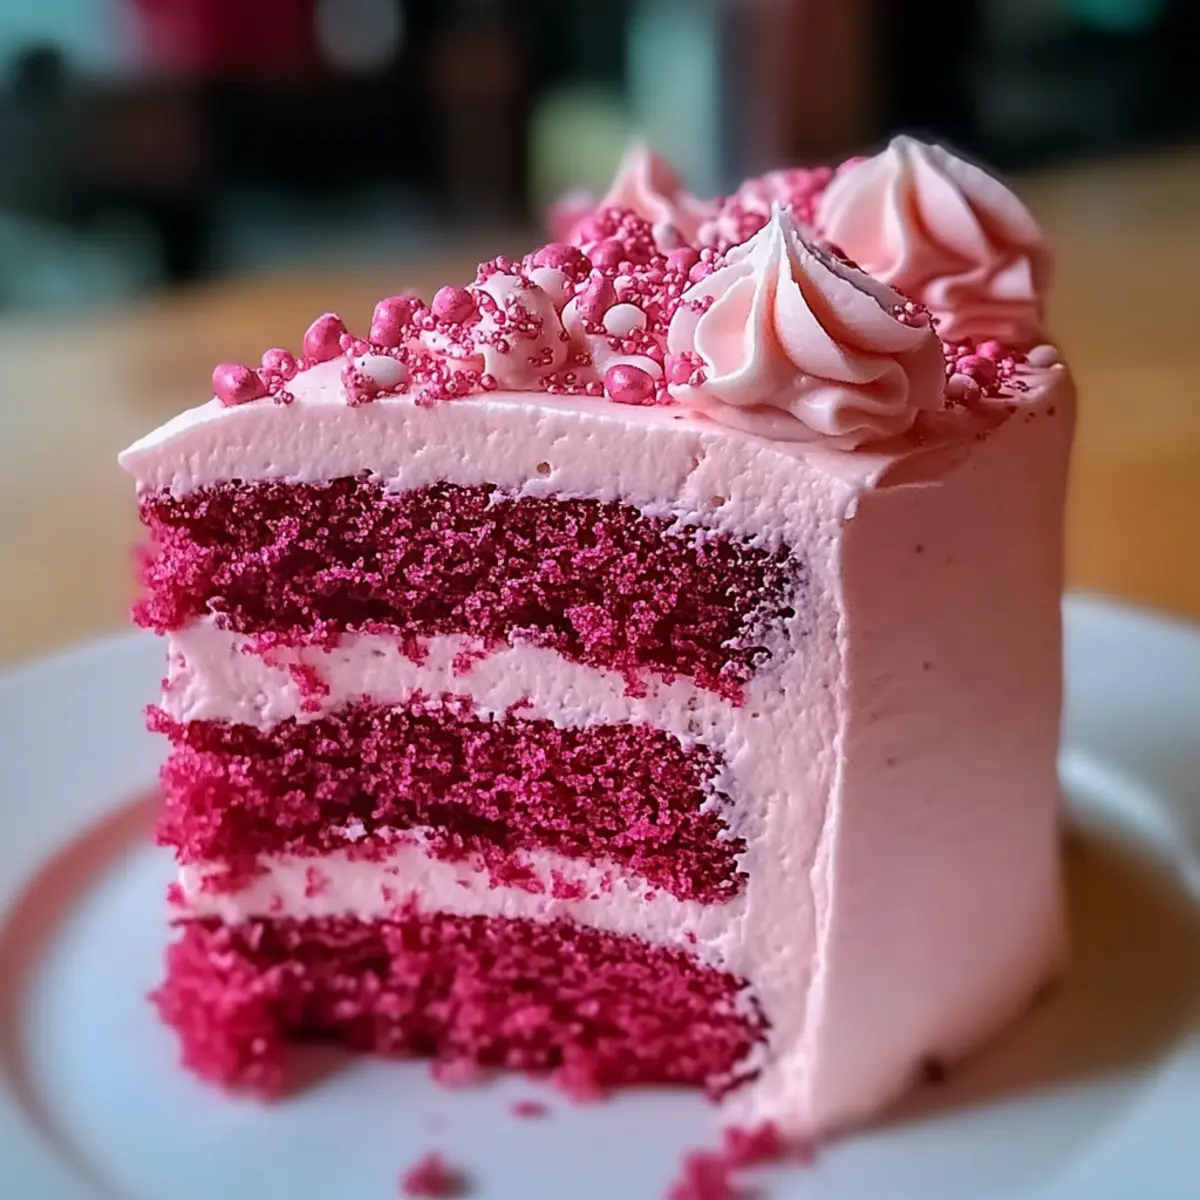
Step 9: Assemble and Decorate
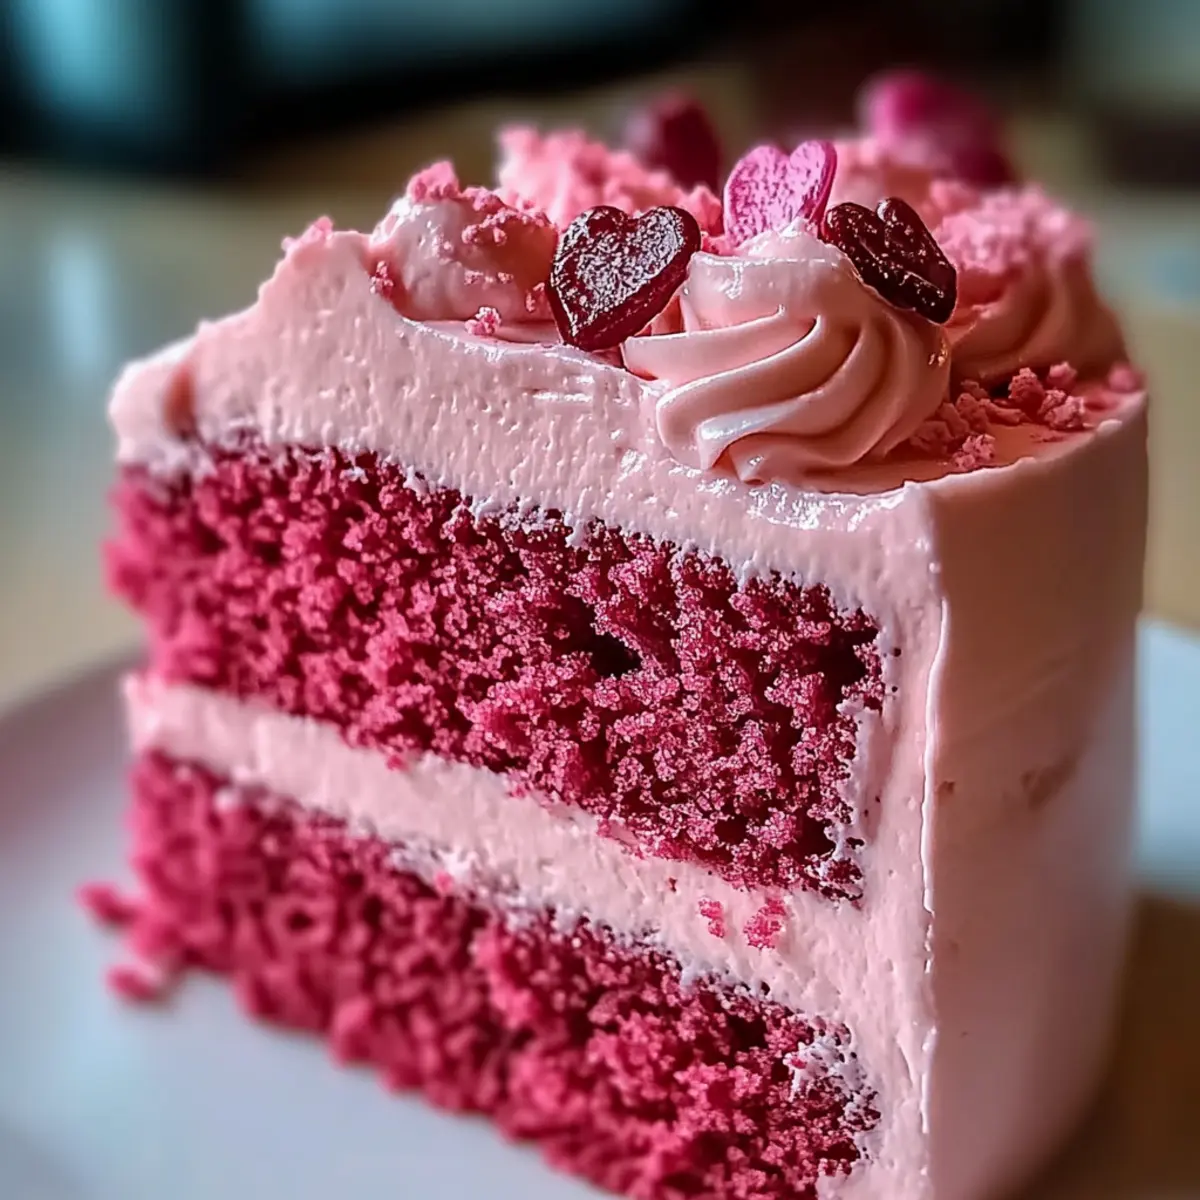
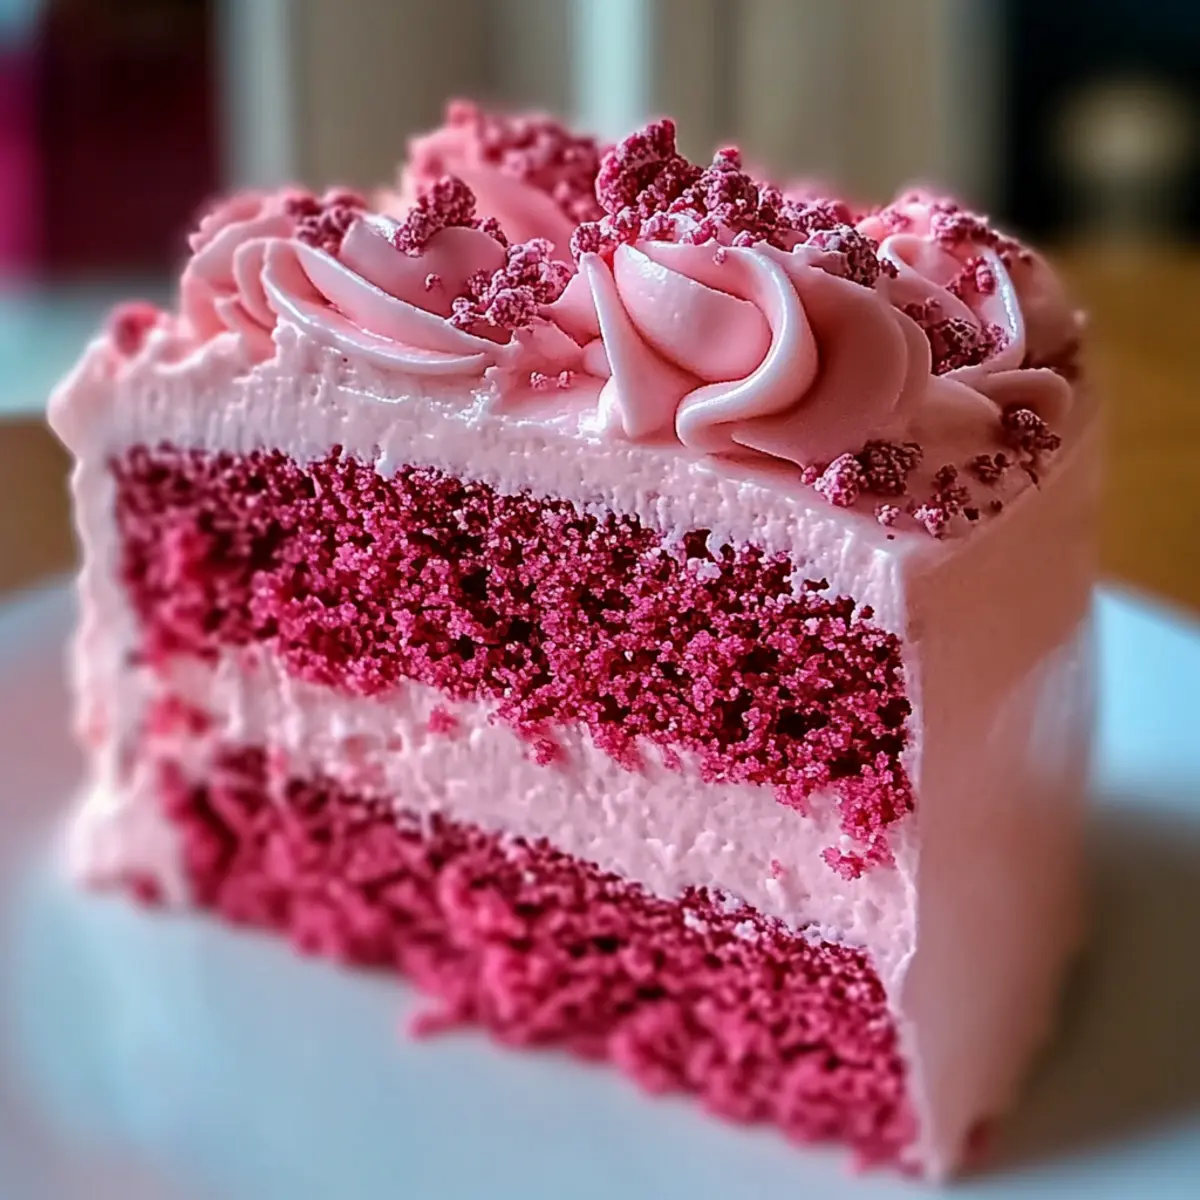
Once the cakes are completely cooled, place one layer on a serving platter. Spread a generous layer of cream cheese frosting on top before placing the second layer on top. Use the remaining frosting to cover the top and sides of the cake. Feel free to add decorative touches as desired for an extra special look!
What to Serve with Irresistibly Moist Pink Velvet Cake
The perfect meal is just a slice away—pair it with delightful accompaniments that elevate your celebration.
-
Fresh Berries: The light tartness of strawberries or raspberries complements the sweet cream cheese frosting beautifully, adding vibrancy and freshness.
-
Pineapple Coconut Sorbet: This tropical treat adds a cool and refreshing contrast to the cake’s rich flavors, perfect for a sunny Mother’s Day gathering.
-
Vanilla Ice Cream: A classic pairing that echoes the cake’s creamy frosting, ensuring each bite is indulgently smooth and comforting.
-
Whipped Cream: Light, airy whipped cream can enhance every slice, offering a fluffy texture that balances the dense cake nicely.
-
Lemon Zest Tea: A warm cup of lemon zest tea provides a citrusy kick that cuts through the sweetness, refreshing your palate between bites.
-
Chocolate-Covered Strawberries: These luscious bites bring a touch of romance and elevate the dessert table, perfect for a celebratory atmosphere.
-
Chilled Peach Bellini: The fruity, sparkling beverage adds a festive bubbliness, enhancing the overall experience with its lively flavors.
-
Creamy Gelato: Rich in texture and intensely flavored, gelato like pistachio or vanilla beautifully complements the pink velvet, creating a dreamy dessert experience.
How to Store and Freeze Pink Velvet Cake
- Room Temperature: Keep the Pink Velvet Cake in an airtight container at room temperature for up to 2 days. This is ideal for enjoying its moist texture right away.
- Fridge: For longer storage, wrap the cake tightly in plastic wrap and refrigerate for up to 3-5 days. This keeps the cake fresh while maintaining its delightful flavor.
- Freezer: Slice the cake and wrap each piece in plastic wrap, followed by aluminum foil. Freeze for up to 3 months. Thaw slices in the refrigerator before serving for the best taste and texture.
- Reheating: If preferred warm, gently heat individual slices in the microwave for about 10-15 seconds. Enjoy the delightful experience of this Pink Velvet Cake as if it’s freshly made!
Expert Tips for Pink Velvet Cake
-
Room Temperature Ingredients: Ensure all ingredients, especially butter and eggs, are at room temperature. This helps create a uniform batter for a light Pink Velvet Cake.
-
Moisture Check: Avoid a dry cake by checking for doneness with a toothpick. It should come out with a few moist crumbs for the perfect texture.
-
Simple Syrup Option: If the cake is drier than expected, brush the layers with a simple syrup to add moisture and enhance flavor.
-
Frosting Consistency: Beat the cream cheese and powdered sugar thoroughly for a smooth, creamy frosting that perfectly complements your Pink Velvet Cake.
-
Color Adjustment: Start with a small amount of pink gel food coloring and gradually add more until you achieve your desired vibrancy without overwhelming the flavor.
Make Ahead Options
These Pink Velvet Cake for Mother’s Day are perfect for meal prep enthusiasts! You can prepare the cake layers up to 24 hours in advance—simply bake as instructed, allow them to cool completely, and then wrap them tightly in plastic wrap to maintain their moisture. For the frosting, you can whip it up and store it in the refrigerator for up to 3 days; just give it a quick stir before using. On the day of serving, simply assemble the cake by layering the frosting between the cooled cakes and finishing with a beautiful frost on the top and sides. With these make-ahead tips, you’ll have a stunning dessert that’s just as delicious, saving you precious time for enjoying the occasion!
Pink Velvet Cake for Mother’s Day Variations
Feel free to personalize this delightful cake with your own favorite flavors and ingredients!
- Gluten-Free: Switch out cake flour for a gluten-free flour blend, perfect for those with dietary restrictions.
- Dairy-Free: Replace butter with coconut oil and use dairy-free cream cheese for a rich frosting that’s kind to lactose-sensitive guests.
- Fruity Twist: Fold fresh strawberries or raspberries into the batter, or layer them between the cake for an extra burst of flavor. Imagine that sweet fruitiness mingling beautifully with the cake!
- Flavor Twists: Incorporate almond extract or a sprinkle of lemon zest for a refreshing brightness that accentuates the cake’s sweetness. Your taste buds will thank you with every bite!
- Nutty Crunch: Add finely chopped nuts like pecans or walnuts for an unexpected texture that pairs wonderfully with the cake’s softness.
- Chocolatey Delight: Swirl in cocoa powder for a rich chocolate flavor or drizzle melted chocolate on top for an indulgent kick. Chocolate and pink are a match made in heaven!
- Citrus Infusion: A hint of orange or lemon juice can elevate the cake’s flavor profile, turning it into a refreshing slice of summer.
- Spicy Kick: A dash of cinnamon or nutmeg gives the cake a warm spice that’s perfect for cozy gatherings—bring on the comforting vibes!
Explore these variations and let your creativity shine in the kitchen, just like with my favorite German Potato Pancakes or a delightful batch of Mini Sausage Pancake Muffins. Enjoy the process of making this cake truly yours!
Pink Velvet Cake for Mother’s Day Recipe FAQs
What type of flour is best for this cake?
For the best results, use cake flour, which provides the right structure and tenderness. If you need a substitute, a blend of all-purpose flour and cornstarch works well to mimic the light texture.
How should I store the Pink Velvet Cake for optimal freshness?
Store the cake at room temperature in an airtight container for up to 2 days, or refrigerate it wrapped in plastic for 3-5 days. This keeps it moist and delicious. When you want to impress, serve it fresh!
Can I freeze the Pink Velvet Cake?
Absolutely! Wrap individual slices tightly in plastic wrap and then in aluminum foil to prevent freezer burn. The cake can be frozen for up to 3 months. When you’re ready to enjoy, simply thaw slices in the refrigerator overnight for best results.
What if my cake turns out too dry?
To prevent dryness, it’s important to check for doneness with a toothpick; it should have a few moist crumbs attached. If your cake is dry, you can brush the layers with a simple syrup (1 part water, 1 part sugar, heated until dissolved) before frosting for added moisture and flavor.
Are there any dietary considerations for this recipe?
Yes! This Pink Velvet Cake can easily be made gluten-free by substituting the cake flour with a gluten-free flour blend. For a dairy-free option, use coconut oil in place of butter and a dairy-free cream cheese for the frosting. Always double-check ingredient labels to avoid allergens related to personal dietary preferences.
Dreamy Pink Velvet Cake for Mother’s Day Celebration
Ingredients
Equipment
Method
- Preheat your oven to 350°F (175°C) and grease two round 9-inch cake pans.
- Combine the softened unsalted butter and white sugar in a large mixing bowl, and beat on medium speed until pale and fluffy.
- Add eggs one at a time, blending completely before adding the next. Then mix in the vanilla extract.
- Whisk together cake flour, baking powder, and salt in a separate bowl.
- Gradually mix the dry ingredients into the wet mixture, alternating with buttermilk, finishing with dry ingredients. Add pink gel food coloring.
- Pour the batter into the prepared pans and bake for 25-30 minutes, checking doneness with a toothpick.
- Cool the cakes in the pans for 10 minutes, then transfer to wire racks to cool completely.
- In a medium bowl, beat the cream cheese and powdered sugar together until smooth.
- Layer the cakes with cream cheese frosting and cover the top and sides with the remaining frosting.
Leave a Reply