
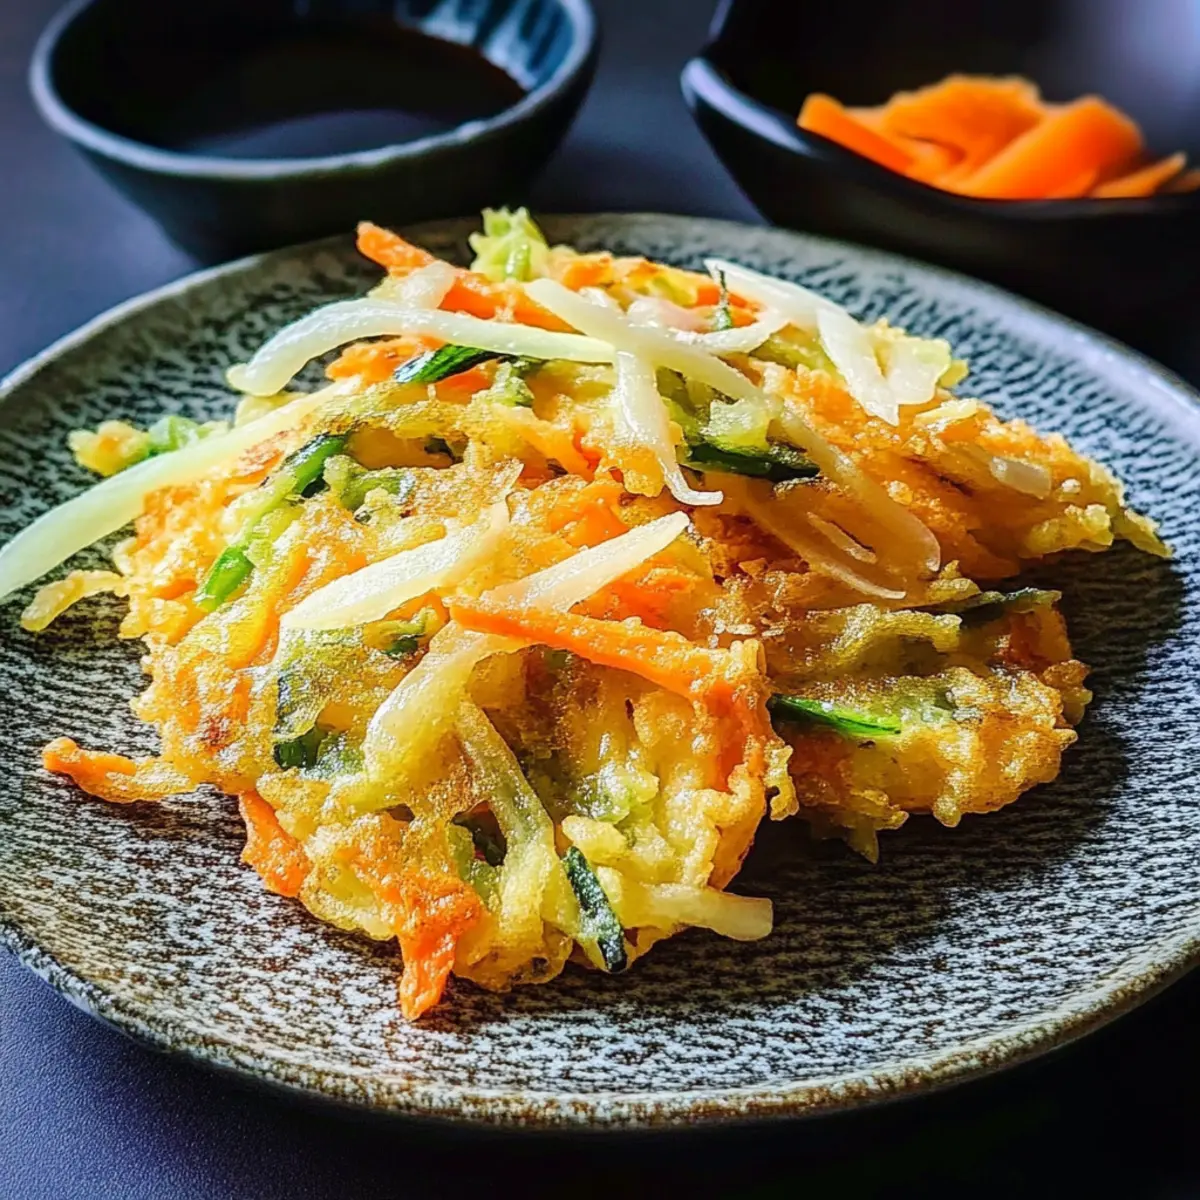
There’s a certain magic that happens when you transform a handful of leftover vegetables into something extraordinary. Enter Kakiage, the crispy Japanese vegetable fritters that not only elevate your culinary game but also serve as a fantastic way to reduce food waste. This versatile recipe allows you to play with whatever veggies you have on hand, turning them into delightful bites that are perfect as a side dish, a topping for noodles, or a stand-alone snack. Plus, Kakiage is a breeze to prepare, making it an ideal choice for busy weeknights or spontaneous gatherings with friends. Are you ready to dive into this crunchy, flavorful experience? Let’s get frying and add a taste of Japan to your kitchen!
Why Is Kakiage So Popular?
Versatile and Adaptable: Kakiage shines with its ability to use any mix of vegetables or seafood, making it perfect for clearing out your fridge.
Crispy Perfection: The light, crispy coating achieved through careful frying creates a satisfying crunch that makes each bite irresistible.
Easy to Make: With simple steps and minimal prep, even novice cooks can whip up a delicious batch without stress.
Fun to Customize: Experiment with different flavorings or incorporate unique ingredients for a personalized touch. Consider adding leafy greens or spices to elevate the taste!
Perfect for Sharing: This dish is great for parties or family gatherings, making it an instant crowd-pleaser when paired with various dipping sauces.
Kakiage Ingredients
For the Fritters
• Carrot – Adds natural sweetness and color, provides beta-carotene; substitute with zucchini for a milder flavor.
• Onion – Offers sharpness and depth, packed with antioxidants; shallots can be used for a sweeter flavor.
• Sweet Potato – Contributes starchy structure and mild sweetness; regular potatoes can replace for a different texture.
• Corn – Provides bursts of sweetness and juiciness; peas work well as a similar texture substitute.
For the Batter
• Plain Flour (All-Purpose Flour) – Essential for the fritter batter and helps create a light coating; a gluten-free flour blend can be used as a substitute.
• Potato Starch (or Cornstarch) – Promotes a crispier texture and reduces oil absorption; arrowroot starch is a great alternative.
• Salt – Enhances overall flavor; adjust to taste for your perfect Kakiage.
• Cold Water – Used to achieve the right batter consistency, preventing gluten formation; ice water yields the best results.
For Frying
• Neutral Oil – Ideal for deep frying, allowing the vegetable flavors to shine; grapeseed or canola oil are great options.
Step‑by‑Step Instructions for Kakiage
Step 1: Prepare the Vegetables
Begin by julienning the carrot and sweet potato, and thinly slicing the onion. Measure out the corn. This step is crucial for ensuring even cooking and a lovely presentation. Aim for uniform sizes, as they’ll fry more consistently. Set the prepared vegetables aside while you make the batter.
Step 2: Coat the Vegetables
In a large bowl, toss the prepared vegetables with plain flour to create a light coating. This step helps the batter adhere better, adding to the delicious texture of your Kakiage. Make sure each piece is evenly coated without clumping, allowing them to mix together nicely for a well-rounded flavor.
Step 3: Make the Batter
In a separate bowl, combine the remaining plain flour, potato starch, and salt. Gradually add cold water, ideally ice-cold, and mix until just combined. Be careful not to overmix—this will help keep your Kakiage light and crispy. The batter should be slightly lumpy, as this ensures the fritters maintain their airy texture when fried.
Step 4: Incorporate the Vegetables
Gently fold the coated vegetables into the batter. Use a spatula to combine without overmixing, as this will help retain the crispiness of the Kakiage. The goal is to have the vegetables evenly distributed through the batter while maintaining their individual textures.
Step 5: Heat the Oil
In a deep frying pan, pour in enough neutral oil to cover the fritters when frying. Heat the oil to 170–180°C (340–355°F). Use a thermometer for accuracy, or drop a small amount of batter into the oil—if it sizzles upon contact, the temperature is just right. This step is vital for achieving that golden brown, crispy exterior.
Step 6: Fry the Fritters
Carefully form small mounds of the mixture and lower them gently into the hot oil. Do not overcrowd the pan; cook in batches if needed. Fry each Kakiage for about 2-3 minutes, until they turn golden brown and crispy. Flip them halfway through for even cooking, creating a delightful crunch.
Step 7: Drain and Serve
Once your Kakiage is perfectly fried, remove them from the oil and let them drain on paper towels. This helps remove excess oil and ensures a crispy finish. Serve your Kakiage hot, either as a side dish, over noodles, or as a tasty snack. Enjoy the delightful blend of flavors and textures!
Expert Tips for Perfect Kakiage
-
Uniform Cutting: Ensure your vegetables are cut into thin, consistent pieces; this promotes even cooking and a beautiful presentation.
-
Gentle Mixing: Mix the batter just until it’s combined to keep your Kakiage light and crispy. Overmixing can lead to dense fritters.
-
Temperature Check: Use a thermometer to ensure the oil is between 170–180°C (340–355°F). If it’s too hot, the exterior will burn before the inside is cooked.
-
Avoid Overcrowding: Fry in batches, allowing enough space between fritters so they can fry evenly and maintain their crispiness.
-
Immediate Serving: Serve Kakiage hot for the best texture. They are best enjoyed fresh, although reheating in the oven can help regain some of their crunch.
Storage Tips for Kakiage
Room Temperature: Kakiage is best enjoyed fresh, but if you need to store it, keep it at room temperature for up to 1 hour to prevent sogginess.
Fridge: Store leftover Kakiage in an airtight container in the fridge for up to 2 days. Make sure they’re separated by parchment paper to maintain their crispiness.
Freezer: For longer storage, freeze Kakiage in a single layer on a baking sheet. Once frozen, transfer them to a freezer bag for up to 1 month.
Reheating: To bring back the crunch, reheating in the oven at 180°C (350°F) for 10-15 minutes is ideal. Avoid microwaving, as it may make the Kakiage soggy.
Make Ahead Options
These Kakiage are perfect for meal prep enthusiasts looking to save time on busy weeknights! You can chop and mix your vegetables up to 24 hours in advance, storing them in an airtight container in the refrigerator to maintain freshness. You can also prepare the batter and keep it in the fridge for up to 3 days. To ensure the best texture when you’re ready to fry, give the batter a gentle stir before adding the chopped vegetables. When it’s time to serve, simply heat your oil and fry them for 2-3 minutes until they are golden brown and crispy, delivering the same delightful crunch and flavor you expect from freshly made Kakiage!
What to Serve with Crispy Kakiage?
Treat your tastebuds to a delightful meal that complements the crispy charm of these flavorful fritters.
- Steamed Jasmine Rice: A fluffy bed of jasmine rice provides a subtle backdrop that highlights the flavors of the kakiage, making every bite satisfying.
- Soba Noodle Salad: Tossing soba noodles with a light soy dressing and fresh veggies creates a wonderful, chilly counterpart that contrasts nicely with the warm fritters.
- Dipping Sauces: Pair with soy sauce, ponzu, or a homemade sesame dipping sauce for an explosion of flavor that enhances the crispy exterior of the kakiage.
- Miso Soup: A delicate miso soup with seaweed and tofu adds warmth and comfort, balancing the crispy texture with a soothing, savory element.
- Pickled Vegetables: A side of tangy pickles brings acidity and brightness to the meal, cutting through the richness of the fried kakiage beautifully.
- Grilled Corn on the Cob: The sweetness of the corn, brushed with butter and a sprinkle of salt, complements the savory flavors of the fritters while adding a fun, summery feel.
Kakiage Variations & Substitutions
Feel free to mix things up! Embrace your creativity with these tasty tweaks and substitutions.
-
Seafood Twist: Add small shrimp or squid for a delightful seafood version that enhances the umami flavor profile. Imagine the juicy bites of shrimp mingling with the crunch of vegetables!
-
Leafy Greens: Incorporate kale or shiso leaves into the mix for added nutrition and depth. The vibrant greens will not only contribute to flavor but also brighten up your Kakiage visually.
-
Gluten-Free: Substitute all-purpose flour with a gluten-free flour blend to cater to a gluten-sensitive audience. Your gluten-free friends will appreciate this delicious alternative!
-
Flavor Boost: Spice things up with a sprinkle of shichimi togarashi or a dusting of sea salt before serving. This little addition can elevate the taste and give it an irresistible kick.
-
Crunchy Alternatives: Instead of corn, use peas for a sweet punch that retains similar texture. The bright green pops of peas will make a fun, colorful addition while blending beautifully with other vegetables.
-
Vegetable Medley: Use whatever leftover vegetables you have on hand, like bell peppers or zucchini. Tossing in different veggies can lead to delightful new flavors in your fritters.
-
Savoury Chunks: For a heartier bite, consider adding cubed tofu to the batter. This addition not only boosts protein content but also offers a delightful textural contrast.
-
Spice It Up: Introduce spicy elements like minced jalapeños or a dash of cayenne pepper in the batter for those who enjoy heat. Just remember, a little goes a long way in adding that fiery flair!
By exploring these Kakiage variations, you can create a unique dish every time you cook. Whether you’re in the mood for something crunchy, spicy, or loaded with veggies, the possibilities are endless! Consider serving these delightful fritters alongside soy sauce or ponzu for dipping, and watch your loved ones dig in with excitement. Enjoy your culinary adventure!
Kakiage Recipe FAQs
What vegetables work best for Kakiage?
Absolutely! Kakiage is incredibly versatile, allowing you to use any mix of vegetables you have on hand. Common choices include carrots, onions, sweet potatoes, and corn. For a twist, consider adding zucchini for a milder flavor, or leafy greens like shiso for added nutrition.
How should I store leftover Kakiage?
To keep your Kakiage fresh, store any leftovers in an airtight container in the fridge for up to 2 days. I recommend placing parchment paper between the fritters to help maintain their crispiness. They are best enjoyed fresh, but this method will keep them tasty for a little longer!
Can I freeze Kakiage?
Yes, you can! To freeze Kakiage, lay the fritters in a single layer on a baking sheet and freeze them until solid. Once frozen, transfer them to a freezer bag for storage. They can stay fresh in the freezer for up to 1 month. When you’re ready to eat, just reheat in the oven for a deliciously crispy treat!
What if my Kakiage isn’t crispy?
If your Kakiage turns out less crispy than desired, there are some steps to troubleshoot. First, ensure that your oil is at the right temperature (170–180°C or 340–355°F) before frying. If the oil is too cool, the batter will absorb more oil. Also, remember not to overcrowd the pan, as this can lead to steaming rather than frying. Try frying in smaller batches for optimal crispiness!
Are there any dietary considerations for Kakiage?
Kakiage can be made vegan by ensuring all your ingredients are plant-based, and you can adjust for gluten-free diets by using a gluten-free flour blend. If you have allergies, make sure to carefully select vegetables that are safe for your dietary needs. And remember, while it’s safe for human consumption, avoid sharing these fritters with pets due to the oil and salt content.
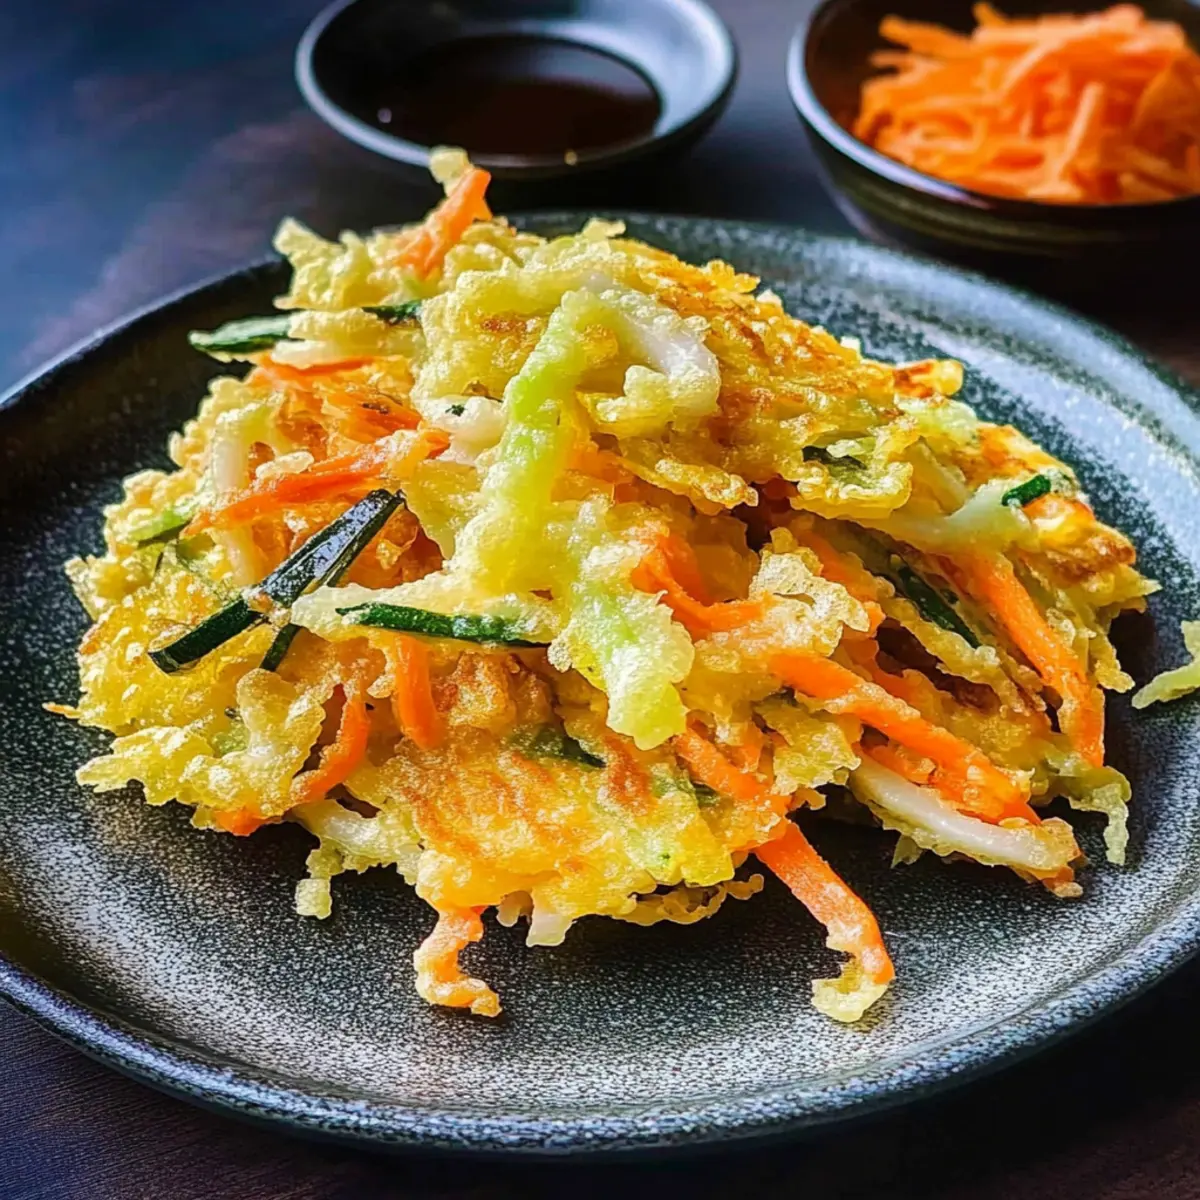
Crispy Kakiage: Irresistible Japanese Veggie Fritters to Love
Ingredients
Equipment
Method
- Prepare the vegetables by julienning the carrot and sweet potato, and thinly slicing the onion. Measure out the corn and set aside.
- Coat the vegetables with plain flour in a large bowl to create a light coating.
- Make the batter by combining plain flour, potato starch, and salt, then gradually add cold water until just combined.
- Gently fold the coated vegetables into the batter, being careful not to overmix.
- Heat enough neutral oil in a deep frying pan to cover the fritters. Heat to 170–180°C (340–355°F).
- Carefully form small mounds of the mixture and fry in hot oil for about 2-3 minutes until golden brown and crispy.
- Drain the fried Kakiage on paper towels and serve hot.
Leave a Reply