
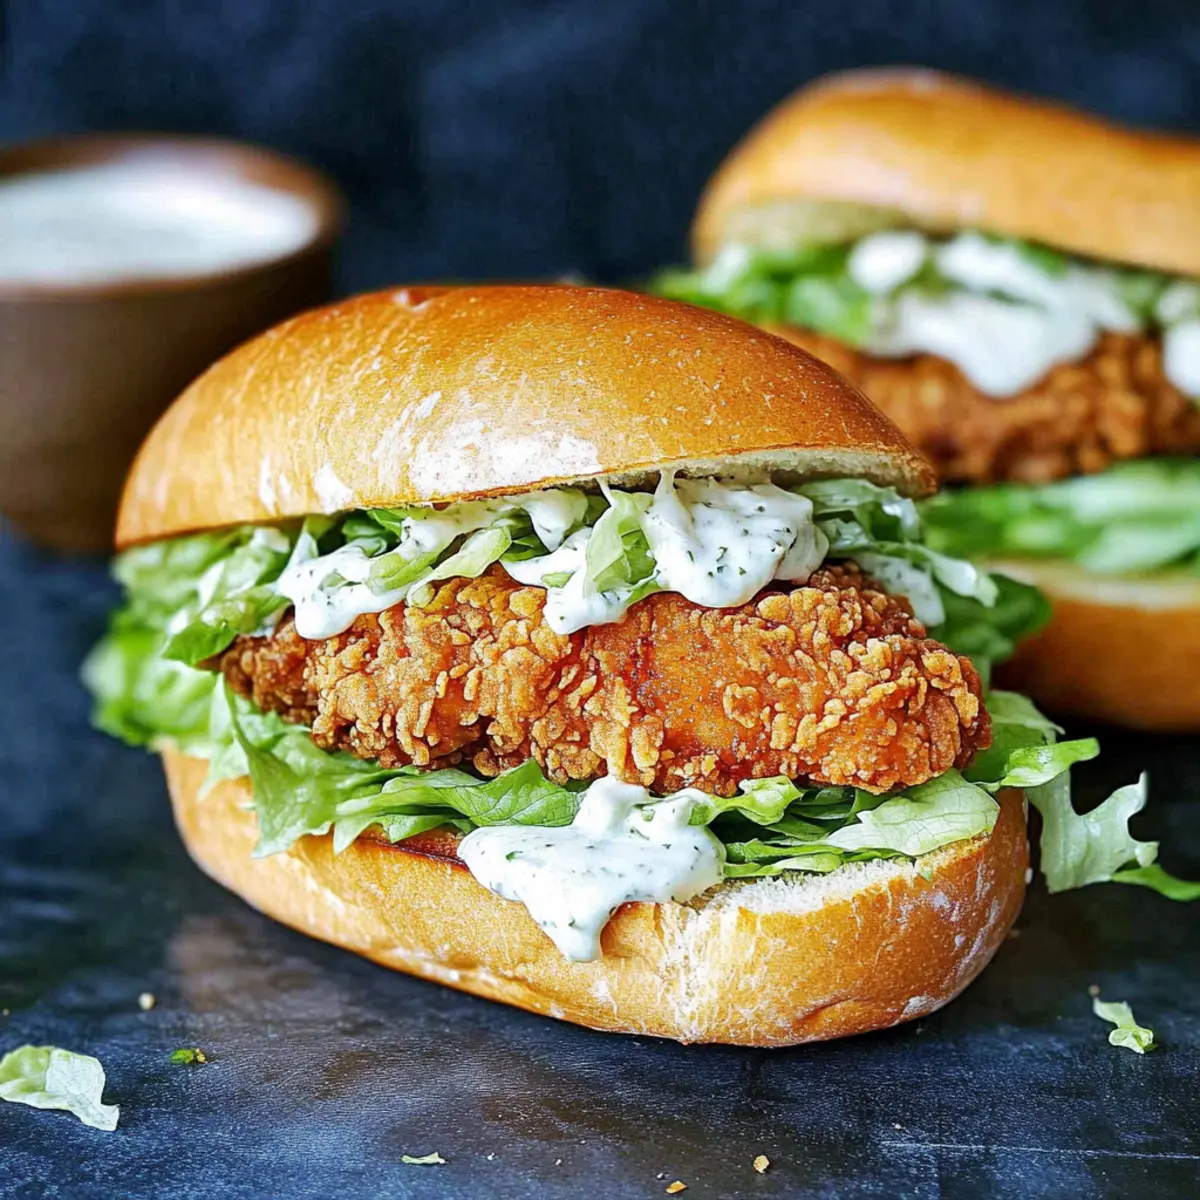
As I stood in my kitchen, the tantalizing aroma of sizzling chicken wafted through the air, instantly transforming my space into a cozy haven. This Crispy Chicken Caesar Sandwich combines perfectly golden-fried chicken cutlets with fresh romaine lettuce and a luscious homemade Caesar dressing, all tucked inside a crusty French baguette. It’s not just an easy lunch; it’s a comforting meal that satisfies a craving for something special, without the stress of time-consuming prep. Whether you’re gearing up for a busy workday or simply craving a delicious dinner, this handheld delight is a quick triumph that everyone will love. Have you ever experienced the sheer joy of digging into a satisfying sandwich that hits all the right notes? Let’s dive in!

Why is this Sandwich So Special?
Unparalleled Flavor: The combination of crispy chicken and creamy homemade dressing takes your taste buds on a delightful journey.
Easy-to-Make: With simple ingredients and straightforward steps, you’ll whip this up in no time, just like you would with Garlic Parmesan Chicken or Chicken Parmesan Air.
Crispy Texture: The golden-fried cutlets paired with a crusty baguette provide a heavenly crunch that makes every bite satisfying.
Versatile: Feel free to swap ingredients, such as using turkey cutlets or bread for a gluten-free option, ensuring it suits everyone’s taste!
Perfect for Any Meal: This sandwich not only shines at lunch but also makes for a fantastic dinner, served alongside fries or a refreshing salad.
Crowd-Pleaser: Whether it’s a casual lunch for one or an impressive meal for guests, this Crispy Chicken Caesar Sandwich is sure to impress!
Crispy Chicken Caesar Sandwich Ingredients
Here’s what you need to create this mouthwatering feast!
For the Dressing
• Full-fat Mayonnaise – Adds creaminess to the dressing; substitute with Greek yogurt for a lighter option.
• Greek Yogurt – Enhances creaminess and tang; could swap with sour cream if needed.
• Dijon Mustard – Provides a sharp flavor; use yellow mustard if Dijon is unavailable.
• Worcestershire Sauce – Imparts depth and umami; consider leaving out if in a pinch.
• Lemon Juice – Adds freshness and acidity; fresh is best, but bottled can work in a bind.
• Parmesan Cheese – Adds nuttiness and richness; Grana Padano can serve as a milder alternative.
• Garlic Cloves – Offers aromatic flavor; garlic powder can substitute in a pinch.
For the Chicken
• Chicken Cutlets – Main protein, crispy and juicy; substitute with chicken thighs or tenders for variation.
• Sea Salt and Ground Black Pepper – Essential for seasoning; use kosher salt and fresh ground pepper for the best flavor.
• Oil for Frying – Necessary for achieving crispy chicken; vegetable or canola oil works well.
• All-purpose Flour – Acts as a breading base; gluten-free flour can be swapped if needed.
• Smoked Paprika – Adds a subtle smokiness; regular paprika can be substituted.
• Eggs – Binds the breading ingredients together; no suitable egg substitute suggested.
• Panko Crumbs – Provides a light, crispy texture; regular breadcrumbs can be used but will yield a denser coating.
• Dried Parsley, Oregano, Garlic Powder, and Parmesan (for breadcrumbs) – Boosts flavor; fresh herbs can replace dried but use more.
For the Sandwich
• Romaine Hearts – Fresh, crispy layer; iceberg lettuce can be substituted for a different crunch.
• French Baguettes – Holds the sandwich together with a crispy exterior; ciabatta or sourdough may also work beautifully.
Get excited to make your own Crispy Chicken Caesar Sandwich that will change your lunch game!
Step‑by‑Step Instructions for Crispy Chicken Caesar Sandwich
Step 1: Prepare the Caesar Dressing
In a medium bowl, combine ½ cup of full-fat mayonnaise, ¼ cup of Greek yogurt, 2 tablespoons of Dijon mustard, 1 tablespoon of Worcestershire sauce, the juice of 1 lemon, ¼ cup of grated Parmesan cheese, 2 minced garlic cloves, and a pinch of salt and pepper. Mix well until you achieve a creamy consistency, then set aside for that luscious touch in your Crispy Chicken Caesar Sandwich.
Step 2: Dress the Lettuce
Take 4-5 tablespoons of the prepared dressing and mix it with 2 cups of chopped romaine hearts in a separate bowl. This step keeps your lettuce fresh and crunchy while the flavors meld. Make sure to coat the lettuce evenly, then refrigerate the mixture until you’re ready to assemble your sandwich – this will elevate the overall taste!
Step 3: Prepare the Chicken Cutlets
Begin by pounding your chicken cutlets to an even thickness of about ½ inch. This ensures that they cook uniformly. Once flattened, season both sides with sea salt and black pepper. You want to enhance the flavors of your chicken for the Crispy Chicken Caesar Sandwich, so don’t skip this important step!
Step 4: Set Up Your Breading Station
Create a three-part breading station: Place 1 cup of all-purpose flour mixed with a teaspoon of smoked paprika on one plate, whisk 2 eggs in a bowl for dipping, and in a third plate, combine 1 cup of panko crumbs with ½ teaspoon each of dried parsley, oregano, garlic powder, and extra Parmesan. This setup will help you achieve that perfect crispy breading on your chicken.
Step 5: Heat the Oil
In a large skillet, pour enough oil for frying—about ½ inch deep—and heat it over medium-high heat until it reaches 175-180°C (350-360°F). To check if it’s ready, drop a small piece of breading into the oil; it should sizzle immediately. Maintaining the right oil temperature is crucial to achieving the crispy coating for your chicken.
Step 6: Bread the Chicken Cutlets
Dredge each seasoned chicken cutlet in the flour mixture, coating it completely. Then dip it into the beaten eggs, allowing any excess to drip off. Finally, press each cutlet into the panko mixture, ensuring it’s well-coated for an extra crunch when frying, which will help create that irresistible Crispy Chicken Caesar Sandwich.
Step 7: Fry the Chicken
Carefully place the breaded chicken cutlets into the hot oil in batches, being careful not to overcrowd the pan. Fry for about 4-5 minutes on each side, or until they are golden brown and crispy. Use a slotted spatula to flip them gently, then transfer to a wire rack to drain any excess oil after frying.
Step 8: Prepare the Baguettes
While the chicken cools slightly, slice your French baguettes open lengthwise. Spread a generous amount of the homemade Caesar dressing on both sides of the bread. This adds a pop of flavor to your Crispy Chicken Caesar Sandwich, making it even more delicious and satisfying.
Step 9: Assemble the Sandwich
On one side of the baguette, layer a generous amount of the crispy chicken cutlets followed by the dressed romaine mixture. For an added touch, sprinkle extra Parmesan cheese over the top. Close the sandwich with the other half of the baguette and press down gently to hold everything together.
Step 10: Serve Immediately
Slice the assembled Crispy Chicken Caesar Sandwich in half and serve it right away for the best texture. Pair it with crispy fries or a vibrant salad to create a well-rounded meal. Enjoy the delightful crunch of the chicken and the freshness of the lettuce as they come together in each mouthful!

Make Ahead Options
These Crispy Chicken Caesar Sandwiches are perfect for meal prep enthusiasts seeking to save time during hectic weeks! You can prepare the homemade Caesar dressing and refrigerate it in an airtight container for up to 7 days. Additionally, breaded chicken cutlets can be prepped and stored in the fridge for up to 24 hours before frying; just remember to cover them to maintain their crispiness. When you’re ready to enjoy your sandwich, simply fry the chicken until golden brown, assemble the sandwich with the freshly dressed romaine, and savor the deliciousness. This way, you’ll have a comforting meal ready with minimal effort!
Expert Tips for Crispy Chicken Caesar Sandwich
• Even Thickness: Pounding chicken to an even thickness ensures uniform cooking, avoiding a dry or undercooked bite.
• Frying Temperature: Keep oil temperature steady at 175-180°C (350-360°F). Overcrowding the pan lowers temperature, leading to soggy breading.
• Assemble Just Before Serving: To maintain that delicious crunch, put together your Crispy Chicken Caesar Sandwich right before eating.
• Baguette Toasting: Lightly toast the baguette to prevent sogginess, enhancing the sandwich’s overall texture and flavor.
• Customizable Ingredients: Feel free to swap in turkey cutlets or gluten-free bread for a personalized touch and accommodate dietary needs.
Crispy Chicken Caesar Sandwich Variations
Feel free to make this delightful sandwich your own, adding your favorite flavors and ingredients!
-
Gluten-Free: Use gluten-free bread and breadcrumbs to ensure everyone can enjoy this scrumptious sandwich. There are great alternatives out there that don’t skimp on flavor!
-
Turkey Swap: Substitute chicken with turkey cutlets for a leaner, equally delicious option. This twist still delivers the crispy texture and creamy flavor you love.
-
Add Avocado: Enhance your sandwich with creamy avocado slices. They add richness and a delightful creaminess that pairs beautifully with the crispy chicken.
-
Spicy Kick: For those who crave heat, add sliced jalapeños or a dash of hot sauce to your dressing. The spice elevates the flavor profile, making each bite exciting.
-
Customize Your Greens: Switch out romaine hearts for peppery arugula or spinach for a different leafy layer. Each option brings its unique texture and flavor to the sandwich.
-
Herb Infusion: Mix fresh herbs like basil or cilantro into your dressing. This adds a burst of freshness that complements the creamy layers perfectly.
-
Cheesy Upgrade: Top your chicken cutlet with melted cheese before assembling. Swiss or provolone work wonderfully for that extra flavor and creaminess.
-
Lemon Zest Boost: Grate some fresh lemon zest into the dressing for an added zing. This brightens up the flavors and brings a lovely brightness to your Caesar!
With these delicious variations, you can amp up your meal creativity while enjoying the core goodness of this Chicken Caesar Sandwich or try out equally tempting options like Parmesan Crusted Chicken or Skillet Chicken Mushroom. Each bite will open up a world of culinary possibilities!
How to Store and Freeze Crispy Chicken Caesar Sandwich
Fridge: Store leftover Crispy Chicken Caesar Sandwich in an airtight container for up to 2 days. To maintain its crunch, keep the dressing and chicken separate until ready to eat.
Freezer: If you want to freeze the components, place the cooked chicken cutlets in a single layer on a baking sheet and freeze until solid. Then transfer to a freezer bag for up to 3 months.
Reheating: To reheat frozen chicken cutlets, bake them in a preheated oven at 190°C (375°F) for 15-20 minutes, or until heated through and crispy.
Dressing Storage: Store leftover Caesar dressing in an airtight container in the fridge for up to one week. Shake or stir before using, and consider adding fresh lemon juice for an extra zing!
What to Serve with Crispy Chicken Caesar Sandwich
This delightful sandwich pairs so perfectly with a variety of sides, each bite enhancing your meal’s comfort and satisfaction.
-
Crispy French Fries: The ideal sidekick, hot, crispy fries add a satisfying crunch and provide a classic pairing that evokes nostalgia.
-
Garlic Roasted Vegetables: These beautifully caramelized veggies not only introduce a burst of flavor but also offer a refreshing contrast to the sandwich’s richness.
-
Classic Caesar Salad: Keep the theme alive with this quick salad loaded with romaine, croutons, and Caesar dressing, adding a light and refreshing touch to your meal.
-
Coleslaw: This creamy and tangy side brings a delightful crunch that contrasts beautifully with the crispy chicken, making each bite a new experience.
-
Potato Wedges: Seasoned and baked to perfection, these offer a heartier alternative to fries while still delivering that comforting potato goodness.
-
Iced Lemonade: A refreshing drink to cleanse the palate between bites, this zesty beverage lends brightness to each mouthful of the Crispy Chicken Caesar Sandwich.
-
Chocolate Chip Cookies: For a sweet finish, these classic cookies provide a comforting bite, rounding out your lunch or dinner with a beloved dessert.
Crispy Chicken Caesar Sandwich Recipe FAQs
How do I choose the right chicken cutlets for this recipe?
Absolutely! When selecting chicken cutlets, look for ones that are pink and plump, without any dark spots or a slimy texture. Freshness is key! If the cutlets are packaged, ensure they have not exceeded their sell-by date, and try to use them within 1-2 days of purchase for the best flavor and tenderness.
How should I store leftovers from my Crispy Chicken Caesar Sandwich?
To maintain the best quality, store leftovers in an airtight container in the fridge for up to 2 days. I suggest keeping the chicken and dressing separate from the bread and lettuce to prevent sogginess. Just before consuming, reassemble the sandwich using fresh ingredients to enjoy that delightful crunch all over again!
Can I freeze the chicken cutlets for later use?
Absolutely! To freeze the crispy chicken cutlets, let them cool completely after frying. Next, lay them in a single layer on a baking sheet and place them in the freezer until solid. This usually takes about 1-2 hours. Once they’re frozen, transfer the cutlets to a freezer bag and label them. They can stay good in the freezer for up to 3 months. When you’re ready to use them, bake them at 190°C (375°F) for 15-20 minutes until they’re hot and crispy.
What should I do if my breading is falling off during frying?
If you find that the breading is coming off, it could be due to not pressing the coating firmly enough onto the chicken or if the chicken is too wet when dipping. Make sure to pat the chicken dry before dredging, and when you coat it, gently press the breadcrumbs onto the chicken to create a solid bond. If you’re still having trouble, try double-dipping the chicken in flour and egg before the breadcrumbs for a sturdier coating.
Are there any dietary considerations to keep in mind for the Crispy Chicken Caesar Sandwich?
Very! If you’re catering to gluten-free diets, simply swap in gluten-free breadcrumbs and flour. For dairy-free options, consider using dairy-free mayonnaise and nutritional yeast instead of Parmesan cheese for a cheesy flavor. Always verify the labels on substitutes for any potential allergens, especially when hosting guests. If cooking for pets, keep the scraps of chicken and mayonnaise out of their reach!

Crispy Chicken Caesar Sandwich That Will Change Your Lunch Game
Ingredients
Equipment
Method
- In a medium bowl, combine ½ cup of full-fat mayonnaise, ¼ cup of Greek yogurt, 2 tablespoons of Dijon mustard, 1 tablespoon of Worcestershire sauce, the juice of 1 lemon, ¼ cup of grated Parmesan cheese, 2 minced garlic cloves, and a pinch of salt and pepper. Mix well until creamy, then set aside.
- Mix 4-5 tablespoons of the dressing with 2 cups of chopped romaine hearts in a separate bowl. Coat evenly and refrigerate.
- Pound chicken cutlets to ½ inch thickness and season both sides with sea salt and black pepper.
- Set up a three-part breading station with flour and smoked paprika, beaten eggs, and panko crumbs mixed with dried herbs and extra Parmesan.
- Heat oil in a large skillet over medium-high until 175-180°C (350-360°F). Check readiness with a small piece of breading.
- Dredge each seasoned chicken cutlet in flour, dip in beaten eggs, and coat with the panko mixture.
- Fry the breaded chicken cutlets in oil for 4-5 minutes per side until golden brown. Drain on a wire rack.
- Slice baguettes open lengthwise and spread dressing on both sides.
- Layer crispy chicken cutlets and dressed romaine on one baguette side, sprinkle with extra Parmesan, close the sandwich, and press gently.
- Slice the sandwich in half and serve immediately.
Leave a Reply