
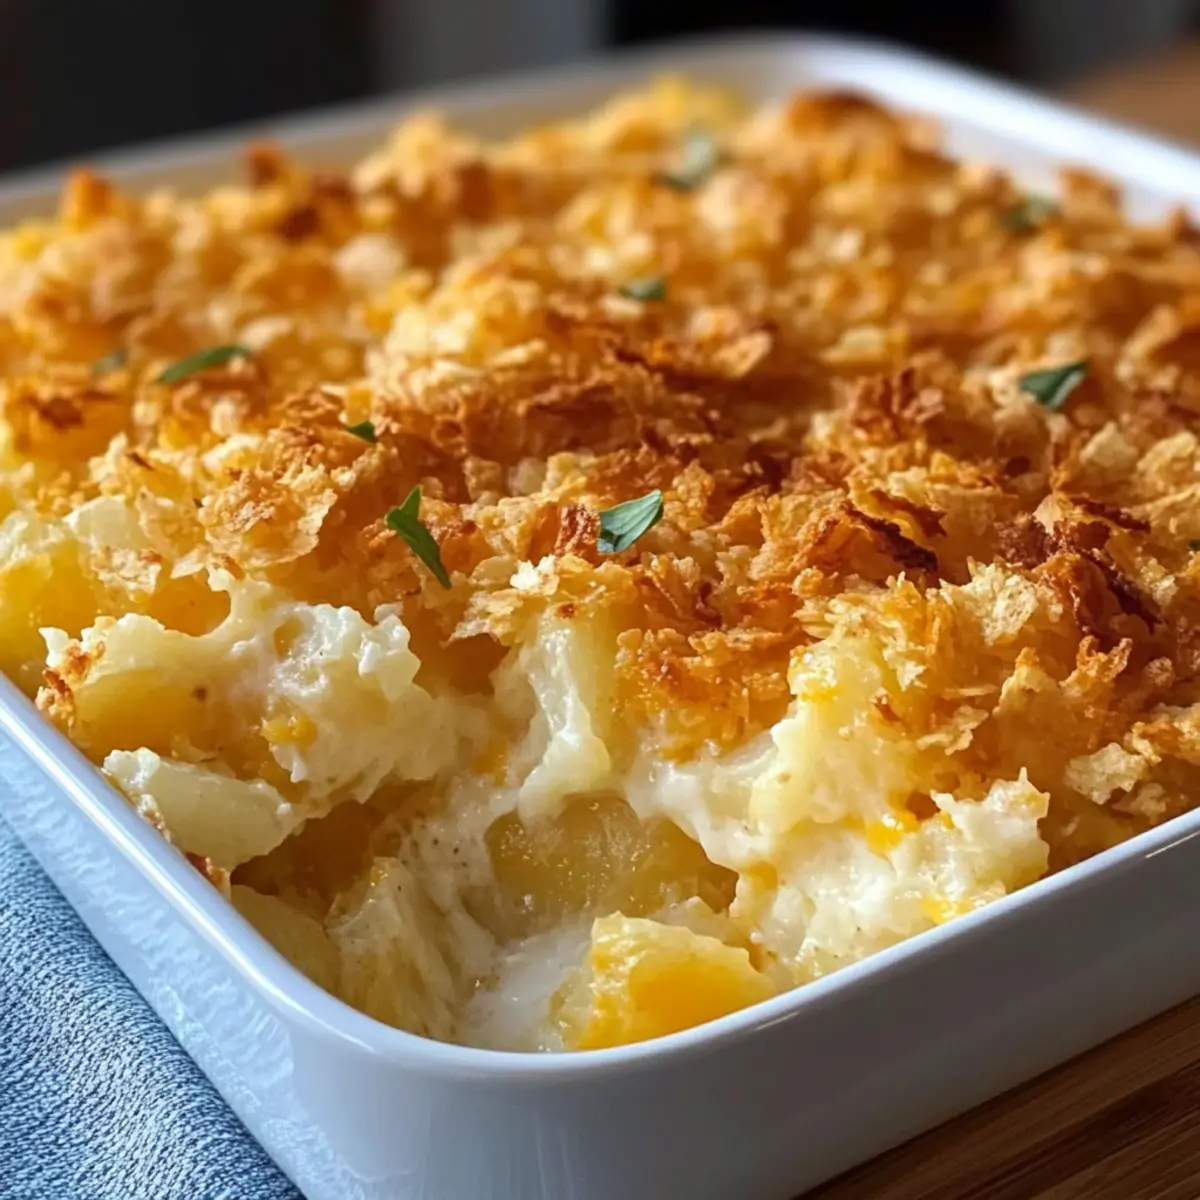
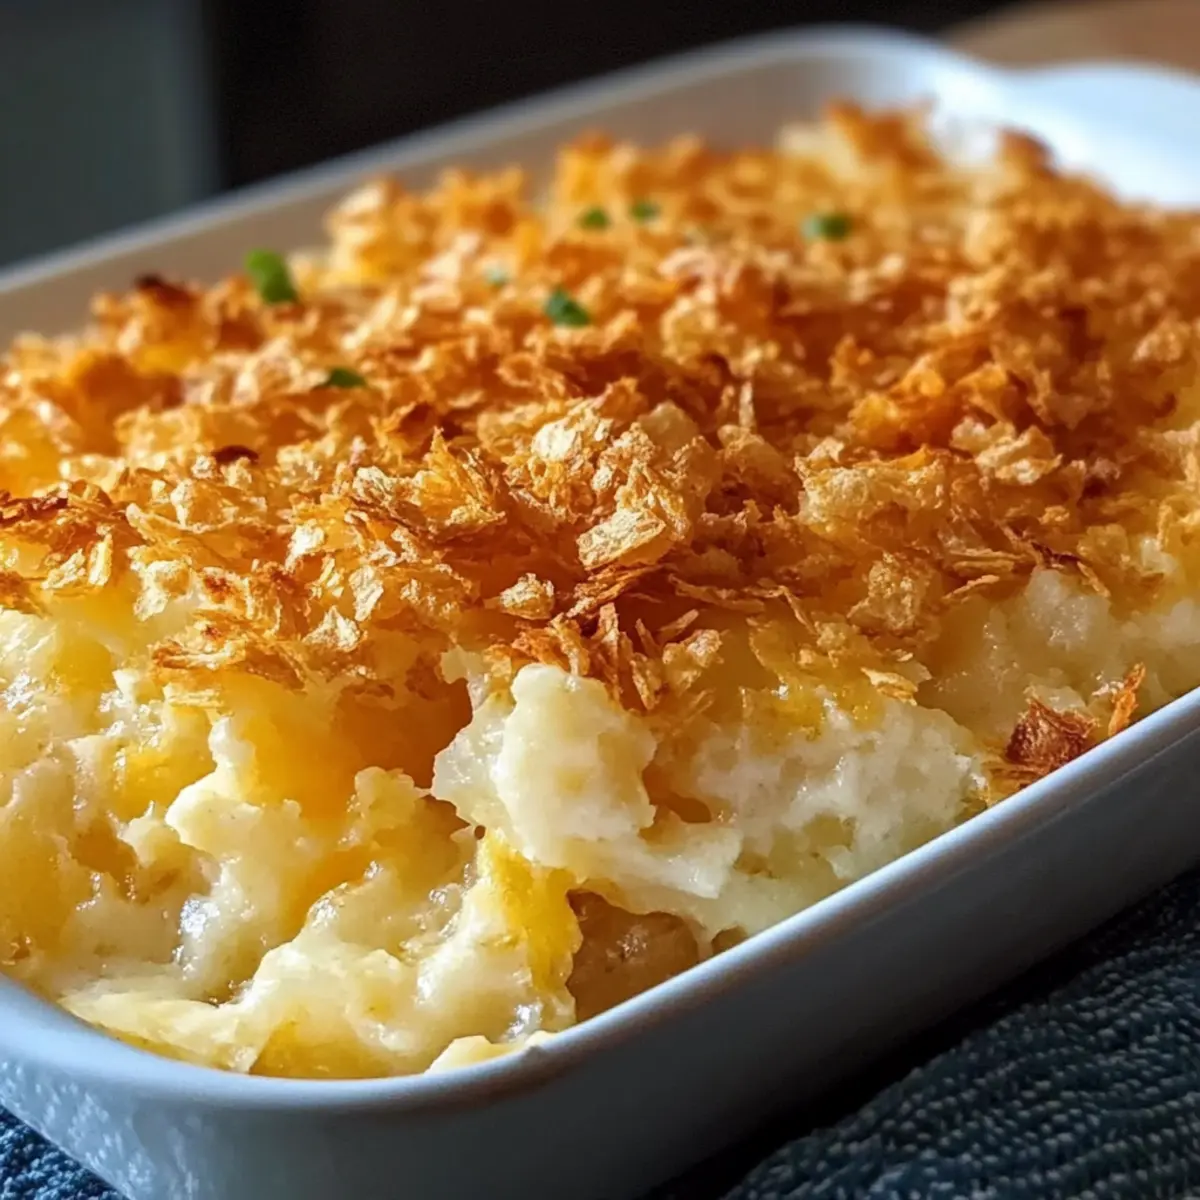
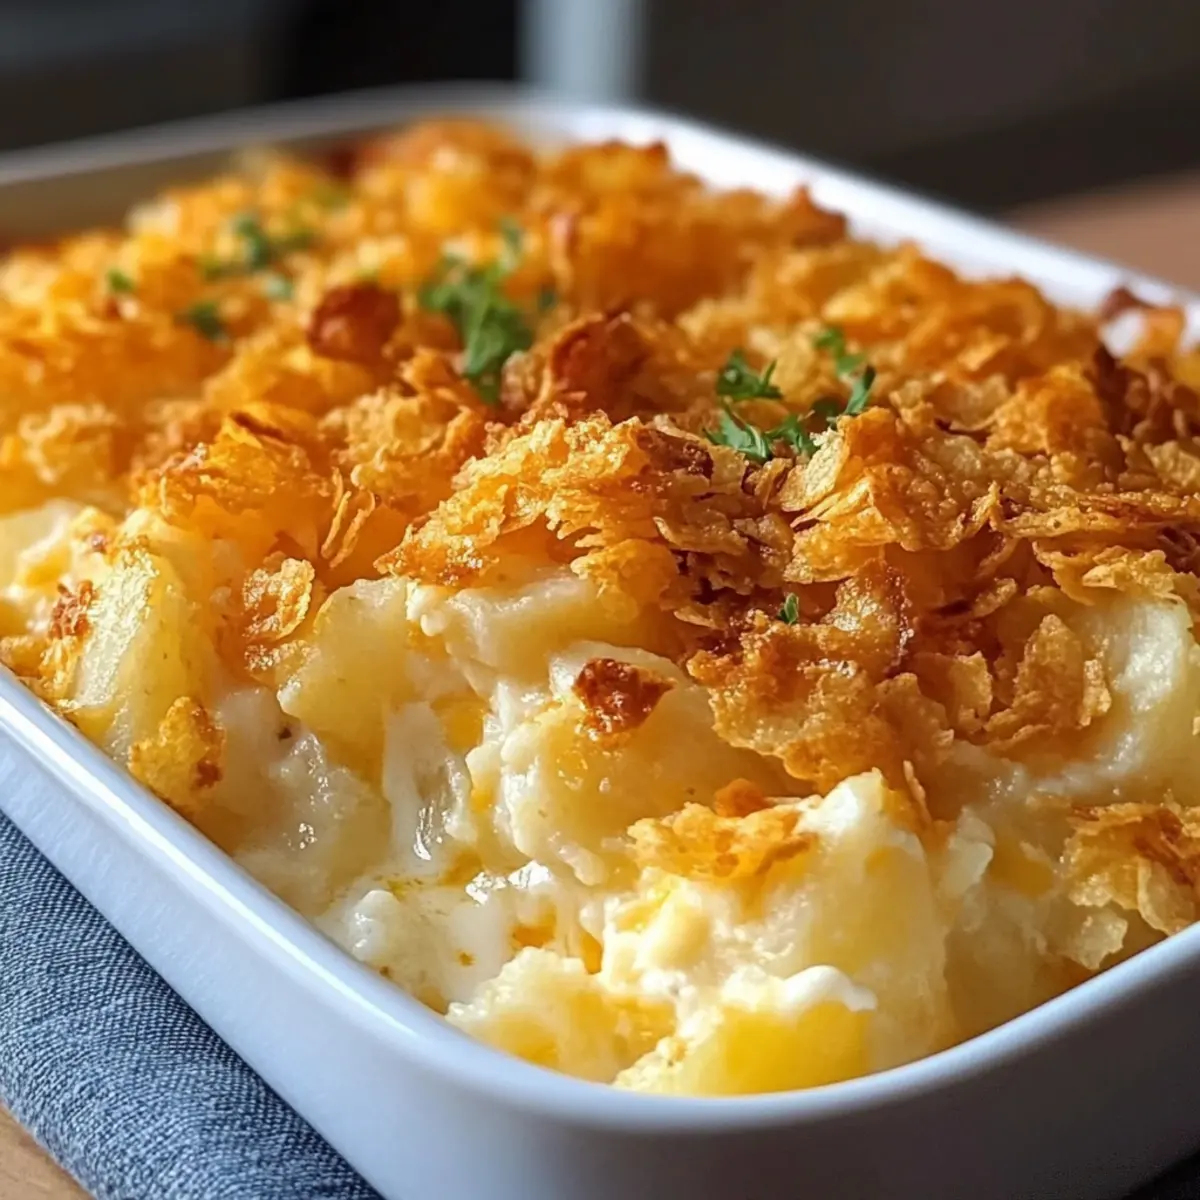
As the comforting smell of bubbling cheese drifts from the oven, I’m reminded of family gatherings where Cheesy Funeral Potatoes claim the spotlight. This delightfully easy side dish, with its creamy, cheesy base and satisfying cornflake crunch, has quickly become my go-to for any occasion—from potlucks to holiday dinners. Offering both warmth and a heaping dose of nostalgia, these potatoes are perfect for anyone seeking to swap out fast food for something truly heartwarming. Plus, they’re a vegetarian delight, making them a hit with everyone at the table. Are you ready to discover the secrets behind this crowd-pleaser that everyone will be requesting?

Why Are Cheesy Funeral Potatoes So Loved?
Comforting Warmth: Picture gathering around the table with loved ones, sharing the tender, cheesy goodness of these potatoes. Simplicity: This recipe is straightforward, requiring just a few basic ingredients, making it a go-to for busy weeknights. Flavor Explosion: The creamy blend of sour cream, cheddar cheese, and a crunch from cornflakes creates a rich flavor that’s hard to resist. Versatile Delight: Whether for a potluck, holiday feast, or a simple family dinner, these potatoes please any crowd! And if you’re looking to expand your cheesy horizons, try pairing them with other favorites like Cheesy Garlic Butter Steak with Rigatoni or Spicy Southern Cheesy Chicken Spaghetti Casserole. Make-Ahead Magic: You can prepare them in advance, saving time while ensuring a delicious dish right when you need it.
Cheesy Funeral Potatoes Ingredients
• Discover the perfect blend of flavors!
For the Casserole
• Frozen Shredded Hashbrowns – The essential base that creates the comforting texture in these Cheesy Funeral Potatoes.
• Cream of Chicken Soup (10.5 oz) – Adds a rich creaminess; for a vegetarian option, use a gluten-free cream soup.
• Sour Cream (2 cups) – Provides tangy creaminess to balance the dish’s richness; Greek yogurt makes a lighter alternative.
• Sharp Cheddar Cheese (2 cups, shredded) – Delivers that robust, cheesy flavor; consider using extra-sharp for extra depth.
• Yellow Onion (1 medium, finely chopped) – Incorporates sweetness and complexity; shallots can be substituted for a milder taste.
• Butter (6 tbsp, divided) – Essential for sautéing and creating a crispy topping; olive oil can be used for a lighter twist.
• Salt (1 tsp) – Enhances the overall flavor; adjust according to your taste preferences.
• Black Pepper (½ tsp) – Adds a subtle kick; omit if you prefer a milder flavor.
For the Topping
• Cornflakes (2 cups, crushed) – Provides a crunchy top layer that contrasts beautifully with the creamy potatoes; gluten-free cornflakes work for dietary needs.
Step‑by‑Step Instructions for Cheesy Funeral Potatoes
Step 1: Sauté the Onion
In a skillet, melt 2 tablespoons of butter over medium heat. Add the finely chopped yellow onion and sauté for 5-7 minutes until it’s soft and lightly golden, releasing a sweet aroma. Stir it frequently to prevent burning, and once done, remove it from the heat to cool slightly.
Step 2: Mix the Base
In a large mixing bowl, combine the cream of chicken soup, sour cream, and shredded sharp cheddar cheese. Fold in the sautéed onion and add the remaining 2 tablespoons of melted butter. Season this creamy mixture with salt and black pepper, stirring until all ingredients are well incorporated, creating a harmonious blend for your Cheesy Funeral Potatoes.
Step 3: Incorporate Hashbrowns
Gently fold in the frozen shredded hashbrowns into the creamy mixture, ensuring that each piece is evenly coated. Take care not to mash the hashbrowns; you want them to remain intact for a better texture. This step builds the foundation for the scrumptious casserole that everyone will love!
Step 4: Prepare for Baking
Transfer the mixed hashbrown and cheese mixture into a greased 9×13-inch baking dish. Use a spatula to spread it evenly and smooth the top, ensuring the mixture is well distributed. This allows for even baking and that beautiful bubbling during the cooking process that makes Cheesy Funeral Potatoes so delightful.
Step 5: Make the Topping
In a small bowl, mix the crushed cornflakes with the remaining 2 tablespoons of melted butter until they are thoroughly coated. Sprinkle this crispy mixture generously over the top of the hashbrown base. This crunchy layer will bake to a golden perfection, creating a delightful contrast to the creamy potatoes underneath.
Step 6: Bake the Casserole
Preheat your oven to 350°F (175°C). Place the prepared baking dish in the oven and bake uncovered for approximately 45 minutes. Keep an eye on it, and when the top is golden brown and the edges are bubbling, you’ll know your Cheesy Funeral Potatoes are ready to be taken out and enjoyed.
Step 7: Let it Rest
Once baked, remove the dish from the oven and let it rest for 5-10 minutes before serving. This resting period allows the flavors to meld beautifully and helps the casserole set, making it easier to slice into perfect portions for everyone at your gathering.
Make Ahead Options
These Cheesy Funeral Potatoes are a lifesaver for busy home cooks looking to streamline meal prep! You can prepare the casserole up to 24 hours in advance by mixing the creamy hashbrown base and placing it in a greased baking dish. Just be sure to cover it tightly with foil or plastic wrap to keep everything fresh and prevent browning. The cornflake topping can also be prepared and stored separately, allowing you to add it right before baking for maximum crunch. When you’re ready to serve, just pop the dish in a preheated oven and bake as directed. You’ll enjoy all the comfort of this dish with none of the last-minute hassle!
What to Serve with Cheesy Funeral Potatoes
These delectable, creamy potatoes are the perfect centerpiece for any comforting meal. Enhance your dining experience with delightful accompaniments that balance their rich flavors.
-
Crisp Green Salad: A refreshing side with a mix of greens and a tangy vinaigrette cuts through the creaminess, providing a perfect contrast. A sprinkle of nuts or seeds adds crunch and rustic charm.
-
Roasted Vegetables: Sweet, caramelized veggies like carrots, Brussels sprouts, or zucchini introduce an earthy note that complements the richness of Cheesy Funeral Potatoes beautifully.
-
Glazed Ham: The sweet and savory profile of honey-glazed ham pairs magnificently, creating a satisfying juxtaposition with the cheesy comfort. It’s an iconic choice for holiday feasts!
-
Grilled Chicken: Marinated grilled chicken brings protein diversity to the table, adding a juicy and flavorful contrast to the creamy potatoes. Opt for a herb marinade for delightful freshness.
-
Corn on the Cob: Sweet corn offers a tender bite with its natural juiciness, seamlessly merging with the casserole’s cheesy goodness, making it a beloved summer pairing.
-
Creamy Coleslaw: Tangy and crunchy coleslaw introduces a textural contrast, refreshing your palate and balancing out the casserole’s heaviness in a delightful way.
-
Apple Crisp: For dessert, serve warm, spiced apple crisp. Its sweet, buttery topping and tender apples provide a lovely, cozy finish to your meal, evoking feelings of nostalgia.
-
Sparkling Cider: A glass of chilled sparkling cider is a dazzling beverage option that brings effervescence to the table, elevating the entire meal experience with its fruity undertones.
How to Store and Freeze Cheesy Funeral Potatoes
Room Temperature: Let your Cheesy Funeral Potatoes cool completely to room temperature before covering. They can be left out for up to 2 hours for serving purposes.
Fridge: Store any leftovers in an airtight container or tightly cover the baking dish with foil, and refrigerate for up to 4 days. Reheat in the oven for best results.
Freezer: For long-term storage, freeze the casserole before baking or after it’s cooled. Wrap tightly in plastic wrap and then aluminum foil. It can keep in the freezer for up to 3 months.
Reheating: To reheat, bake from frozen at 350°F (175°C) for about 1 hour, or until heated through. If refrigerated, reheat in the oven for about 30 minutes, ensuring the cornflake topping stays crispy.
Cheesy Funeral Potatoes Variations
Feel free to let your imagination run wild and make your Cheesy Funeral Potatoes uniquely yours!
-
Different Cheese: Swap sharp cheddar for Gruyère or Monterey Jack to introduce a different, creamy flavor that elevates the dish. You could even mix cheeses for a delightful twist!
-
Veggie-Loaded: Add sautéed mushrooms, spinach, or bell peppers to incorporate more nutrition and color, making it a wholesome feast in every bite. Kids might love the vibrant colors!
-
Herb Infusion: Stir in fresh herbs like parsley, rosemary, or thyme to add a refreshing aroma and enhance the flavor profile. Think of your favorite herb garden blooming right in your casserole!
-
Twice-Baked Style: Bake the casserole halfway, then remove, let cool slightly, and stir in bacon or ham before top-baking. This adds a savory punch that will have everyone craving seconds.
-
Extra Crunch: Sprinkle some crispy onion straws on top of the cornflakes for an added crunch and a zest that complements the creaminess beautifully. The texture is simply irresistible!
-
Spicy Kick: Mix in jalapeños or a dash of hot sauce for a spicy surprise that brings warmth and excitement to your cheesy comfort food. Perfect for those who love a little heat!
-
Zesty Alternative: Use cream of mushroom soup for a completely vegetarian and earthy twist, providing a different base flavor without compromising on creaminess.
-
Holiday Flair: For a festive touch, mix in cranberry sauce or serve alongside roasted turkey. The combination of flavors will make your gatherings even more memorable.
As you explore these variations, don’t forget to pair your cheesy masterpiece with a crisp green salad or roasted vegetables. If you’re feeling adventurous, why not try it with Cheesy Cajun Garlic Chicken Rotini Skillet? Your friends and family will absolutely love the creative combinations!
Expert Tips for Cheesy Funeral Potatoes
• Resting Time: Let the casserole sit for 5-10 minutes post-baking to achieve firmer slices. This crucial step prevents it from being too runny when serving.
• Cheese Choice: Opt for sharp cheddar cheese for maximum flavor. Substituting with milder cheese could result in a bland experience, missing out on the dish’s true potential!
• Even Coating: Ensure hashbrowns are well mixed with the creamy base for a consistent texture. Uneven coating may lead to dry spots in your Cheesy Funeral Potatoes.
• Crispy Topping: For a crunchier cornflake topping, consider adding a light dusting of additional crushed cornflakes right before serving, especially if reheating in the oven.
• Ingredient Substitutions: Feel free to customize the recipe with alternatives. For a vegetarian option, use gluten-free cream soup instead of cream of chicken to cater to dietary needs.
• Baking Dish Prep: Grease your baking dish thoroughly to ensure an easy release. Sticking could make serving your delicious Cheesy Funeral Potatoes a challenge!
Cheesy Funeral Potatoes Recipe FAQs
How do I select the best frozen shredded hashbrowns for this recipe?
Absolutely! Look for brands that offer shredded hashbrowns with a consistent size—this ensures even cooking and a better texture. Opt for bags labeled as “all-natural” without any added preservatives or seasonings for the best flavor. The more the merrier when it comes to choosing crispy, golden offerings!
What is the best way to store leftover Cheesy Funeral Potatoes?
For sure! Once cooled, store your leftover Cheesy Funeral Potatoes in an airtight container or cover the baking dish tightly with foil. They will stay fresh in the refrigerator for about 4 days. Remember, if they’re still warm when covering, this can trap steam and make them soggy, so cool them to room temperature first!
Can I freeze Cheesy Funeral Potatoes, and if so, how?
Absolutely! To freeze, you can do so before baking or after the dish has cooled. Wrap the casserole tightly in plastic wrap, followed by aluminum foil to prevent freezer burn. It can last in the freezer for up to 3 months. When you’re ready to enjoy, just bake from frozen at 350°F (175°C) for about an hour, or until heated through and bubbly.
Why is my Cheesy Funeral Potatoes casserole falling apart when I serve it?
Very common! One reason could be if you skip the essential resting time after baking. Letting the casserole sit for 5-10 minutes allows it to set, providing firmer slices that hold together better. Additionally, ensure that your hashbrowns are evenly coated in the creamy mixture to avoid dry spots, which can lead to a crumbly texture.
Are there any dietary considerations for making Cheesy Funeral Potatoes?
Yes! For those with dietary restrictions, you can easily make this recipe vegetarian and gluten-free. Substitute the cream of chicken soup with a gluten-free cream soup or a homemade white sauce to make it suitable. Just keep in mind that using Greek yogurt in place of sour cream is a great way to reduce fat while still keeping that creamy goodness!
Can I use other types of cheese in my Cheesy Funeral Potatoes?
Very much! While sharp cheddar cheese delivers that heartwarming flavor you crave, you can experiment with other types like Gruyère or Monterey Jack for a different taste. Try mixing up the cheeses for a delightful flavor twist that might just become your new favorite version!
Irresistibly Cheesy Funeral Potatoes - Comfort in Every Bite
Ingredients
Equipment
Method
- In a skillet, melt 2 tablespoons of butter over medium heat. Add the finely chopped yellow onion and sauté for 5-7 minutes until soft and golden. Remove from heat to cool slightly.
- In a large mixing bowl, combine cream of chicken soup, sour cream, and shredded cheddar cheese. Fold in the sautéed onion and add the remaining 2 tablespoons of melted butter. Season with salt and pepper, stirring until well incorporated.
- Gently fold in the frozen shredded hashbrowns, ensuring each piece is coated without mashing them.
- Transfer the mixture into a greased 9x13-inch baking dish, smoothing the top and ensuring even distribution.
- In a small bowl, mix the crushed cornflakes with the remaining 2 tablespoons of melted butter until coated. Sprinkle this mixture over the top of the hashbrown base.
- Preheat your oven to 350°F (175°C). Bake uncovered for approximately 45 minutes until the top is golden brown and edges are bubbling.
- Once baked, let the dish rest for 5-10 minutes before serving to allow flavors to meld.
Leave a Reply