
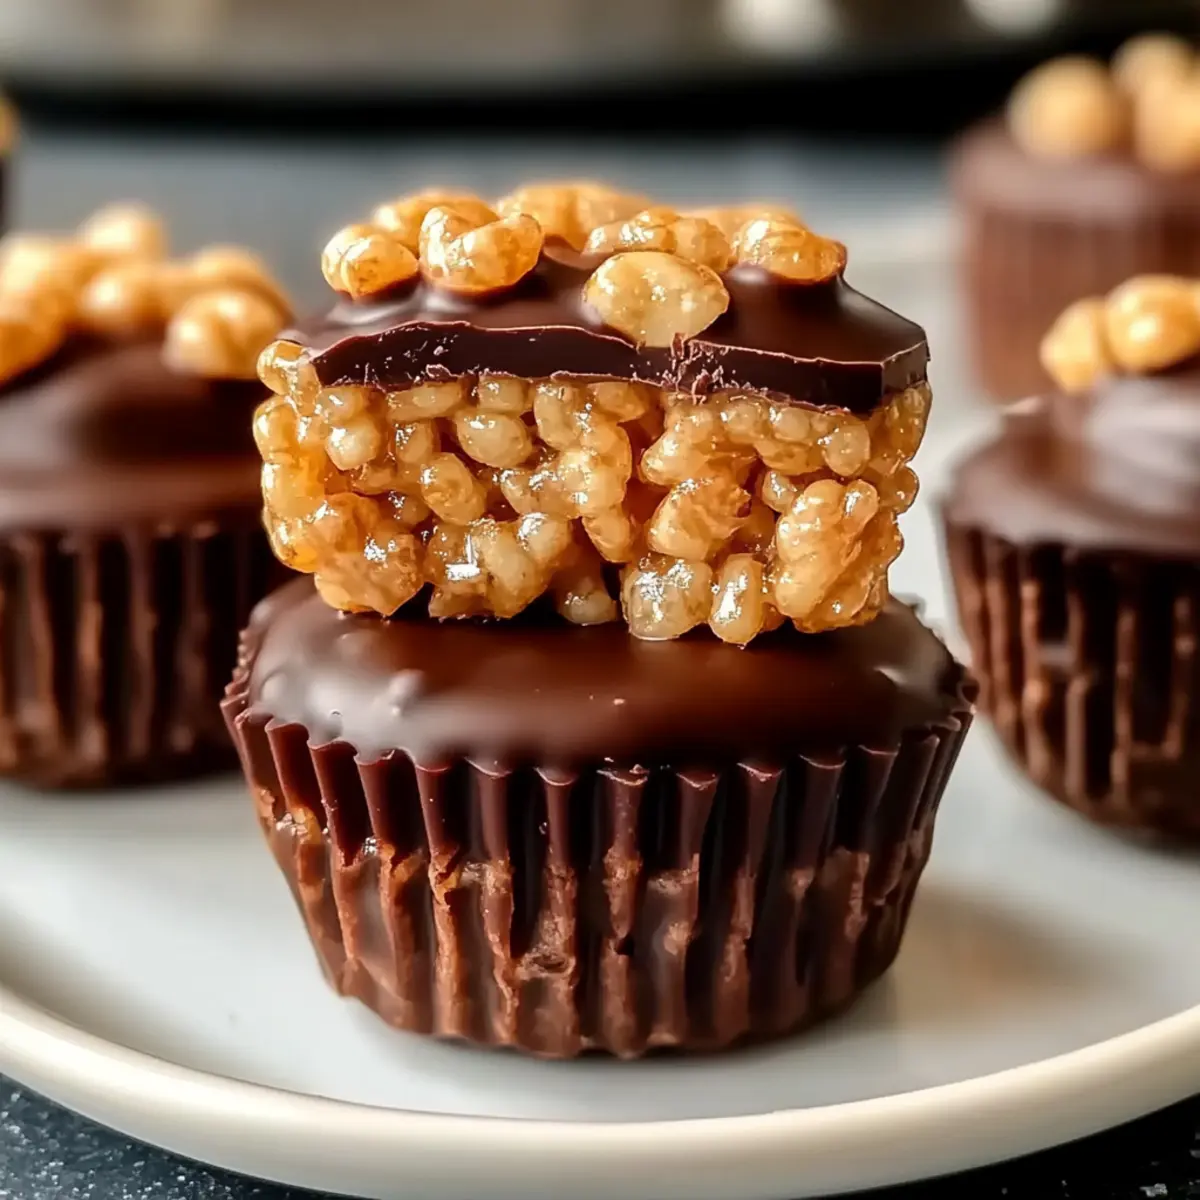
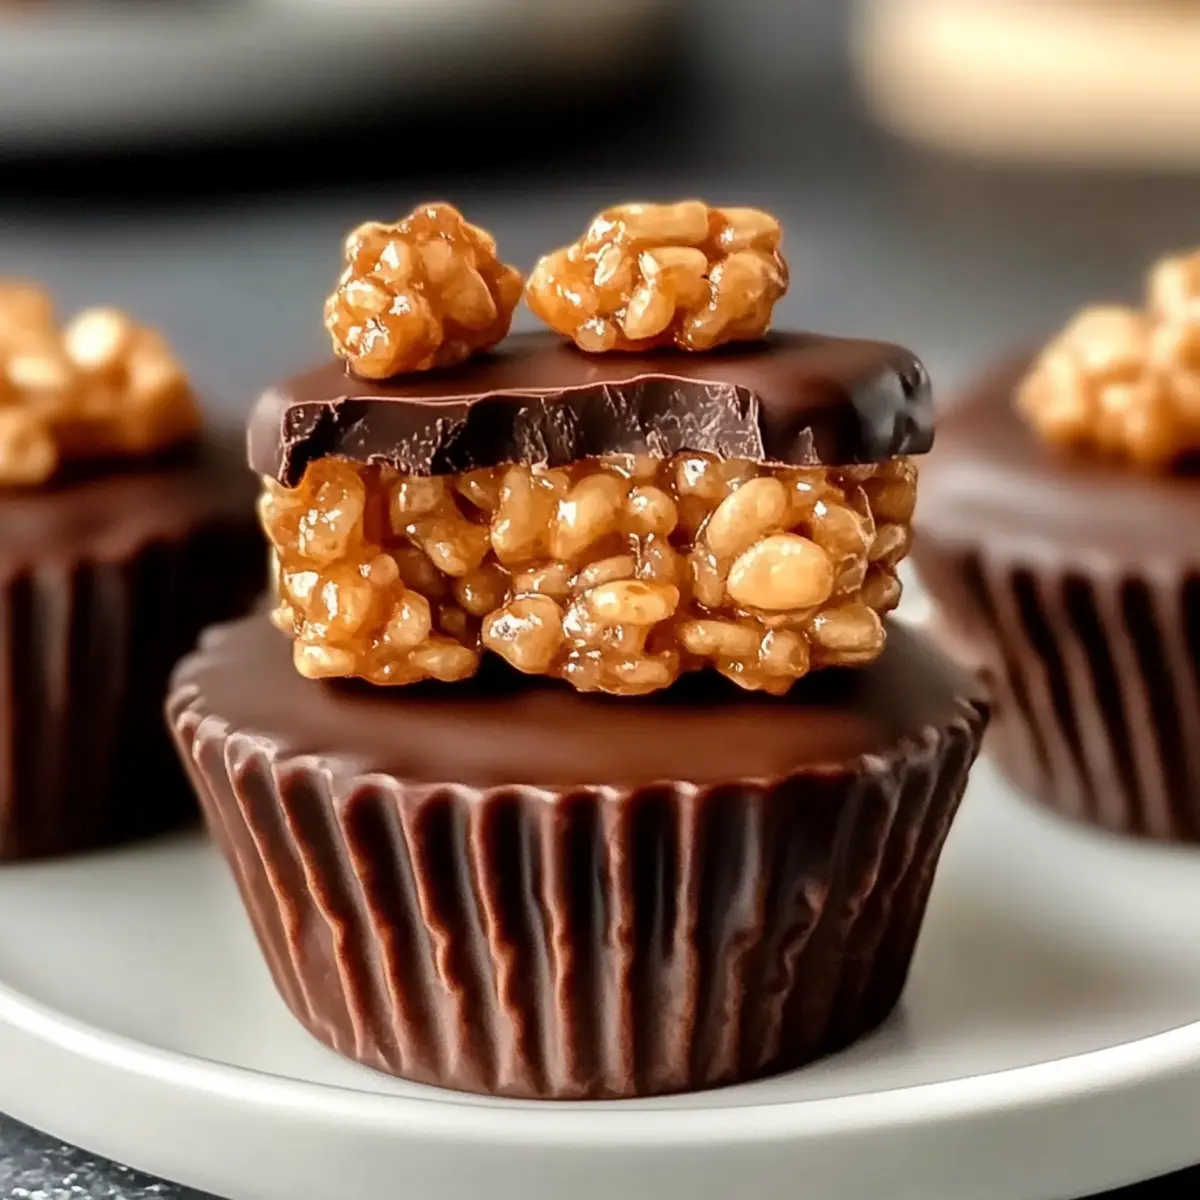
“Sometimes, the most delightful creations come from the simplest of ingredients.” That’s how I felt when I first made these no-bake Chocolate Peanut Butter Rice Krispie Cups. With their irresistible combination of creamy peanut butter, rich chocolate, and crispy Rice Krispies, they quickly became a go-to treat in my home. Not only are they incredibly easy to whip up—perfect for those days when you want something sweet but don’t feel like turning on the oven—but they’re also customizable for every taste preference, making them a big hit with family and friends alike. Whether it’s a last-minute party snack or a cozy evening treat, these cups bring a sense of joy that’s hard to resist. Curious about how to create your own batch of these delightful cups? Let’s dive into the recipe!
Why are these Rice Krispie Cups so special?
No-Bake Convenience: These Chocolate Peanut Butter Rice Krispie Cups come together in a snap, requiring no baking, which means less mess and more enjoyment!
Customizable Delight: Enjoy the freedom to switch up ingredients—substituting almond butter or adding butterscotch chips can cater to any craving, making each batch uniquely yours.
Family-Friendly Fun: Perfect for kids and adults alike, these treats offer a delightful way to introduce children to cooking, creating lasting memories in the kitchen together.
Texture Triumph: With a combination of creamy, crunchy, and sweet, every bite delivers a satisfying contrast that will leave your taste buds cheering for more.
Great for Any Occasion: Whether it’s a casual family snack or an indulgent party treat, these cups are sure to impress and satisfy, making them a favorite for gatherings.
Give these delectable cups a try today, and if you’re craving something else, check out my Lemon Garlic Butter Cod Bowls with Roasted Brussels Sprouts for another fantastic dish!
Chocolate Peanut Butter Rice Krispie Cups Ingredients
For the Base
- Rice Krispies cereal – Provides structure and crunch; feel free to substitute with any puffed rice cereal.
- Creamy peanut butter – Adds richness and creaminess; try switching to crunchy peanut butter for extra texture or almond butter for a nut-free option.
- Unsalted butter – Helps combine the ingredients into a cohesive mix; coconut oil serves as a great dairy-free substitute.
- Mini marshmallows – Acts as a binding agent and sweetener; consider using marshmallow fluff or vegan marshmallows for different variations.
For the Chocolate Topping
- Chocolate chips – The sweet layer that finishes off the treat; dark chocolate or alternative chocolate can make for a deliciously healthier option.
- Vanilla extract (optional) – Enhances the flavor; you can skip this if you’re after a simplified version.
- Sea salt (optional) – Balances out the sweetness; just a pinch will elevate the overall flavor.
Try creating your own batch of these delightful Chocolate Peanut Butter Rice Krispie Cups that everyone will adore!
Step‑by‑Step Instructions for Chocolate Peanut Butter Rice Krispie Cups
Step 1: Melt Base
In a medium saucepan, melt 3 tablespoons of unsalted butter and 4 cups of mini marshmallows over low heat. Stir continuously for about 5–7 minutes until the mixture is smooth and completely melted, taking care not to let it bubble. This creates a sticky base that binds your delicious Chocolate Peanut Butter Rice Krispie Cups together.
Step 2: Incorporate Peanut Butter
Once the marshmallow mixture is melted, remove it from heat and immediately stir in 1 cup of creamy peanut butter. Mix thoroughly for about 1-2 minutes until the peanut butter is fully combined and the mixture is creamy. This step infuses your cups with that rich peanut butter flavor that complements the chocolate perfectly.
Step 3: Mix Cereal
In a large mixing bowl, pour in 6 cups of Rice Krispies cereal. Carefully pour the warm peanut butter-marshmallow mixture over the cereal, and use a spatula to gently fold everything together for about 2-3 minutes. Ensure that all the Rice Krispies are evenly coated for that signature crunch in each Chocolate Peanut Butter Rice Krispie Cup.
Step 4: Shape Cups
Prepare a muffin tin by lining it with paper liners for easy removal later. Spoon generous amounts of the Rice Krispies mixture into each liner, pressing down gently with your fingers or a spoon to form a compact flat base. You want them to hold their shape well, creating a stable foundation for the upcoming chocolate layer.
Step 5: Add Chocolate Layer
Next, melt 1 cup of chocolate chips in the microwave in 30-second intervals, stirring between each, until smooth and glossy—this should take about 1-2 minutes total. Spoon the melted chocolate over each Rice Krispie cup, ensuring it covers the mixture without overflowing. This rich layer adds sweetness and brings your Chocolate Peanut Butter Rice Krispie Cups to life.
Step 6: Cool
Allow the assembled cups to set at room temperature for about 20 minutes. If you’re in a hurry, you can place them in the refrigerator to speed up the cooling process. Letting them chill will ensure that the chocolate hardens perfectly, resulting in beautifully formed treats ready to enjoy!
Make Ahead Options
These Chocolate Peanut Butter Rice Krispie Cups are a fantastic option for meal prep, allowing you to indulge in delightful treats with minimal last-minute effort! You can prepare the base mixture (steps 1-4) and store it in an airtight container in the refrigerator for up to 3 days, just make sure to press it down tightly to maintain shape. When you’re ready to enjoy, simply melt the chocolate and finish assembling the cups (step 5), which takes just a few minutes. This method ensures that they remain just as delicious and fresh, perfect for busy weeknights or unexpected cravings!
What to Serve with Chocolate Peanut Butter Rice Krispie Cups
Treat yourself to an unforgettable dessert experience by adding delicious sides to complement these luscious no-bake treats.
-
Fresh Fruit Salad: A vibrant mix of seasonal fruits adds a refreshing, juicy contrast to the richness of the cups.
-
Vanilla Ice Cream: Indulge your sweet tooth with a scoop of creamy vanilla ice cream, elevating each bite’s flavor profile.
-
Salted Caramel Sauce: Drizzle some salted caramel over the top for a sweet-savory experience that balances the chocolate decadence beautifully.
-
Chocolate Milk: Pair these cups with a glass of chocolate milk for a nostalgic twist that any family member would love.
-
Almonds or Peanuts: Offer a side of roasted nuts for an additional crunchy texture, creating a delightful contrast to the soft rice crispy treats.
-
Whipped Cream Topping: Top each cup with freshly whipped cream to add a light, fluffy texture, making each bite feel like a mini celebration.
These flavorful companions will enhance your Chocolate Peanut Butter Rice Krispie Cups, ensuring a delightful experience that you and your loved ones won’t forget!
Expert Tips for Chocolate Peanut Butter Rice Krispie Cups
- Keep It Low: Maintain low heat when melting the butter and marshmallows to avoid burning, ensuring your Chocolate Peanut Butter Rice Krispie Cups have a perfect texture.
- Fold Gently: When mixing in the Rice Krispies, fold carefully to maintain their lightness and crunch—overmixing can lead to mushy cups.
- Use Liner Wisely: Make sure to line your muffin tin with paper liners to prevent sticking; this helps maintain the shape of your cups during removal.
- Let Them Cool: Allow the cups to cool completely for the chocolate layer to harden properly—this guarantees a firm and enjoyable bite.
- Customize Flavors: Experiment with various add-ins like butterscotch chips or nuts to make each batch of Chocolate Peanut Butter Rice Krispie Cups uniquely delightful.
Chocolate Peanut Butter Rice Krispie Cups Variations
Feel free to get creative with these Chocolate Peanut Butter Rice Krispie Cups and tailor them to your taste buds!
- Nutty Twist: Add ½ cup of chopped nuts like almonds or pecans for an extra crunch that elevates every bite.
- Crunchy Alternative: Swap in crunchy peanut butter instead of creamy for added texture and a delightful surprise in each cup.
- Vegan Delight: Use plant-based butter and vegan chocolate chips to make these treats completely vegan-friendly without sacrificing flavor.
- Flavor Boost: Mix in butterscotch chips along with chocolate for a decadent layer of flavor that complements the peanut butter wonderfully.
- Spicy Kick: Sprinkle a tiny pinch of cayenne pepper or cinnamon into the melted chocolate for a surprising hint of warmth that beautifully contrasts the sweetness.
- Dried Fruit: Add in a handful of dried cranberries or raisins for a burst of fruity flavor that balances the rich chocolate and peanut butter.
- Granola Crunch: Fold in 1 cup of your favorite granola for added texture and a wholesome touch—perfect for breakfast on the go!
- Chocolate Swap: For a healthier treat, replace regular chocolate with dark chocolate or a sugar-free alternative to lower the sweetness without losing indulgence.
Experimenting with these variations can make each batch unique! If you’re in the mood for something different, why not try my Pumpkin Chocolate Chip Cookies for a seasonal twist or Cowboy Butter Chicken for a satisfying savory meal? Enjoy the journey of delicious discovery!
Storage Tips for Chocolate Peanut Butter Rice Krispie Cups
- Room Temperature: Store the cups in an airtight container at room temperature for up to 1 week. This keeps them fresh and maintains their delightful texture.
- Refrigerator: If you prefer a chilled treat, you can keep the Rice Krispie cups in the fridge for up to 2 weeks. Just ensure they’re well-wrapped to avoid drying out.
- Freezer: For longer storage, individually wrap each cup in plastic wrap and freeze them for up to 1 month. Thaw in the fridge before enjoying!
- Reheating: These treats are best enjoyed as is, but if you want to soften them, you can warm them slightly in the microwave for about 10-15 seconds.
Chocolate Peanut Butter Rice Krispie Cups Recipe FAQs
What’s the best way to select ripe ingredients?
For the best flavor, opt for fresh, high-quality ingredients. Ensure your peanut butter is creamy and smooth for the perfect consistency, and use chocolate chips that are labeled for melting to ensure a glossy finish. If substituting nuts or other ingredients, check for freshness and quality as well.
How should I store my Chocolate Peanut Butter Rice Krispie Cups?
Store these delightful cups in an airtight container at room temperature for up to 1 week. If you’d like them to last longer, refrigerate them for up to 2 weeks, just make sure they’re well-wrapped to keep their texture!
Can I freeze Chocolate Peanut Butter Rice Krispie Cups?
Absolutely! Wrap each cup individually in plastic wrap and store them in a freezer-safe container. They can be frozen for up to 1 month. When you’re ready to enjoy them, simply thaw in the refrigerator overnight before indulging!
What should I do if my cups don’t set properly?
If your Chocolate Peanut Butter Rice Krispie Cups aren’t setting as expected, it could be due to not cooling long enough or using too much liquid in the peanut butter mixture. Ensure you’ve melted the butter and marshmallows over low heat without boiling them. If they’re too soft, you can refrigerate them for a bit longer to help them firm up.
Are these cups safe for kids with nut allergies?
While these treats contain peanut butter, you can easily make them nut-free by using sunflower seed butter or a seed-based spread. Be sure to check all ingredient labels for potential allergens, especially for chocolate and other mix-ins!
How do I adjust the sweetness level?
If you find these chocolate peanut butter rice krispie cups too sweet, you can reduce the amount of mini marshmallows or use dark chocolate instead of semi-sweet chocolate chips for a more balanced flavor. Additionally, consider skipping the added vanilla extract, as this can also contribute to the overall sweetness.
Delicious Chocolate Peanut Butter Rice Krispie Cups to Make Today
Ingredients
Equipment
Method
- In a medium saucepan, melt 3 tablespoons of unsalted butter and 4 cups of mini marshmallows over low heat, stirring continuously for about 5–7 minutes until smooth.
- Remove from heat and stir in 1 cup of creamy peanut butter, mixing for 1-2 minutes until fully combined.
- In a large mixing bowl, pour in 6 cups of Rice Krispies cereal and pour over the warm peanut butter-marshmallow mixture, gently folding together for about 2-3 minutes.
- Prepare a muffin tin with paper liners and spoon the Rice Krispies mixture into each liner, pressing down gently to form a compact base.
- Melt 1 cup of chocolate chips in the microwave in 30-second intervals, then spoon the melted chocolate over each Rice Krispie cup.
- Allow to set at room temperature for about 20 minutes or refrigerate to speed up the cooling process.
Leave a Reply